
Introduction
Anti-graffiti coatings are protective barriers for masonry and concrete that simplify graffiti removal. Sacrificial coatings are designed to be removed along with graffiti and re-applied, while permanent systems stay on the surface and resist staining. Both aim to simplify cleanup and reduce damage, but choose based on maintenance tolerance and environment.
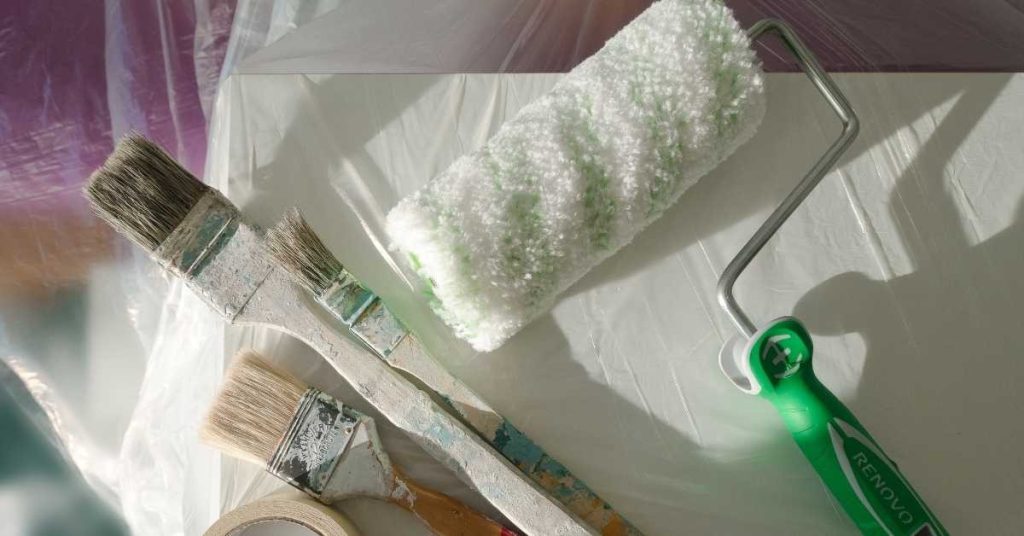
Application methods vary from brushes and rollers to spray equipment, depending on product and surface. Check label for surface prep steps, drying times, and recommended tools. Coverage area per unit varies with porosity and texture, so plan with manufacturer instructions and test a small area before committing.
Key takeaways
- Sacrificial coatings provide easy graffiti removal by sacrificing the film over time.
- Permanent (non-sacrificial) coatings resist graffiti longer but may require professional removal.
- Choose based on substrate compatibility, surface prep, and maintenance workflows.
- Apply with brushes, rollers, or spray equipment following manufacturer instructions.
- Coverage varies by surface porosity; document area per unit through product label.
- Include safety: wear gloves, eye protection, and ventilation during application.
Table of Contents
- Introduction
- Key takeaways
- Quick Comparison: Sacrificial Vs Permanent (Non-Sacrificial)
- How the Systems Work — Technical Information
- Surface Compatibility and Aesthetic Impact
- Application Instructions and Best Practices
- Removal, Maintenance and Re-Application Workflows
- Cost, Lifecycle and ROI Considerations
- Environmental, Health and Safety Considerations
- Choosing the Right System — Decision Checklist and Common Mistakes
- Conclusion
- FAQ
Quick Comparison: Sacrificial Vs Permanent (Non-Sacrificial)
Definition first: sacrificial coatings wear away or are removed with graffiti, while non-sacrificial systems form a durable barrier or modify the surface. Understand that non-sacrificial implies longer intervals between reapplications and different cleaning approaches. The choice hinges on how long you expect protection to last and how you plan to maintain the surface.
Typical use-cases map clearly to protection goals: temporary or museum-grade displays lean toward sacrificial options, outdoor or high-traffic areas favor permanent deterrence. Decision drivers include project duration, exposure, and budget. Think through quick checks like surface porosity, climate, reuse plans, and your maintenance capacity to guide the initial category decision. A one-page checklist can help you decide which system to consider first, with notes on future-proofing and re-coating cadence.
What is a Sacrificial Anti-Graffiti Coating?
A sacrificial anti-graffiti coating is designed to protect your masonry or concrete surfaces by forming a removable film. It’s like a temporary shield that you can peel off when it gets dirty.
These coatings are typically used on historic or heritage masonry where the original appearance must remain unchanged. They’re also great for areas where graffiti removal is needed frequently, as they can be easily peeled off and replaced.
Key point: Sacrificial coatings are temporary solutions that protect your surface without altering its appearance.
What is a Permanent (Non-Sacrificial) Anti-Graffiti Coating?
A permanent, or non-sacrificial, anti-graffiti coating is a clear polymer, urethane, or silane treatment that penetrates into the surface of your masonry or concrete. It doesn’t form a film like sacrificial coatings.
These coatings work by making it easy to remove paint and other graffiti with solvents or cleaners. They’re ideal for murals, public art, and high-risk infrastructure where long-term protection is needed.
Key point: Permanent coatings provide lasting protection but may alter the surface’s appearance slightly.
How the Systems Work — Technical Information
Core difference: sacrificial coatings are erasable by removal, while permanent systems act as barrier films or chemically modify the substrate. They operate through film-forming resins or chemical treatments like silanes, siloxanes, urethanes, and polyacrylates to deter graffiti. Understanding this helps predict cleanup ease and reapplication needs.
Porous masonry and concrete interact with coatings via porosity and moisture movement. Film formation and penetration depend on substrate texture and moisture, affecting long-term adhesion. The two primary mechanisms are a surface or near-surface barrier and a durable treatment that repels paints. Prep steps and compatibility with sealers, plus test patches, are essential to avoid failures and ensure reliable performance.
Material composition and mechanisms
The stuff in your anti-graffiti coating matters. It’s what makes paint stick or come off.
- Wax/Polymer Films: These create a barrier that stops paint from sticking. Look for high solids content (60%+) to ensure good coverage and durability. Avoid low-solids products, they won’t last.
- Silanes/Siloxanes: These penetrate deep into the concrete, chemically bonding with it. They’re durable but can be more expensive. Make sure you get a product with good UV resistance to prevent yellowing.
- Urethanes: Urethanes form a tough, flexible film that resists abrasion and impact. Check for high hardness (Shore D 70+) and low VOCs (less than 350 g/L) to ensure good performance and safety.
- Silicones: Silicone coatings are durable and resistant to UV, weathering, and chemicals. Look for products with high solids content (40%+) and good elongation (at least 200%) for flexibility.
- Fluoropolymers: These offer excellent stain resistance but can be more expensive. Ensure the product has good chemical resistance to prevent damage from harsh cleaners.
Durability and lifespan factors
The life of your anti-graffiti coating depends on a few things. UV rays, weather, how porous your concrete is, and how often it gets cleaned all play a part.
UV exposure breaks down coatings over time. So, if your surface sees a lot of sun, look for products with high UV resistance (like silicones or fluoropolymers).
Weathering can also shorten lifespan. In harsh climates, consider coatings with good weatherability and abrasion resistance.
Porous surfaces need more durable coatings to prevent premature failure. Check manufacturer claims about longevity on porous substrates.
Material specs and standards explained
Before you buy, check these material specs to ensure you’re getting a good product.
- Coverage: Look for products with high coverage rates (at least 100 sq ft per gallon) to minimize waste and application time.
- VOCs: Low VOCs (less than 350 g/L) mean better air quality during application. Check local regulations as well.
- Permeability/Breathability: Some coatings can trap moisture, leading to issues later on. Ensure your product has good permeability to prevent this.
- Abrasion and UV Resistance: High abrasion resistance (like Shore D 70+) and UV resistance ensure your coating lasts longer.
- Warranty Terms: Check the warranty period. Longer warranties indicate better product confidence.
Surface Compatibility and Aesthetic Impact
Different substrates respond to coatings based on porosity and texture. Brick, cast concrete, and natural stone vary in how deeply products can penetrate and how easily residual graffiti can be removed. Surface prep needs change with substrate to promote good adhesion and avoid streaks or blotching.
Finish type also matters: troweled, brushed, honed, or textured surfaces influence adhesion and potential sheen changes. Expect some subtle visual shifts like darkening or slight texture modification, and communicate these to clients before work begins. Compatibility with existing sealers or water repellents, and whether a sacrificial or permanent system is chosen, will affect appearance and breathability.
Porous vs non-porous substrates
Porosity matters when choosing anti-graffiti coatings. Porous surfaces like brick or natural stone absorb liquids, while cast concrete can be both porous and dense.
Sacrificial systems work best on porous surfaces. They penetrate deep, providing good adhesion and breathability. On non-porous surfaces, they may not adhere well or could trap moisture causing issues.
Permanent systems are suitable for both porous and non-porous surfaces. However, on highly porous surfaces, they might darken due to absorption of the coating’s pigments.
Effects on appearance, historic materials, and murals
Choosing a coating depends on your surface’s aesthetic. Historic materials, murals, or publicly visible finishes need special consideration.
- Sheen change: Some coatings can increase sheen, making surfaces appear glossier. Look for low-sheen options if you want to maintain a natural look.
- Darkening: Porous surfaces may absorb pigments, darkening the appearance. Test on a small area first.
- Texture change: Some coatings can fill in surface textures, altering the tactile feel. Consider this if your surface has unique textures or is a historic material.
- Murals: Anti-graffiti coatings can protect murals but may slightly alter colors. Always test on a small area first.
- Historic materials: Be cautious with permanent systems on historic materials. They can trap moisture, causing damage over time. Sacrificial systems are often safer but may need reapplication.
Application Instructions and Best Practices
Pre-application checks should cover substrate type, moisture content, and any old coatings or graffiti-removal residues. Do a small adhesion test and verify environmental constraints. Establish a suitable window according to the product datasheet before starting.
Surface preparation requires graffiti residue removal, oil or salts cleanup, and complete drying. Address porosity with the recommended prep step to ensure adhesion. Select an application method suitable for the surface, and follow exact mixing, pot life, and film-thickness guidance from the datasheet.
Surface preparation and step-by-step application
Thoroughly prepare your surface to ensure optimal anti-graffiti coating performance.
- Clean the surface: Remove all graffiti, dirt, oil, grease, and salts using appropriate cleaners or removers. Rinse and let it dry completely.
- Check for moisture: Use a moisture meter to test for excess moisture in the substrate. If present, address the issue before proceeding.
- Repair cracks: Fill any cracks with an appropriate concrete repair material to prevent coating failure.
- Efflorescence removal: Remove any white salts (efflorescence) using a suitable cleaner to avoid compromising adhesion.
- Test patch: Apply a small test patch of the anti-graffiti coating in an inconspicuous area to check for adhesion and compatibility with your substrate.
- Select application method: Choose between spray, roller, or brush based on your substrate type and product recommendations. Spraying is generally best for large areas while rollers and brushes are ideal for smaller surfaces or detailed work.
- Avoid overspray: Protect adjacent surfaces using drop cloths or masking tape to prevent unwanted coating application.
- Ensure even coverage: Apply the coating in thin, even layers following the manufacturer’s film-thickness guidelines. Avoid puddling or sting (excessive coating buildup) which can lead to poor performance and aesthetic issues.
Tools and materials checklist
Use this checklist before starting your anti-graffiti coating project to ensure you have all necessary tools and materials.
- Surface cleaners: Choose cleaners suitable for your substrate (concrete or masonry) and the type of contamination present. Consult manufacturer recommendations to avoid damaging the surface.
- Appropriate sprayer/roller/brush: Select a sprayer, roller, or brush that suits your application method and substrate. Follow manufacturer guidelines for tool selection.
- Personal Protective Equipment (PPE): Gloves, safety glasses, and protective clothing are essential to protect you from chemicals and overspray.
- Moisture meter: Use a moisture meter to test your substrate’s moisture content before application. Excessive moisture can compromise coating adhesion.
- Test patch materials: Have extra coating material on hand for creating test patches to check compatibility and adhesion.
- Drop cloths/masking tape: Protect adjacent surfaces from overspray using drop cloths or masking tape.
- Safety data sheets (SDS): Consult SDS for each product you’re using to understand potential hazards, proper handling, and storage procedures.
- Proper ventilation: Ensure adequate ventilation in the work area to prevent the buildup of harmful fumes. Use fans or open windows as needed.
Quick rule: Always consult manufacturer tooling recommendations and safety data sheets before starting your project to ensure you’re using the right tools and handling materials safely.