
Introduction
Designing flooring that ends up regretted happens when durability, upkeep, and style don’t line up in a real room. This article gives plain, hands-on steps to troubleshoot and correct those choices. You’ll learn to spot red flags early and adjust plans before your project slips away.
If you already chose something risky, start by checking the manufacturer’s guidance on wear, cleaning, and finish care, then compare with your room’s traffic and moisture. For stone or high-polish floors, note that marble and other stone can chip or show scratches and require specialized maintenance, so verify sealers and warranties. Watch for mosaic seams and grout durability, and beware trendy finishes that look great at install but fade or scratch quickly—check samples and test in a small area.
Key takeaways
- Choosing stone like marble requires sealing schedule and ongoing maintenance realities.
- High-polish floors show scratches easily; consider matte finish for living areas.
- Mosaic and heavy grout lines trap dirt; prep easier cleaning pathways and grout seal.
- Trendy flooring fades quickly; plan for replacement or finish updates over time.
- Safety: ensure slips resistance and proper subfloor prep before any floor install.
- Troubleshooting: patch small issues early; some problems require full replacement.
Table of Contents
- Introduction
- Key takeaways
- Why Designers Regret Certain Flooring Choices
- Marble and Other Natural Stone — Why They Often Disappoint
- Glossy, High-Polish Floors — the Pitfalls of Showy Finishes
- Mosaic and Heavily Grouted Tile — Beauty Vs. Practicality
- Anything Too Trendy — the Risk of Fast-Fading Fashions
- Safety and Practicality Considerations Homeowners Overlook
- Common Selection Mistakes and How to Avoid Them
- Troubleshooting After Installation — Fixes, Patches, and When to Replace
- Conclusion
- FAQ
Why Designers Regret Certain Flooring Choices
Designers often flag floors that look impressive at first but demand heavy upkeep. The daily life cost shows up in sealing needs, frequent cleaning, and long‑term restoration bills. These realities influence comfort, budgets, and long‑term satisfaction.
Their cautions extend to durability and wear patterns across common materials, from scratches to fading and chipping in real rooms. They weigh safety, noise, and resale impact alongside initial price and appearance. This sets the stage for a practical trade‑off between glamour and practicality.
Maintenance and longevity pitfalls
Some flooring choices might look great at first, but their high-maintenance nature can lead to regrets down the line. Here are some mistakes to avoid:
- Porous stone (like travertine or limestone): They require regular sealing and can stain easily if not maintained properly.
- Specialty finishes (e.g., acid-stained concrete, hand-scraped hardwood): These unique looks need careful upkeep to prevent fading or wear patterns from becoming too apparent.
- Dark colors: They show every speck of dirt and can be challenging to clean thoroughly.
- High-gloss finishes: While they reflect light beautifully, they also highlight every scuff and scratch.
To avoid these pitfalls, consider materials that are naturally durable or require minimal maintenance. Regular cleaning and proper care will help extend the lifespan of your floors.
Practicality vs. aesthetics
Aesthetics are important, but they shouldn’t compromise functionality. Here are some common clashes between form and function:
Pets and kids: Dark colors, light fabrics, or delicate materials might look stunning in a showroom but can be disastrous with pets or children. Opt for durable, easy-to-clean options instead.
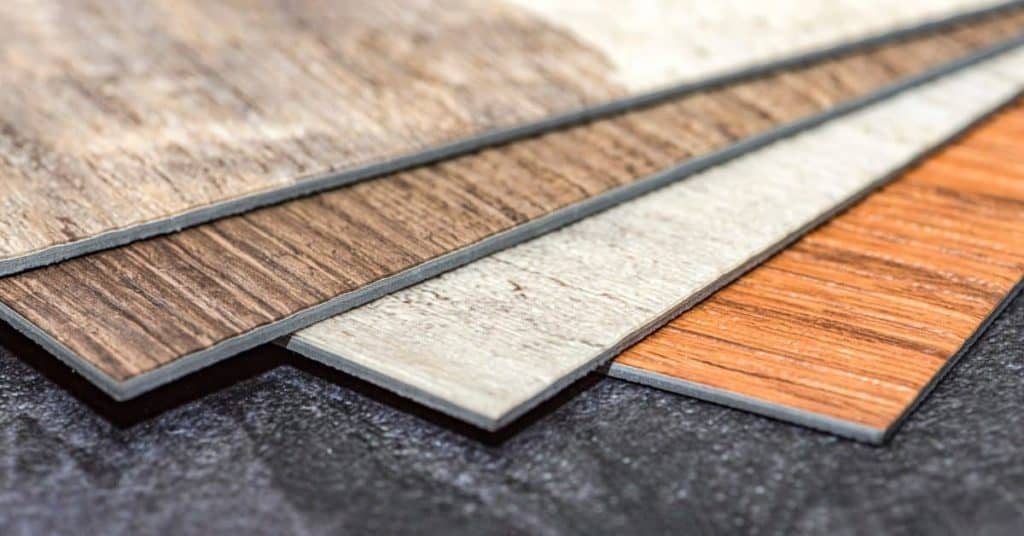
High traffic areas: While hardwood might seem like a great choice, it can scratch easily in high-traffic zones. Consider more durable alternatives like luxury vinyl plank or tile.
Always consider your lifestyle and needs when choosing flooring. A beautiful floor is no good if it’s constantly being damaged or is a hassle to maintain.
Cost and resale consequences
Expensive or ultra-trendy floors might seem like a great investment, but they can actually hurt your ROI and limit potential buyers. Here are some financial mistakes to avoid:
Overly expensive materials: While high-end materials can add value, they won’t necessarily recoup their full cost at resale. Stick with mid- to high-range options that appeal to a broad range of buyers.
Ultra-trendy designs: Trends come and go, and what’s hot today might be out of style tomorrow. Opt for timeless choices that will still look good years down the line.
Remember, the goal is to add value to your home, not just spend money on it. Choose floors that balance aesthetics, functionality, and long-term resale potential.
Marble and Other Natural Stone — Why They Often Disappoint
Natural stone draws attention with unique color and veining, but these advantages come with persistent downsides. High porosity makes staining more likely, and polishing isn’t a one‑and‑done finish. Homeowners often feel the burden of ongoing sealing and maintenance.
Acidity sensitivity, etched halos, and the risk of dulling or cloudy patches can undermine perceived value. Variations between slabs heighten mismatches and upkeep challenges. The result is a premium feel with frequent upkeep questions that many homeowners find burdensome.
Troubleshooting stains and etching
Marble’s porous nature makes it prone to staining. Here’s how to tackle common issues:
Stains: Clean spills immediately. For tougher stains, use a poultice made from baking soda and water. Apply, let sit, then vacuum off.
Etching: Acidic spills leave ‘etching’ halos on polished surfaces. For light etching, use a marble polishing kit. Severe cases may need professional restoration.
Maintenance schedule and realistic costs
Marble needs regular sealing to protect against moisture and stains. Here’s a maintenance checklist:
– Sealing: Every 1-2 years, apply a penetrative sealer following manufacturer’s instructions.
– Cleaning: Use neutral-pH cleaners. Avoid acidic or alkaline products.
Costs: Sealer: $30-$50 per bottle (covers 200-400 sq ft). Professional restoration: $100-$500 per sq ft.
Safer alternatives that mimic stone
For a similar look with less maintenance, consider these options:
– Porcelain tile: Dense, non-porous, and resistant to staining. Available in large formats for a seamless look.
– Engineered stone-look planks: Made from composite materials, they’re durable, stain-resistant, and mimic natural stone’s beauty.
Choose these alternatives when you want low-maintenance floors that still look like natural stone.
Glossy, High-Polish Floors — the Pitfalls of Showy Finishes
High‑polish surfaces catch the eye for drama, but they reveal every scuff and fingerprint. Scratches, swirl marks, and dulling become noticeable quickly in busy homes. Glare from lighting tests patience and comfort in daily use.
Maintenance cycles and potential for chemical damage add to the equation. Reglazing or refinishing can be costly and disruptive. Alternatives like matte or satin finishes can preserve elegance with less upkeep.
Reducing glare and slip risk
Glossy, high-polish floors can reflect light, causing glare that’s uncomfortable to the eyes. To mitigate this:
Opt for less reflective finishes. A satin or matte finish reduces glare without sacrificing elegance.
Slip risk is higher on smooth, polished surfaces. In wet or humid areas like bathrooms and kitchens, consider these fixes:
Textured topcoats add grip without compromising the look. Anti-slip treatments can be applied to existing floors. Strategic rug placement also helps absorb moisture.
Repairing scratches and dulling shine
High-polish surfaces show every scratch. Here’s how to tackle this:
For minor scratches, use a touch-up kit designed for your floor type. For deeper ones, you might need a professional.
Dulling is inevitable with foot traffic. To revive the shine:
Use a mild cleaner and soft cloth to remove dirt. For light dulling, buff the area with a polishing machine or by hand using a suitable polish. If the floor is severely dulled, it may need refinishing or even replacement.
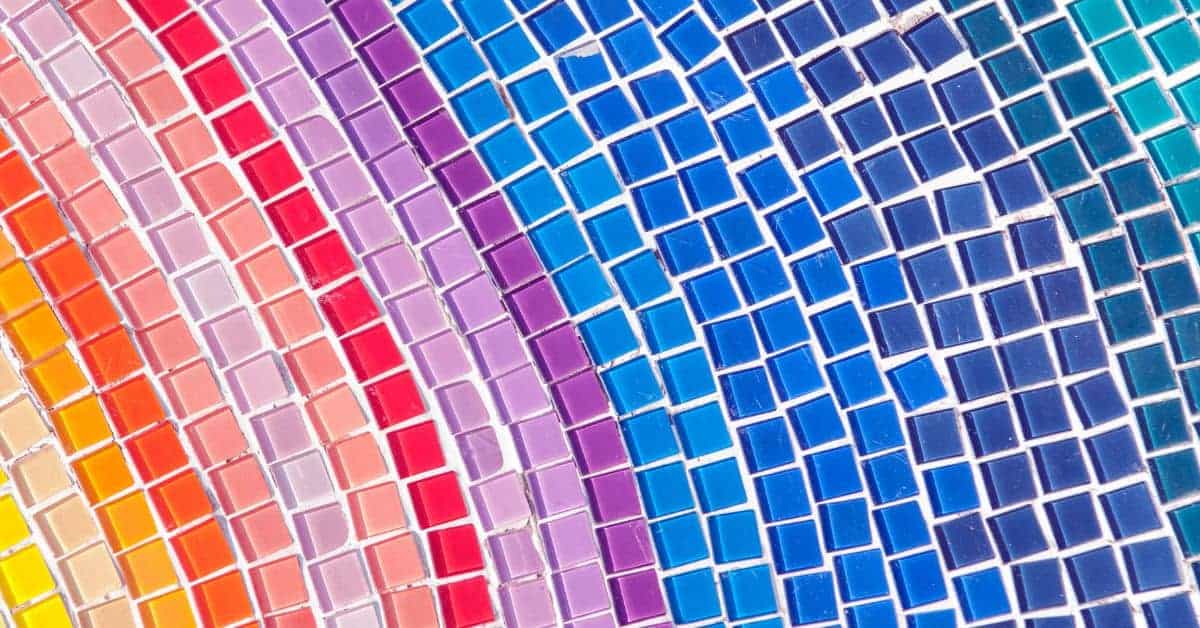
Mosaic and Heavily Grouted Tile — Beauty Vs. Practicality
Mosaics captivate with intricate patterns, yet grout porosity and mold risk keep maintenance front and center. Stain susceptibility and frequent cleaning demands drive ongoing costs. In real rooms, the pattern can overshadow practicality in busy zones.
Labor costs rise with pattern density, tile size, and grout width, making repairs more complex. In moisture and high‑traffic areas, wear and grout breakdown can become persistent issues. Smart substitutions can deliver similar aesthetics with lower upkeep.
Cleaning and preventing grout failure
Mosaic tiles with heavily grouted patterns look stunning, but they demand constant care. Grout is porous, so it absorbs liquids and dirt, leading to discoloration and mold growth.
Regular cleaning is key. Use a soft-bristled brush or cloth with mild detergent and warm water. Avoid harsh chemicals that can damage grout.
Sealing helps prevent absorption. Apply grout sealer after installation, then every 2-3 years. If grout crumbles or turns black, it’s time for regrouting. This involves grinding out old grout and replacing it.
Epoxy grouts are more durable but harder to install. They’re worth considering in high-traffic areas or where moisture is a concern.
Design-smart placement and alternatives
Mosaics can overwhelm large spaces. Use them sparingly, like in accent walls or backsplashes. In high-traffic areas, consider larger-format tessellations that mimic mosaic patterns but have fewer grout lines.
Moisture-prone zones need special attention. In showers, use larger tiles with wider grout joints to minimize the risk of mold and mildew growth. Consider using epoxy grout, which is more resistant to moisture.
For low-maintenance alternatives, consider subway or metro tiles. They offer a similar look but have less grout per square foot. Or, opt for large-format porcelain slabs that mimic stone with minimal grout lines.
Remember, beauty and practicality should go hand in hand. Choose materials that fit your lifestyle and the demands of each space.
Anything Too Trendy — the Risk of Fast-Fading Fashions
Trendy floors push bold colors and textures, but fashion tends to fade. Buyers often worry about matching future remodels and furniture changes. The risk is a design that dates itself quickly.
A practical approach uses a timeless base with interchangeable accents. Consider durability and ease of coordination with common cabinetry and fixtures. This helps protect resale value while still allowing personal style tweaks.
How to future-proof your flooring choice
Choosing timeless over trendy doesn’t mean you can’t have style. Here’s how:
Neutrals are key. They’re the canvas for any color scheme. Go with classic wood tones, neutral stone looks, or durable modern laminates.
Mix in trends sparingly. One bold element paired with neutrals keeps your space fresh without dating it fast.
Use removable decor to test bolder looks. Area rugs, finishes, and accessories can be swapped out easily when you tire of a trend.
When to embrace a trend and when to avoid it
Embracing trends isn’t always a mistake, but knowing when to do so is crucial. Here are some rules of thumb:
- Avoid if budget’s tight. Trendy materials can be pricey. Stick with neutrals and add trendy touches later.
- Embrace if you plan to stay a while. If you’re in for the long haul, go ahead and indulge your trendy side.
- Avoid in high-traffic areas. Kitchens, baths, and basements need durable, low-maintenance choices. Trends often fall short here.
- Embrace in less-used spaces. Guest rooms, home offices, or other spaces that don’t see daily wear can handle trendier choices.
- Avoid if resale’s a priority. Highly stylized choices may limit buyer appeal. Stick with timeless options for better resale value.
Ultimately, it’s about balance and knowing your priorities. Embrace trends where they make sense, but always keep one foot in the timeless camp.
Safety and Practicality Considerations Homeowners Overlook
Slip resistance, especially when wet, influences safety and comfort. Texture treatments and floor slope matter, and quick home tests help gauge risk. Comfort underfoot also hinges on hardness, cushioning, and temperature feel.
Acoustics, heating compatibility, and pet or mobility needs deserve early consideration. Easy cleaning and long‑term durability should align with upfront costs and maintenance expectations. These factors shape everyday livability and value.
Slip resistance and traction solutions
When choosing a floor, consider its slip rating. It’s measured on a scale of 0 (lowest) to 1 (highest). You can find these ratings in product specs or ask the manufacturer.
Textured finishes, like textured trowel or brushed effects, can improve traction. For high-risk areas, consider non-slip coatings. Rugs and treads are quick fixes for slippery spots.
Test floors yourself by spilling water on them. If it beads up and doesn’t spread out, the floor might be too smooth. Tilted surfaces increase slip risk, so keep that in mind when planning your layout.
Noise, insulation, and underfoot comfort
Hard floors like concrete or tile can echo noise. Underlayments, often made of foam or rubber, can reduce impact noise and room-to-room reverberation.
For warmth and cushioning, consider radiant-compatible flooring. It allows heat to pass through, keeping your feet cozy in winter. Area rugs also provide insulation and underfoot comfort.
Think about long-standing tasks and barefoot occupancy. Hard floors can cause foot fatigue over time. If you have kids or plan on spending lots of time on your feet, consider softer options like cork or vinyl with cushioning layers.
Common Selection Mistakes and How to Avoid Them
Sufficient sampling means room‑scale trials in real lighting and usage. Full‑width samples under natural and artificial light prevent surprising reads. Align choices with actual foot traffic and maintenance expectations.
Lighting, color accuracy, and undertones influence outcomes after installation. Map out maintenance, sealing, and durability to protect long‑term satisfaction. A pre‑purchase checklist helps catch misalignment before committing.
How to evaluate samples correctly
When it comes to flooring, seeing is believing. But don’t be fooled by small samples. Insist on full-width, room-scale samples whenever possible.
Evaluate them in both natural and artificial lighting. Check how they look under daylight, LED, and ambient lamps. This helps you spot any surprises after installation.
Test the samples for feel and acoustics too. Walk on them to see if they’re comfortable and quiet enough for your needs.
Questions to ask contractors and suppliers
Before you commit, grill your contractors and suppliers. Ask about warranties – what’s covered, how long it lasts, and what voids it.
Inquire about installation methods. Some finishes need specific techniques or equipment. Make sure they’re up to the task.
Moisture is a concrete floor’s enemy. Ask about moisture mitigation strategies during installation and how they’ll handle potential issues.
Lastly, ask about maintenance needs. Find out what cleaning routines, sealing schedules, and stain resistance you can expect. This helps you plan for the long term.
Troubleshooting After Installation — Fixes, Patches, and When to Replace
Post‑install issues like buckling, gaps, and discoloration require clear evaluation. Distinguish cosmetic patches from problems that threaten structure or warranty. Plan repairs that preserve long‑term performance and value.
Diagnostic steps include moisture checks, substrate flatness, and acclimation history. Decide between repair and replacement using visible movement, continuing damage, and return timelines. Document issues for warranty and plan next steps with replacement materials if needed.
Quick fixes vs. long-term repairs
Not every post-install issue requires a major overhaul. Some can be fixed quickly and easily. But knowing when to do a quick fix versus a long-term repair is crucial.
Temporary patches, like filler for small gaps or silicone sealants, are great for quick fixes. They can buy you time until you can address the root cause properly.
However, if you’re seeing widespread issues or problems that keep recurring, it’s time for a long-term repair. This might mean replacing sections of flooring, addressing subfloor issues, or even changing your flooring material altogether.
Remember, quick fixes are just that – quick. They won’t solve the underlying problem and may need to be redone in the future. Always aim for long-term solutions where possible.
When to call a pro or plan for replacement
Some flooring issues are beyond the scope of DIY repairs. Knowing when to call in a professional can save you time, money, and potential damage to your home.
Structural movement, like buckling or cupping boards, is a sign of a serious problem. This could be due to moisture damage, improper installation, or subfloor issues. It’s crucial to get a professional assessment before attempting any repairs.
Persistent moisture damage is another red flag. If your flooring continues to show signs of water damage despite your best efforts, it’s time to call in the pros. They have specialized tools and knowledge to diagnose and treat moisture problems.
Even if you decide to replace your flooring, it’s a good idea to get a professional assessment first. They can help you understand why the original installation failed and how to prevent the same issues with your new flooring.
Conclusion
Repair and replace decisions sit on your ability to protect people and preserve the look for years. Prioritize a flooring choice that meets safety, durability, and maintenance needs, and you’ll avoid costly regrets down the road.
Make a final check by walking the space with a critical eye: inspect trim and transitions, test small panels or samples in a quiet corner, verify moisture and load conditions, confirm slip resistance and edge stability, preview daily use for a few days, and only proceed if everything feels solid and stable; do the work in the order of prep, install, and finish, and keep the area clear of trips and spills while you perform any patching or sealing, then recheck once done. Safety first means stopping if anything looks warped, soft, or uneven, and testing a small area first before committing to a full repair or replacement.
Common mistakes to avoid include rushing a trendy look without testing durability, skipping moisture or subfloor checks, and choosing glossy finishes that glare or scratch too easily; keep to practical, proven materials, document the warranty and maintenance needs, and always unplug power tools, wear eye protection, and follow product instructions to the letter.
If the project involves structural concerns, stubborn damage, or uncertain moisture levels, don’t push through alone—call a professional. When timing, budget, or safety flags are in play, a pro can save you from ripples of damage and big charges later. Stay purposeful, stay cautious, and you’ll finish with a floor that performs as promised.
FAQ
What common problems show up with marble and other natural stone floors, and how do I spot them before I install?
Stone can etch from acids and stain if not sealed. It may be uneven or prone to cracking if the substrate isn’t perfectly flat. Check the label, manufacturer instructions, and local guidance for recommended sealers and maintenance.
Why are high-polish (glossy) floors often a bad match for DIY installs, and what should I expect to deal with long term?
Glossy finishes scratch easily and show marks from everyday traffic. They glare under bright light and can be slippery when wet. Regular cleaning and re-buffing or refinishing are common, and you’ll want to know the maintenance steps from the product you choose.
What mosaic floor problems should I watch for, and how can I prevent issues after installation?
Mosaic with heavy grout can crack or loosen if the substrate isn’t flat or if movement occurs. Small, tight joints can trap dirt and be hard to seal properly. Make sure the subfloor is flat and that you understand how the grout and sealer products are meant to be used.
Which flooring options stay timeless and what maintenance should I plan for each?
For lasting performance, consider durable ceramic or porcelain tile, solid or engineered options with a robust wear layer, or quality luxury vinyl plank. Maintenance ranges from regular sweeping and damp mopping to periodic sealing or refinishing—always follow the label, manufacturer instructions, and local guidance for care steps.