
Introduction
Laminate flooring is a budget-friendly, easy-to-install option that imitates wood while using a particleboard or fiberboard core. When choosing, look at how thick the top wear layer feels, how the underlayment handles sound, and what the installation method requires. This guide helps you pick honestly, without hype, and tells you what to check on labels and instructions.
Wide plank vs. narrow plank comes down to look, feel, and how the planks fit your space in Indian Land, SC. Note thickness, how it affects comfort, durability, and sound, and watch for common installation mistakes and color matching with your existing trim. Always verify with the manufacturer instructions and local rules if any, and choose a plank size you can handle DIY without regrets.
Key takeaways
- Wide vs narrow plank: value in Indian Land, SC (2/4 competitors).
- Understand laminate basics: types, construction, and labeling for informed choices.
- Laminate thickness affects comfort, sound, and durability in everyday use.
- Match laminate with cabinets, trim, paint, and existing floors for cohesion.
- Use appropriate underlayment for moisture control and sound reduction in homes.
- Avoid common installation mistakes and follow safety guidelines to prevent damage.
Table of Contents
- Introduction
- Key takeaways
- Understand Laminate Basics: Types, Construction, and Labeling
- Laminate Thickness and How It Affects Comfort, Sound, and Durability
- Plank Width and Style: Wide Vs Narrow and Design Impact
- Matching Laminate to Cabinets, Trim, Paint, and Existing Floors
- Underlayment, Moisture Control, and Sound Reduction
- Common Installation Mistakes and Safety Considerations
- Cost Breakdown: Materials, Installation, and Hidden Expenses
- Pets, Longevity, Cleaning, and Environmental Conditions
- Conclusion
- FAQ
Understand Laminate Basics: Types, Construction, and Labeling
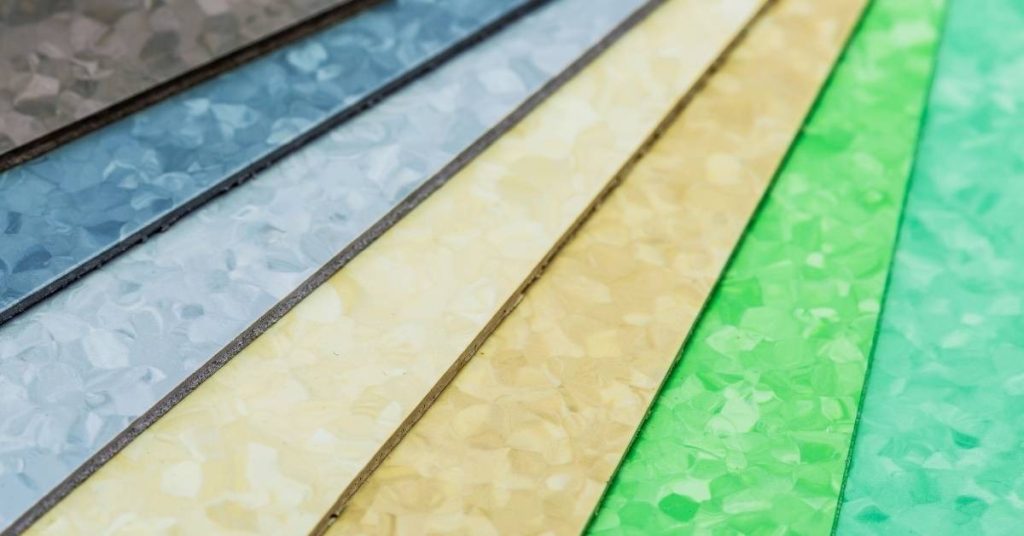
Laminate is built in layers that each add a specific quality. The wear layer protects the design, the core provides structure, and the backing supports moisture resistance and stability. Pay attention to how each layer feels underfoot and in everyday use.
Read labels closely to decode what you’re buying. Look for AC ratings, thickness cues, core material notes, moisture claims, gloss level, warranty language, and any installation requirements. How a product is labeled often guides where it will perform best in your home.
Laminate layers explained
The durability and moisture resistance of laminate flooring depend on its construction. Here’s what each layer does:
Wear Layer: This top layer protects the floor from scratches, stains, and fading. Thicker wear layers offer better protection.
Core (HDF/PCB): The core provides stability and structure. High Density Fiberboard (HDF) is denser and more stable than Particle Core Board (PCB).
Backing: The backing layer prevents moisture from getting into the core, enhancing moisture resistance.
Interpreting product labels and performance claims
Understand these key terms to make informed decisions:
AC Rating: This indicates abrasion resistance. Higher numbers (AC1-AC5) mean better durability.
Thickness: Thicker laminates are more stable and feel more solid underfoot.
Core Material & Water/Moisture Resistance: Look for HDF cores and moisture-resistant backing for humid areas like basements.
Ask retailers about tested performance in high-traffic, pet-friendly, or kitchen environments.
Laminate categories and intended uses
Manufacturers categorize laminates based on their durability and intended use:
Standard DPL (Direct Pressure Laminate): Suitable for low-traffic areas like bedrooms. Thinner, less durable.
High-Pressure Laminate (HPL): Better suited for high-traffic areas and kitchens. More durable, thicker wear layer.
Water-Resistant Laminates: Ideal for basements or bathrooms. Have moisture-resistant cores and backing.
Choose based on your lifestyle and the room’s demands.
Laminate Thickness and How It Affects Comfort, Sound, and Durability
Thickness interacts with the core and wear layer to influence feel, durability, and noise. In practice, a thicker panel can feel steadier underfoot and may reduce hollow sounds in busy areas. But core density and underlayment also play big roles.
Go beyond a single number when reading specs. Note wear layer thickness, core material or density, any impact or humidity ratings, acoustic values, and warranty terms. Match these details to the room and subfloor you’re working with for a balanced choice.
Durability and wear expectations
The thicker the laminate, the more durable it tends to be. But thickness isn’t everything.
The wear layer is crucial. It’s the top layer that protects against scratches and scuffs. Thicker wear layers mean better resistance.
Core stability also matters. A dense core won’t warp or delaminate as easily, even with thinner laminates. So, look for a balance of thickness, good wear layer, and stable core.
Comfort and acoustic performance
Thicker laminate feels more solid underfoot. It’s less ‘bouncy’ than thinner options.
But thickness alone doesn’t control noise. Underlayment plays a big role. It can reduce impact sound, especially on concrete subfloors.
If you’re concerned about noise, look for laminates with high IIC (Impact Insulation Class) ratings and consider using underlayment.
When thicker isn’t always better
Thicker laminate costs more. So, if you’re on a budget, thinner might be the way to go.
Thicker laminates can be harder to install, especially in tight spaces like stairs or under cabinets.
Also, thicker laminate may not fit with your existing trim and doors. You’ll need to check compatibility during installation.
Plank Width and Style: Wide Vs Narrow and Design Impact
Wide planks create a seamless look that can make smaller rooms feel larger by reducing grout lines. Narrow planks add texture and traditional appeal, especially in tighter or irregular spaces. Consider running patterns and alignment with doors and windows to avoid visual clutter.
Plank width affects flow, installation constraints, and maintenance. Wider boards can reveal minor substrate imperfections more easily, while narrow boards may require more joints and transitions. Weigh wear patterns, budget, and your design goals when choosing.
Choosing plank width for room scale and layout
When selecting laminate flooring, consider the size of your room and its layout. Wide planks can make small rooms feel larger by minimizing grout lines and creating a continuous surface.
In smaller spaces or irregularly shaped rooms, narrow planks add texture and traditional charm. They also allow for more flexibility in layout, helping to avoid optical clutter or misalignment with windows and doorways.
For open-plan living areas, wider planks can create a seamless flow between spaces. Conversely, narrower planks can help define separate zones within an open space.
When planning your pattern, consider staggering seams for a more natural look or using a running bond layout to create visual interest. Align patterns with room geometry and doorways to maintain a cohesive appearance.
Finish and surface texture choices
The finish and surface texture of your laminate flooring can significantly impact its appearance and maintenance needs. Matte finishes have a subtle, understated look that hides wear well, making them ideal for high-traffic areas.
Satin or semi-gloss finishes offer a slight sheen, enhancing the natural beauty of the wood grain but showing wear more easily. Embossed textures add depth and realism to the flooring, further helping to disguise scratches and scuffs.
Consider your lifestyle and maintenance preferences when choosing a finish. If you have pets or children, a matte or embossed texture may be a better choice for hiding wear and tear.
Additionally, darker colors and textures can help mask dirt and dust, making them suitable for areas with less natural light or higher foot traffic.
Plank layout and transitions
Proper planning of your laminate flooring layout is crucial to ensure a cohesive, attractive finish. Consider the direction of your planks in relation to room geometry and natural light sources.
For doorways, stagger seams to avoid alignment with the doorway itself, creating a more visually appealing transition. If using wider planks, consider installing transition pieces at thresholds to maintain a consistent look and prevent tripping hazards.
Furniture layout and cabinetry should also be considered when planning your flooring installation. Ensure that baseboard heights are compatible with the chosen plank width to maintain a cohesive flow without abrupt changes or mismatched scales.
In open-plan spaces, consider using wider planks in larger areas and narrower planks in smaller, more intimate spaces to create visual distinction between zones.
Matching Laminate to Cabinets, Trim, Paint, and Existing Floors
Create a fixed-element inventory before picking tones. List your cabinets, trim, doors, and paint colors to reference during selection. This helps narrow options and prevents clashes at a glance.
Test tones under different lighting and with fixed elements to verify undertones. Document how samples look near cabinets and trim, then adjust with a cohesive plan for sheen and plank style. This practical workflow reduces surprises after installation.
How to test samples at home
Bring your laminate samples into the room where they’ll be installed. This is crucial because lighting can change drastically from one space to another.
View them at different times of day – morning, afternoon, and evening – to see how they look in various light conditions. Natural light especially can make a big difference.
Take photos of the samples next to your existing cabinets, trim, and paint. This will help you compare them side by side later on. Use a consistent camera angle and lighting for accurate results.
Pairing undertones and contrast strategies
First, identify the undertone of your cabinets, trim, and existing floors. Warm undertones have red, orange, or yellow hues, while cool undertones lean towards blue, green, or gray.
For a cohesive look, consider matching undertones – warm with warm, cool with cool. But don’t be afraid to mix it up for contrast. A warm laminate can add depth to cool cabinets and vice versa.
Think about the level of contrast too. If your fixed elements are dark, consider lighter laminates to brighten the space. Or go for a bold look with high-contrast colors.
Managing mixed-floor seams and visual transitions
If you’re keeping some existing floors, use transition strips to connect the new laminate with the old. This hides the seam and prevents tripping hazards.
For a seamless look, match the width of your laminate planks to the existing floor’s plank or tile size. If that’s not possible, stagger the joints on both sides of the seam to break up the pattern.
Consider using a transition piece with a different color or finish at the seam. This can draw attention away from the difference in flooring and create a unique design element.
Underlayment, Moisture Control, and Sound Reduction
Underlayment choices influence cushion, insulation, and how flat the floor ends up. Different materials alter feel, temperature, and the way the laminate handles minor subfloor imperfections. Comfort and quiet start with the right underlayment selection.
Moisture control and barriers depend on your subfloor and environment. Decide when to use a vapor retarder, a moisture barrier, or no barrier based on conditions and manufacturer guidance. Pair this correctly with your laminate thickness and locking system.
Types of underlayment and performance trade-offs
Underlayment plays a crucial role in your laminate flooring installation. It provides cushioning, insulation, and levels out the subfloor. Different materials offer varying benefits:
Foam is affordable, provides good insulation, and helps level minor subfloor imperfections. However, it’s not moisture-resistant and can compress over time.
Cork offers excellent cushioning and sound reduction but is more expensive than foam. It’s naturally moisture-resistant but can be less durable in high-traffic areas.
Rubber provides superior durability, soundproofing, and moisture resistance. It’s the pricier option but ideal for heavy traffic zones or moist environments like kitchens or bathrooms.
Underlayment choices for basements and moisture-prone areas
Below-grade rooms need special attention to prevent moisture issues. Here’s what to do:
First, test your concrete slab’s moisture levels. Use a calcium chloride test (CM) or relative humidity (RH) testing. If results are high, consider using a moisture barrier.
Next, choose an underlayment with built-in vapor retarder or add a separate one if needed. This prevents moisture from migrating into your laminate flooring.
Lastly, ensure your subfloor is clean and flat to prevent future issues like gaps or compression.
Warranty and installation requirements related to underlayment
Proper underlayment choice and installation are crucial for maintaining your laminate flooring warranty. Here’s what you need to know:
Check the manufacturer’s warranty language. Some warranties require specific underlayment types or installation methods.
Use the recommended underlayment thickness based on your subfloor and room conditions. Too thin, and you risk compression; too thick, and you might void the warranty due to height restrictions.
Follow the manufacturer’s guidelines for installation methods. Incorrect installation can void warranties, leading to costly repairs or replacements down the line.
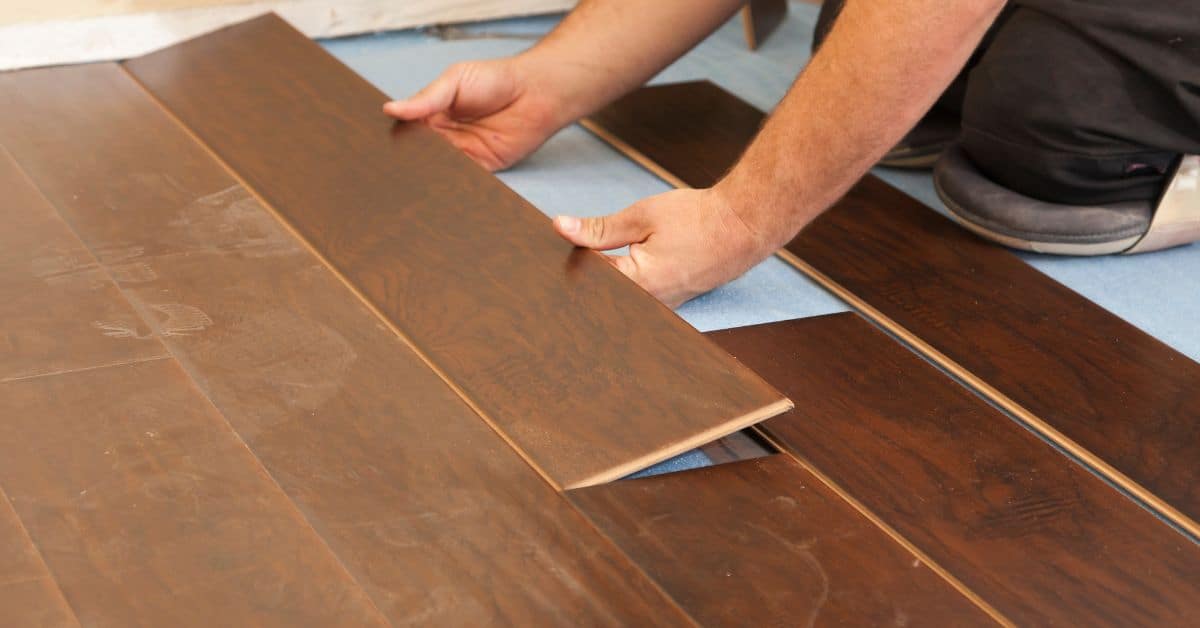
Common Installation Mistakes and Safety Considerations
Expect common errors to creep in if the substrate isn’t prepped or acclimation isn’t allowed. Gaps, buckling, and failed transitions often trace back to underlayment or alignment issues. Correct sequencing and spacing around walls are essential to a clean finish.
Stay safe and stay practical during install. Use proper PPE, handle heavy planks with care, and watch for electrical or stair hazards. Decide whether to DIY or hire a pro based on risk and warranty considerations.
Top installation mistakes to avoid
Don’t let these common errors turn your laminate flooring project into a regret. Learn from the pros and steer clear of these pitfalls.
- Skipping acclimation: Laminate needs time to adjust to room conditions. Skip this, get gaps or buckling.
- Improper subfloor prep: Uneven, damp, or dirty subfloors lead to failures. Check and prep before laying a plank.
- Insufficient expansion gaps: Laminate expands and contracts with humidity. Ignore this, get buckling.
- Poor transition placement: Incorrect transitions cause tripping hazards and early wear. Plan them right.
These mistakes are easy to avoid with a bit of planning and patience.
When to hire a professional and what to expect
DIY is great, but sometimes it’s best to leave it to the pros. Here are scenarios where hiring an installer makes sense.
Complex layouts: Intricate patterns or large areas can be challenging for beginners. Pros have the experience to handle these.
Time constraints: If your project has a tight deadline, consider hiring help. They can get the job done faster.
When hiring, ask about their prep process, estimated timeline, and cleanup plan. A good installer will explain everything clearly.
Stair, threshold, and slip-safety guidance
Stairs and thresholds can be tricky spots in your laminate flooring project. Here’s how to keep them safe and looking good.
Stairs: Use stair nosing with built-in safety strips for better traction. Secure each piece properly to prevent accidents.
Thresholds: Transition strips are a must here. They protect edges, prevent tripping, and maintain the floor’s integrity.
Always prioritize safety over speed. Take your time in these areas to ensure lasting results.
Cost Breakdown: Materials, Installation, and Hidden Expenses
Break down the main cost areas without guessing numbers. Focus on product grade and thickness, underlayment options, and necessary accessories to complete the job. This helps you spot value versus waste in practical terms.
Account for installation choices and potential extras. Consider removal, transitions, and any subfloor prep or repairs that might come up. A clear quote protocol helps you compare estimates and avoid surprises later.
What affects laminate pricing
The price of laminate flooring varies based on several factors. Let’s break it down:
Wear Layer Quality: The wear layer protects your floor from scratches and damage. Thicker, higher-quality layers cost more but last longer.
Core Materials: Laminate cores can be made of different materials like HDF or MDF. Better quality cores mean better stability and durability at a higher price.
Brand and Finish: Well-known brands often charge more for their reputation and customer service. Special finishes like hand-scraped or textured surfaces also add to the cost.
Hidden and ongoing costs to plan for
When budgeting, don’t forget about these often overlooked expenses:
Subfloor Repair: If your subfloor needs repairs or leveling, that’s extra work and material cost.
Transition Strips: You’ll need transition strips to connect laminate to other flooring types. They’re not expensive but can add up if you have a lot of transitions.
Old-Floor Disposal: If your old floor needs removal, there may be disposal fees or rent-for-dump charges. Some suppliers include this in their estimate, others don’t.
Furniture Moving: You might need to hire help to move heavy furniture out of the room during installation. It’s a small cost but worth planning for.
Value strategies and warranty considerations
To get the best long-term value, consider these tips:
Focus on Performance Specs: Don’t just look at the price. Check the AC rating for durability, the wear layer thickness for scratch resistance, and the core material for stability.
Check Warranty Terms: A longer warranty doesn’t always mean better coverage. Read the fine print to understand what’s covered and for how long.
Consider Total Cost of Ownership: Cheaper laminate might need replacing sooner, costing you more in the long run. It’s like buying a cheaper car that needs frequent repairs – it’s not always the best value.
Pets, Longevity, Cleaning, and Environmental Conditions
Pet-friendly attributes often come from a robust wear layer, scratch resistance, and moisture-tolerant cores. These features influence how well laminate stands up to claws, accidents, and daily living. Match the specs to your household habits.
Maintenance and environmental factors matter as much as initial choice. Plan for appropriate humidity control, sun exposure, and entryway protection to extend life. Align maintenance cadence with warranty language to stay covered.
Choosing Pet-Friendly and Scratch-Resistant Options
When you’ve got pets, durability’s key. Look for laminates with:
Thick wear layer: More protection against claws and paws.
Scratch-resistant finish: Some brands claim ‘pet-proof’. Test it: Gently drag a dog tag or claw across the surface.
Water-resistant core: Like HDF with resin, it handles accidents better. Avoid particleboard cores.
Maintenance, Spot Repair, and Stain Management
Keep your floor looking sharp:
Clean gently: Use a damp mop with mild cleaner. Avoid abrasives or vinegar.
Blot spills: Don’t rub. Blot up liquids quickly to prevent absorption.
Spot repair: For deep scratches, use touch-up markers designed for your laminate.
Humidity, Temperature, and Long-Term Stability
Stable climate keeps your floor happy:
Ideal humidity: Keep it between 40-60% RH. Too dry or wet can warp or buckle planks.
Temperature control: Maintain a steady temperature, ideally between 60-80°F (15-27°C). Fluctuations cause expansion/contraction.
Ventilation: Good airflow helps maintain humidity levels. Use exhaust fans in kitchens and baths.
Conclusion
Choosing laminate carefully now saves safety headaches, prevents costly mistakes, and keeps the floor looking right for years. A solid plan protects the subfloor, the finish, and your time.
Assess the project start to finish in one sweep: confirm your chosen type and thickness, verify labeling and installation requirements, align plank width with the room style, match the underlayment and moisture control to the space, measure accurately with extra material for cuts and mistakes, acclimate the planks as needed, set aside a clear stretch of time for the actual install, and maintain proper expansion gaps and clean, dry conditions to avoid warping or squeaks.
Common mistakes to avoid include skipping moisture checks or underlayment, cutting corners on expansion gaps, and rushing through joints or transitions. Safety first means wearing gloves, eye protection, and hearing protection when using tools, keeping pets and kids out of the work zone, and testing any new approach in a small area before committing to the whole floor. If the space has significant moisture risk, if you have uneven subfloor trouble beyond light sanding, or if you feel uncertain about fasteners, staples, or glue choices, stop and get a pro to assess.
When to call a professional is clear: if the subfloor needs repair, if you encounter persistent moisture issues, or if you lack the right tools or time for careful acclimation and precise cutting. Stay steady, follow the plan, and you’ll finish with a durable, good-looking floor that you can be proud of.
FAQ
How thick should laminate be for comfort and durability
Check the manufacturer’s labeling for the core thickness and wear layer. Consider how the floor will feel underfoot and how much sound it will carry in your space. For any spec that matters, rely on the label or instructions from the maker and local guidelines.
What are the most common laminate installation mistakes
Don’t skip a proper expansion gap around the perimeter. Don’t ignore moisture considerations in basements or kitchens. Ensure planks are locked tight and aligned; sloppy seams are a quick path to gaps and squeaks.
How do I choose plank width to fit my space
Wide planks create a bold, roomy look; narrow planks read traditional and can hide subtle layout mistakes. Match the width to the room size, ceiling height, and existing trim or cabinets for a cohesive feel. Always verify with the product label and test a sample against your trim color.
How should I budget for laminate flooring and underlayment
Plan for the cost of the laminate, underlayment, fasteners, and any needed tools. Include waste, transition strips, and potential subfloor prep. If you’re unsure, check product instructions and local rules for recommended underlayment choices and any extra materials.