
Introduction
Cork flooring in kitchens is a natural, resilient surface that can be kept water-friendly with the right finish. It brings warmth underfoot and can feel softer than tile, but it needs careful sealing and proper subfloor prep. This intro covers how cork is made, how to install it, and what finish helps prevent water spots.
Choosing between glue-down and floating cork, plus selecting the right finish, makes a big difference in kitchen moisture resistance. Maintenance is simple but relies on avoiding standing water and following the finish manufacturer’s guidance for cleaning and re-sealing. Check product labels and installer instructions for your exact cork type, and double-check local rules or expectations if moisture is a concern.
Key takeaways
- Cork flooring is made from bark—harvested sustainably without felling trees, refreshes naturally.
- For installation, glue-down is quiet and stable; floating is easier for DIY.
- Finishes matter: choose water-resistant sealers to reduce water spots in kitchens.
- Keep cork away from standing water; wipe spills promptly to prevent damage.
- Environmentally friendly: cork reclaims rapidly, but verify sustainable sourcing claims with labels.
- Types vary: tiles, planks, or prefinished—check moisture tolerance and maintenance.
- Water resistance limits: cork is not waterproof; use guards and mats in wet zones.
Table of Contents
- Introduction
- Key takeaways
- What Cork Is and How Cork Flooring Is Made
- Environmental Benefits and Sustainability
- Types of Cork Flooring for Kitchens: Tiles, Planks, Prefinished Vs Unfinished
- Durability and Wear Resistance in Kitchen Use
- Installation Methods: Glue-Down, Floating, and Common Mistakes to Avoid
- Cork in Kitchens and Wet Areas: Water Resistance, Limitations, and When to Avoid It
- Finishes That Prevent Water Spots and Protect Cork in Kitchens
- Cost, Maintenance, Brands, Buying Checklist, and Long-Term Care
- Conclusion
- FAQ
What Cork Is and How Cork Flooring Is Made
Cork is the bark of the cork oak; harvesters shave the outer bark without cutting the tree down, so the tree keeps growing. Check the product label or manufacturer data sheet to see whether the flooring is a solid cork layer or agglomerated (composite) cork before you buy.
Why that matters: solid layers and engineered planks behave differently for stability and wear in a kitchen. Warning: agglomerated cork is made from ground cork glued into boards and can react differently to moisture and impacts than a thicker solid wear layer.
Harvesting and raw material
The quality of cork starts at the harvesting stage. Choosing the right raw material ensures your flooring performs well and lasts.
- Sustainable Tapping: Cork oak bark can be harvested every 9-12 years without harming the tree, making it a sustainable resource.
- Bark Quality: Denser cork offers better durability and insulation. Look for products rated high on density.
- Porosity: Cork’s natural pores provide thermal insulation and sound dampening. Avoid low-porosity cork that lacks these benefits.
- Avoid Low-Grade Cork: Using poor-quality cork can lead to cracking, staining, and weak bonds with other layers.
- Harvest Time: Bark harvested in spring has higher tannin content, which can cause discoloration. Opt for bark harvested in summer or autumn.
Manufacturing process: tiles, planks, and layers
The manufacturing process turns raw cork into flooring products. Understanding it helps you choose the right product for your kitchen.
Agglomerated Cork: This composite material is made by granulating cork, mixing it with a binder, pressing it under high heat, and cutting it into tiles or planks. It’s more affordable but less durable than solid cork.
Solid Cork: Made from single pieces of cork, this option offers superior durability and performance. It can be cut into tiles or planks and topped with a wear layer for added protection.
Backed Planks: These have a thin layer of cork glued to a stable core, usually HDF or plywood. They’re more dimensionally stable but offer less insulation than solid or agglomerated cork.
Environmental Benefits and Sustainability
Cork comes from a renewable bark harvest process, not tree felling, and many suppliers list certifications on their product paperwork. Look for certification claims on the label or manufacturer website and verify with the certifier when sustainability is a priority.
Why it matters: renewable sourcing and low-waste processing reduce lifecycle impacts compared with nonrenewable floors, and indoor-air quality ties to finishes and adhesives. Benefit: choosing low‑VOC finishes and verified cork helps keep the kitchen healthier and can extend the floor’s service life; check product data sheets for VOC and end‑of‑life guidance.
Carbon, renewability, and ecosystem impacts
Cork oak forests are a renewable resource. The bark is harvested every 9 years without felling the tree.
Carbon sequestration: Cork oak forests absorb CO2 and store carbon. Each hectare can capture up to 14 tons of CO2 annually, making cork a sustainable choice for your kitchen’s carbon footprint.
Biodiversity benefits: Cork oak forests support diverse wildlife. By choosing cork flooring, you’re contributing to the preservation of these ecosystems.
Certifications and what to check
Before purchasing, verify certifications to ensure sustainability claims are valid. Here’s a quick checklist:
- FSC or PEFC certification: Check for forest management and chain-of-custody certifications (e.g., FSC, PEFC). These guarantee responsible harvesting.
- Emissions declarations: Look for product-specific emissions data. This helps track the carbon footprint of your flooring.
- Product declarations: Check for third-party verified product declarations (e.g., EPDs) that detail lifecycle impacts.
- Avoid: Be wary of suppliers who can’t provide these certifications or declarations. They might not meet sustainability standards.
Quick rule: Always request documentation from your supplier to ensure you’re making an informed, eco-friendly choice.
Types of Cork Flooring for Kitchens: Tiles, Planks, Prefinished Vs Unfinished
Cork comes as tiles, planks, and rolls, and each format has different installation and sealing needs—verify format and whether it’s prefinished on the product label. Decide on the format, then check the manufacturer’s instructions for installation method and required underlayment.
Why that matters: tiles and glue‑down planks tend to be more stable in wet areas, while floating systems are easier for DIY but need correct gaps and underlayment. Practical warning: unfinished cork requires shop or site finishing and more maintenance; prefinished saves time but still needs the right topcoat for kitchen durability.
Cork Tiles vs Cork Planks
When it comes to cork flooring, you’ve got two main formats: tiles and planks. Each has its own strengths and best uses.
Tiles are typically 12×12 inches or smaller, perfect for creating intricate patterns. They’re easy to replace if damaged, but can be more labor-intensive to install due to the number of pieces.
Planks, on the other hand, come in various widths and lengths, mimicking hardwood flooring. They’re quicker to install, easier to match during repairs, and hide gaps better than tiles. However, they can be more prone to expansion and contraction issues if not installed correctly.
Prefinished vs Unfinished Cork
Cork flooring comes in two finish types: prefinished and unfinished. Both have their pros and cons.
Prefinished cork has a factory-applied sealant and wear layer, making it ready to use right out of the box. It’s more durable, water-resistant, and requires less on-site work. However, it can be more expensive and may have limited color options.
Unfinished cork needs to be sealed and finished on-site. This allows for a custom look and better control over the final sheen. It’s cheaper upfront but requires more time and effort during installation. Plus, it can be less water-resistant until properly sealed.
Durability and Wear Resistance in Kitchen Use
The floor’s density, core build, and finish determine how well cork stands up to traffic, dropped items, and chair casters—check the manufacturer’s wear statements and warranty details before committing. Inspect the product data sheet for wear-layer construction and recommended finish systems for kitchens.
Why that matters: a hard, properly applied finish protects against abrasion and water spots; a low‑density core will dent and wear faster. Realistic warning: even tough cork can mark from heavy appliances and sharp objects, so follow the maintenance schedule and use protective pads where needed.
How finishes and construction affect scratch, dent, and wear resistance
The finish and construction of your cork flooring play a big role in how it holds up to everyday kitchen use. Here’s what you need to know:
Finish: Urethane or aluminum oxide finishes are tougher and more durable than water-based coatings. They provide better resistance to scratches, dents, and wear. However, they may have a higher gloss level that shows scuffs more easily.
Construction: Cork flooring with a thicker wear layer (top layer) will resist scratches and dents better than thinner ones. The density of the core also matters. Tighter cores offer better resistance to indentation under heavy foot traffic or dropped objects.
Heat, UV, and stain resistance considerations
Cork flooring can handle heat well, but there are a few things to consider:
Heat: Cork can withstand temperatures up to 140°F (60°C). However, prolonged exposure to higher temps from hot pans or appliances can cause damage. Use trivets and avoid placing heavy appliances directly on the floor.
UV rays: Direct sunlight can fade cork over time. Keep your kitchen’s natural light in mind when planning layout and use window treatments if necessary.
Stains: Cork is naturally resistant to most stains, but oil-based stains (like cooking oil) can penetrate the surface. Clean spills promptly to prevent staining. For tougher stains, consult your manufacturer’s care guide.
Installation Methods: Glue-Down, Floating, and Common Mistakes to Avoid
Two main methods are glue‑down and floating; pick the one suited to your subfloor and moisture profile and follow the manufacturer’s acclimation and moisture‑testing instructions. Before installation, perform flatness and moisture checks and hold onto the product’s prep checklist from the maker.
Why that matters: poor prep or skipping acclimation causes gaps, cupping, and adhesive failures. Common mistake: using the wrong adhesive or skipping a moisture barrier—both will cause callbacks and shorten the floor’s life in a kitchen.
Glue-down installation: when and how
Glue-down is your best bet for stability in high-traffic areas like kitchens. Here’s what you need to know:
When to choose glue-down: It’s ideal for concrete slabs on grade, or when you want a solid, stable floor.
Key prep steps include:
- Check base compaction. It should be at least 95%.
- Moisture test the slab. Use a calcium chloride test for 72 hours. Acceptable range is 3 lbs/1000 sq ft/day.
Hiring a pro: Consider hiring a professional if you’re unsure about moisture testing or compaction. They’ve got the tools and know-how to get it right.
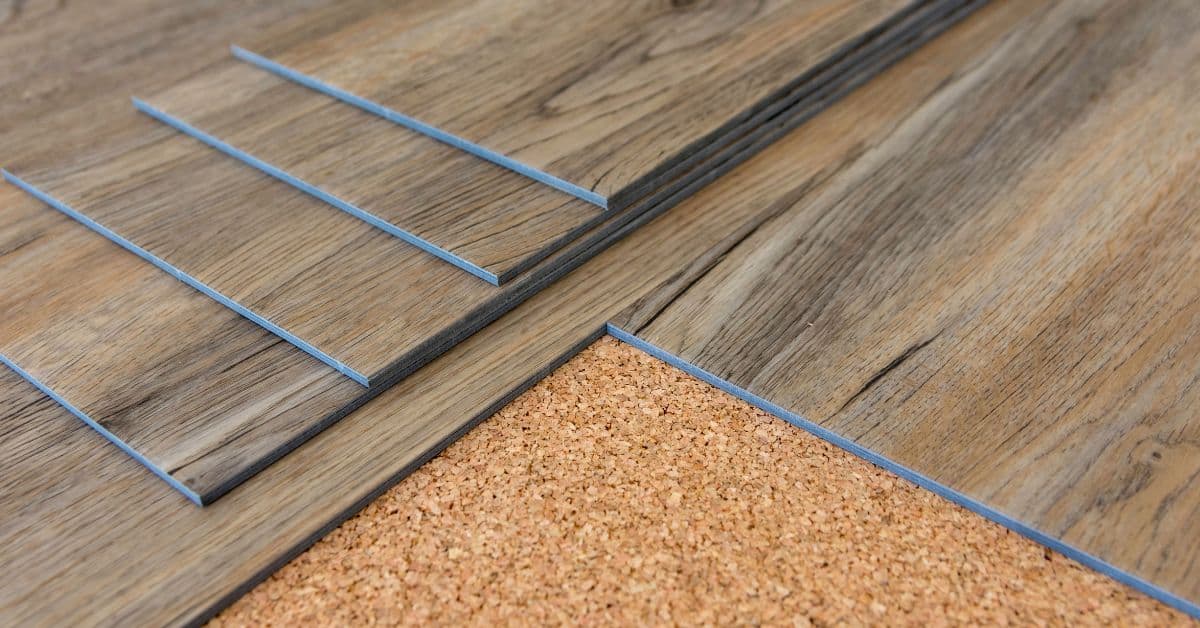
Floating installation: underlay, expansion gaps, and transitions
Floating installations are great for DIYers as they don’t require glue. Here’s what you need to know:
Underlay: In kitchens, use a moisture barrier underlay like polyethylene sheeting. It stops moisture from rising and damaging your floor. Always check the manufacturer’s recommendations for specific products.
Expansion gaps: Concrete slabs move with temperature changes. So, leave a 1/4″ to 3/8″ gap around the perimeter and between boards. Fill these with expansion joint filler after installation.
Transitions: When meeting other flooring types, use transition strips or T-molding. They cover gaps and prevent tripping. Make sure they match your floor’s color and style. Always check local building codes for specific transition requirements.
Common installation mistakes and how to avoid them
Even with the best intentions, DIYers often fall into common pitfalls during laminate flooring installation. Here are some mistakes to steer clear of:
- Inadequate subfloor prep: Skimping on subfloor preparation can lead to uneven surfaces and squeaky floors later on. Always ensure your subfloor is clean, dry, flat, and structurally sound before installation.
- Ignoring moisture: Moisture is laminate’s enemy. Check the relative humidity of the room where you’re installing (it should be between 35-65%) and consider using a moisture barrier underlayment if necessary.
- Poor transitions: Neglecting proper transitions at doorways can cause tripping hazards and allow moisture to seep in. Always use transition strips, T-molding, or reducers where needed, and ensure they’re securely attached.
Double-check these points before you start your project. A little extra time spent on preparation can save you a lot of headaches down the road.
Cork in Kitchens and Wet Areas: Water Resistance, Limitations, and When to Avoid It
Cork resists small spills better than untreated wood but it is not the same as a fully waterproof floor; check the technical data for water‑resistance claims and installation limits. Map out wet zones (sink, dishwasher, drop zones) and follow the manufacturer’s guidance on safe distances and required sealants.
Why that matters: prolonged or standing water damages cork even with a finish; ventilation and good drainage reduce risk. Red flag: if the layout has constant standing water or wet features, choose a true waterproof product instead of relying on heavy sealing alone.
How cork handles spills, humidity, and standing water
Cork is naturally resistant to moisture but it’s not waterproof. Spills on cork should be wiped up promptly. Cork can handle short-term exposure to humidity or small spills without issue.
However, prolonged contact with water or standing water can cause cork to swell and warp. Once saturated, cork may take a long time to dry out completely, increasing the risk of damage.
Cork’s cellular structure allows it to absorb moisture, which is why it’s important to keep it as dry as possible in kitchen areas prone to water exposure.
Practical placement rules and edge treatments
In kitchens, avoid installing cork directly under sinks or dishwashers where constant water exposure is likely. Instead, opt for a waterproof material like vinyl or tile in these areas.
Use thresholds to separate wet and dry areas. Ensure they’re properly sealed with caulk or another suitable sealant to prevent water from seeping underneath.
Seal cork edges, especially on tiles, using a suitable edge sealant before installation. This helps prevent water from entering the core of the cork through the edges.
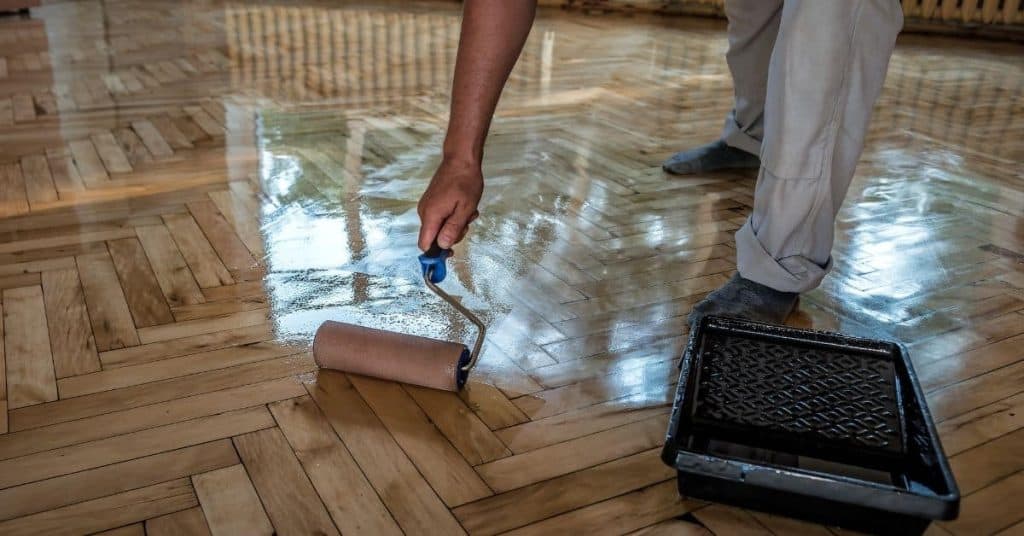
Finishes That Prevent Water Spots and Protect Cork in Kitchens
Select finishes that form a tight, durable film and note whether they’re factory-applied or meant for site finishing; read the product technical sheet for recommended topcoats and recoat intervals. Verify slip resistance, VOC data, and compatibility with the cork product before buying or refinishing.
Why that matters: the right finish keeps moisture out of the cork cells and reduces water‑spotting and stains. Practical tip: factory finishes save time, but site-applied systems let you tailor protection for heavy kitchen use—either way, follow the manufacturer’s maintenance and re‑coat schedule.
Factory-applied finishes: polyurethane, UV-cured urethane, and aluminum-oxide enhanced coats
Prefinished cork flooring often comes with factory-applied finishes that provide excellent water resistance. These finishes create hard, water-repellent surfaces to protect your floor from spills and moisture.
Polyurethane and UV-cured urethane are popular choices. They form a tough, durable film that seals the cork surface, preventing water absorption. Look for finishes with low porosity and high film thickness for better protection.
Some manufacturers also offer aluminum-oxide enhanced coats. Aluminum oxide is a hard mineral that increases the finish’s durability and resistance to scratches and stains. Always confirm the water resistance rating and warranty coverage with the manufacturer.
Maintenance topcoats, sealers, and recoat schedules
Regular maintenance is key to preventing water spots on cork flooring in kitchens. Topcoats and sealers help maintain the floor’s protective barrier against moisture.
Apply a suitable topcoat or sealer as recommended by the manufacturer after installation. Recoating should be done every 3-5 years, depending on wear and tear. Follow manufacturer guidelines for compatible products and recoating intervals to ensure optimal performance.
Use cleaners specifically designed for cork flooring to avoid stripping the finish or causing discoloration. Regularly inspect your floor for any signs of wear or damage, and address them promptly to maintain longevity.
Cost, Maintenance, Brands, Buying Checklist, and Long-Term Care
Costs depend on cork grade, finish, and installation needs—compare product specs, warranties, and required prep rather than relying on a single price. Use a buying checklist: confirm type, thickness, finish, moisture resistance, warranty, and installation method on the product paperwork before purchase.
Why that matters: a higher‑spec product and correct installation reduce long‑term maintenance and replacement frequency. Benefit: regular cleaning, prompt spill response, and scheduled re‑coating extend service life; if you’re unsure about a brand claim, check third‑party test results and warranty fine print.
What affects cost and what to verify before buying
Before making a purchase, understand the factors that influence cork flooring costs and verify key details to ensure you’re getting quality products.
- Cork grade: Higher grades like B or AB offer better durability. Check the product label for grading standards.
- Finish type: Pre-finished cork is more expensive but saves time and labor. Unfinished needs on-site application.
- Installation method: Glue-down is cheaper, floating adds cost but allows for easier repair/replacement.
- Subfloor prep: Existing subfloor condition affects installation costs. Ensure it’s flat, dry, and clean.
- Warranty: Request a copy to understand coverage and duration. Longer warranties indicate better quality.
- Finish specifications: Ask for details on the finish used (polyurethane, UV-cured urethane, etc.) and its expected lifespan.
- Lab test results: Request VOC emissions, slip resistance, and other relevant lab tests to ensure safety and performance.
- Installation support: Check if the manufacturer or retailer offers installation guidance or support.
Quick rule: Don’t skimp on quality. Better materials and finishes last longer, saving you money in the long run.
Daily, periodic, and long-term maintenance plan
Regular care keeps your cork kitchen floor looking great and performing well.
- Daily: Sweep or vacuum to remove dirt and debris. Use a damp mop with mild soap for weekly cleaning.
- Spills: Clean up immediately using a soft cloth and warm water. Avoid harsh chemicals.
- Avoid: Don’t use vinegar, ammonia, or abrasive cleaners as they can damage the finish.
- Periodic (every 3-6 months): Apply a fresh coat of sealant to maintain water resistance and protect against scratches.
- Long-term (every 5-10 years): Refinish or reseal the floor, depending on finish type. Consult your manufacturer’s guidelines.
Quick rule: Regular maintenance extends the life of your cork flooring and keeps it looking new.
Where to buy and brands to research
Find reliable sources for your cork flooring by evaluating retailers, manufacturers, and local installers.
- Retailers: Look for stores with a good reputation, knowledgeable staff, and clear return/exchange policies.
- Manufacturers: Research established cork producers. Check their website for product information and certifications.
- Warranty length: Longer warranties indicate better quality products and customer support.
- Installation support: Ensure the retailer or manufacturer offers guidance or support for installation.
- Certifications: Look for third-party certifications (e.g., GREENGUARD, FloorScore) that verify product safety and quality.
- Local installers: Get recommendations from friends or online reviews. Interview potential installers to ensure they’re experienced with cork flooring.
Quick rule: Don’t rush your purchase. Take time to research and compare brands, retailers, and installers for the best results.
Conclusion
With cork flooring in the kitchen, the big payoff is a durable surface that keeps a warm look without sacrificing safety. Focus on choosing the right type and finish, test patches first, and respect water limits to protect your investment.
Make the move by following a simple flow: decide between tiles, planks, or prefinshed options; pick a finish that guards against water spots; confirm your chosen installation method suits your space; and verify your chosen finish and adhesive are compatible with kitchen use. Test a small area first, follow the manufacturer’s drying times, and check for any edge or seam concerns before you commit.
Common mistakes to avoid are rushing the finish or sealant, skipping a moisture check in subfloor or cabinet areas, and using water aggressively on unfinished cork. A basic safety rule is to keep water away from exposed cork until you know the finish is fully cured, and never mix incompatible products. If you’re unsure about substrate conditions, glue-down requirements, or working around cabinets and appliances, pause and verify before proceeding.
If the project touches unexpected moisture, uneven subfloors, or complex glue-down work, or you’re unsure about finishes in a wet area, call a pro. With careful planning and these checks, you can finish confident and ready to enjoy a durable, attractive kitchen floor for years to come.
FAQ
What are the main pros and cons of cork flooring in a kitchen?
Cork is soft underfoot, offers good sound absorption, and can be stylish. It’s naturally antimicrobial and a bit more forgiving on drops. It can be sensitive to standing water and sharp tools, so quick cleanups and proper finish matter for longevity.
Which installation method is best for cork in a kitchen: glue-down or floating?
Glue-down tends to feel solid and reduces expansion gaps, but it requires a clean, dry subfloor and correct adhesive. Floating floors are easier to install and replace but can feel looser and may show gaps with humidity changes. Check manufacturer instructions for subfloor prep and approved methods before choosing.
Is cork eco-friendly, and what should I look for when evaluating sustainability?
Cork is harvested from the bark of cork oak trees, which can regrow. Look for certifications or labels from the manufacturer or third parties, and check the sourcing details. Ask about finishing, lifetime disposal options, and any adhesives or finishes used in the product.
What maintenance routines help cork floor last in a kitchen?
Sweep or vacuum regularly to remove grit, wipe with a damp mop using a pH-balanced cleaner, and dry any spill immediately. Avoid soaking the floor and use protectors on furniture legs. Follow the finish manufacturer’s care guidelines and reapply finish as recommended.