
Introduction
Vinyl flooring is a durable, affordable option made from layered vinyl that can mimic wood or tile. It’s popular with DIYers for easy cutting, quick installs, and low maintenance, but it has drawbacks like possible denting or seams showing over time. Choose the right product and subfloor setup by checking the label and manufacturer guidance before you start.
What to watch includes the wear layer condition, seam integrity, and the suitability of your subfloor. Common fixes you can handle at home include re-adhering loose sections, resealing edges, and choosing the right materials for repairs, but always follow product instructions and local rules. If in doubt, consult the manufacturer label or installer guidance before making a change.
Key takeaways
- Understand vinyl flooring types (sheet, tile, plank) and subfloor compatibility.
- Check product labels for wear layer thickness and water resistance claims.
- Plan for proper underlayment and moisture barriers to prevent future issues.
- DIY installation is possible but follow manufacturer guidelines and local code requirements.
- Use sharp utility knife and straight edge for clean cuts.
- Seal transitions and thresholds to prevent moisture seepage at doorways.
- Regular cleaning: sweep, damp mop, avoid harsh chemicals that degrade finish.
Table of Contents
- Introduction
- Key takeaways
- Quick Overview and Types of Vinyl Flooring
- Pros: Why Homeowners Choose Vinyl
- Cons and Limitations to Watch for
- What to Watch When Buying and Evaluating Products
- Installation: DIY Considerations and Professional Installation Cues
- Common Problems and Practical Fixes
- Maintenance and Cleaning Best Practices
- Tools, Materials Checklist and Specs to Verify
- Conclusion
- FAQ
Quick Overview and Types of Vinyl Flooring
Vinyl flooring is a resilient, plastic-based option used in homes for a variety of rooms. It comes in several forms designed for different needs. Understanding sheet, luxury vinyl tile/plank, and rigid-core options helps you match performance to your space.
Each type has construction differences that affect moisture resistance, comfort, and durability. Look at how the top layers, cores, and underlayers are built when you compare products. Check the product label or data sheet to confirm what you are getting for your room and budget.
Main product types explained
Vinyl flooring comes in three main types, each with its own strengths and best uses.
Sheet vinyl is sold in large rolls, perfect for covering big areas like kitchens or bathrooms. It’s durable, waterproof, and easy to install.
Luxury Vinyl Tile/Plank (LVT/LVP) mimics the look of natural materials like wood or stone. It’s versatile, comes in various sizes, and is great for both residential and commercial spaces.
Rigid-core vinyl has a rigid core layer that makes it extra stable and durable. It’s ideal for areas with heavy foot traffic or furniture, and it can even be installed over existing flooring.
Construction layers and terminology
Understanding vinyl flooring construction helps you pick the right product for your needs.
The wear layer is the top part that takes the most abuse. Thicker wear layers mean better durability and easier maintenance.
The printed layer gives vinyl its look – wood grain, stone texture, etc. Better quality prints offer more realistic looks.
The core/backing is the base that provides stability and support. Rigid-core options have a solid core for extra strength.
Pros: Why Homeowners Choose Vinyl
Vinyl offers strong water resistance for kitchens, baths, and laundry areas. It also comes in a wide range of designs, from realistic visuals to bold patterns. The surface can feel comfortable underfoot compared with harder floors.
Affordability and easier maintenance are common reasons people pick vinyl. Consider your room type and traffic level when weighing these benefits against other materials. Verify the manufacturer’s guidance for cleaning and care on the product label.
Durability and water resistance benefits
Vinyl flooring is tough stuff. It’s made to take a beating, making it ideal for high-traffic areas like kitchens and hallways.
But where vinyl really shines is with moisture. Spills won’t soak in or warp the material. That’s why it’s perfect for bathrooms and laundry rooms. No more worrying about water damage.
Pro tip: Even though vinyl can handle water, don’t let standing water sit on it too long. It’s not completely impervious to moisture over time.
Aesthetics and design flexibility
Vinyl can mimic the look of wood or stone, giving you that high-end feel without the price tag. You’ll find a wide range of textures, colors, and plank or tile sizes to choose from.
Want a classic hardwood floor in your living room? Vinyl can do that. How about stone tiles in your bathroom? Yep, vinyl can pull off that look too.
And the best part? You can mix and match designs to create unique patterns or borders. Let your creativity flow.
Cost and installation advantages
Vinyl is affordable, plain and simple. It’s cheaper than hardwood or stone, making it a great option for budget-conscious homeowners.
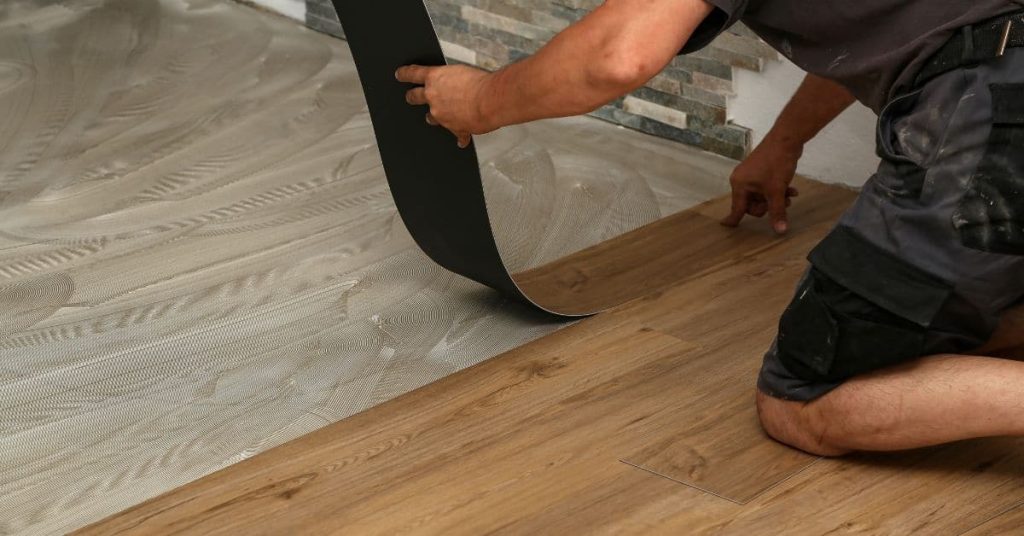
Installation is a breeze too. With interlocking planks or tiles, you can DIY this project in no time. No glue required. Just click them together and you’re done.
And if you do need to use adhesive, it’s still a fast process compared to other flooring types. Less time spent on installation means less money out of your pocket.
Cons and Limitations to Watch for
Vinyl can scratch, dent, or wear down with heavy use and sharp objects. Some colors may fade with prolonged sun exposure in certain rooms. Subfloor imperfections can show through if the underlayment isn’t addressed.
Indoor air considerations exist with some vinyl products, so check for low-emission claims on the data sheet. End-of-life disposal varies by product and local rules, so verify recycling options and guidance. Always review the label and manufacturer instructions for limits on use and warranty coverage.
Surface damage and longevity issues
Vinyl flooring, while durable, isn’t immune to wear and tear. Here’s what you can expect:
Scratches: Deep grooves from heavy furniture or sharp objects can mar the surface. Regularly use floor protectors on furniture legs.
Dents: High heels, pet claws, or dropped items can leave permanent indentations. Keep pets’ nails trimmed and be careful with heavy objects.
Edge lifting: Moisture or improper installation can cause edges to lift over time. Ensure proper subfloor preparation and ventilation during and after installation.
Indoor air quality and environmental concerns
Vinyl flooring can emit volatile organic compounds (VOCs), especially when new. Here’s how to mitigate this:
Check product certifications like FloorScore. This ensures the product meets strict indoor air quality standards.
Review manufacturer disclosures for VOC content and allow time for off-gassing before moving furniture in or occupying the space.
Ventilate the area during and after installation to help disperse any emitted gases.
Subfloor and temperature/moisture sensitivity
Vinyl flooring needs a flat, dry subfloor and stable temperatures to perform well. Here’s why:
Flat subfloor: Uneven surfaces can cause vinyl planks to warp or buckle over time. Ensure your subfloor is level before installation.
Dry subfloor: Moisture can cause vinyl to swell, delaminate, or lift. Keep the subfloor dry and address any moisture issues before installing.
Stable temperatures: Extreme heat or cold can cause expansion/contraction, leading to gaps or buckling. Maintain consistent room temperature for best results.
What to Watch When Buying and Evaluating Products
Assess room suitability by checking moisture and traffic expectations for the area. Look for a wear layer or equivalent that matches how you live in that space. Read the installation method options to ensure your project plan fits your skill set.
Pay close attention to warranty fine print and any conditions. Take samples and compare them in your space, and review product data sheets for performance claims. When in doubt, verify details with the manufacturer instructions and local requirements.
Matching product to room and traffic
When buying vinyl flooring, it’s crucial to choose a product that suits your room’s needs. Here are some guidelines:
Bathrooms & Kitchens: Opt for 100% waterproof options with heavy-duty wear layers (20-30mil) and thick cores. These areas see high moisture and traffic.
High-Traffic Areas: Go for products with tough wear layers (18-26mil), dense cores, and enhanced scratch resistance.
Basements & Low-Traffic Rooms: You can save money here. Choose products with lighter wear layers (10-18mil) and thinner cores, but ensure they’re still moisture-resistant if below grade.
How to read wear-layer, warranty, and installation info
Before purchasing, scrutinize these key details:
Wear Layer: Thicker is better for high-traffic areas. Check mil thickness (e.g., 20mil).
Warranty: Look for long-term coverage (15-30 years) and what’s covered (e.g., wear, stain, moisture damage).
Installation Info: Check if the product is DIY-friendly. Read about subfloor prep, tools needed, and installation method (glue-down, interlocking, etc.).
Visual checkpoints before purchase
Before committing to a product, order samples and inspect them thoroughly. Here’s your checklist:
- Color/pattern variation: Check for consistency across planks. Inconsistencies might mean uneven results.
- Plank repeat: Ensure the pattern repeats evenly to avoid noticeable variations in your installation.
- Transitions & trim: Confirm matching transitions and trims are available, especially for unique shapes or sizes.
- Edges & corners: Check edge quality. Poor edges can lead to damage during installation.
- Surface texture: Feel the surface. It should match your desired finish (e.g., smooth, hand-scraped).
- Plank size & shape: Ensure they fit your room’s dimensions and layout.
- Seams & joints: Check for tight seams and consistent joint width.
- Backing & core: Inspect the backing and core for any defects or inconsistencies.
Quick rule: If in doubt, ask for more samples or consult with a flooring professional.

Installation: DIY Considerations and Professional Installation Cues
DIY can work for certain vinyl products if you have basic tools and a prepared subfloor. Plan your layout and cut lines carefully to avoid waste. Be aware of potential pitfalls that commonly appear in home projects.
If you hire a pro, confirm the scope, timing, and access to materials. Prepare the space by removing thresholds and ensuring a flat surface. Always follow the product manufacturer’s installation guidelines and local rules when coding applies.
Site prep and subfloor requirements
Before you start laying concrete, you gotta get your site ready. Here’s what you need to do:
Test for moisture. Concrete loves dry places. Check the moisture level of your subgrade with a calcium chloride test. Aim for 4% or less.
Check flatness tolerances. Your subfloor should be flat as a pancake. Use a straight edge to check. For residential jobs, aim for no more than 3/16″ variation over 10 feet. If it’s not flat enough, you’ll need to level it with a concrete leveling compound.
Clean and prep the site. Remove any debris, oil stains, or vegetation. Sweep the area clean. If you’re pouring over an existing slab, make sure it’s clean and free of contaminants. A wire brush can help with that.
Common DIY mistakes to avoid
Even with careful planning, DIY projects can go wrong. Here are some common mistakes to steer clear of when installing concrete.
- Poor acclimation: Concrete needs time to adjust to your home’s temperature and humidity. Skip this step, and you might end up with cracks or other issues. Always follow the manufacturer’s acclimation guidelines.
- Incorrect laying direction: Laying concrete in the wrong direction can lead to improper drainage and weakening of the surface. Make sure to lay it perpendicular to your home’s joists, as mentioned earlier under site prep.
- Inadequate underlayment: A proper underlayment provides a stable base for your concrete. Skimping on this can result in a weak, uneven surface. Refer back to the section on subfloor requirements for details.
- Improper seam treatment: Seams left untreated can allow moisture to seep through, leading to damage and costly repairs. Always seal seams properly using the recommended products and techniques.
Double-check these points before you start your project. A little extra time spent planning can save you a lot of headaches down the road.
When to hire a pro
DIY concrete work can save you money, but it’s not always the best choice. Here are some situations where it’s wise to call in a professional:
Complex layouts: If your project involves intricate patterns, curves, or multiple pours that need precise timing, consider hiring an expert. They have the experience and tools to get it right.
Moisture remediation: Before pouring new concrete, you might need to fix existing moisture issues. This can involve complex drainage systems and waterproofing membranes. A pro knows how to tackle these problems safely and effectively.
Warranty requirements: Some manufacturers require professional installation for their products to remain under warranty. Always check the product label or manufacturer instructions before starting your project.
Common Problems and Practical Fixes
Gaps, buckling, and bubbles often point to subfloor issues or improper installation. Scratches and seam separation can show up with heavy use and movement. Adhesive failures may arise from moisture, surface cleanliness, or product selection.
Most repairs require a methodical approach: isolate the problem, select a compatible patch or plank, and follow the product instructions. In some cases, replacement is the safest option after evaluating the extent of damage. Reference manufacturer guidance for any repair steps and timing.
Fixing gaps, buckling, and seam issues
First, identify the cause. Gaps can be due to improper installation or subfloor movement. Buckling often results from excessive moisture.
For gaps: Check if the subfloor is stable. If so, re-adhere loose planks using a suitable vinyl adhesive. For wider gaps, consider replacing affected planks.
For buckling: Identify and fix the moisture source. Once dry, gently press down the buckled area. If it doesn’t flatten, replace the affected planks.
For seam issues: Check if seams are separating due to subfloor movement or improper installation. Re-adhere loose seams using a seam welder or vinyl adhesive. If severe, replace affected planks.
Repairing scratches, dents, and surface wear
Light scratches can be buffed out with a soft cloth and mild abrasive. For deeper scratches or dents, use a vinyl filler specifically designed for your flooring.
For larger areas: Use a patch kit to replace damaged sections. Ensure the new piece matches the existing floor in color and pattern.
Temporary remedies include using area rugs to cover worn spots. However, these are not long-term solutions and should be used sparingly.
Addressing bubbles, adhesive failure, and moisture damage
Bubbles under vinyl flooring are usually caused by trapped air or moisture. Adhesive failure often results from using the wrong adhesive or improper installation.
For bubbles: Poke a small hole in the bubble to release the air. If it refills with air, the subfloor may be too moist. Address the moisture issue before attempting repair.
For adhesive failure: Identify and fix the cause (wrong adhesive, improper installation). Remove affected planks, clean the area, and re-adhere using the correct adhesive.
For moisture damage: If vinyl flooring has buckled or delaminated due to excessive moisture, remove it. Once the subfloor is dry, install new flooring with a moisture barrier if necessary.
Maintenance and Cleaning Best Practices
Establish a routine that includes light daily care and periodic deeper cleaning. Use products and methods recommended by the manufacturer to protect the wear surface. Avoid abrasive tools that can dull or scratch the finish.
Preventive measures like quick cleanup of spills and using protective pads under heavy furniture help extend life. Review the care section on the label or data sheet for room-specific recommendations and any cautions on cleaners or steam use.
Daily and periodic cleaning routines
Keep your vinyl flooring looking its best with these simple daily and periodic cleaning routines.
Daily: Sweep or vacuum to remove dirt, dust, and debris. Use a soft-bristle broom or a vacuum without a beater bar to avoid scratching the surface.
Periodic (weekly/monthly): Mop with a damp mop using a pH-neutral cleaner designed for vinyl flooring. Avoid over-wetting as excess water can seep into joints and cause damage.
Stain, spill, and spot-removal tips
Act quickly to remove spills and stains from your vinyl flooring. Here’s how:
Spills: Blot up excess liquid immediately with a clean cloth or paper towel. Then, use a pH-neutral cleaner and a soft cloth or mop to clean the area.
Stains: For tough stains like marker, nail polish, or candle wax, use a specialized remover designed for vinyl flooring. Always test in an inconspicuous area first.
Long-term care and protecting finishes
Maintain your vinyl flooring’s beauty with these long-term care tips:
Protective measures: Use felt pads on furniture legs to prevent scratches. Place mats at entryways to trap dirt and reduce wear.
UV protection: Keep window coverings closed during peak sun hours to protect your flooring from UV damage, which can cause fading over time.
Repair vs replace: If you notice significant scratches or damage, consider repairing with a touch-up kit designed for vinyl flooring. However, if the damage is extensive, it may be time to replace the floor.
Tools, Materials Checklist and Specs to Verify
Assemble a practical set of tools for both installation and repairs, plus the necessary materials for your chosen vinyl type. Create a plan that includes underlayment options, seam tapes, and appropriate adhesives if required. Keep the project simple by matching tools to the job size.
Summarize the key specs you must verify, such as wear layer, core construction, and certifications. Always read product data sheets and the manufacturer instructions to confirm compatibility with your space and local rules. When in doubt, verify requirements with the retailer or installer guidance.
Tools and materials checklist for install and repairs
Before you start, make sure you have all the necessary tools and materials. This list covers typical installations and DIY fixes.
- Tape measure: To ensure accurate measurements.
- Chalk line: For snapping straight lines for cuts.
- Utility knife: For trimming vinyl planks to size.
- Circular saw: For cutting larger pieces (optional).
- Vinyl flooring adhesive: Choose one compatible with your subfloor and vinyl type.
- Underlayment: Consider using an underlay for added comfort and soundproofing.
- Safety glasses: Protect your eyes from debris during cutting.
- Work gloves: To protect hands when handling materials.
- Knee pads: For comfortable installation, especially on larger areas.
Quick rule: Always double-check your tools and materials before starting to avoid delays or mistakes.
Key specs and certifications to check
Before purchasing, verify these key specifications and certifications to ensure you’re getting a quality product.
- Wear-layer rating: Check the wear layer thickness (20-40 mil) for durability.
- Installation method: Ensure it’s compatible with your subfloor and layout.
- Warranty details: Understand what’s covered and for how long.
- Indoor-air certifications: Look for industry-recognized labels like GREENGUARD or FloorScore.
- Moisture resistance: Check if it’s suitable for your room’s humidity levels.
- Acclimation time: Follow manufacturer guidelines to prevent issues post-installation.
- Noise reduction: Consider this factor, especially for high-traffic areas.
- Seam width: Check if it matches your room’s dimensions to minimize waste.
Quick rule: Don’t compromise on quality. Verify these specs to avoid costly mistakes.
Questions to ask manufacturers and safe test/check ranges
Contact the manufacturer or consult their guidelines for specific recommendations and acceptable ranges.
- Recommended traffic/use: Ask about heavy foot traffic, furniture movement, etc.
- Moisture tolerance: Check if it’s suitable for your room’s humidity levels.
- Acclimation time: Follow manufacturer guidelines to prevent issues post-installation.
- Temperature range: Ensure it can handle your home’s temperature fluctuations.
- Subfloor requirements: Check if your subfloor meets their standards.
- Installation method compatibility: Confirm it works with your chosen installation method.
- Seam width and expansion gap: Ask about recommended seam widths and expansion gaps for your room size.
- Cleaning and maintenance guidelines: Understand how to care for your specific vinyl type.
Quick rule: Always consult the manufacturer’s guidance. It’s their product, so they know best.
Conclusion
Vinyl floors are a durable, affordable update when you handle prep, installation, and fixes the right way. The key is safety, clean work, and following the product’s instructions so the look and performance last.
First, check the space in a calm, stepwise way: make sure the subfloor is dry and flat, confirm the product type and wear layer, verify measurements, and gather the tools and materials before you start. Acclimate the material as required, test a small patch in a hidden or inconspicuous area, and lay out your plan for cuts, seams, and transitions. Work in a well lit space, wear eye and hand protection, and keep a clear path for tools and waste. Follow the manufacturer’s guidance for underlayment, adhesives, or floating installation, and don’t rush the cuts or the rolling.
Two common mistakes to avoid are skipping moisture checks and acclimation, which leads to warping or gaps, and ignoring expansion gaps near walls and fixtures, which invites buckling. Never cut corners on surface prep or use the wrong adhesive or tape on seams. A simple safety rule: test small sections first, clean as you go, and don’t force a fit where the floor doesn’t want to settle. If you’re unsure about subfloor moisture, use the right test method and wait for clear results before committing.
If you encounter lingering unevenness, extensive water damage, or complex transitions, call a professional rather than forcing a DIY fix. For the rest, stay disciplined, follow the steps you’ve outlined, and you’ll end with a floor that looks good, lasts, and is easy to maintain. Stay steady, measure twice, and keep moving forward with confidence.
FAQ
Is vinyl flooring a good choice for high-moisture areas like kitchens or laundry rooms?
Vinyl can handle moisture better than wood, but it’s not indestructible. Check the product label for moisture tolerance and ensure proper subfloor prep. If you’re unsure, follow manufacturer instructions and local guidance.
What should I check before installing vinyl over my subfloor?
Make sure the subfloor is clean, flat, and dry. Level any high spots and fill cracks per the subfloor’s instructions. If in doubt, verify with the product’s installation guide or consult a professional.
How do I fix issues after installation, like seams showing or looseness?
For seam visibility, ensure proper adhesive and alignment during install. If edges lift, follow the product’s repair steps or consider re-adhering with the recommended adhesive. Always check label or manufacturer guidance before reworking.
What maintenance routines will keep vinyl looking good long term?
Use approved cleaners and avoid harsh solvents that can fog the surface. Wipe spills promptly and use mats at entrances to cut grime. If you’re unsure about a cleaner, check the product label or manufacturer instructions.