
Table of Contents
- Introduction
- Understanding the Causes of Low Spots and Puddling
- Assessing the Problem Area
- Planning and Preparation Before Repairs
- Methods for Leveling and Repairing Low Spots
- Step-by-Step Guide to Applying Concrete Overlays
- Aesthetic and Environmental Considerations
- Effective Drainage Solutions for Preventing Patio Puddling
- Maintenance Tips for Long-Lasting Repairs
- Exploring Alternative Solutions for Fixing Low Spots
- When to Call in the Professionals for Patio Repairs
- Final Thoughts on Keeping Your Patio in Top Shape
- FAQ
Introduction
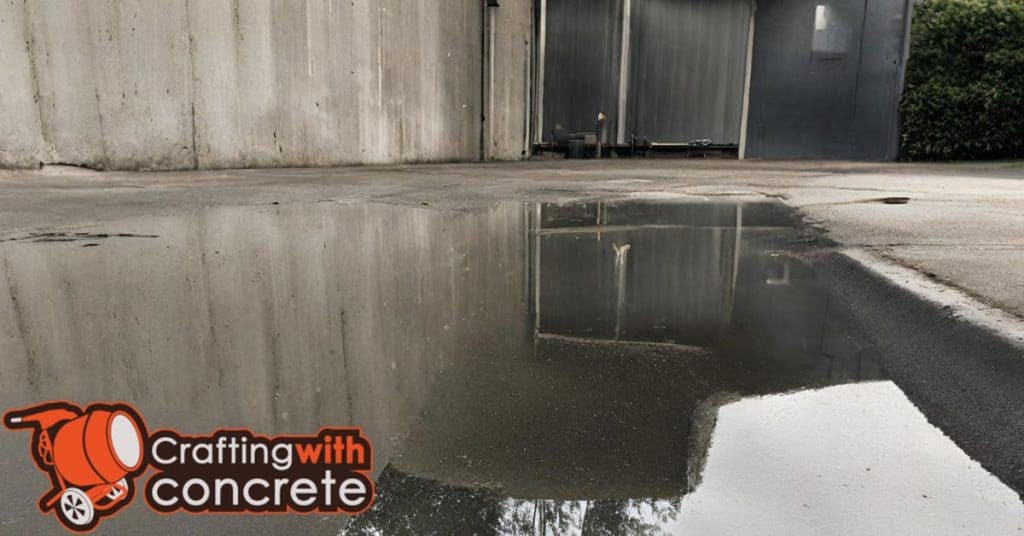
To fix low spots on patio edges that puddle, you need to level the surface by adding a suitable filler material and ensuring proper drainage. In this article, you’ll learn step-by-step methods to effectively address these low spots, preventing water accumulation and maintaining the integrity of your patio.
Understanding the Causes of Low Spots and Puddling
Low spots and puddling on patio edges often arise from factors like soil erosion, improper drainage, and ground settling. Poor construction practices, such as inadequate compaction of base materials, can also compromise patio stability and lead to these issues.
Understanding these causes is crucial for anyone looking to maintain a durable and functional patio. Environmental factors like heavy rainfall and freeze-thaw cycles can exacerbate the problem, while vegetation and root growth may further alter the surface. By learning how to diagnose these issues through visual inspections and simple tests, DIY enthusiasts can effectively address and prevent future problems.
Poor Initial Construction
Improper leveling during construction can be a major culprit behind low spots and puddling. If the ground isn’t prepared correctly from the start, you’re bound to face problems later. Always check base compaction before laying any surface. A poorly compacted base can settle unevenly, creating dips and valleys where water collects.
Another critical step is ensuring the ground is graded properly. The surface should have a slight slope to direct water away from structures. If this isn’t done right, you’ll end up with water pooling in the wrong places. Use a level to verify the slope, and don’t just eyeball it.
It’s tempting to rush through the initial construction phase, but cutting corners here will cost you more in the long run. Take the time to get the foundation right. A solid, well-prepared base is your best defense against future issues with low spots and puddling.
Soil Erosion and Settlement
Soil erosion and settlement are common culprits behind low spots in your yard. Over time, natural forces like rain and wind can gradually wear away the soil, creating depressions. This is especially true if your soil is loose or sandy. If you notice water pooling in certain areas, it’s a sign that erosion might be at work.
To tackle this, start by checking the affected areas for signs of soil movement. If you see exposed roots or uneven ground, it’s time to take action. You can add topsoil to level the area, but make sure to compact it properly. A poorly compacted base will just lead to more settling and puddling down the line.
Keep an eye on drainage patterns too. Water should flow away from your home, not towards it. If your yard slopes incorrectly, consider regrading it. This might be a bigger project, but it’s crucial for preventing further erosion and settlement issues. Remember, addressing these problems early can save you a lot of headaches later.

Assessing the Problem Area
To effectively assess the problem area on your patio, start by visually inspecting for low spots, particularly where water tends to pool after rain. Utilize a straightedge or level to pinpoint uneven surfaces and measure the depth of these depressions. Mark any identified low spots with chalk or tape to streamline the repair process.
Understanding the causes of low spots, such as soil settling or poor drainage, is crucial for planning effective repairs. Documenting your findings with photos or notes can be invaluable in devising a comprehensive repair strategy. This proactive approach not only aids in addressing current issues but also helps prevent future problems, ensuring a long-lasting and even patio surface.
Tools for Assessment
To accurately assess low spots on your patio, you’ll need the right tools. These will help you identify problem areas and plan your next steps effectively.
- Level: A long carpenter’s level is essential for checking the evenness of your patio surface. Make sure it’s at least 4 feet long for better accuracy.
- String Line: Use a string line to create a reference line across your patio. This helps in spotting dips and high spots when combined with a line level.
- Line Level: Attach this small tool to your string line to ensure it’s perfectly horizontal. This will highlight any deviations in your patio’s surface.
- Measuring Tape: Measure the depth of any low spots. Knowing the exact depth will help you determine how much material you’ll need to fill them.
- Chalk or Marker: Mark the areas that need attention. This will make it easier to remember where to focus your repairs later.
Pro tip: Always double-check your measurements and markings. Mistakes can lead to more work down the line, so take your time to get it right the first time.
Measuring Depth and Slope
First, grab a long, straight board and a level to measure the depth of any low spots. Lay the board across the area where you suspect a dip. Place the level on top and check the bubble. If it’s off-center, measure the gap between the board and the ground at the deepest point. This distance is your depth. Mark these spots so you know where to add filler later.
Next, assess the slope of your patio. Place the board on the surface and position the level on top. A proper slope is crucial for drainage, so the bubble should lean slightly toward the desired runoff direction. If it doesn’t, you might need to adjust the base. Make sure to check base compaction as well. A poorly compacted base can lead to uneven settling, making your slope ineffective.
Don’t eyeball it; precise measurements prevent future headaches. If your slope is off, water will pool and damage your patio over time. Remember, fixing it now is easier than tearing up the whole thing later. Pay attention to these details to ensure a long-lasting, functional patio.
Planning and Preparation Before Repairs
Before starting any repair work on your patio, it’s crucial to assess the extent and location of low spots along the edges. Gathering the right tools and materials, such as concrete mix, trowels, a level, and safety gear, is essential. Additionally, checking weather conditions ensures that you have a dry and temperate environment for applying concrete.
Proper planning not only saves time but also enhances the durability of your repairs. Addressing drainage issues by installing a slight slope or adding drainage channels can prevent future puddling. Ensuring the patio surface is clean and free of debris will promote effective adhesion of the new concrete, leading to a longer-lasting repair.
Gathering Materials and Tools
Before diving into repairs, make sure you have all the necessary materials and tools. This will save you time and frustration. Here’s what you’ll need:
- Safety gear: Always wear safety goggles and gloves. Protect yourself first.
- Measuring tape: Measure twice, cut once. Accurate measurements prevent costly mistakes.
- Hammer drill: Essential for drilling into tough surfaces like concrete. Use the right bit for the material.
- Screwdriver set: A variety of sizes is crucial. Magnetic tips can help with small screws.
- Utility knife: Perfect for cutting materials like drywall or insulation. Keep it sharp for clean cuts.
- Level: Ensures your work is straight and even. Don’t eyeball it; use the level.
- Paintbrushes and rollers: Choose the right size for the job. Quality brushes leave a better finish.
- Drop cloths: Protect floors and furniture from dust and paint. Reusable ones save money.
- Caulking gun: For sealing gaps and cracks. Practice on scrap material to get a smooth finish.
Pro tip: Keep your tools organized in a toolbox or belt. It speeds up the process and reduces the chance of losing anything mid-project.
Safety Precautions
Before diving into any repair work, make sure to prioritize safety. Start by ensuring the power is turned off if you’re dealing with electrical repairs. This might seem obvious, but it’s a step that’s often overlooked. Double-check that the power is off using a voltage tester. It’s a small tool that can prevent big accidents.
Next, consider your personal safety gear. Wear protective gloves and goggles to shield yourself from sharp objects and debris. If you’re working in a dusty environment, a mask is a must. Don’t skimp on these items; they are your first line of defense against injuries.
Finally, make sure your workspace is organized. Keep your tools in a designated area to avoid tripping hazards. If you’re using ladders, ensure they are stable and positioned correctly. A cluttered workspace is an accident waiting to happen, so take a few minutes to tidy up before starting your repairs.
Ensuring Safety During Patio Repairs
When tackling patio repairs, safety should be your top priority. Ignoring safety measures can lead to accidents and injuries, turning a simple DIY project into a costly ordeal. Let’s break down the key precautions you need to take to keep yourself and your workspace safe.
- Wear Protective Gear: Always wear safety goggles, gloves, and sturdy footwear. These protect against flying debris, sharp tools, and heavy materials.
- Secure Your Workspace: Keep your work area tidy. Clear away any tripping hazards and ensure all tools are stored properly when not in use.
- Check Equipment: Inspect all tools before use. Ensure power tools are in good working order and cords are free from damage. Faulty equipment can lead to serious injuries.
- Proper Lifting Techniques: Use your legs, not your back, when lifting heavy materials. If something is too heavy, ask for help or use a dolly to move it safely.
- Ventilation: If you’re working with chemicals or sealants, ensure the area is well-ventilated. Fumes can be hazardous if inhaled over time.
- Weather Conditions: Avoid working in wet or windy conditions. Slippery surfaces and flying debris increase the risk of accidents.
- Electrical Safety: If your repairs involve electrical work, always turn off the power at the breaker box before starting. Use a voltage tester to confirm the power is off.
Emergency Preparedness
Always have a first aid kit on hand and know the location of the nearest phone in case of emergencies. Familiarize yourself with basic first aid procedures, such as treating cuts or burns. Quick action can make all the difference in an emergency situation.
Methods for Leveling and Repairing Low Spots
Low spots on patio edges can occur due to factors like soil erosion or settling. To address these issues, self-leveling concrete is an effective method for filling and leveling uneven areas. Preparing the patio surface is crucial before applying any leveling compound to ensure a smooth finish.
Understanding the causes of low spots can help prevent future issues. Using a concrete patching compound is ideal for smaller repairs, ensuring that your patio remains even and safe. Proper drainage is essential to prevent puddling, which can lead to further damage over time.
Concrete Overlay Application
Start by ensuring the surface is clean and free of debris. A clean base is crucial for the overlay to adhere properly. Use a pressure washer or a stiff brush to remove dirt and dust. Once clean, check base compaction to ensure the existing concrete is stable and won’t shift under the new layer.
Mix the overlay compound according to the manufacturer’s instructions. Consistency is key here; it should be smooth and lump-free. Pour the mixture over the low spots and use a trowel to spread it evenly. Work quickly and efficiently to avoid the overlay setting before it’s properly leveled.
After application, use a long, straight edge to smooth the surface. This step helps ensure the overlay is level with the surrounding areas. Allow the overlay to cure as directed. Rushing this process can lead to cracks and uneven surfaces. Once cured, inspect the area to confirm it’s level and solid.
Alternative Solutions
When dealing with low spots, sometimes the best approach is to use patching compounds. These are great for small areas where a full concrete overlay isn’t necessary. Make sure the area is clean and dry before applying. Mix the compound according to the instructions and use a trowel to spread it evenly over the low spot. Let it cure properly before using the surface.
If the low spots are due to poor drainage, consider re-sloping the area. This involves adjusting the surface so water flows away instead of pooling. You might need to remove some material from higher areas and fill in the lower ones. Be precise with your slope; a slight angle is usually enough to direct water away.
Always check base compaction before applying any solution. A poorly compacted base can cause future settling, leading to more low spots. If the base is the problem, you’ll need to address this first to ensure long-lasting results.

Step-by-Step Guide to Applying Concrete Overlays
Applying a concrete overlay is a straightforward process that can rejuvenate your patio surface. This step-by-step guide will walk you through gathering the necessary materials, preparing the surface, mixing the overlay, and applying it smoothly to achieve a durable and attractive finish.
For DIY enthusiasts and professionals alike, understanding how to apply a concrete overlay can save time and money while enhancing the appearance and longevity of concrete surfaces. Proper application ensures a seamless blend with existing surfaces and provides an opportunity to customize the finish with textures or sealants for added protection and aesthetic appeal.
Step-by-Step Layout Process
Let’s lay out the rectangle using string lines and the 3-4-5 method to ensure your concrete overlay is perfectly aligned. Follow these steps carefully.
- Drive the first stake into the ground at one corner of your planned area.
- Measure out the length of one side and drive a second stake at the end point.
- Attach a string line between these two stakes, keeping it taut.
- From the first stake, measure 3 feet along the string line and mark it.
- From the first stake, measure 4 feet perpendicular to the string line and drive a third stake.
- Measure the diagonal between the 3-foot mark and the third stake; adjust the stake until the diagonal measures 5 feet.
- Repeat the process for the opposite side and check that all diagonals are equal to confirm the rectangle is square.
Pro tip: Always double-check your measurements before moving on. A small error at this stage can lead to big problems later.
Preparing the Surface
Start by giving your patio a thorough cleaning. Remove all furniture and sweep away loose debris. Use a pressure washer to blast away dirt and grime. If you don’t have one, a stiff-bristled brush and some elbow grease will do. Make sure the surface is spotless, as leftover dirt can ruin your overlay.
Next, inspect the concrete for any cracks or damage. Fill these with a concrete patching compound. Let it dry completely. If you skip this, your overlay might crack too. Check base compaction to ensure the ground beneath is solid. A poorly compacted base can cause the overlay to shift or crack over time.
Finally, apply a concrete bonding agent. This helps the overlay stick better. Use a roller or brush for even coverage. Let it dry as per the instructions. Don’t rush this step. A strong bond is crucial for a lasting finish. Once dry, you’re ready to move on to the next steps of the overlay process.
Mixing and Applying the Overlay
Start by reading the instructions on your overlay mix bag. Different products have different water ratios, and getting this wrong can ruin your project. Use a clean bucket and a mixing paddle attached to a drill for a consistent blend. Mix until smooth, with no lumps. If you see dry spots, keep mixing. This isn’t the time to rush.
Once mixed, pour the overlay onto the prepared surface. Use a trowel to spread it evenly. Work quickly but carefully. The overlay starts setting fast, so don’t dawdle. Keep the thickness consistent to avoid weak spots. Feather the edges to blend with surrounding areas. If you need a second layer, wait for the first to set but not fully cure. This helps layers bond better.
Watch out for air bubbles. They weaken the overlay. Use a spiked roller to remove them. If you skip this, expect problems down the line. After application, protect the surface from foot traffic and weather until it cures. Follow curing times on the product label. Patience pays off here, ensuring a durable finish.
Step-by-Step Repair Process for Fixing Low Spots on Patio Edges
Fixing low spots on your patio edges requires a methodical approach to ensure long-lasting results. By following these steps, you can effectively address the issue and prevent future water pooling. Gather your tools and materials, and let’s get started.
- Identify Low Spots: Begin by marking the low spots with chalk or tape. Use a level or straightedge to determine the depth and extent of the depressions.
- Prepare the Area: Clear the patio of any debris, dirt, or loose materials. A clean surface ensures better adhesion of repair materials.
- Mix the Concrete: Follow the manufacturer’s instructions for mixing the concrete. Aim for a consistency that’s not too runny, similar to thick oatmeal, to ensure it fills the low spots effectively.
- Apply the Concrete: Pour the mixed concrete into the marked low spots. Use a trowel to spread it evenly, making sure to feather the edges to blend seamlessly with the existing surface.
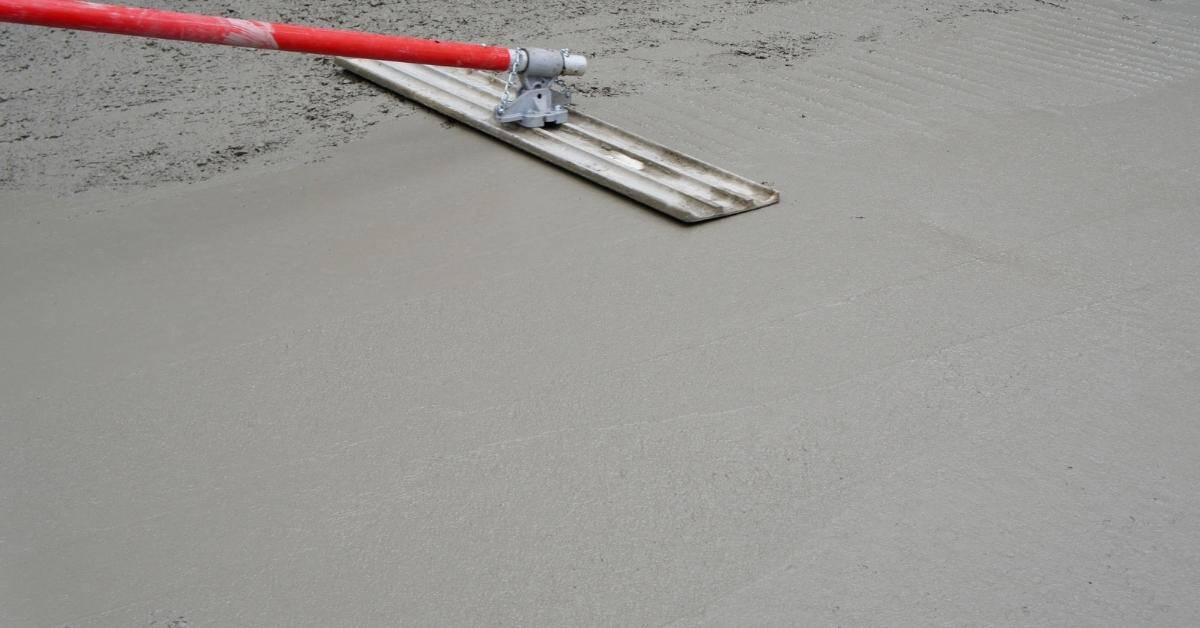
- Level the Surface: Use a straightedge or screed to level the concrete. Move it back and forth across the surface to remove excess material and ensure a smooth finish.
- Allow to Cure: Let the concrete cure according to the manufacturer’s guidelines. Avoid foot traffic during this time to prevent any disturbances.
- Seal the Surface: Once cured, apply a concrete sealant to protect against moisture and enhance durability. This step is crucial for preventing future issues.
Final Touches
After sealing, inspect the area for any imperfections. If necessary, make minor adjustments or touch-ups. Regular maintenance and inspections will help keep your patio in top condition, ensuring your repair efforts last for years to come.
Aesthetic and Environmental Considerations
Maintaining the aesthetic appeal of your patio while addressing low spots is crucial for both beauty and functionality. By matching concrete colors and textures, you can ensure repairs blend seamlessly with the existing design. Additionally, opting for eco-friendly materials like recycled aggregates or sustainable concrete mixes can enhance both the look and environmental impact of your patio.
Proper drainage solutions not only prevent water pooling but also reduce environmental harm. Incorporating natural elements such as plants or permeable pavers can further boost the visual appeal and support sustainability. Choosing eco-friendly solutions offers long-term benefits, including reduced maintenance needs and improved durability, making it a smart investment for any patio project.
Blending Repairs with Existing Patio
Matching repairs to your existing patio is crucial for maintaining a cohesive look. Start by identifying the original materials used in your patio. This includes the type of stone, tile, or concrete. Visit a local supplier with a sample if you’re unsure. They can help you find the closest match in color and texture.
Before diving into repairs, test your materials. Mix a small batch and let it dry to see how it compares. Remember, wet materials can look different once they dry. Adjust your mix if needed to get the right shade.
Pay attention to the surface texture. Use the same finishing techniques as the original patio. If it was brushed, troweled, or stamped, replicate that process. Consistency in texture is as important as color for a seamless repair.
Finally, consider the weather and environmental conditions. Work on a dry day to ensure materials set properly. Avoid shortcuts. Rushing repairs can lead to mismatched patches that stand out like a sore thumb.
Using Eco-Friendly Materials
When repairing your patio, using eco-friendly materials not only helps the environment but also ensures that your repairs are sustainable and blend well with existing structures. Here’s a list of materials you should consider.
- Recycled Concrete – Opt for recycled concrete aggregate to reduce waste and lower your carbon footprint.
- Natural Stone – Choose locally sourced natural stone to minimize transportation emissions and support local businesses.
- Eco-Friendly Sealant – Use water-based, low-VOC sealants to protect your patio without releasing harmful chemicals.
- Permeable Pavers – Select permeable pavers to allow water to drain through, reducing runoff and promoting groundwater recharge.
- Sustainable Timber – If using wood, go for FSC-certified timber to ensure it’s sourced from responsibly managed forests.
Pro tip: When choosing eco-friendly materials, always check for durability and strength ratings to ensure they meet your repair needs without compromising on quality.
Effective Drainage Solutions for Preventing Patio Puddling
Proper drainage is crucial to prevent water from pooling on your patio, which can lead to low spots and structural damage. By implementing effective drainage solutions, you can ensure water flows away from your patio, maintaining its integrity and appearance. Here are some practical options to consider for improving drainage around your patio.
- Install French Drains: These are trenches filled with gravel and a perforated pipe that redirects water away from the patio. They’re especially useful for areas with persistent water issues.
- Use Permeable Pavers: These pavers allow water to seep through and into the ground below, reducing surface runoff and minimizing erosion.
- Create a Swale: A shallow ditch that channels water away from your patio. Line it with grass or gravel to enhance its appearance and functionality.
- Regrade the Area: Adjust the slope of the ground surrounding your patio to ensure water flows away from it. This might involve adding or removing soil to achieve the desired angle.
- Install Gutter Extensions: Direct downspouts away from the patio with extensions or splash blocks to prevent water from pooling at the edges.
- Add a Dry Well: A dry well collects and disperses water underground, preventing it from accumulating on the surface. It’s an effective solution for managing excess water.
- Regular Maintenance: Keep gutters and drains clear of debris to ensure water can flow freely and doesn’t back up onto your patio.
Choosing the Right Drainage Solution
Selecting the appropriate drainage solution depends on your specific patio conditions and local climate. Consider consulting a professional to assess your situation and recommend the best approach to ensure optimal drainage and prevent future problems.
Maintenance Tips for Long-Lasting Repairs
Maintaining your patio is crucial for ensuring that repairs last as long as possible. Regular cleaning to remove debris and organic matter can prevent moisture buildup, which often leads to further damage. Sealing the surface with a concrete sealant at the right intervals helps protect against water penetration and weathering, while regular inspections for new cracks allow for prompt repairs.
Proper drainage maintenance is essential to prevent water accumulation, which can undermine the patio’s structure. Seasonal care, such as removing snow in winter and checking for erosion after heavy rains, ensures that your patio remains in optimal condition year-round. These maintenance practices not only extend the life of your repairs but also save you time and money in the long run.
Regular Inspection and Cleaning
Keep your repairs in top shape by making regular inspections a habit. Walk around your property every month or so and look for any signs of wear or damage. Pay close attention to areas that were recently repaired. Catching small issues early can save you from bigger headaches down the line.
Cleaning is just as crucial. Dirt and debris can cause unnecessary wear on surfaces. Use a broom or hose to remove any buildup from repaired areas. For tougher grime, a gentle scrub with soapy water should do the trick. Avoid harsh chemicals; they can damage the materials and undo your hard work.
Don’t forget to check for proper drainage. Water pooling around repairs can weaken them over time. Make sure gutters and drains are clear to prevent water from sitting where it shouldn’t. If you notice any drainage issues, address them promptly to protect your repairs.
Addressing Minor Issues Early
Don’t wait until a small problem turns into a costly disaster. Spotting and fixing minor issues early can save you time and money. If you notice a crack, a loose tile, or even a squeaky hinge, take action immediately. Ignoring these can lead to bigger, more expensive repairs down the road.
Regular inspection and cleaning are your first line of defense, as mentioned earlier. But when you spot something off, don’t just note it down—fix it. A simple repair now can prevent a major headache later. For instance, if you see a small leak, tighten the fitting or replace a washer. Ignoring leaks can lead to water damage and mold, which are far more challenging to deal with.
Be proactive. If you’re unsure how to handle a minor issue, do some research or consult a professional. It’s better to ask questions now than to pay for a major repair later. Remember, addressing minor issues early is a smart strategy for maintaining your home and ensuring long-lasting repairs.
Exploring Alternative Solutions for Fixing Low Spots
When it comes to fixing low spots on patio edges, sometimes traditional methods aren’t enough. Exploring alternative solutions can offer more effective and lasting results. These options not only address the immediate problem but also enhance the overall functionality and aesthetics of your patio.
- Permeable Pavers: These allow water to pass through, reducing surface runoff and minimizing erosion. They’re a great choice for areas prone to puddling.
- Re-sloping: Adjusting the slope of your patio can redirect water flow, preventing future low spots. This might involve adding or removing material to achieve the desired angle.
- French Drains: Installing a French drain can effectively channel water away from problem areas. This underground solution is ideal for persistent drainage issues.
- Gravel Beds: Adding a layer of gravel around the patio edges can improve drainage and prevent soil erosion, keeping your patio stable over time.
- Retaining Walls: For patios on a slope, retaining walls can help manage soil movement and prevent low spots from forming due to erosion.
- Vegetative Solutions: Planting ground cover or grass around the patio can help absorb excess water and stabilize the soil, reducing the risk of low spots.
Choosing the Right Solution
Selecting the best alternative solution depends on your specific situation. Consider factors such as the severity of the low spots, local climate, and your budget. Consulting with a professional can provide insights into the most effective approach for your patio.
When to Call in the Professionals for Patio Repairs
Sometimes, the issues with your patio are just too big for a DIY fix. Extensive damage or complex drainage problems can require the expertise of a professional. Knowing when to call in the pros can save you time, money, and a lot of frustration. Here are some signs that it might be time to bring in a professional.
- Severe Cracking: If your patio has deep or widespread cracks, a professional can assess the structural integrity and recommend the best repair method.
- Complex Drainage Issues: When water consistently pools despite your best efforts, a professional can design and implement effective drainage solutions.
- Significant Settling: If large sections of your patio have sunk, re-leveling might require heavy machinery and expertise that only a professional can provide.
- Permits and Regulations: For major repairs that might require permits, a professional can navigate local regulations and ensure compliance.
- Specialized Tools: Some repairs need specialized tools that are not cost-effective for a one-time DIY project. Professionals have access to these tools and the know-how to use them effectively.
- Material Matching: If you’re struggling to match materials for a seamless repair, a professional can source and apply the right products for a cohesive look.
When selecting a contractor, do your homework. Check their credentials and read reviews from previous clients. Get multiple quotes to ensure you’re getting a fair price. A good professional will provide a detailed plan and timeline for the repairs, so you know exactly what to expect.
Final Thoughts on Keeping Your Patio in Top Shape
Fixing low spots on your patio edges is essential to maintaining a functional and attractive outdoor space. By addressing the root causes and implementing effective repair methods, you can prevent water pooling and extend the life of your patio. Here are some key takeaways to ensure your efforts are successful and long-lasting.
- Always start with a thorough assessment of the problem area to understand the underlying causes of low spots.
- Invest in quality tools and materials to ensure your repairs are durable and effective.
- Prioritize proper drainage solutions to prevent future water pooling and structural damage.
- Consider using eco-friendly materials to minimize environmental impact while maintaining your patio’s aesthetic appeal.
- Regularly inspect and maintain your patio to catch minor issues early and prevent costly repairs down the line.
- Don’t hesitate to consult a professional for complex issues beyond your DIY capabilities.
- Stay informed about the latest techniques and materials to keep your patio in top condition for years to come.
Long-Term Maintenance Strategies
Maintaining your patio’s integrity requires ongoing attention. Regular cleaning, sealing, and inspections are key to preventing damage and ensuring your repairs last. By staying proactive, you can enjoy a beautiful and functional patio without frequent, costly interventions.
FAQ
Why do low spots form on patio edges?
Low spots usually form because of poor drainage or improper initial grading. Water collects in these areas, causing them to sink over time. Fixing the grading and ensuring proper drainage can prevent this issue.
Can I just fill low spots with more concrete?
Simply adding more concrete is a temporary fix and often a waste of time. Without addressing the underlying drainage or compaction issues, the problem will return. It’s better to fix the root cause first.
What tools do I need to fix low spots?
You’ll need a shovel, a level, and some gravel or sand for proper base material. A tamper or plate compactor is essential for compacting the base. Don’t skimp on these tools if you want a lasting fix.
How can I prevent low spots from forming again?
Ensure proper grading and drainage around your patio. Regularly check for water pooling and address it immediately. Good maintenance habits go a long way in preventing future problems.
Is it necessary to remove the entire patio to fix low spots?
Not always, but it depends on the extent of the issue. For minor low spots, you can often fix them by re-leveling the affected area. Severe problems might require removing sections to address the base properly.