
Introduction
A drainage swale in concrete is a shallow, sculpted channel that directs water away while keeping a smooth, integrated look. The idea is to route water on the surface or just below, and still read as part of the yard, not a gutter. Plan with proper slope, width, and edge treatment, and confirm you can safely strike and form it with the tools you have.
Mark the path where you want the swale, set sturdy forms, and pour or place concrete to shape the channel with a curved, natural edge. Finish with trowel and broom textures that match surrounding surfaces, then cure per the product instructions. Always check the concrete label, follow manufacturer directions, and verify any local rules or requirements before you start.
Key takeaways
- Confirm permits and setback rules with local authorities before starting any trenching.
- Plan swale grading to promote runoff away from structures without a gutter look.
- Hide the channel with adjacent landscaping, edging, and shallow slopes for disguise.
- Use compatible concrete mix and sealants; follow manufacturers for surface protection.
- Inspect after heavy rains for erosion or sags and repair promptly.
- Schedule routine maintenance to clear debris and preserve the swale appearance.
- Wear eye protection and gloves during excavation; trench unseen utilities can injure.
Table of Contents
- Introduction
- Key takeaways
- What a Concrete Swale Is and Why Aesthetics Matter
- Site Assessment and Regulatory Checks Before You Build
- Design Principles to Disguise the Channel and Avoid a Gutter Look
- Tools, Materials, and Specifications for DIY-Friendly Results
- Step-by-Step Installation Workflow (Prep Through Finish)
- Landscaping and Decorative Elements to Soften Appearance
- Maintenance, Troubleshooting, and Preserving the Look
- Project Timeline, Cost Factors, and When to Hire a Professional
- Conclusion
- FAQ
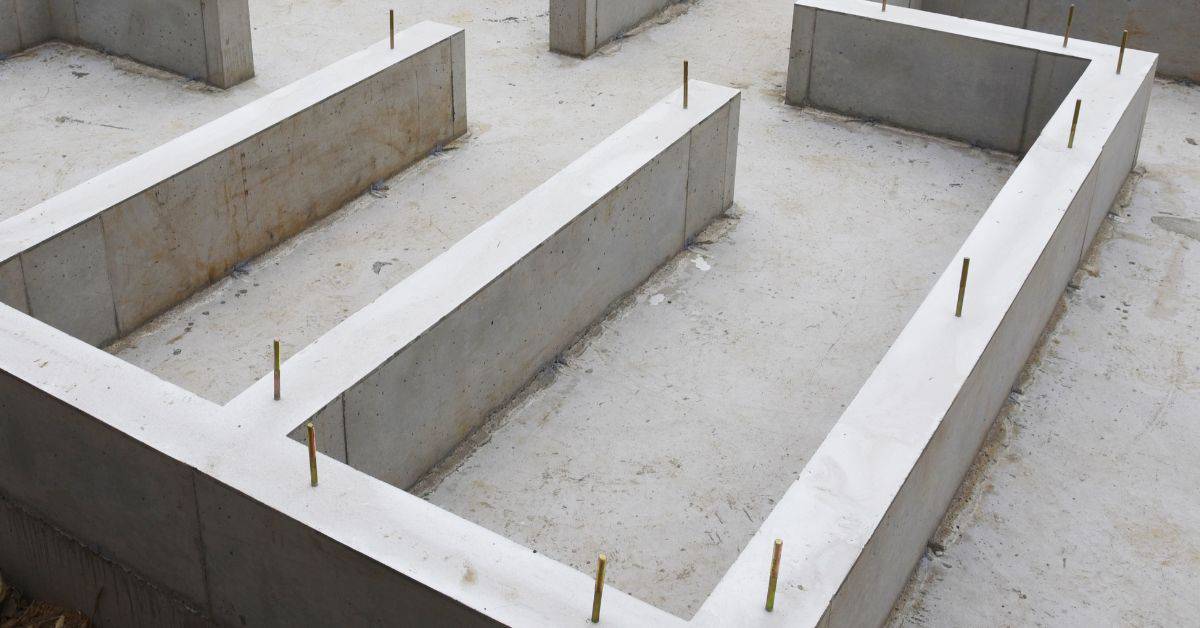
What a Concrete Swale Is and Why Aesthetics Matter
A concrete swale is a shallow channel designed to move rainwater away from surfaces and into a drainage system or landscape feature. It differs from a standard gutter by being integrated into the ground and surrounding design, rather than hanging along a edge. Visual cohesion with the landscape helps the swale feel intentional, not like a basic drain.
How it looks matters because the swale should blend with plantings, hardscape edges, and sight lines. A well-integrated swale reduces the sense of maintenance and makes drainage feel deliberate. Keep aesthetics in mind from the first layout to the finish coat.
Swale vs. Gutter: Function and Form
A swale is not your average gutter. It’s designed to channel water away from a specific area, like a low spot in your yard or around your foundation.
Unlike gutters that collect rainwater from rooftops, swales are open channels that blend into the landscape. They’re wider and shallower, allowing water to spread out and soak into the ground naturally.
Expect a swale to look like a gentle slope in your yard, not a deep trench or a narrow channel. It’s all about functionality and aesthetics.
When a Concrete Swale is the Right Solution
A concrete swale might be your best bet when you’ve got a large area to drain or heavy clay soil that doesn’t absorb water well. It’s also great for directing water away from structures like your home or garage.
If you’re going for a modern look, concrete can fit right in with your hardscaping. Plus, it’s durable and low-maintenance. Just remember, concrete isn’t always the cheapest option, so keep that in mind when planning your budget.
A concrete swale is also ideal for areas with heavy traffic or where you need a defined edge to prevent erosion. It’s not just about looks; it’s about function too.
Site Assessment and Regulatory Checks Before You Build
Start with a walk of the property to identify where water currently flows and where it should drain. Note any slopes, adjacent structures, and drainage outlets. Mark potential obstacles like utilities or roots before digging.
Check local codes, permits, and HOA rules that apply to drainage projects. Look for requirements on setbacks, surface materials, and any stormwater guidelines. If in doubt, label the source of the rule and where to verify it on the official site.
Conducting a Basic Site and Grading Assessment
Before you start, grab your tape measure, level, and a notepad. Walk your property to understand its layout.
Measure the slope direction. You want water to flow away from your home. Mark this on your sketch.
Look for obstacles like trees, fences, or low spots that might block or slow down water flow. Note these on your sketch too.
Check existing drains and where they lead. You may need to tie into them.
Permits, Stormwater Rules, and HOA Considerations
Before you pour a drop of concrete, check with your local building department. They’ll tell you about permits needed.
Understand your area’s stormwater regulations. Some places have rules about how much water runoff needs to be managed on-site.
If you live in an HOA community, check their guidelines too. They might have aesthetic or placement restrictions for swales.
Always better safe than sorry. A quick call can save you a lot of trouble later.
Design Principles to Disguise the Channel and Avoid a Gutter Look
Use profile shaping that follows the natural slope and grade of the surrounding landscape. Avoid sharp, boxy edges that scream gutter by adding rounded or gentle transitions. Edge details can include soft concrete rims or adjacent planting beds.
Incorporate textures and finishes that echo nearby patios, pavers, or mulch areas. Integrate the swale with surrounding elements so it reads as a landscape feature rather than purely functional. Consider sight lines and focal points to guide the eye away from a utilitarian appearance.
Profile, slope, and curvature strategies
The key to making your concrete swale look natural is to mimic the profile of a real waterway. That means using subtle slopes, gentle curves, and variable widths.
Subtle Slopes: A gentle 1-2% slope is usually enough to direct water without looking like a gutter. Check with local guidelines for acceptable ranges.
Gentle Curves: Use soft, gradual curves instead of sharp angles. This helps the swale blend into the landscape and look more natural.
Variable Widths: Vary the width along the length of the swale to create a more organic feel. Narrow sections can lead into wider ones, following the path of least resistance like a real waterway would.
Edge details and transitions into surrounding surfaces
The edges of your swale are crucial for integrating it with the rest of your landscape. Here’s how to detail them:
Chamfers: Instead of sharp, 90-degree edges, use chamfers – beveled edges that slope down to the surface below. This softens the look and makes the swale less prominent.
Recessed Transitions: If your swale meets other surfaces like pavers or planting beds, recess it slightly so it doesn’t stick out. This helps it blend in with the surrounding area.
Blending Joints: Make sure joints between the swale and adjacent surfaces are well-blended to avoid a harsh line. Use a flexible sealant if necessary to ensure a smooth transition.
Finish, color, and texture choices for a naturalized look
The finish, color, and texture of your swale can help it blend seamlessly into the landscape. Here are some options:
Stamped Patterns: Use stamping mats to imprint textures like stone or wood into the wet concrete. This can make the swale look more like a natural feature than a man-made one.
Exposed Aggregate: Expose small pebbles and stones in the concrete surface by washing away the top layer of cement paste. This gives the swale a natural, earthy appearance.
Color Stains: Use acid stains or integral colors to give your swale a warm, earthy hue that matches its surroundings. Avoid bright whites or grays that scream ‘concrete’.
Honed Finishes: A honed finish gives concrete a smooth, matte surface that looks more like natural stone than raw concrete.
Tools, Materials, and Specifications for DIY-Friendly Results
Prepare a practical checklist of hand tools, screeds, levels, and basic safety gear. List concrete mix options that suit a shallow channel and a reasonable set time for your climate. Include reinforcement like mesh or decorative rebar where appropriate.
Always cross-check product labels, manufacturer instructions, and local rules for mix ratios, curing methods, and load considerations. If unsure about structural specs, consult the label or a local pro for guidance. Avoid guessing any critical performance requirements.
Concrete mix, reinforcement, and durability considerations
The concrete mix is crucial for your swale’s longevity. For outdoor exposure like a swale, use a low water-cement ratio to boost strength and durability.
Reinforcement is key too. Use rebar or fiber reinforcement. Rebar needs proper spacing and overlap; fibers can be mixed in at the ready-mix plant.
Curing matters. Keep your swale moist and covered for 7 days to let it gain full strength.
Forms, templates, and specialized tools for curved profiles
When your swale needs a curve, use this checklist. It’s best to plan ahead with your design.
- Flexible forms: Rent or buy these for easy shaping. They’re great for large curves.
- Plywood templates: Build these for smaller curves or precise shapes. Use them as guides for your flexible form.
- Curved rebar: Bend rebar to match your curve. It’s tricky, so consider renting a rebar bender.
- Level and string line: Ensure your curve follows the correct slope.
- Tape measure: Check dimensions as you go.
- Circular saw or jigsaw: Cut plywood templates accurately.
- Screws or nails: Attach plywood templates securely.
- Form release agent: Spray this on forms to prevent concrete sticking.
Quick rule: Always double-check your curve’s accuracy before pouring. A bad curve is hard to fix.
Step-by-Step Installation Workflow (Prep Through Finish)
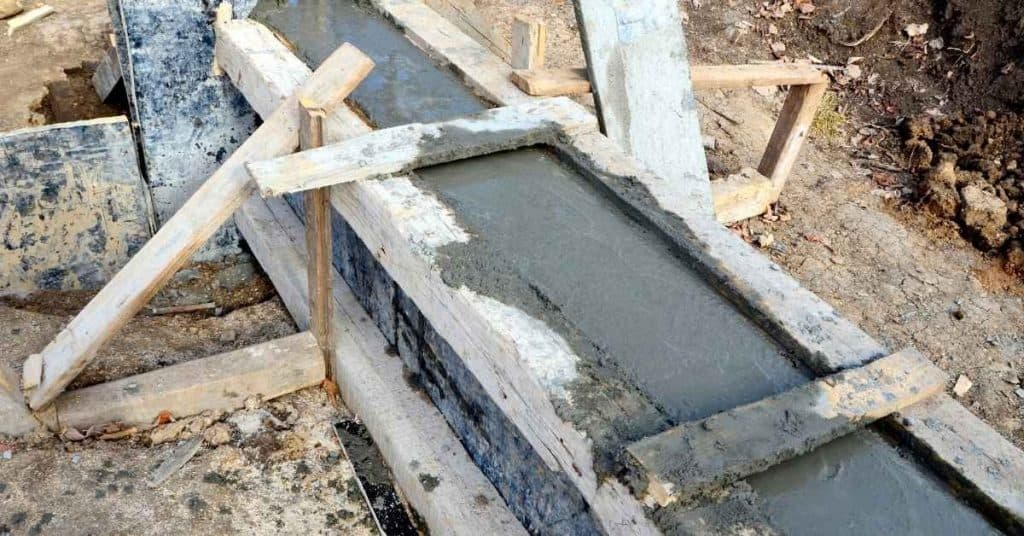
Plan the work window and mark the excavation path according to the design. Excavate to the required depth and slope, keeping the base compact and even. Set forms to hold the shape during pour.
Place reinforcement if specified and pour concrete in manageable lifts. Screed and finish the surface to a smooth yet natural texture. Cure according to product guidance and protect the finish from weather or heavy traffic during initial set.
Step-by-Step Installation Process
The following steps guide you through the installation process, from preparation to final checks, ensuring a successful DIY concrete swale.
- Preparation: Clear the site, check safety, and gather tools. Safety first: wear appropriate gear and follow local regulations.
- Excavation: Dig out the swale path as per your design. Keep it neat for easy forming later.
- Main Work: Follow the steps in this guide – form, pour, shape, finish, and cure. Patience is key: let each stage set properly before moving on.
- Cleanup: Remove forms, clean up debris, and inspect your work. Proudly admire: your new concrete swale!
- Final Checks: Ensure the swale aligns with your design, slopes correctly, and has no visible defects. If unsure, consult a pro.
Excavation, base prep, and establishing final grades
Proper excavation and base preparation ensure your swale’s longevity. Start by digging out the path according to your design.
Next, compact the base. Use a plate compactor for best results. This prevents settling over time.
Add a layer of bedding material, like sand or gravel, for better concrete adhesion and stability. Level it out.
Finally, establish final grade lines. Stake them out and use string to ensure accuracy during forming.
Forming, pouring, and shaping the swale
Proper forming techniques create smooth transitions. Use straight, secure forms for your swale’s edges.
When pouring concrete, start at the highest point and work down to avoid cold joints. Pour in sections, ensuring each section meets the next smoothly.
To achieve a natural appearance, shape the profile. Use a shovel or rake for large areas, then refine with a float. Work quickly before the concrete sets.
For curves, use flexible forms or create templates to maintain consistency in your swale’s shape.
Timed finishing and curing to preserve texture and color
Timing is crucial for achieving the desired finish. After pouring, let the concrete set slightly before floating.
Use a magnesium float to level and smooth the surface. Work in small sections to avoid leaving footprints or uneven areas.
Apply your chosen texture while the concrete is still plastic. Use stamps, brooms, or other tools for different effects.
After texturing, cure properly. Keep the swale moist and covered with a curing compound to maintain its color and strength. Follow the manufacturer’s instructions for best results.
Landscaping and Decorative Elements to Soften Appearance
Add plantings, gravels, or mulch adjacent to the swale to soften edges and hide edge transitions. Decorative grates or permeable infill can maintain flow while reducing a stark, industrial look. Ensure the design preserves drainage capacity while enhancing curb appeal.
Choose materials and colors that harmonize with existing hardscapes. Use edging or low-profile trims to maintain clean lines without creating a gutter-like silhouette. Plan for maintenance access and irrigation needs near the swale.
Plant selection and placement to frame the swale
The right plants can turn your drainage swale into a landscape asset. Go for low-maintenance, water-tolerant varieties that thrive in moist conditions.
Evergreens, like Rhododendrons or Leyland Cypress, work well to frame the swale and provide year-round screening. Place them at regular intervals along both sides.
For a more natural look, add ornamental grasses and perennials. They’ll soften the edges and add color. Plant them in clusters, alternating with the evergreens.
Decorative grates, gravel infill, and permeable accents
To disguise the swale’s function and add curb appeal, use decorative elements. These can be metal grates, gravel strips, or permeable pavers.
Metal grates can cover openings while allowing water to flow through. Choose a design that complements your home’s architecture. Install them securely, ensuring they won’t shift during heavy rain.
Gravel infill and permeable pavers can create intentional design language. Use gravel in shades of gray or earth tones for a natural look. Lay pavers in a herringbone pattern to add visual interest.
Remember, these elements should enhance the swale’s appearance while maintaining its flow capacity. Don’t block water from entering or flowing through.
Maintenance, Troubleshooting, and Preserving the Look
Set up a routine to inspect and clean the swale after heavy rains and seasonal changes. Look for erosion, sediment buildup, or settlement that may alter the shape. Address small issues before they become larger problems.
Repair approaches should maintain both function and aesthetics. If cracking or spalling occurs, verify with product guidance and consider resealing or patching. Keep an eye on edge details and vegetation health to preserve the overall appearance.
Routine inspection and seasonal maintenance checklist
Use this checklist to keep your concrete drainage swale functioning efficiently and looking great year-round.
- Spring: Inspect for winter damage. Clear any debris or blockages.
- Summer: Check for erosion around edges. Ensure plants are thriving.
- Fall: Rake leaves and clear gutters. Refresh finishes as needed.
- Winter: Inspect for ice buildup. Clear any blockages caused by snow melt.
- Regularly: Check for cracks or settlement. Ensure grates are secure.
- Annually: Apply a fresh sealant to protect the concrete’s finish.
Quick rule: Regular upkeep prevents minor issues from turning into major problems.
Repairing cracks, settlement, and staining without visible patches
Timely repairs maintain your swale’s seamless appearance. Here’s how to tackle common issues discreetly.
Cracks: Use a color-matched patching compound. Apply with a putty knife, feathering the edges for a smooth finish.
Settlement: Level any sunken areas using a self-leveling concrete mix. Pour slowly and evenly to avoid creating new cracks.
Staining: Clean stains promptly using a compatible sealer and mild detergent. Avoid harsh chemicals that can damage the finish.
Project Timeline, Cost Factors, and When to Hire a Professional
Identify the major phases from site assessment to finish work and curing. Consider weather windows and access constraints that affect scheduling. Build in time for approvals if required by local rules or HOA guidelines.
Recognize factors that influence cost, such as site complexity, materials, and any required permits. Use the guidance for realistic sequencing and know when a landscape architect, civil engineer, or licensed contractor is advisable. When in doubt, consult the appropriate professional for a second check on design and safety.
Variables that influence cost and schedule
The size, shape, and complexity of your site are the first things affecting budget and time. A simple straight swale is quicker and cheaper than a curved one.
Finish choice also plays a big role. Exposed aggregate or stamped concrete takes longer and costs more than plain gray.
Access to the site matters too. If we’ve got to haul materials over rough terrain, it’ll take longer and cost more.
Weather’s another wildcard. Rain can delay pouring, cold snaps need extra curing time. Plan for these when scheduling.
Scenarios that require pro involvement
If your property has complex drainage patterns or steep grades, it’s wise to bring in a landscape architect or civil engineer. They can design a swale that works with your site, not against it.
Structural constraints like utility lines or rock outcrops might need a licensed contractor to handle safely. Don’t DIY if you’re unsure about what’s underground.
Some projects require permits. If you’re in doubt, consult with your local building department first. They can tell you when you need a pro to sign off on plans.
In all these cases, it’s better to bring in the pros early. They can help avoid costly mistakes down the line.
Conclusion
This project pays off when the swale handles water without turning into a gutter, looks organized, and doesn’t put you or the structure at risk. Start by confirming you’ve checked site rules, chosen a design that blends with the surroundings, and tested a small area to confirm flow and finish before committing.
Proceed with a simple mental checklist: verify that the drainage path matches the intended slope and outlet, confirm the materials and forms meet your design specs, washout and compaction are controlled, and seal or stain as planned only after the final surface is cured; then perform the work in a steady sequence from prep to finish, keeping safety gear on, and stopping to recheck alignments if ground shifts or sediment moves. Finally, walk the site after each major step to catch drift, scale, or height issues, and schedule basic maintenance tasks so the look stays intact.
Two or three common mistakes to avoid are letting the channel sit too shallow or too steep, which wrecks both performance and aesthetics; skipping the regulatory checks or permits that can derail the project; and rushing finish work or improper curing, which leads to cracks or staining. Safety rules are clear: test small areas first, use proper PPE, keep pathways clear, and don’t tilt or hammer on wet concrete—wait for the right cure window and climate conditions.
If the scope grows beyond simple repairs or you’re unsure about grading, drainage calculations, or local rules, it makes sense to call a professional. You’ll save time and avoid costly rework. Stay steady, follow the plan, and you’ll end up with a durable, discreet drainage swale that lasts.
FAQ
How can I disguise the concrete swale edge so it doesn’t look like a gutter?
Use a gentle, continuous profile with a shallow slope and rounded transitions. Add a subtle toe-in of grass, gravel, or a narrow trench mulch line to blur the edge. Check manufacturer guidance for edge finishing options and local appearance guidelines.
What drainage slope and outlet should I target for effective flow without pooling?
Aim for a gradual slope that keeps water moving toward the outlet. Avoid steep drops that cause splash or erosion. Verify with project labels or local guidance to confirm acceptable gradients for your site conditions.
How do I keep a concrete swale from cracking or showing wear over time?
Use proper joints and control grooves as directed by the concrete mix instructions. Seal or apply a compatible finish to reduce surface wear. Follow product labels and manufacturer instructions for curing and protection guidelines.
When is the right time to tweak grading or add edging after installation?
Inspect after the first several rain events and after seasonal changes. Make small gravity-and-compaction adjustments if you notice standing water or shifting edges. If unsure, consult the label, installation guide, or local rules before making changes.