
Introduction
Epoxy-coated rebar is steel reinforcing bar coated with epoxy to resist moisture and corrosion.
It’s used in concrete projects where moisture or soil contact is expected. Think of it as a protective shell for rebar in harsher environments.
Transport and handling can be different from galvanized bars, so plan how you load, carry, and splice long pieces. Weather and temperature during installation matter; protect the coating from damage and follow the manufacturer instructions for curing or bonding as applicable. Costs can add up if you need more overlap or specialty connectors, so compare options and check the label for requirements, plus consider maintenance needs and long-term durability when planning the job.
Key takeaways
- Epoxy-coated rebar improves corrosion resistance but bond depends on surface prep.
- Weather and handling affect coating integrity; inspect for nicks during placement.
- Transport varies with coating; epoxy-coated rebar is often easier to load.
- Lapp splices and development length depend on project details and code guidance.
- Long-term durability relies on quality concrete cover, inspections, and corrosion monitoring.
- Safety: wear eye protection, avoid overheating, and verify coating integrity before pours.
Table of Contents
- Introduction
- Key takeaways
- What Epoxy-Coated Rebar Is and Why Bond Performance Matters
- How Epoxy Coating Changes Concrete–Steel Bond Mechanics
- Handling, Transport, and Weather Constraints on Bond Quality
- Lap Splices, Development Length, and Detailing Effects
- Long-Term Performance, Degradation Modes, and Inspection Planning
- Common Installation Mistakes and Safety/Quality-Control Measures
- Cost and Lifecycle Analysis for Choosing Reinforcement
- Practical Decision Guide and Specification Recommendations
- Conclusion
- FAQ
What Epoxy-Coated Rebar Is and Why Bond Performance Matters
Epoxy-coated rebar (ECR) refers to steel reinforcing bars with a polymer coating intended to limit corrosion in concrete members. The coating thickness and material are specified by the project and manufacturer, and ECR is used in environments where moisture and chlorides are concerns.
The core purpose is to slow or prevent steel corrosion by isolating the steel from pore solution while the concrete remains highly alkaline. Bond performance between concrete and steel remains central to structural behavior, and ECR can alter surface roughness and the interfacial transition zone, influencing load transfer and crack control in flexure and shear.
Epoxy coating materials and application methods
The epoxy coating on rebar is crucial for corrosion protection. The type of epoxy and how it’s applied can affect the bond between the rebar and concrete.
- Shop-applied coatings: Applied in controlled conditions, ensuring better quality and adhesion. Look for ASTM A771/A771M standards. Tip: Inspect before use.
- Field-applied coatings: Applied on-site, may have varying quality due to weather or site conditions. Check manufacturer’s guidelines for application temperatures and humidity ranges.
- Epoxy vinyl ester: Tougher, more resistant to chemicals but can be more expensive. Spec: ASTM D5638/D5638M. Avoid: Overuse, as it may reduce bond.
- Fusion-bonded epoxy (FBE): Applied molten, bonds well with steel. Spec: ASTM A709/A709M. Avoid: Inconsistent application leading to weak spots.
- Solvent-free epoxies: Environmentally friendly, good adhesion. Spec: ASTM D6384/D6384M. Avoid: Improper curing leading to weak coating.
Structural consequences of reduced bond
A weaker bond between rebar and concrete can lead to several issues. Load transfer from concrete to steel is reduced, leading to increased stress on the concrete.
This can result in wider cracks, as the concrete can’t rely on the rebar for support. Over time, these wider cracks allow more water and oxygen to reach the steel, accelerating corrosion.
The long-term behavior of the structure is also affected. Reduced bond can lead to earlier onset of corrosion, reduced service life, and potentially increased maintenance costs.
In extreme cases, reduced bond can lead to structural failure, as the rebar may not be able to hold the concrete together under heavy loads or during an earthquake.
How Epoxy Coating Changes Concrete–Steel Bond Mechanics
The coating changes the frictional characteristics at the interface, affecting micro-contact between steel and surrounding cement paste. The texture and thickness of the epoxy can create a barrier that reduces direct chemical interaction at the surface.
Moisture interaction and curing conditions influence how the interfacial chemistry evolves over time, which in turn can shift long-term bond durability. Research trends explore how coating variables and exposure conditions modify pull-out and shear transfer at the micro and macro scales.
Coating thickness, surface profile, and holidays impact
The thickness of the epoxy coating affects bond. Too thin, it might not protect well or could cause rust spots. Too thick, it reduces bonding area.
Surface roughness matters too. A rougher finish increases micro-contact points, boosting bond. But be careful – excessive roughness can hide defects (holidays).
Holidays – bare steel spots – are bad news. They let moisture in, causing rust and weakening bond. Inspect and repair holidays before concreting.
Comparing bond: epoxy-coated vs bare vs galvanized
Bare rebar bonds well initially, but rusts quickly. Galvanized has good corrosion resistance and decent initial bond.
Epoxy-coated can outperform both in long-term durability, if properly applied and cured. But it might underperform in high-shrinkage concretes or when exposed to harsh conditions before curing.
In some cases, epoxy may perform similar to bare rebar initially. So, consider your project’s specific needs and exposure conditions when choosing between these options.
Handling, Transport, and Weather Constraints on Bond Quality
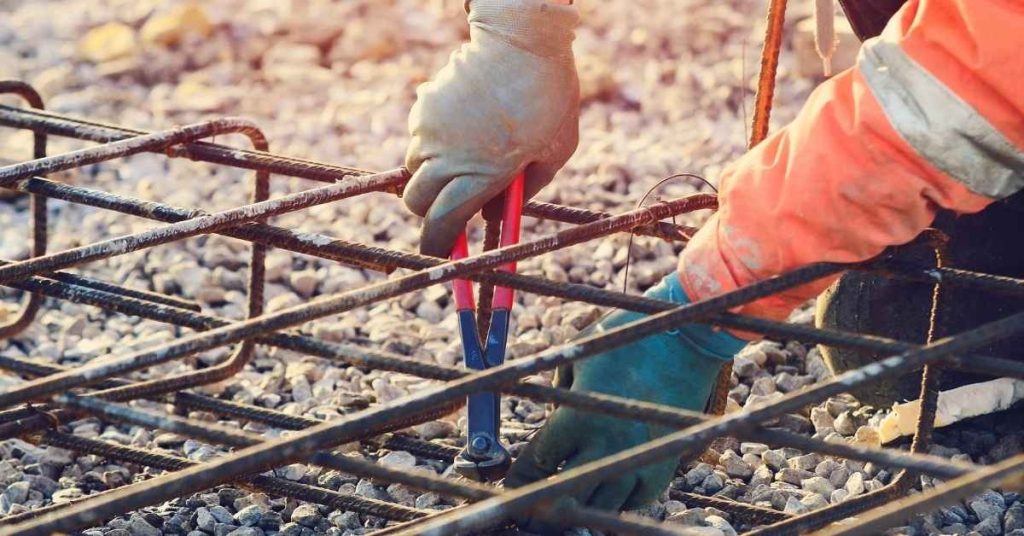
Careful handling and transport practices help prevent nicks, gouges, or delamination of the epoxy coating. Use padding, proper racks, and gentle loading to protect the surface during movement.
On-site storage and weather exposure can impact coating integrity. Protect coils or bundles from moisture intrusion and monitor temperature and humidity during storage and concrete placement to avoid brittle behavior or coating degradation.
Practical handling comparisons with galvanized rebar
Galvanized and epoxy-coated rebars have different handling requirements. Epoxy coatings are more fragile, so they need extra care.
Bundling: Galvanized bars can be bundled tightly without worry. Epoxy-coated ones should be spaced out to prevent coating damage.
Cutting: Galvanized bars can be cut with a torch or abrasive blade. Epoxy-coated ones need a clean, sharp blade to avoid nicking the coating.
Transport: Both types should be secured during transport. But for epoxy-coated rebars, use padding and dedicated racks to prevent crushing or peeling the coating.
Weather and curing considerations for placement
Temperature and humidity affect both concrete curing and epoxy coating integrity. Here’s what you need to know:
Temperature: For optimal bond, keep temperature between 50-80°F (10-27°C) during transport, storage, and placement. Below 50°F, coatings can become brittle; above 80°F, concrete sets too fast.
Humidity: High humidity can cause moisture intrusion under the coating, weakening bond. Keep relative humidity below 80% during storage and before pouring.
Waiting periods: After exposure to extreme conditions, wait until temperatures/humidity return to acceptable ranges before pouring. This could take hours or days, depending on conditions.
Lap Splices, Development Length, and Detailing Effects
Epoxy coating influences how transfer of stresses occurs at splices, with potential changes to effective lap lengths and bond transfer capacity. The coating can require adjustments in detailing to maintain continuity of force flow.
Development length and cover requirements may shift as a result of the coating, and the design must account for environmental exposure and confinement. Detailing strategies should emphasize proper alignment, avoidance of moisture-trapping features, and compatibility with mechanical splices if used.
Design checks and standards to consult
Before you start, check ACI 301 or local codes for epoxy-coated rebar. Your structural engineer can help with this.
ACI 318-19 provides guidelines on lap splice lengths and development lengths for coated bars. You’ll need to know your concrete strength (f’c) and the bar size.
Key: Lap splices are shorter, but you might need longer development lengths due to reduced bond. Always consult your engineer to be sure.
Visual checkpoints and on-site acceptance criteria
Use this checklist during placement to ensure good bond. It’s best to do these checks before concrete is poured.
- Coating condition: Check for any damaged or missing coating. If you find any, reject the bar.
- Overlap contact: Ensure bars are properly aligned and in full contact at lap splices. No gaps allowed!
- Concrete consolidation: Make sure concrete is well-consolidated around the bars. Slump tests can help here.
- Bar alignment: Check that bars are straight and aligned with each other. Bent or misaligned bars can cause bond issues.
- Edge protection: Ensure bars at edges have proper cover to protect against corrosion.
- Splice type: If using mechanical splices, ensure they’re properly installed and protected from concrete segregation.
- Stud ends: For welded wire reinforcement, check stud ends are secure and won’t cause bond problems.
- Concrete cover: Verify that concrete cover meets code requirements. Too little cover can lead to corrosion.
Quick rule: If you’re unsure about any of these checks, stop work and consult your engineer or inspector.
Long-Term Performance, Degradation Modes, and Inspection Planning
Epoxy coatings age in concrete environments through processes that can create discontinuities in the film. Holidays, under-film corrosion, and chemical attack are typical concerns for bond continuity over time.
Inspection planning should align with service milestones and exposure conditions, with nondestructive methods used to detect coating integrity and bond continuity. Degradation pathways inform retrofit or replacement decisions and maintenance planning.
How coatings fail and when bond loss occurs
Check this list regularly to ensure your epoxy-coated rebar maintains its bond strength.
- Mechanical damage: Inspect for scratches, gouges, or other physical damage that can compromise the coating. Use a flashlight and magnifying glass if necessary.
- UV/alkali exposure: Check for discoloration, chalking, or cracking due to prolonged sun and alkaline attack. Look at areas with direct sunlight exposure.
- Chloride ingress: Inspect for signs of rust staining or delamination, indicating chloride has penetrated the coating. Use a moisture meter to check for dampness behind the coating.
- Holidays (missing spots): Perform a holiday test using a solution that reacts with exposed steel. Apply it to the coating and look for red stains indicating holidays.
- Blistering: Inspect for raised, blistered areas on the coating surface. These can trap moisture and accelerate corrosion.
- Delamination: Check for peeling or flaking of the coating from the steel surface. Use a sharp tool to gently scratch the coating and look for adhesion.
- Corrosion under film: Inspect for signs of rust beneath the coating, indicating corrosion has started. Look for discoloration or blisters that feel warm to touch.
- Moisture intrusion: Check for water stains, dampness, or efflorescence on the concrete surface above the rebar. This can indicate moisture has penetrated and is attacking the coating.
Quick rule: Regular inspections help catch failures early, preventing major bond loss and costly repairs.
Inspection intervals and monitoring strategies
Use this checklist to plan your inspection schedule and monitor epoxy-coated rebar performance.
- Initial inspection: Perform a thorough visual check within the first week after placement. Look for any defects or damage during curing.
- Annual inspections: Conduct a detailed visual inspection every year to catch early signs of degradation. Check holidays, blistering, delamination, and rust staining.
- Exposure-driven inspections: Inspect more frequently in harsh conditions like coastal areas (chloride exposure), cold climates (freeze-thaw), or high heat environments. Every 6 months may be necessary.
- Post-repair/retrofit inspection: Check the repaired or retrofitted area within a week after completion, then again at 3 and 6 months to ensure proper curing and performance.
- Holiday testing: Perform holiday tests every 2-5 years, depending on exposure conditions. Use a solution that reacts with exposed steel to find holidays.
- Non-destructive testing (NDT): Consider using NDT methods like half-cell potential or linear polarization resistance for early corrosion detection. Every 3-5 years is recommended.
- Targeted sampling: If signs of degradation are present, take concrete samples for laboratory analysis to assess the extent and cause of damage.
- Documentation: Keep detailed records of all inspections, test results, and maintenance activities. This helps track performance over time and plan future assessments.
Quick rule: Regular, targeted inspections help extend service life by catching and addressing issues early.
Common Installation Mistakes and Safety/Quality-Control Measures
Frequent installation mistakes include inadequate cleaning, lingering residues, moisture entrapment, and surface contamination that compromise coating performance. Proper cleaning and surface inspection before install are essential.
Quality-control measures cover coating integrity checks during handling and placement, visible holidays, and adherence to thickness tolerances. Safety procedures and on-site documentation support consistent workmanship and compliance.
Typical installation errors and their consequences
Here are some common mistakes that can happen during epoxy-coated rebar installation, which can reduce the bond between the concrete and steel.
- Over-handling: Too much handling can damage the coating. Avoid excessive handling; use protective coverings when moving rebar.
- Improper welding/cutting: Heat from welding or cutting can damage the coating. Use cool cutting methods and avoid welding on coated areas.
- Poor cleaning: Dirt, oil, or grease can prevent proper bonding. Ensure rebar and formwork surfaces are clean before installation.
- Inadequate consolidation: Insufficient concrete around the rebar can lead to poor bond. Avoid voids; ensure proper concrete placement and consolidation.
These mistakes can weaken the structure over time, so it’s crucial to avoid them during installation.
Holiday testing, QC documentation, and worker safety
Holidays are areas where the coating is missing or damaged. Detect holidays using a holiday detector before installation.
Documentation is key to quality control. Keep records of coating condition, contamination controls, and acceptance criteria.
Worker safety is paramount when handling epoxy-coated rebar. Use appropriate PPE, including gloves, safety glasses, and protective clothing. Ensure proper ventilation for epoxy fumes. Follow fall/impact protection protocols.
Regularly inspect the coating during handling, placement, and curing to maintain bond quality and worker safety.
Cost and Lifecycle Analysis for Choosing Reinforcement
Total cost considerations encompass upfront material costs, installation effort, and long-term maintenance in corrosive environments. Lifecycle thinking helps weigh short-term savings against potential future repairs or replacements.
Comparisons with alternatives should reflect environmental exposure, cover requirements, service life expectations, and inspection regimes. A practical framework guides decisions without relying on prescriptive numbers alone.
Project scenarios where epoxy may be cost-effective or not
Epoxy-coated rebar isn’t always the cheapest upfront, but it can save you in the long run. Here’s when it might pencil out.
High exposure environments: If your project’s in a place with lots of chlorides or freeze-thaw cycles, epoxy’s corrosion resistance can pay off big time. Plain steel or even galvanized rebar might rust quicker, leading to costly repairs.
Long service life: For projects meant to last, like public infrastructure or high-end residential, epoxy’s longer lifespan can justify its higher initial cost. You won’t be replacing it as often as cheaper alternatives.
Intense handling: If your project involves a lot of handling and transporting rebar—like on big construction sites—epoxy’s better protection against damage can save you from costly mistakes.
Tools and materials checklist for estimating and procurement
Before you order, use this checklist to ensure you’ve got everything covered. Start early to avoid delays.
- Coated bar premium: Get quotes from suppliers for epoxy-coated rebar. Include delivery costs.
- Repair materials: Estimate needs for touch-up coatings, primers, and repair mortars.
- Testing equipment: Holiday detectors to ensure coating integrity before placement.
- Contractor QC costs: Include labor and equipment for on-site quality control.
- Engineer input: Consult with a structural engineer to confirm rebar sizes, grades, and quantities.
- Concrete mix design: Ensure your concrete’s compatible with epoxy-coated rebar.
- Weather monitoring: Plan for any weather-related delays or adjustments.
- Safety equipment: Include fall protection, personal protective gear, and signage.
Quick rule: Always get project-specific quotes. One size doesn’t fit all in construction.
Practical Decision Guide and Specification Recommendations
A concise decision framework helps readers evaluate exposure class, environmental conditions, and structural importance to determine the need for epoxy-coated rebar. Documented criteria support consistent application across projects.
Specification and contract language should clearly state coating standards, adhesion checks, curing compatibility with concrete mix, and QA/QC milestones. Including warranty language and defect remedies helps project teams manage expectations and quality outcomes.
Quick selection guidance by use case
Epoxy-coated rebar is often used in harsh environments where corrosion protection is crucial. Here’s a quick guide to help you decide:
Marine decks and bridge decks: Epoxy is typically the go-to choice due to its excellent resistance against chlorides and moisture.
Precast members: Epoxy can be beneficial for storage protection, but it’s not always necessary. Consult your engineer based on specific exposure conditions.
Indoor structures with no harsh chemicals or moisture: Plain rebar is usually sufficient and more cost-effective.
Specification checklist and sample contract requirements
Use this checklist to ensure your contract covers essential epoxy-coated rebar details. Include these clauses when drafting or reviewing contracts:
- Epoxy coating standards: Clearly state ASTM/ACI references, coating thickness, adhesion tests, and cure compatibility.
- Handling and detailing: Specify storage protection, bend radii, overlap lengths, and coupler/splice requirements to maintain coating integrity.
- QA/QC milestones: Include inspection points for coating application, curing, and before concrete placement.
- Holiday testing: Mandate holiday testing (salt spray or water droplet) to ensure no missed spots in the epoxy coating.
- Acceptance criteria: Define pass/fail thresholds for visual inspections, adhesion tests, and holiday testing.
- Repair protocols: Outline procedures for repairing damaged coatings before concrete placement.
- Manufacturer warranties: Include language covering warranties on epoxy-coated rebar and defect remedies.
- Documentation deliverables: Require project closeout documents, including test results, inspection reports, and maintenance guidelines.
Quick rule: Always consult with a structural engineer to confirm specific requirements for your project.
Conclusion
Protecting bond performance with epoxy-coated rebar comes down to handling, respect for coating integrity, and careful planning from first move to final cure. Do that, and you’ll get safer, straighter pours that look good and last longer.
Check coating condition as you handle and move the bars, verify concrete cover and alignment, confirm lap splices and development lengths match the spec, review weather and moisture constraints before pour, and plan formwork, reinforcement layout, and inspection steps so nothing is left to chance. Keep transport and storage clean and dry, avoid nicking or gouging the coating, and ensure the pour timing matches your curing plan. Inspect the concrete surface after pouring and throughout curing for signs of bond loss and degradation, and document everything so you can track performance over time.
Common mistakes to avoid are surprising but simple: don’t bend epoxy-coated bars beyond the manufacturer’s bend radius, don’t expose the coating to abrasion or heat that can weaken it, and don’t skip critical checks like coating integrity, cover, splice length, and post-pour inspections. Always wear proper PPE, keep rebar off the ground and away from sharp edges, and don’t rush the pour or skip a planned inspection window. If you’re unsure about complex splice rules, long spans, or damaged coating, stop and bring in a professional to verify the layout and safety.
If the job involves uncertain coating condition, complex lap splices, or large or critical structural elements, call in a qualified contractor or structural advisor rather than push ahead. Stay practical, stay safe, and keep the plan and the checks simple—your project will stand up to time and weather.
FAQ
Is epoxy-coated rebar easier or harder to transport than galvanized rebar, and what should I watch for in the field?
Epoxy-coated bars are similar in size and shape to plain rebar, but the coating can add concern for surface damage during handling. Handle with care to avoid scraping or gouging the coating, and use clean slings or baskets. Check the coating integrity on arrival and after unloading, and document any damaged spots before installation.
How does weather affect epoxy-coated rebar during installation, and what should I avoid?
Cold damp days or rain can affect concrete pour timing and coating performance if you’re not careful. Avoid laying epoxy-coated bars into wet mud or directly into standing water, and protect the coating from freezes or rapid temperature swings where possible. Always follow the coating supplier’s instructions and local practice for temp and moisture limits.
Will moisture or dampness impact the epoxy coating over time, and how do I mitigate that risk?
Moisture exposure during curing matters for the concrete bond, but the coating itself should be protected during handling. Keep the bars dry before use, and store them off the ground with a clean, dry surface. If you find surface moisture or rust on the bar ends, inspect and note for follow-up with the coating supplier or manufacturer instructions.
For future projects, should I lean toward galvanized if I’m unsure about epoxy, and what factors drive that choice?
Galvanized might be easier to source or replace in some scenarios, and it avoids moisture-driven coating questions entirely. Compare long-term maintenance needs, potential bond behavior differences, and the availability of replacement bars. Check the project specs, manufacturer guidance, and local rules before deciding.