
Introduction
These stepping stones are reinforced concrete pieces designed to resist cracking through proper reinforcement, curing, and freeze–thaw considerations. Cracks typically come from shrinkage, settling, or temperature shifts, so controlling moisture and movement helps. When choosing materials, check labels and manufacturer instructions for suitability in outdoor, mid-stain conditions and for any local rules that apply to your area.
Practical reinforcement options include using a light wire or mesh within the core, or adding surface fibers to slow cracking, with care not to trap air pockets. Practice proper curing by keeping the fresh concrete moist or protected as it hardens, and consider design details that reduce exposed surface area to freeze–thaw cycles. Always verify local guidelines and product instructions to ensure your approach fits your climate and project requirements.
Key takeaways
- Choose proper reinforcement: mesh or rebar grids embedded above base for cracking control.
- Cure stones evenly in shade, keep moisture gentle to prevent rapid drying.
- Avoid freeze–thaw damage by using clean joints and compacted base drainage.
- Use non-corrosive curing methods and follow manufacturer guidelines for longevity.
- Wear eye protection and gloves when mixing, pouring, or lifting heavy forms.
- Plan for flat, level stepping stones with even load paths and spacing.
Table of Contents
- Introduction
- Key takeaways
- Why Stepping Stones Crack — Quick Diagnostic Guide
- Tools and Materials Checklist for Durable DIY Stepping Stones
- Step‑by‑step DIY Process to Cast Non‑cracking Stepping Stones
- Reinforcement Techniques Explained — Pros, Cons, and Cost Considerations
- Curing Best Practices and Common Mistakes to Avoid
- Designing for Freeze–Thaw Cycles and Wet Climates
- Maintenance, Repair Methods, and Lifespan Extension
- Conclusion
- FAQ
Why Stepping Stones Crack — Quick Diagnostic Guide
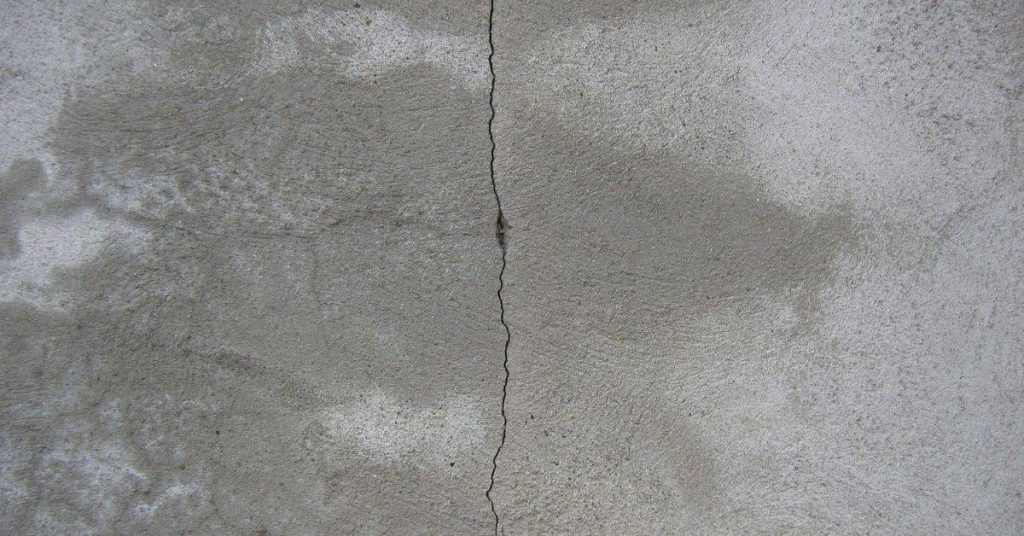
Cracks in stepping stones come from a few common mechanisms. Look for patterns that hint at shrinkage, settlement, or freeze–thaw stress. A quick read of the crack shape helps point to likely causes.
Use a simple visual check to separate issues: uniform fine cracks suggest shrinkage, displacement or gaps indicate settlement, and rough edges with repeated moisture cycles point to freeze–thaw damage. Keep an eye on edge spalling or movement between stones as additional clues.
Types of cracks and what they mean
Cracks in your concrete stepping stones can tell a story about what went wrong. Here’s how to read them:
Shrinkage cracks are fine, hairline cracks that run across the stone. They happen when the concrete dries and shrinks.
Overloading cracks start near an edge under heavy use or weight. You’ll see them as diagonal lines running from the loaded area.
Settlement cracks show up where stones are out of line, or gaps widen at one edge. This happens when the base beneath settles unevenly.
Freeze-thaw cracks have rough, flaky edges. They recur with winter moisture and frost cycles, causing spalling along the edges.
Assessing severity: cosmetic vs structural
Not all cracks are created equal. Some can be lived with, others need immediate attention:
For cosmetic cracks, they’re usually thin (less than 1/8 inch), don’t run through the whole stone, and aren’t getting wider over time.
For structural failures, look for wide cracks (over 1/8 inch), cracks that run through the whole stone or show displacement at joints. These need repair or re-pouring to prevent further damage.
Test by trying to push stones apart at the crack. If they move, it’s a sign of serious settlement or freeze-thaw damage.
Tools and Materials Checklist for Durable DIY Stepping Stones
Core tools set the stage for a uniform mix and a smooth finish. Include a mixer or bucket, a hoe or spade, trowels, a float, an edging tool, and a rubber mallet. These help keep mix consistency and prevent surface weaknesses.
Materials and mixes matter for crack resistance. Gather cement, sand, aggregate, water, and any bonding agents or fiber additives you plan to use. Have edging panels, a stake system, and reinforcement ready, plus a compacted base and curing cover options.
Tools you’ll need (mixing, molding, finishing, safety)
Before you start mixing concrete, make sure you have all the right tools. This will speed up your work and help prevent cracks.
- Mixer or mixing bucket: For a uniform mix. Skipping this can lead to weak spots.
- Hoe/spade: To break up clumps of dry mix.
- Trowel: For spreading and leveling the concrete.
- Margin trowel: To create smooth, vertical edges.
- Float: To remove air bubbles and ensure a smooth surface.
- Edging tool: For creating clean, straight edges.
- Rubber mallet: To tap down high spots and eliminate voids.
- Safety glasses: Protect your eyes from debris.
- Gloves: To protect your hands from cement burns.
- Ear protection: If using power tools like a mixer or saw.
Quick rule: Always check your tools before you start. A missing tool can slow down work and increase the risk of mistakes.
Concrete mix choices, admixtures, and additives
Choosing the right concrete mix is crucial for durability. Here’s what to consider:
- Bagged mixes: Easy to use but may not be as strong as custom mixes.
- Custom mixes: Allow you to control strength and durability. Check the cement-to-sand ratio (usually 1:3 or 1:4).
- Water: Add just enough for a workable mix. Too much water weakens concrete.
- Plasticizers: Improve workability without adding extra water. Check the label for dosage instructions.
- Air-entrainment admixtures: Add tiny air bubbles to improve freeze-thaw resistance. Check the air content (usually 5-8%).
- Retarders: Slow down setting time for larger projects. Check the label for usage and safety instructions.
- Bonding agents or epoxy: For joints, to prevent water seepage and improve durability.
Quick rule: Always follow manufacturer’s guidelines when using admixtures. Too much can weaken concrete.
Reinforcement materials to consider
Reinforcing your stepping stones prevents cracking from heavy loads and temperature changes.
- Synthetic fibers: Inexpensive, easy to use. Good for small, lightly loaded stepping stones.
- Welded wire mesh: Provides better strength than fibers. Suitable for medium-sized stepping stones with moderate loads.
- Small steel reinforcement (rebar): Offers the most strength. Ideal for large stepping stones or areas with heavy traffic.
- Placement: Place reinforcement in the middle of the slab, not at the bottom. This distributes loads evenly.
- Tension: Keep reinforcement taut to prevent sagging, which can cause cracks.
Quick rule: Choose reinforcement based on stone size and expected loads. Too little reinforcement can lead to cracking under heavy loads.
Step‑by‑step DIY Process to Cast Non‑cracking Stepping Stones
Start with a clear site assessment: check slope, drainage, sun exposure, and local codes. Decide the stone size and thickness to reduce cracking risk. This alignment helps lower later repair needs.
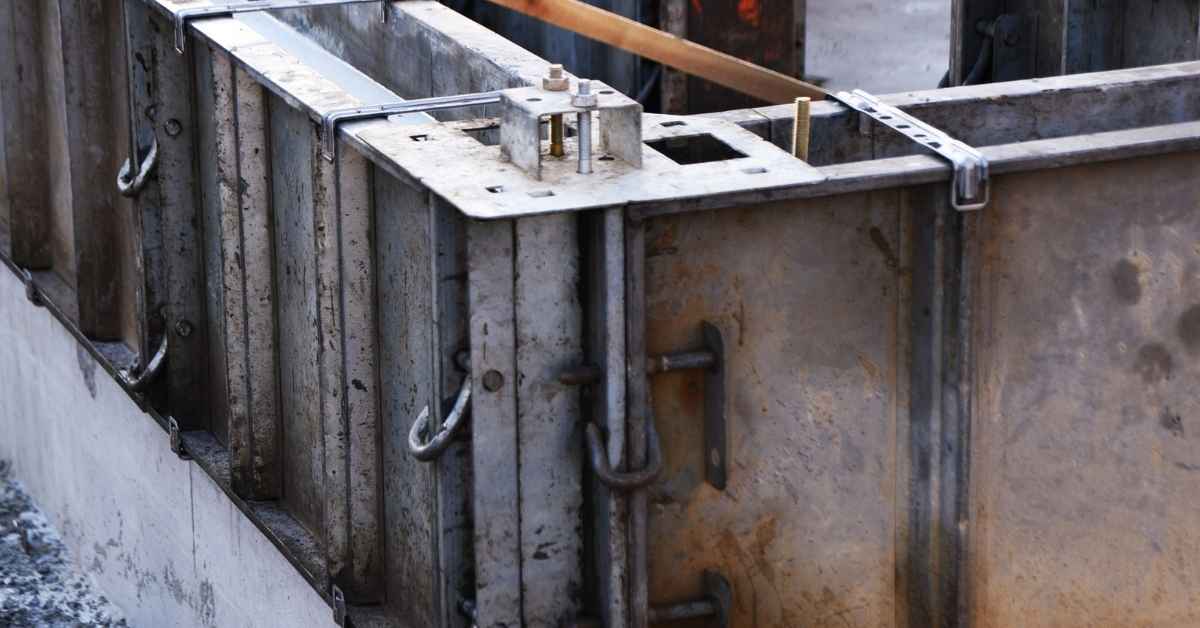
Think through formwork, reinforcement, and curing early. Set precise dimensions and level the forms. Plan where joints will go to segment large pours and control cracks.
Site prep, forms, and base setup
First things first, you gotta get your site ready. We’re talkin’ flat and drained here.
Start by removing any grass or debris. Then, compact the soil – you can rent a plate compactor for this. Aim for about 90-95% compaction. Check your local rules if you’re unsure.
Now, let’s set those molds. You can use plastic or wooden forms, whatever floats your boat. Just make sure they’re sturdy and won’t leak. Grease ’em up with a release agent – that’s a fancy way of saying something to stop the concrete from stickin’. WD-40 works fine.
For the base, you want a mix of gravel and sand, about 3:1 ratio. Spread it out, level it off, and compact it again. This gives your stones a solid foundation to sit on.
Mixing, placing, and finishing the concrete
First off, you’ve got to get your mix right. Check your cement bag for the correct water-to-cement ratio, usually around 5:1 or 4:1 by volume. Too much water makes weak concrete that’ll crack like a dried-up mud pie.
Workability is key here. You want it to flow and level out nicely in your forms without being too soupy. If it’s too stiff, add a bit more water or use a concrete admixture for better workability. But remember, less is more with water. Add just enough to get the job done.
Now, place that concrete. Pour it into your forms and use a shovel or a concrete rake to spread it out evenly. Then, grab your trusty vibrator (yes, you heard right) and give it a good shake to remove any air pockets. This’ll help prevent those nasty cracks from forming.
Finally, finish that surface. Use a bullfloat to smooth it out, but don’t overdo it. Too much floating can cause surface crazing. Let it sit for a bit, then use an edger tool to give the edges a nice, clean look. And there you have it – concrete that’s ready to set and last.
Embedding reinforcement and decorative insets
Now that your forms are set and base is ready (check compaction), it’s time to beef up your stepping stones with some strength. We’re talking about fibers, mesh, or small bars here.
Fibers: These little guys help control cracking. Sprinkle them evenly over the base before placing concrete. Aim for around 1-2 lbs per cubic yard. Too many can cause issues with finishing.
Mesh or small bars: For extra strength, embed a layer of wire mesh (check size) or small rebar (around 1/2″ to 3/4″) in the middle of your stepping stone. Make sure it’s well secured and won’t float up when you pour.
As for decorative stones or inserts, place them after you’ve poured and leveled your concrete (follow leveling instructions). Press them firmly into the wet mix to ensure a strong bond. Avoid placing them near edges or corners where they could create weak spots.
Reinforcement Techniques Explained — Pros, Cons, and Cost Considerations
Reinforcement options range from fibers to mesh to rebar, each with its crack-control strengths. Fibers help limit shrinkage cracking, while mesh and rebar resist larger movements. Choose based on expected loads and spacing constraints.
Installation ease and cost vary: fibers are simple, mesh is common, and rebar adds heft. Consider the project size and budget, then follow spacing and overlap guidance to maximize effectiveness.
Synthetic Fiber Reinforcement
Fibers — polypropylene or fiberglass — are the simplest and cheapest reinforcement option. They control both plastic shrinkage (when concrete is wet) and drying shrinkage (as it hardens).
Micro fibers, tiny and numerous, disperse evenly throughout the mix to stop micro-cracks from forming. Use them for small decorative stepping stones with light foot traffic.
Macro fibers, longer and fewer, bridge larger cracks that might otherwise form due to settlement or temperature changes. They’re ideal when you want to minimize maintenance but keep costs low.
Fibers alone excel in compacted bases and where edge support is minimal. No special installation steps; just mix them into your concrete batch before pouring.
Mesh and Small Steel Reinforcement
Welded wire mesh or small rebar (less than #4) are better for larger stepping stones or areas with light vehicle traffic. They control crack widths by distributing stress evenly.
Place mesh or rebar in the middle third of your concrete pour, where tension forces are highest. This keeps cracks from showing on the surface. Use chairs or supports to maintain proper elevation.
For stepping stones, one layer should suffice. Overlapping is crucial; stagger joints by at least 12 inches for maximum effectiveness. Follow manufacturer’s guidelines for spacing — typically 6 to 8 inches on center.
Mesh and small steel are best suited where you need extra strength, like along walkways or near heavy objects. They’re more labor-intensive but offer superior crack resistance.
Cost Comparison and Selection Guide
Reinforcement costs vary, so consider your project’s size, load expectations, and budget. Here’s a quick comparison:
- Fibers: Cheapest option (around $0.50 – $1.50 per square foot). Easy to install.
- Mesh/Wire: Mid-range cost ($2 – $4 per square foot). More labor-intensive but offers superior strength.
- Composite Bars/Rebar: Most expensive ($3 – $6 per square foot). Highest strength, ideal for heavy loads or large stones.
Splurge on reinforcement when longevity matters most — like near your home’s entrance or where heavy objects sit. For small decorative pours, fibers often suffice.
Consider time and labor too. Fibers take minutes; mesh/rebar can add hours. Choose based on your skills, available time, and desired results.
Curing Best Practices and Common Mistakes to Avoid
Curing is the single most impactful step for minimizing shrinkage and surface defects. It works best when moisture is kept in during the early curing period. Compare curing impact against other steps to understand its importance.
For small pours, use water misting, plastic coverings, curing blankets, or sealers as appropriate. Establish a routine that maintains moisture for the recommended period and adapts to hot, dry or cool, damp conditions.
Effective curing methods for stepping stones
Curing is the most crucial step in preventing cracking and surface defects in your DIY concrete stepping stones. Here are some effective methods to retain moisture and promote proper hydration:
Water mist or continuous sprinkling is ideal for small pours like stepping stones. Start misting 24 hours after finishing, when the initial set has taken place. Keep the surface damp but not waterlogged.
Curing blankets or plastic sheeting can be used to cover the steps and retain moisture. Apply them immediately after finishing, ensuring they’re secure and don’t dry out the edges. Remove them once the concrete has gained sufficient strength (usually 3-7 days).
Curing compounds are sealers applied to the surface that prevent water loss. They can be used alone or in combination with other methods. Apply them after the initial set, following the manufacturer’s instructions.
Common curing mistakes and troubleshooting
Even small pours like stepping stones can be ruined by improper curing. Here are some common mistakes to avoid, along with practical fixes:
- Drying too quickly: Overly rapid drying causes surface cracks and weakens the concrete. To fix, re-wet the surface and adjust your climate control measures.
- Uncovering during early curing: Removing covers before the concrete has gained sufficient strength leads to moisture loss and cracking. Keep covers on until at least 3-7 days after pouring.
- Skipping moisture retention on edges/borders: Edges dry out faster, leading to cracks. Ensure all areas are properly covered and moisturized.
- Incompatible sealers or curing compounds with decorative finishes: Some sealers can react poorly with decorative elements like stains or aggregates. Test your chosen sealer on a small area first.
- Neglecting joint alignment or reinforcement during curing: Improperly aligned joints or unprotected reinforcement can cause cracking. Ensure joints are properly formed and reinforcement is well-covered.
If you notice any of these issues, address them promptly to save your pour. Regular inspection and timely intervention are key in concrete curing.
Designing for Freeze–Thaw Cycles and Wet Climates
Freezing, thawing, and standing water attack small concrete pieces through microcracking and edge spalling. Drainage and moisture management are essential to reduce these effects. Stepping stones are especially vulnerable when moisture sits at joints.
Incorporate positive slopes and proper drainage to keep the bed dry. Use air-entrained mixes and appropriate water–cement balance to form usable air voids. Joint spacing and reinforcement strategies should align with water flow and salt exposure considerations.
How freeze–thaw damages concrete and design responses
Freeze-thaw cycles, standing water, and deicing salts can wreak havoc on small concrete elements like stepping stones. Here’s why:
Microcracks form when water seeps into tiny pores in the concrete, then freezes and expands. This causes internal stress, leading to more cracks.
Over time, these microcracks grow, causing spalling (flaking) and scaling (peeling). Stepping stones are particularly vulnerable due to their small size and exposure to the elements.
To minimize damage, use air-entrained concrete, which has tiny air bubbles that act as cushions against freeze-thaw pressure. A proper water-cement ratio ensures adequate strength, and thicker stones with smoother surfaces resist cracking better.
Drainage, slope, edges, and installation details
Proper drainage is key to protecting stepping stones from freeze-thaw damage. Here’s how:
Ensure a positive slope away from structures to encourage water runoff. Avoid low-lying pools that can trap water around the stones.
Use trench or drainage strategies to keep the stone bed dry. This could be as simple as creating gaps between stones for water to flow through, or installing a permeable base like gravel.
Edge restraints help prevent stones from shifting and cracking under freeze-thaw stress. They also direct water away from the edges, reducing damage.
Maintenance, Repair Methods, and Lifespan Extension
Set up a simple seasonal maintenance calendar for stepping-stone paths. Include pre-winter checks for cracks, displacements, and drainage. This keeps issues manageable before they worsen.
Learn practical DIY repairs like crack sealing, releveling, and resetting loose units. Pair these with a moisture-friendly curing and sealing routine to extend life and maintain safe, attractive stepping stones.
Routine Maintenance Checklist
Use this checklist every season to keep your stepping stones in tip-top shape. Catch issues early before they become big problems.
- Spring: Inspect for any cracks or displacements that may have occurred over winter. Address minor issues immediately.
- Summer: Check for weed growth between stones and in joints. Remove them promptly to prevent further damage.
- Fall: Ensure proper drainage by checking that water flows away from the stepping stones. Clean out any debris from joints.
- Winter (pre): Apply a breathable sealer to protect against freeze-thaw cycles. This should be done every 2-3 years.
- Winter (post): Inspect for any signs of damage after the snow melts. Repair as needed.
- After heavy rain: Check for standing water or ponding. Ensure proper drainage to prevent efflorescence and spalling.
- Annually: Re-level any displaced stones to maintain a smooth, even surface.
- Every 3-5 years: Reseal the stepping stones with a breathable, UV-stable sealer to maintain their longevity.
Quick rule: Regular maintenance is key. Don’t wait for problems to become major before addressing them.
Repair Methods for Small and Larger Cracks
Small hairline cracks can often be sealed, while larger cracks may require patching or even replacement. Here’s how to decide which method to use.
Surface sealants: For fine hairline cracks (less than 1/8 inch), a flexible surface sealant like silicone caulk can be used. Apply after cleaning and drying the crack.
Epoxies: Larger cracks (up to 1/4 inch) may require an epoxy patch. Clean, prepare, and prime the crack before applying the epoxy according to manufacturer’s instructions.
Patching vs replacement: For cracks wider than 1/4 inch or those that are rapidly widening, consider replacing the stone rather than patching. Patching may only be a temporary fix in these cases.
Always prepare cracks by cleaning them out, ensuring they’re dry, and applying a primer before attempting any repair method.
Conclusion
Get this right and your stepping stones will last years longer, look better, and stay safe in wet and freezing weather. The core ideas are solid: proper reinforcement, strict curing, and a design that handles movement and moisture without cracking.
Before you pull the tenter and pour, run a simple check: confirm the base is solid and dry, verify the reinforcement plan matches your layout, keep mix and cure times within recommended ranges, test for frost risk in your climate, and ensure the stones will sit level with good drainage. Treat each step as a small project with its own cure window and inspection points, and document any adjustments for the next pour.
Avoid these traps: skipping reinforcement or using the wrong size or spacing, under-curing or rushing demolding, and ignoring freeze–thaw design in wet climates. Don’t mix too wet or too dry, don’t pour on a damp base, and never pull a stone out of the mold before it’s firm. Work in safe conditions, wear eye and skin protection, and keep children and pets away from wet concrete until it’s properly set.
If you face large areas, heavy loads, complex reinforcement, or questionable drainage, call in a pro rather than guessing. With careful steps and practical checks, you can finish strong and enjoy durable, crack‑resistant stepping stones that keep their look and function for years. You’ve got this—steady progress beats all the guesswork, and every well‑made stone adds value to your outdoor space.
FAQ
What are the common types of cracks in stepping stones and what usually causes them?
Hairline cracks happen as concrete cools and shrinks. Wide cracks can come from poor mix, rapid drying, or movement in the base. Soil settling and frost heave can also open cracks over time. Check product labels and local guidelines to understand what’s typical for your area.
What are practical options for reinforcing stepping stones without breaking the bank?
Chopped plastic or fiber additives can help with toughness, but you also need proper form work and a stable base. Rebar or mesh is effective but can be overkill for small stones; place any reinforcement as recommended by the manufacturer and keep it away from the edges where it can rust or bite into the form. Always follow label instructions and local rules for placement and coverage.
What curing methods work best for DIY stepping stones to prevent cracks?
Keep the surface damp for a few days after pour or use a compatible curing compound as directed. Avoid direct sun, wind, and heat that speed drying too fast. If you see surface crazing, adjust moisture and consider a misting routine per product instructions.
How can I protect stepping stones from freeze–thaw damage on a budget?
Ensure good drainage so water doesn’t pool around edges. Use a well-graded base and proper joint spacing to relieve pressure. Avoid adding de-icing salts near the stones; if you must, follow local guidance and manufacturer instructions for safe use. Regular maintenance of cracks and joints will extend life.