
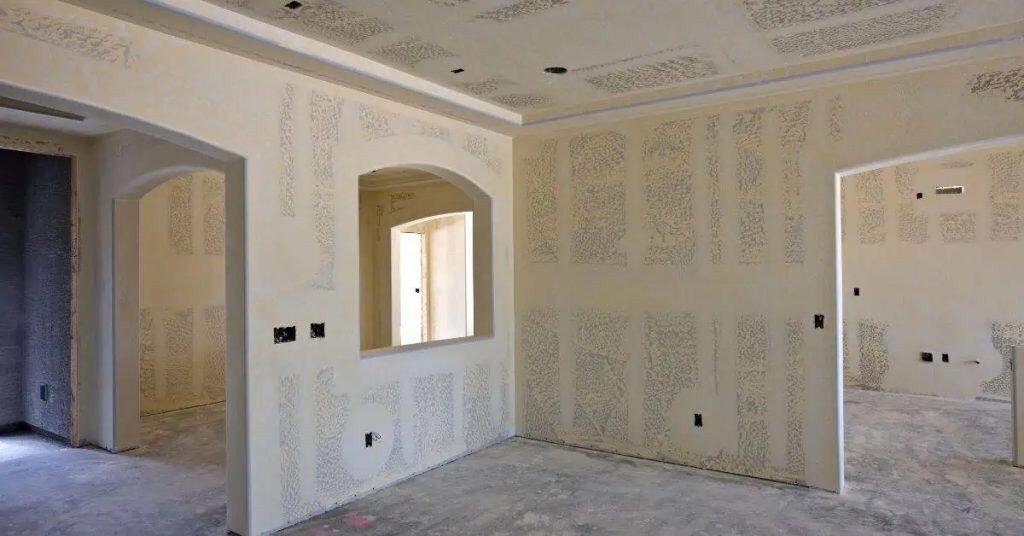
Introduction
Drywall installation mistakes are the common missteps that ruin seams, fasteners, and the overall look. This article calls out the big ones so you can avoid them while hanging sheets. We’ll keep it practical and talk through hands-on fixes and best practices you can apply on a typical job site.
To avoid the big pitfalls, plan your sheet layout, cut clean, and drive fasteners where they belong without overdriving. Keep seams tight, tape and mud evenly, and let joints set before sanding. If in doubt, check the product label, manufacturer instructions, and any local rules for what to use and how to cure.
Key takeaways
- Plan layout carefully to avoid misaligned sheets and corner gaps.
- Drywall edges and joints require accurate cuts to reduce finishing work.
- Use proper screws and spacing; avoid overdriving to prevent nail pops.
- Taping and mudding should be thin, feathered, and allowed adequate drying time.
- Inspect for loose panels, gaps, or cracks before finishing to save repairs.
- Wear eye protection and masks; keep work area clear of trip hazards.
Table of Contents
- Introduction
- Key takeaways
- Major Mistakes That Sabotage Drywall Projects
- Planning and Layout Pitfalls
- Cutting and Fitting Errors
- Hanging and Fastening Mistakes
- Taping, Mudding, and Finishing Mistakes
- Joints, Corners, and Trim Problems
- Tools, Materials, and Safety Checklist
- Inspection, Troubleshooting, and Repair Steps
- Conclusion
- FAQ
Major Mistakes That Sabotage Drywall Projects
This section highlights the big, high‑impact errors that show up in finished walls. You’ll see how small missteps can snowball into costly delays and visible defects. The goal is to help you spot and fix these issues early.
Focus on the problems that tend to derail a project: mismeasured panels, improper fasteners, and poor edge alignment. We’ll outline a practical order to tackle fixes and prevent repeats. For any specification, check the product label or manufacturer instructions before proceeding.
Failing to Plan Scope and Sequence
Drywall installation might seem straightforward, but it’s a complex task. Underestimating its complexity leads to rework, delays, and cost overruns.
Solution: Create a simple workplan before you start. List all the steps, from measuring and cutting to taping and sanding. Include room for unexpected issues.
Break down your project into manageable sections. Prioritize areas with special needs or tight corners first. This way, you won’t get overwhelmed and can keep track of progress easily.
Ignoring Environmental and Site Conditions
Humidity, temperature, and unfinished framing can wreak havoc on your drywall installation. Ignoring these factors leads to cracks, warping, and other issues.
Solution: Perform site checks before starting. Check humidity levels – ideally, they should be between 35% and 50%. If it’s too high or low, address the issue before proceeding.
Ensure the temperature is within a suitable range (between 60°F to 80°F). Check framing for square and plumb. Any issues here can cause problems later on.
Skipping Inspection and Permitting
Before you start any drywall installation, check local codes and permit needs. Skipping this step can lead to safety hazards and legal issues.
- Check local building codes: Ensure your project complies with local regulations regarding fire resistance, soundproofing, etc.
- Obtain necessary permits: Some areas require permits for drywall installation. Check with your local building department to avoid fines or forced rework.
- Inspect framing: Before installing drywall, ensure the framing is up to code and structurally sound.
- Check for asbestos: If your home was built before 1980, it might contain asbestos. Have it tested before starting any work.
- Ensure proper ventilation: Drywall installation can be dusty. Ensure you have adequate ventilation to protect yourself from potential health hazards.
- Check for pests: Pests can damage framing and drywall. Inspect for signs of infestation before starting work.
- Check for mold or moisture: Moisture and mold can compromise the integrity of your drywall. Check for any signs before installation.
- Inspect electrical and plumbing: Ensure all electrical and plumbing work is up to code and safe before installing drywall.
Quick rule: Always err on the side of caution when it comes to safety and legal requirements. It’s better to spend a little extra time checking than risking your project or your safety.
Planning and Layout Pitfalls
Good layout saves time and reduces waste. This intro covers framing checks, stud layout, and panel orientation to prevent seams coming in at awkward spots. Proper planning makes finishing easier later on.
Tips include laying out sheets to minimize seams and planning for central line alignment. Inspect framing before hanging and verify that your layout matches the wall geometry. When in doubt, reference the construction docs or local building rules for layout standards.
Not verifying framing and stud condition
Before you start hanging drywall, take a close look at your framing. Warped or improperly spaced studs can cause uneven walls, making it tough to get that smooth finish.
Check each stud for straightness. If one’s crooked, shim it with thin pieces of wood until it’s level. This extra step ensures your drywall hangs evenly and looks professional.
Don’t skip this. It might seem like a hassle now, but it’ll save you time and frustration later on.
Wrong sheet orientation and seam placement
Drywall sheets come in standard sizes. But that doesn’t mean you should just slap them up any which way. Take a moment to plan your layout.
Orient the sheets with room dimensions in mind. This helps minimize seams and waste. And stagger those seams – don’t line them up like bricks. That makes your walls stronger and easier to finish.
Remember, every seam is a potential weak point. Make ’em strong, make ’em few.
Poor access and sequencing for openings
Doors, windows, and utilities – they all need space to breathe. Plan your drywall layout with these openings in mind.
Start at the top of each wall, working down. This way, you won’t have to cut around those openings later on. It’s safer, faster, and neater.
Think ahead. Consider where your doors and windows are going. Plan your drywall layout accordingly.
Cutting and Fitting Errors
Accurate measuring and careful cutting set the stage for tight joints. Poor cuts lead to gaps, oversized holes, and weakened sheet edges. This section covers marking, scoring, and test fits before fastening.
Use sharp tools and cut along the line with slow, steady motions. For tricky shapes, double‑check dimensions against room features and verify edge support. When unsure, consult your sheet manufacturer’s data sheet or label for cutting guidelines.
Inaccurate cuts leading to gaps or tight fits
Measuring and cutting drywall sheets accurately is crucial for a smooth, gap-free finish. Common mistakes include not measuring from the right spot on the wall or using worn-out tools.
Always measure from the center of the stud to ensure your cut lines up perfectly. Use a sharp utility knife and a straight edge for clean cuts. Before cutting, score the sheet several times to make it easier to snap along the line.
After cutting, test-fit the panel before installing to check for any gaps or tight fits. If you find issues, adjust your cut accordingly.
Mistakes around openings and fixtures
Fitting drywall around windows, doors, electrical boxes, and pipes can be tricky. Common mistakes lead to cracking or uneven surfaces.
- Windows and Doors: Measure and cut carefully to avoid overhangs or gaps. Use a jigsaw for curved cuts.
- Electrical Boxes: Remove the cover, trace around it, then cut out the drywall using an utility knife and a straight edge.
- Pipes: Use a reciprocating saw to cut around pipes, ensuring you don’t damage them.
- Angles: For inside corners, use a special corner bead or tape to create a smooth finish.
Always test-fit your pieces before installing to ensure they fit properly and avoid future issues.
Not planning layouts to reduce waste
Proper layout planning helps minimize scrap and maintains consistent seam locations. Start by measuring your walls accurately, then plan your sheet placement.
For best results, stagger your seams like bricklaying for added strength. This means the seam of one sheet should not line up with the seam below it on the next row.
Also, consider using full sheets where possible. They’re stronger and reduce waste compared to smaller pieces. If you must cut a full sheet, do so carefully to minimize scrap.
Hanging and Fastening Mistakes
Fastening patterns and screw depth control are essential for a flat, strong install. Improper patterns can cause buckling, blown screws, or nail pops. This part explains how to support large sheets and ceilings during hang.
Follow recommended fastener spacing and avoid overdriving screws. Support panels as you go to reduce sagging. If you’re unsure about fastener type or depth, check the product instructions or building code references for your material and thickness.
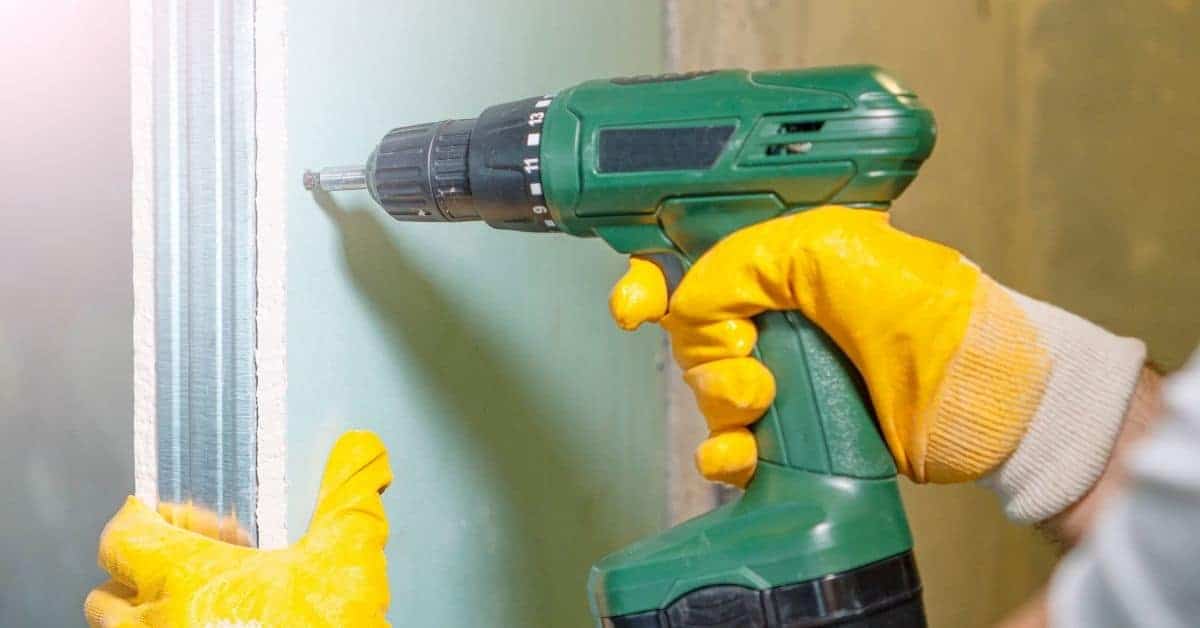
Incorrect Fastener Type or Length
Using the wrong screws or nails can cause serious issues. Panels might crack, and framing could be damaged.
Screws: Use drywall screws, not nails. They’re designed to hold panels securely without splitting them. 1-1/4″ to 2″ screws are standard for walls; use 2″ for ceilings.
Nails: If you must use nails (like for metal studs), use drywall nails, not finishing nails. And keep them short – no longer than 1-1/4″.
Overdriven or Underdriven Fasteners
Improper screw depth causes visual and structural problems. Overdrive, and you’ll see screws poking through the paper; underdrive, and they won’t hold.
Setting depth: Use a screwdriver with a magnetic tip to set consistent depth. Start at an angle, then drive straight in. Stop when the head is flush or just below the surface.
For ceilings, use toggle bolts for heavy fixtures to avoid overdriving into the ceiling.
Poor Alignment and Inadequate Support
Proper alignment prevents seams from showing. Good support keeps sheets from sagging or buckling.
Aligning seams: Butt sheets together tightly, keeping seams straight and level. Use a 4′ or 6′ straightedge to check.
Supporting ceiling sheets: Install furring strips or hat channels for support every 12″-16″. For long spans, use resilient clips to help absorb movement.
Taping, Mudding, and Finishing Mistakes
Finishing quality hinges on choosing the right compound and proper tape technique. Common errors create visible seams or texture issues. We cover the sequence and technique to minimize those risks.
Watch for too much or too little mud, improper tape bedding, and sanding gouges. When selecting compounds, verify compatibility with your drywall and paint system. When in doubt, review the manufacturer’s finishing guide or label directions.
Wrong compound choice or mixing errors
Picking the right joint compound and mixing it correctly is crucial for a smooth, durable finish. Here are common mistakes to avoid:
- Using drywall primer instead of joint compound – Primer doesn’t fill gaps or create a smooth surface.
- Choosing the wrong type of joint compound for your needs – Lightweight compounds are for small repairs, while all-purpose is for most jobs. Check product labels to ensure you’re using the right one.
- Mixing too much at once – Mix only what you can use within 30 minutes to prevent setting before application.
- Not mixing thoroughly or adding water incorrectly – Inconsistent mixing leads to lumps and poor adhesion. Always follow the manufacturer’s instructions for water content and ensure it’s mixed well.
Double-check these points to avoid wasting time and materials on a subpar finish.
Poor taping and embedding technique
Improper tape embedding and feathering can lead to bubbles, ridges, or even cracks in your finished walls. Here’s how to avoid these issues:
First off, never skimp on embedding the tape. You want it to be fully covered by the joint compound, not just laid on top. Use a wide taping knife (at least 12″) and press firmly to work the compound into both sides of the tape.
When feathering out, don’t go too thin or you’ll end up with ridges. But don’t leave it thick either, or you’ll get bubbles. Aim for a smooth, even layer that tapers off gradually. If you’re not sure, check the product label for specific recommendations.
Remember, patience is key here. Don’t rush through the process. Take your time to ensure each step is done right. It’s better to spend a few extra minutes now than have to fix problems later.
Over-sanding and surface damage
Alright, listen up. Sanding is where a lot of you DIYers mess up. You’re either too aggressive or not careful enough.
First off, make sure your joint compound is dry before you start sanding. If it’s still wet, you’ll just create low spots and make more work for yourself. Check the label on your compound to see how long it takes to dry.
Now, when you’re sanding, go light. You don’t need to bear down like you’re trying to start a fire. Use even, smooth strokes, following the length of the joint. If you’re sanding perpendicular to the joint, you’re asking for trouble – you’ll create low spots and maybe even gouges.
And for Pete’s sake, don’t let your sander get away from you. Keep it under control, and don’t let it wander off into un-sanded areas. That’s how you end up with sanded patches all over your wall like some kind of crazy quilt.
Lastly, dust. You’ve got to manage the dust. Wear a mask, use a vacuum attachment on your sander, or both. You don’t want to be breathing that stuff in, and you sure as heck don’t want it settling all over your nice clean room.
Joints, Corners, and Trim Problems
Nice corners and clean trims sell a professional look. This section points out where corners and returns tend to fail and how to tighten up transitions. Use visual checkpoints to confirm crisp lines as you work.
Plan corner radii and trim returns before setting them in place. Check for feathered edges and consistent texture across joints. If you’re unsure about corner treatments, consult the edging or trim instructions from the manufacturer.
Inside corner and outside corner finishing errors
Corners can make or break your drywall finish. Here are common mistakes to avoid.
- Squint corners: Not using a corner bead results in weak, uneven corners that crack easily. Solution: Use metal or paper-faced corner beads for strength and straight lines.
- Over-embedding: Too much compound embeds the tape, causing it to bubble or crack as it dries. Solution: Apply a thin layer of compound, embedding just the tape’s edges.
- Inconsistent taping: Not keeping corner taping consistent results in uneven walls. Solution: Use a t-square and level to keep your corners straight and even.
- Skipping sanding: Not sanding after compound application leaves rough, uneven surfaces. Solution: Lightly sand with 120-grit sandpaper between coats for smooth results.
Proper corner finishing ensures a durable, professional-looking finish.
Improper treatment of control and movement joints
Control and movement joints are crucial for accommodating natural expansion and contraction. Ignoring them leads to cracks and damage.
Identifying joints: Look for changes in direction, openings like doors or windows, and any areas where walls meet floors or ceilings. These are common joint locations.
Proper treatment involves scoring the drywall with a utility knife before taping, allowing movement without cracking. Use backer rod in wider gaps to prevent compound from filling them completely.
Regularly inspect your joints for signs of stress and address any issues promptly to maintain a healthy drywall system.
Trim, casing, and transition alignment issues
Properly aligning drywall edges with trims and casings creates clean sightlines and prevents gaps. Here’s how to get it right.
Measure and mark the trim or casing location on the drywall before cutting. This ensures accurate placement and reduces waste.
Inside corners: Use a t-square to draw a line along the corner, then cut along this line with a utility knife. This creates a clean edge for the trim to sit against.
For outside corners, use a miter box or miter saw to create 45-degree cuts on the trim pieces. Test fit them before applying adhesive or nails to ensure a tight, even fit.
Tools, Materials, and Safety Checklist
A practical DIY kit keeps the job moving smoothly. This intro lists essential tools and how to verify material quality before you start. Safety gear and rental vs. purchase decisions are included as well.
Double‑check material labels for type, thickness, and fire or moisture ratings if applicable. Inspect tools for sharpness and calibration, and confirm that you have a plan for safe handling and storage. If any item is unclear, refer to the manufacturer instructions or local safety rules.
Essential tools and correct usage
Before you start your concrete project, ensure you have the right tools and know how to use them. This checklist will help you avoid common mistakes that can lead to expensive rework.
- Tape measure: Check it against a known length to ensure accuracy. Inaccurate measurements lead to wrong quantities of materials.
- Level: Test it on a flat surface to confirm it’s working properly. A wonky level results in uneven surfaces and sloped floors.
- Shovel: Ensure the blade is straight and not bent. A bent shovel makes mixing and placing concrete difficult, leading to improperly mixed or placed concrete.
- Wheelbarrow: Check tires for proper inflation and ensure it’s balanced. A wobbly wheelbarrow can cause spills and waste materials.
- Concrete mixer (if using): Test it with a small batch of concrete to ensure it works correctly. A faulty mixer results in improperly mixed concrete, which weakens the final product.
- Formwork: Inspect for any damage or warping. Damaged formwork leads to uneven surfaces and leaks, causing costly repairs.
- Concrete vibrator: Test it with a small piece of rebar to ensure it’s working properly. A faulty vibrator results in air pockets and weak concrete.
- Gloves and safety glasses: Check for any holes or cracks. Inadequate PPE can lead to injuries from sharp objects or flying debris.
Quick rule: Always double-check your tools before starting a task. A few minutes of verification can save you hours of rework and prevent costly mistakes.
Materials selection and what to verify
Before you start any drywall installation, use this checklist to ensure you’ve got the right materials for your job. It’s best to do this before making any purchases.
- Drywall Type: Check it’s gypsum-based (not wood or metal).
- Thickness: Measure with a tape measure. Common sizes are 1/2″, 5/8″, and 1/4″.
- Moisture Rating: Look for ‘Green Tag’ or ‘Type X’ for moisture resistance.
- Fire Rating: Check for ‘Type C’ or ‘Type X’ for fire resistance. Always follow local codes.
- Manufacturer: Verify it’s from a reputable brand to avoid low-quality products.
- Edges: Ensure they’re straight and not damaged. Check for beveled or square edges.
- Sizing: Measure your walls/ceilings to ensure panels are the right size (common sizes: 4′ x 8′, 4′ x 10′, 4′ x 12′).
- Storage: Check storage conditions. Panels should be dry, not warped or cracked.
Quick rule: Always check local codes and manufacturer instructions to ensure you’re using the right materials for your specific job.
Safety practices and personal protective equipment
Before starting any concrete work, review this checklist to ensure a safe and productive job site.
- Lifting techniques: Always lift with your legs, not your back. Keep the load close to your body. Check product labels for specific lifting guidelines.
- Dust control: Use a damp cloth or misting system to control dust when cutting or grinding concrete. Regularly check and maintain your dust collection equipment.
- PPE – Hard hat: Wear a hard hat in areas where there’s a risk of falling objects. Inspect it regularly for cracks or damage.
- Safety glasses: Protect your eyes from debris and chemicals. Ensure they meet ANSI Z87.1 standards.
- Gloves: Wear appropriate gloves for the task at hand. Check frequently for wear and tear.
- Steel-toed boots: Protect your feet from heavy objects and sharp edges. Ensure they meet ASTM F2413 standards.
- Respirator (when needed): Use a respirator when working with silica dust or other harmful substances. Ensure it fits properly and is certified by NIOSH.
- Additional precautions: When working at heights, use fall protection equipment as required by local rules. Always have a first aid kit on site.
Quick rule: If it’s not safe, don’t do it. Prioritize safety over speed to prevent costly mistakes and injuries.
Inspection, Troubleshooting, and Repair Steps
Post‑install checks catch defects before they become visible problems. This section provides a systematic checklist for cracks, nail pops, and texture inconsistencies. The aim is quick detection and targeted repairs.
Describe the defect, identify possible causes, and outline repair steps that restore the surface. If you’re unsure about a repair method, consult the product data sheet or the contractor’s guidance for approved patches and finishes.
Visual checkpoints before finishing
Before you start taping and painting, use this checklist to ensure your drywall is ready.
- Check for flatness: Use a straight edge to find any dips or bumps. Inconsistencies can cause visible imperfections later on.
- Inspect seam tightness: Look for any gaps between sheets. If found, they’ll need to be filled before taping.
- Check fastener depth: Ensure all screws or nails are flush with the surface. Protrusions can cause problems during finishing.
- Check moisture levels: Use a moisture meter to ensure drywall isn’t wet. Excess moisture can lead to mold and warping.
- Verify joint width: Ensure joints are consistent in width for even taping and mudding.
- Inspect corners: Check that corner beads are properly seated and not damaged.
- Check for nail pops: Nail pops indicate movement and should be addressed before finishing.
- Examine texture: Ensure the entire surface has a consistent texture. Inconsistencies can show up after painting.
Quick rule: A thorough visual inspection now prevents costly touch-ups later.
How to diagnose and fix common failures
Regularly inspect your drywall for these common issues and address them promptly.
- Cracking: Hairline cracks are usually due to settling. Wider cracks may indicate a more serious problem like foundation movement.
- Bulging: Bulges often occur when drywall is nailed too close to the edge or not properly secured.
- Nail pops: Nail pops are caused by seasonal expansion and contraction. They should be filled and sanded smooth.
- Uneven texture: Inconsistent texture can occur due to improper sanding or application of texture spray.
- Popping nails/screws: Popping fasteners indicate movement and should be re-secured.
- Water damage: Water stains or warping may indicate a leak that needs to be addressed immediately.
- Sagging seams: Sagging seams are usually due to improper mudding or not allowing enough time for drying between coats.
- Drywall tape peeling: Peeling tape is often caused by applying too much compound, which can prevent proper adhesion.
Quick rule: Early detection and repair of these issues will save you time and money in the long run.
Preventive maintenance and long-term care
Regular inspections and simple maintenance can extend the life of your drywall finish.
- Annual inspection: Inspect your walls annually for any signs of damage or wear.
- Check humidity levels: Maintain proper humidity levels to prevent warping, cracking, or mold growth.
- Address nail pops promptly: Fill and sand nail pops as soon as they appear to prevent them from getting worse.
- Clean walls regularly: Dust and dirt can accumulate on walls over time. Regular cleaning helps maintain the finish.
- Monitor for water damage: Keep an eye out for any signs of water damage, which can lead to serious problems if left unaddressed.
- Avoid excessive vibration: Vibrations from heavy equipment or furniture can cause drywall to crack over time.
- Control temperature fluctuations: Extreme temperature changes can cause drywall to expand and contract, leading to cracks.
- Regularly check fasteners: Ensure all screws and nails remain secure. Loose fasteners can cause nail pops or other issues.
Quick rule: Regular maintenance is key to keeping your drywall looking great for years to come.
Conclusion
A solid drywall job lasts and looks right when you stay focused on safe, durable work. The right steps protect your walls, your investment, and you and your family from avoidable problems.
Check the plan against layout, mark joints, dry-fit panels, cut precisely, hang with correct spacing, drive fasteners flush but not overdriven, apply tape with steady mud, let coats dry fully and sand smooth, inspect joints and corners, and finish with a clean coat in a controlled, well-lit area.
Avoid overdriving screws, skipping curing times, or rushing the mud and sanding. Keep your shoes and tools clear of the work area, wear eye protection and a dust mask when sanding, and test new work in a small spot before committing. If a joint or corner still looks uneven after two passes, step back and fix it now rather than chasing problems later.
If gaps, severe misalignment, or warped panels show up, or you’re facing structural issues, call a pro rather than forcing a fix. Stay practical, work steadily, and you’ll finish with a durable, professional-looking result you can be proud of.
FAQ
What should I do if drywall panels seem to bow or warp before hanging?
Don’t force panels into place. Let them acclimate in the room and use these tips: support at the edges, shim where needed, and plan for longer edges to run true. Check the label or manufacturer instructions for recommended acclimation and handling.
How can I avoid gaps at corners and where walls meet ceilings?
Drywall needs accurate layout and solid backing. Snap lines, dry-fit to check alignment, and use corner beads correctly. If you see misalignment, pause and re-check the underlying framing and fasteners before finishing.
What’s the quickest way to spot and fix staple or nail dimples after hanging?
Look for indentations that sit proud or leave dimples after mudding. Do not skim over large dimples; address them with a light touch of mud and additional fasteners where needed, then proceed with pre-finish sanding once dry. If unsure, follow the product label for cure times and recoat guidelines.
How do I know I’ve chosen the right backing for heavier patches or repairs?
Backering matters for stability. Use the manufacturer’s guidance to pick the backing material and fastener type, and ensure it is compatible with your drywall thickness. When in doubt, check the label or instructions for compatibility and load limits.