
Introduction
Estimating paint quantities means figuring out how much paint you’ll need to cover a space before you buy. Keep it practical by measuring walls and considering surface type and layers. Always check the label for coverage guidance and any extra coats.
The simple method is to estimate area, pick a rough coverage figure, and add a little extra for waste. Double-check ceilings, trim, and any textured surfaces, and note that primer or multiple coats may change the amount. If in doubt, read the paint label and follow local rules for prep and disposal.
Key takeaways
- Accurate estimates start by measuring each surface’s dimensions before calculations.
- Record door, window, and trim areas separately for precise paint needs.
- Plan for primer and multiple coats; adjust orders with extra material.
- Safety first: use respirator, goggles, and proper ventilation during painting.
- Check manufacturer guidelines and local codes before applying specialty coatings.
- Keep a printable checklist for on-site measurements, paints, and tools.
Table of Contents
- Introduction
- Key takeaways
- Why Accurate Paint Estimation Matters
- Quick Simple Method (Step-by-Step)
- Detailed Measurement by Surface Type
- Paint Coverage, Coats, and Primer Considerations
- Common Avoidable Mistakes and How to Avoid Them
- Tools and Materials Checklist
- Cost Estimation and Buying Strategy
- Practical Examples, Formulas, and Printable Checklist
- Conclusion
- FAQ
Why Accurate Paint Estimation Matters
Accurate paint estimation keeps you from buying too much or too little. When you estimate right, you reduce waste, save money, and avoid mid-project runouts. Plan for touch-ups and a contingency so you don’t stall.
Knowing how much you need helps you schedule work and avoid surprises. Different products vary, so check the label or manufacturer instructions to confirm coverage and any special handling. For disposal, check local household hazardous waste rules and never dump paint into drains or soil.
Project outcomes affected by wrong estimates
Estimating paint quantities is no guesswork. Get it wrong, and you’ll face real problems on-site.
Run out mid-job, and you’re looking at delays while you order more. Worse still, if your new batch doesn’t match the old one, you might end up with visible lines where you stopped and started again.
Too much paint left over? That’s money down the drain. Plus, who wants to store gallons of paint that’ll likely never be used?
Accurate estimation is your friend here. It keeps projects running smoothly and budgets in check.
Common misconceptions
There are plenty of myths out there about paint coverage and container sizes. Don’t let them trip you up.
For instance, some folks think a gallon covers 400 square feet. Not true! It’s more like 350-400 square feet per gallon, depending on the paint type and surface.
And those big 1-gallon containers? They’re not always the best deal. Sometimes, smaller quantities can be cheaper per square foot. Check your product data before you buy.
Don’t rely on guesswork. Measure your surfaces accurately and check manufacturer specs to get a solid estimate.
Quick Simple Method (Step-by-Step)
This quick method keeps you practical: measure the surface area, check the product’s coverage on the label or datasheet, and plan for primer and multiple coats. Then buy with a modest buffer so you’re not short. Use the guidance on your specific product rather than guessing numbers.
Knowing why it matters helps you avoid waste and headaches when you shop. Getting the right amount saves time, money, and trips back to the store. If you’re unsure about numbers, check the label or datasheet and follow local disposal rules for household hazardous waste.
Step-by-Step Process
Follow this clear, practical sequence to estimate paint quantities like a pro. It’s quick and easy to grasp.
- Preparation: Gather measuring tools, safety gear (gloves, goggles), and note-taking materials.
- Safety checks: Ensure the area is well-ventilated, clear of obstructions, and free from hazards before starting.
- Main work: Measure each surface area separately (walls, ceilings) and subtract doors/windows. Record dimensions clearly.
- Calculate needed paint: Divide total area by coverage per can, then multiply by coats required. Round up to nearest container size.
- Final checks: Double-check calculations, gather necessary tools, and confirm return policies before purchasing.
Measure surface area
Accurate measuring is key. Here’s how to do it right:
For walls: Measure height and width of each wall, then multiply. Subtract doors and windows’ areas.
For ceilings: Measure length and width, then multiply. No need to subtract here.
Record dimensions separately for each surface to keep track easily.
Calculate paint needed using coverage
Now, let’s figure out how much paint you need:
Divide total area by the coverage listed on the paint label. This gives you cans needed for one coat.
Multiply this number by the number of coats required (usually 2).
Example: If your walls are 100 sq ft and the paint covers 10 sq ft per can, you’ll need 10 cans for one coat. For two coats, that’s 20 cans.
Rounding and buying guidance
Almost done! Here are some final tips:
Round up to the nearest whole can. It’s better to have a little extra than not enough.
Buy an additional 10-15% for touch-ups and spills. This ensures you won’t run out mid-project.
Check return policies in case you buy too much, and note batch codes to ensure color consistency if more is needed later.
Detailed Measurement by Surface Type
Detailed measurement by surface type means you measure flat ceilings, vertical walls, textured finishes, trim, and cabinetry separately. Each surface type needs its own method and math to get accurate results. And you should note surface condition and texture when you record measurements.
Different textures and edges change how much material you need and how you cut it. Noting condition and texture helps avoid waste and bad fits later, and it keeps you from guessing. If you’re unsure about a specific surface, check the label or datasheet for guidance.
Ceilings and high walls
Start by measuring your ceiling area. It’s usually square footage, like floors. But remember, access can be tough. Ladders, scaffolding – it all adds time and paint.
Texture matters too. Popcorn ceilings or textured paints need more coverage. Smooth ceilings are easier.
Don’t forget to account for any skylights, vents, or other openings. Subtract those areas from your total.
Trim, doors, and cabinetry
Measure trim length first. It’s linear footage. Baseboards, crown molding – all of it.
Doors and cabinets are square footage, like walls. But they’re usually smaller areas.
Application matters here. Trim needs careful cutting in. Doors and cabinets often need multiple coats or special finishes.
Exterior vs interior surfaces
Exteriors have more surfaces – soffits, eaves, siding. Measure each one separately.
Roughness counts here too. Exterior paint needs to cover rough surfaces and protect from weather. That means more paint per square foot.
Weatherproofing treatments like primers or sealers can add to your total. Make sure you account for those.
Paint Coverage, Coats, and Primer Considerations
Finish sheen, surface porosity, and primer use all affect how much paint you’ll need. Always check the manufacturer data sheets for realistic coverage expectations. A primer can cut the amount of topcoat you need, and tinted primers can change how you use the finish.
Porous walls drink more paint than slick plaster, and sheen level changes coverage. Use the right primer for the substrate and follow label directions; if unsure, check the label or datasheet. This matters because guessing can waste product and leave you with patchy results.
Coverage rates and how to verify them
The coverage rate on the paint can is a starting point. But don’t rely on it blindly. Surfaces vary, so you need to test.
Grab a small area – like behind a door or in a closet. Slap on a coat and see how much coverage you get. Adjust your estimate based on what you find.
Pro tip: Use the same paint type and roller/brush for testing as you will for the job. That way, you’re getting real-world results.
Primer and tinting impacts
Primer’s a game-changer. It seals porous surfaces, improves paint adhesion, and can reduce the number of topcoats needed. Win-win.
But here’s where it gets tricky: if you’re going from dark to light or vice versa, you might need an extra coat or two. That’s where tinted primer comes in – it can help even out the base color and cut down on topcoat needs.
Remember, every surface is different. So, always check the manufacturer’s guidelines for their specific paint lines.
Number of coats and visibility factors
The number of coats you need depends on what you’re seeing – or not seeing. If you’ve got a high-contrast color change, expect to apply more coats.
Surface defects like holes or cracks might also demand extra coats. You want that smooth, uniform finish, right?
Rule of thumb: Plan for two coats minimum. But if you’re going from white to black, you might need three or four. It’s better to have a little extra paint than not enough.

Common Avoidable Mistakes and How to Avoid Them
Common avoidable mistakes are wrong measurements, ignoring surface porosity, and not accounting for trim or primers. To prevent this, read the product label, follow the prep and application steps, and perform a small test patch before buying much. Always check the label/datasheet for specifics on your situation.
A quick test patch and a small test run save time, money, and hard-to-fix issues later. Understanding how the product reacts on your surface helps you plan trim, primers, and coats without surprises. If you’re unsure, check the label/datasheet and follow local disposal rules for any leftovers.
Underestimating rough or absorbent surfaces
Ever painted a textured wall or an old brick fireplace? You might’ve run out of paint halfway through. Porous and rough surfaces soak up more paint than smooth ones.
Here’s how to avoid this:
Test first, grab a small can of your chosen paint, and slap some on a hidden area. If it disappears like sand in water, you’ll need extra. Check the product label too – it might tell you how much more to use.
Adjust your calculations, once you know how much more paint you need, bump up your estimate. Better safe than sorry.
Ignoring color change and base coats
Changing from white to black? You’re gonna need more paint. Deep or contrasting colors require extra coats, sometimes even a primer.
Here’s how to plan for it:
Consider the contrast, if you’re going from light to dark or vice versa, assume you’ll need at least two full coats.
Check the label, some paints have better ‘hiding’ properties than others. If yours doesn’t hide well, you might need a primer too.
Add it all up, once you’ve factored in extra coats and maybe a primer, adjust your estimate again.
Mismatching batches and failing to label leftovers
You finish painting, put away the leftover cans, then a year later you need to touch up. But wait – those cans look identical! Which one is yours?
Here’s how to keep track:
Keep receipts and batch codes, when you buy paint, hold onto the receipt and make note of the batch code on the can. If you’re buying online, print out the order confirmation.
Store small amounts separately, keep a little bit of each color in a separate, clearly labeled container. That way, if you need to touch up, you know exactly which one to use.
Label cans, before you put away those leftover cans, label them with the project location and date. It’ll save you a lot of headache down the road.
Tools and Materials Checklist
This H2 covers the tools and materials you should bring and what to check before you buy. It breaks down measurement tools, protective supplies, application tools, and consumables. Focus on choosing quality rollers and brushes and inspecting packaging and labels before purchasing.
Having the right gear saves time and avoids rework. Quality rollers, brushes, and protective gear help you get better coverage and stay safe, so check labels and manufacturer guidance if anything is unclear.
Measurement tools and templates
Before you start cutting or drilling, use this checklist to ensure your measurements are accurate. This will save you time, material, and costly mistakes.
- Tape Measure: Check it’s calibrated correctly by measuring a known distance (like a standard door frame, which is typically 36″).
- Laser Measure: Test it on a straight line to ensure it’s reading accurately. Cross-check with your tape measure.
- Wall Dimensions: Measure the width and height of each wall you’ll be working on, including any doors or windows.
- Trim Sizes: Measure the width and height of trim pieces to ensure they fit properly. Check for any miter cuts needed at corners.
- Template or Outline: For complex shapes or patterns, create a template using cardstock or thin plywood. Test it before cutting your final material.
- Level and Plumb Bob: Verify walls are plumb (vertical) and level (horizontal) before measuring for trim or installing fixtures.
- Stud Finder: Locate studs behind drywall to ensure you’re securing your work properly. Test it on a known stud location first.
- Square Tool: Check that your square is accurate by measuring 90-degree angles around your workspace.
Quick rule: Always double-check your measurements and use multiple methods to confirm them. A few extra minutes spent checking can save hours of rework later on.
Paint and application tools
Use this checklist before starting your painting project to ensure you have the right tools for the job. This will help you achieve a professional finish and avoid costly mistakes.
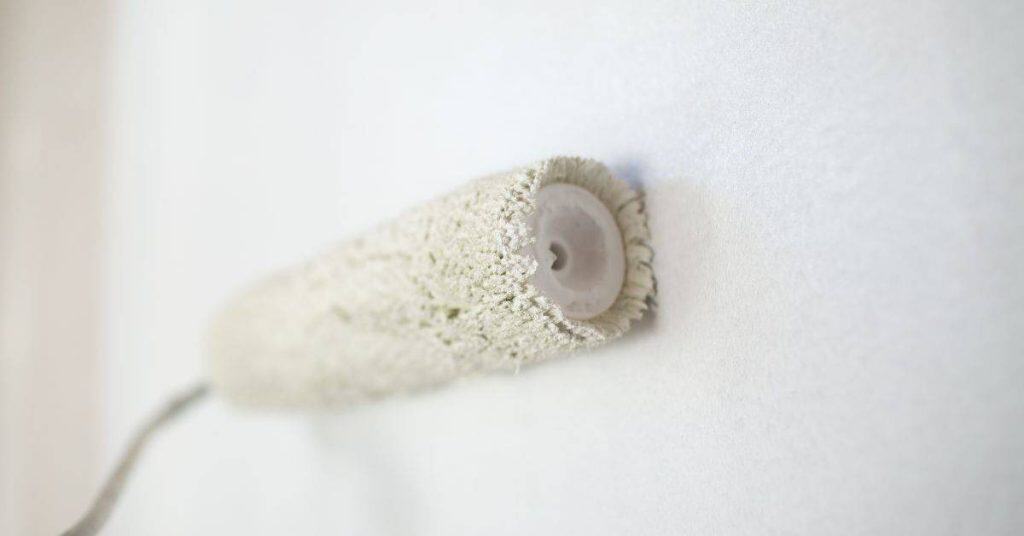
- Brushes: Check bristle type (natural or synthetic) and size (1/2″ to 4″). Natural bristles are best for oil-based paints, while synthetics work well with water-based paints. Too small a brush will take too long; too large may cause drips.
- Rollers: Inspect cover (3/8″, 1/2″, or 3/4″) and nap length (1/8″ to 3/4″). Smaller covers are for trim, larger for walls. Longer naps hold more paint but may leave marks; shorter naps offer better control.
- Roller handles: Ensure they’re compatible with your roller covers. Check if extension poles are needed for high ceilings or large areas.
- Trays: Make sure they’re deep enough (1″ to 2″) and wide enough (6″ to 9″) for your rollers. Too shallow may cause spills; too narrow restricts movement.
- Extension poles: If using, check length (18″ to 5′) and ensure they’re secure when extended. Too short means extra effort; too long can be unstable.
- Drop cloths: Verify size (6′ x 9′ to 12′ x 15′) and material (canvas or plastic). Plastic is cheaper but less absorbent; canvas is more durable but pricier. Too small may not protect your floor adequately.
- Painter’s tape: Check adhesion strength (medium or heavy-duty) and width (3/4″ to 2″). Medium duty is for most jobs; heavy-duty is for textured surfaces. Too narrow may not seal properly; too wide may be difficult to handle.
- Sandpaper: Inspect grit size (120 to 220) and type (wet/dry or dry only). Medium grit removes imperfections; fine grit smooths surfaces. Using the wrong grit can damage surfaces or leave visible marks.
Quick rule: Always check your tools before starting. The right tool for the job ensures a better finish and saves time and money in the long run.
Visual checkpoints and sample testing
Before you start painting, use this checklist to ensure your prep work is on point and your paint will apply as expected. Do these checks before you commit to a full purchase or application.
- Check Paint Color: Swatch the color on a small, hidden area to confirm it’s what you ordered and like.
- Inspect Surface: Look for any missed spots, imperfections, or areas that need touch-up sanding.
- Test Sheen Level: Ensure the sheen level (gloss, satin, flat) matches your needs by checking product labels or manufacturer instructions.
- Check Paint Consistency: Stir paint thoroughly and check for any lumps or inconsistencies. If unsure, pass it through a strainer.
- Verify Primer Application: Check that primer has been applied evenly and allowed to dry as per manufacturer’s instructions.
- Check Tape Lines: Ensure painter’s tape is secure, straight, and won’t peel off during painting. Test a small area for adhesion.
- Test Paint Application: Apply a small amount of paint to a hidden or inconspicuous area to check coverage, drying time, and final appearance.
- Check Weather Conditions: Ensure temperature and humidity are within the recommended range for painting (check product labels).
Quick rule: Always do a test patch before committing to a full application. It’s cheap insurance against expensive rework.
Cost Estimation and Buying Strategy
Translate your paint quantity estimates into a budget by comparing products and container sizes. Check the warranty, return policy, and local availability as you pick options. Plan for leftovers and label cans to save future costs.
This helps you avoid buying too much or too little and cuts waste. Look for how easy it is to return opened cans and whether a retailer has your local stock. Paint can go bad—watch for signs it’s bad like separation, odor, or thickening—and always check local household hazardous waste rules for disposal.
Buying for Leftovers and Future Touch-ups
Always buy a little extra paint. You’ll thank yourself later when you need to fix a scratch or cover a small area.
Label each can with the room, date, and any mix codes. This way, you know what’s in them and they’re ready for touch-ups.
Pro tip: Store cans properly, upright and away from heat sources. Check the manufacturer’s shelf-life recommendations to ensure your leftovers are still good when you need them.
Where to Buy and Comparing Products
Paint is paint, right? Not quite. Different brands have different qualities, warranties, and support.
Start by checking the technical datasheets. They’ll tell you about coverage, drying time, and other important details. Don’t forget to consider the warranty too.
If you’re unsure, ask for samples. Paint a small area with each one and see how they hold up over time. Also, check if there are any contractor or trade options available – sometimes these have better warranties or support.
Practical Examples, Formulas, and Printable Checklist
This section walks you through practical examples and simple formulas you can use on the job. Use area divided by coverage per container and placeholder variables so you can drop in the numbers you find on product labels.
You’ll also get a printable checklist of the measurement steps and items you need to buy for DIY work. It helps you plan, double-check your quantities, and avoid trips back to the store.
Small Room Example Walkthrough
Use this checklist for smaller rooms like bedrooms, bathrooms, or home offices.
- Measure length and width: Use a tape measure. Round up to nearest foot.
- Subtract openings: Doors, windows, and other openings. Don’t forget closets!
- Calculate area: Multiply length by width.
- Determine coats: Most paints need 2 coats. Absorbent surfaces may need more.
- Check product label: Note coverage per container (e.g., 10 sq ft/gal).
- Calculate quantity needed: Divide area by coverage. Round up to nearest whole number.
- Add 10-15% extra: For touch-ups, spills, and waste.
- Check label for color change: Some colors need base coats or additional paint.
- List on purchase list: Include product name, quantity needed, and any special notes.
Quick rule: Always round up to ensure you have enough paint.
Large Exterior Project Considerations
Use this checklist for large exterior projects like house painting or fence staining.
- Assess surface prep: Check for peeling paint, rot, or other damage. Repairs may be needed.
- Check weather forecast: Plan work around dry days to allow proper curing.
- Schedule contractors: If hiring help, coordinate their schedules with your painting plans.
- Calculate area: Measure each section (walls, trim, etc.) separately. Add them together.
- Determine coats: Exterior paints usually need 2-3 coats. Check product label for recommendations.
- Check product label: Note coverage per container and drying time.
- Calculate quantity needed: Divide total area by coverage. Round up to nearest whole number.
- Add 10-15% extra: For touch-ups, spills, waste, and potential re-coats due to weather.
- Plan for staging: Have drop cloths, ladders, and other equipment ready.
Quick rule: Exterior projects require more planning. Allow extra time for prep and drying.
Printable Measurement and Purchase Checklist
Use this printable checklist to keep track of measurements, product details, and purchases.
- Room/area: Write down the room or area you’re painting (e.g., Living Room).
- Length x Width: Record dimensions in feet.
- Subtract openings: List doors, windows, etc. and their sizes.
- Area: Calculate length x width – openings.
- Coats needed: Estimate based on surface type and product label.
- Coverage per container: Note from product label (e.g., 12 sq ft/gal).
- Quantity needed: Divide area by coverage. Round up to nearest whole number.
- Extra paint needed: Add 10-15% for touch-ups and waste.
- Product name: Write down the product name (e.g., Behr Ultra).
- Color: Note color name or number.
- Buy/verify list: List items to buy (paint, brushes, etc.) and what you’ve verified (e.g., ‘Checked coverage with store clerk’).
Quick rule: Keep this checklist handy throughout the project. Update it as needed.
Conclusion
Getting the estimate right protects the look, the long life of the paint, and your wallet. Do the math, plan for primers and coats, and you’ll avoid runny edges, thin spots, and expensive rework.
Check in this order: confirm the total wall area by room, note surface types and any textures, subtract windows and doors, estimate coverage per coat from the can or label, add a guard for extra coats and primer, and then compare to the total paint you can buy. Use the quick method for a fast pass, then refine with surface-type measurements and a printable checklist to lock in a safe, practical quantity. Test a small area first and adjust before you buy the whole order.
Common mistakes to avoid are guessing on area, underestimating required coats, and skipping primer when it’s needed. Always double-check measurements, read the paint label for coverage, and follow safe mixing and application practices. If a project involves tall ceilings, intricate trim, or potential moisture issues, consider bringing in a pro instead of pushing through on your own. Stay deliberate, stay safe, and you’ll finish with solid color that lasts and looks right. You’ve got this.
FAQ
How can I avoid misjudging paint by area?
Start with the surface area you measured in your plan. Check the product label or manufacturer instructions for how much area a gallon covers. Apply a small waste factor or extra for touch‑ups, and adjust if you’re using specialty finishes.
Should I count windows and doors separately in my estimate?
Yes. Subtract areas that won’t be painted or will get a different finish. For doors and trim, use their specific coverage guidance and don’t mix with wall paint in the same calculation unless the product labels say you can.
How do I use a simple method without getting tangled in details?
Estimate total wall area, then look up the paint’s coverage per gallon on the label. Add a little extra for corners, edges, and doors. If you’re unsure, check the manufacturer instructions and local rules for any special considerations.
When should I estimate primer and multiple coats?
Primer needs are shown on the primer label. If you’re applying a light or dark color over a previous finish, plan for an extra coat or two as guided by the product instructions. Always verify with the product label and manufacturer guidance.