

Introduction
Concrete care is keeping slabs and surfaces clean, protected, and maintained to prevent damage.
Regular observation helps you spot cracks, moisture intrusion, or wear before it worsens. If you see something off, check the product label or local guidelines before acting.
Fixes that last come from addressing the root cause with simple, durable steps you can do yourself. Use a clean brush or broom, follow surface prep, and apply an appropriate patch, sealant, or coating per instructions. Always test a small area first and follow manufacturer guidance or local rules for curing times and protections.
Key takeaways
- Inspect for cracks and spalling after seasonal freezes; address promptly to prevent widening.
- Keep surfaces clean before repairs; dust and debris hinder bonding and sealant performance.
- Use proper PPE and ventilation when mixing concrete-related repairs for safety.
- Check manufacturer guidelines for repair products and cure times, avoid shortcuts.
- Schedule inspections after major weather events to catch hidden damage early.
- Develop a long-term maintenance plan with periodic cleaning and resealing.
Table of Contents
- Introduction
- Key takeaways
- Quick Principles of Concrete Care
- Common Types of Concrete Damage and Their Causes
- Inspection Checklist and Visual Checkpoints
- Tools and Materials Checklist
- Durable Repair Techniques: Step-by-Step Guidance
- Preventive Care, Cleaning, and Sealing Strategies
- Seasonal and Climate-Specific Guidance
- Long-Term Maintenance Plan and When to Call a Professional
- Conclusion
- FAQ
Quick Principles of Concrete Care
Concrete durability hinges on keeping moisture balanced, avoiding heavy loads beyond its capacity, and ensuring proper curing. Regular upkeep prevents small issues from turning into costly repairs.
Preventive care beats reactive fixes every time. Check labels and manufacturer guidance when selecting sealers or curing compounds and follow local rules.
Why proactive maintenance matters
Maintaining your concrete isn’t just about keeping it looking good. It’s about preventing small issues from turning into big, expensive problems.
Cracks start small. Water seeps in, freezing and thawing causes damage. Before you know it, you’re looking at a costly repair or even replacement.
Regular inspection lets you catch these issues early. A quick fix now saves you time, money, and stress later on.
Remember: Prevention is always cheaper than cure.
Key environmental and load factors
Concrete’s tough, but it’s not invincible. Here are some things that can cause damage:
Water: It seeps into cracks, freezes, and expands, causing more damage.
Freeze-thaw cycles: These weaken concrete over time. De-icing salts speed up this process.
UV rays: They can dry out concrete, making it more susceptible to cracking.
Traffic loads: Heavy vehicles or foot traffic can cause surface damage and cracks.
Poor drainage: Standing water accelerates all these processes. Keep your concrete dry where possible.
Common Types of Concrete Damage and Their Causes
Cracks, spalling, scaling, efflorescence, staining, and settlement each point to a root cause you can trace. Understand whether movement, moisture, or chemical exposure is driving the failure.
Link each damage type to likely causes like improper curing, freeze-thaw cycles, poor base prep, or exposure to salts and acids. This helps you diagnose before choosing a repair method.
Cracks: hairline to structural
Concrete cracks are common, but not all are created equal. Let’s differentiate them.
Hairline and shrinkage cracks: These are thin, usually less than 0.1mm wide. They’re often due to concrete drying too fast or insufficient curing. They won’t get worse if the cause is addressed.
Thermal and settlement cracks: These form due to temperature changes or settling of the foundation. They can be wider, but usually aren’t structural issues unless they’re growing.
Load-related and reinforcement-corrosion cracks: These are serious. They’re wide (over 0.1mm), often diagonal, and may indicate structural problems or reinforcing steel corrosion. If you see these, get a pro’s opinion.
Surface defects: scaling, spalling, and pop-outs
Concrete surfaces can deteriorate in several ways. Here are the most common.
Scaling: This is when the top layer of concrete flakes off. It’s often due to freezing-thawing cycles or using de-icing salts. If it’s just the surface, you might be able to grind and reseal.
Spalling: Spalling is deeper than scaling. Pieces break off, exposing the aggregate underneath. This could be due to poor finishing, freezing-thawing, or even a weak concrete mix. Repairs need substrate prep to prevent recurrence.
Pop-outs: These are small pieces that pop out of the surface. They’re usually due to air voids in the concrete. If they’re small and not many, you can fill them. Otherwise, it might be a sign of poor construction.
Stains, efflorescence, and biological growth
Concrete can stain and grow things. Here’s how to identify and tackle these issues.
Stains: Concrete can absorb liquids, staining it. Oil, rust, and organic matter are common culprits. Cleaning might help, but sometimes you’ll need to seal or replace the concrete.
Efflorescence: This is when white salts rise to the surface, often due to moisture moving through the concrete. It’s usually harmless but unsightly. Scrubbing with a acid-based cleaner can help.
Biological growth: Mold, mildew, and algae can grow on concrete, especially in damp areas. They’re slippery and unsightly. A bleach solution or specialized cleaner can kill them. Prevent recurrence by improving drainage and reducing moisture.
Inspection Checklist and Visual Checkpoints
Establish a simple weekly or monthly inspection routine and stick to it. Photograph cracks, color changes, and surface texture from multiple angles.
Note any new movement or moisture signs and check for trip hazards. Always follow safety precautions and work from a stable area.
What to look for at a glance
Use this quick checklist whenever you inspect your concrete surfaces. It helps catch issues early.
- Widening cracks: Check for hairline cracks growing wider. They can indicate structural issues if ignored.
- Exposed aggregate: Look for areas where the top layer has worn off, exposing the coarse aggregate beneath. This reduces durability.
- Pools of water: Standing water can cause damage over time. Ensure proper drainage.
- Corroded rebar: Check for rust stains or cracks above where rebar is located. Corrosion weakens reinforcement.
- Uneven surfaces: Feel for dips or bumps. They can indicate underlying problems.
- Cracking around edges: Inspect corners and joints. Cracks here can lead to larger issues.
- Discoloration: Check for stains, efflorescence, or biological growth. These may indicate moisture or other problems.
- Spalling or pop-outs: Look for flaking or popping off of the surface. This reduces structural integrity.
Quick rule: If you spot any of these, inspect further and address promptly to prevent bigger issues.
Measuring severity and deciding urgency
After your initial inspection, use this checklist to assess damage severity and decide on repairs.
- Crack width: Measure cracks. Hairline (less than 0.2mm) are minor, wider ones need attention.
- Crack length: Longer cracks indicate more severe issues. Anything over 1m should be checked by a pro.
- Number of cracks: More cracks mean bigger problems. Consider professional help if there are many.
- Rebar exposure: If rebar is exposed, it’s urgent. Rust can cause rapid deterioration.
- Water presence: Standing water that doesn’t drain within 24 hours indicates a serious problem.
- Surface area affected: More than 10% of the surface damaged? It might be time to call in experts.
- Structural integrity: If you suspect damage affects structural soundness, consult a professional immediately.
- Previous repairs: Check if previous fixes have failed. This indicates recurring issues need addressing.
Quick rule: Take photos and notes to document severity. For minor cosmetic issues, DIY repairs may suffice. Anything urgent or structural, call a pro.
Tools and Materials Checklist
Assemble a basic DIY toolbox with sturdy hand tools, a mixer or paddle, gloves, eye protection, and a respirator where needed. Have items for cleaning and surface prep ready before you start.
Double check labels and compatibility on primers, patch compounds, and sealers. When a job needs specialty equipment or controlled conditions, consider renting from a reputable outfit.
Essential hand and power tools
Before you start any repair work, ensure you have the right tools. This checklist helps you prepare for small repairs that last.
- Tape measure: Measure cracks and defects to determine severity.
- Chisel: Remove loose concrete and prepare surfaces for patching.
- Hammer: Tap chisels and drive nails when needed.
- Wire brush: Clean surfaces to remove dust, debris, and loose material.
- Putty knife: Apply repair materials smoothly and evenly.
- Safety glasses: Protect your eyes from debris and falling objects.
- Work gloves: Prevent hand injuries while handling tools and materials.
- Respirator (optional): Protect against dust when grinding or chipping concrete.
Quick rule: Always wear safety gear to protect yourself from potential hazards.
Repair materials and how to choose them
Selecting the right repair material is crucial for a lasting fix. This checklist helps you choose the best product for your concrete damage.
- Patching mortars: Ideal for filling cracks, holes, and other surface defects.
- Bonding agents: Enhance adhesion between old and new concrete surfaces.
- Epoxies: Suitable for structural repairs and heavy-duty applications.
- Sealers: Protect concrete from moisture, stains, and other damage.
- Silicone caulk (optional): Fill small cracks and joints to prevent water intrusion.
Quick rule: Always check product labels for compatibility with your specific repair needs and follow manufacturer guidelines for best results.
Durable Repair Techniques: Step-by-Step Guidance
Begin with thorough surface prep, removing damaged concrete and creating a sound base. Match repair materials to the substrate and expected load.
Mix and apply following manufacturer instructions, then cure correctly and protect from traffic. Avoid common mistakes like skipping prep, improper mixing, or premature loading.
Step-by-Step Repair Process
Follow these practical steps for durable concrete repairs. Safety first, then prep, main work, and cleanup.
- Inspect the area, wear safety gear (gloves, glasses).
Reason: Safety first, protect yourself from debris.
Check: Ensure you’re wearing appropriate PPE. - Clean the surface using a wire brush or pressure washer.
Reason: Remove dirt, dust for better adhesion.
Check: Surface should be clean and dry. - Prepare the repair area by chipping out damaged concrete (if needed).
Reason: Removes unsound material, improves repair’s strength.
Check: Area is stable, no loose pieces remaining. - Mix your chosen repair mortar or concrete according to package instructions.
Reason: Correct mix ensures best results.
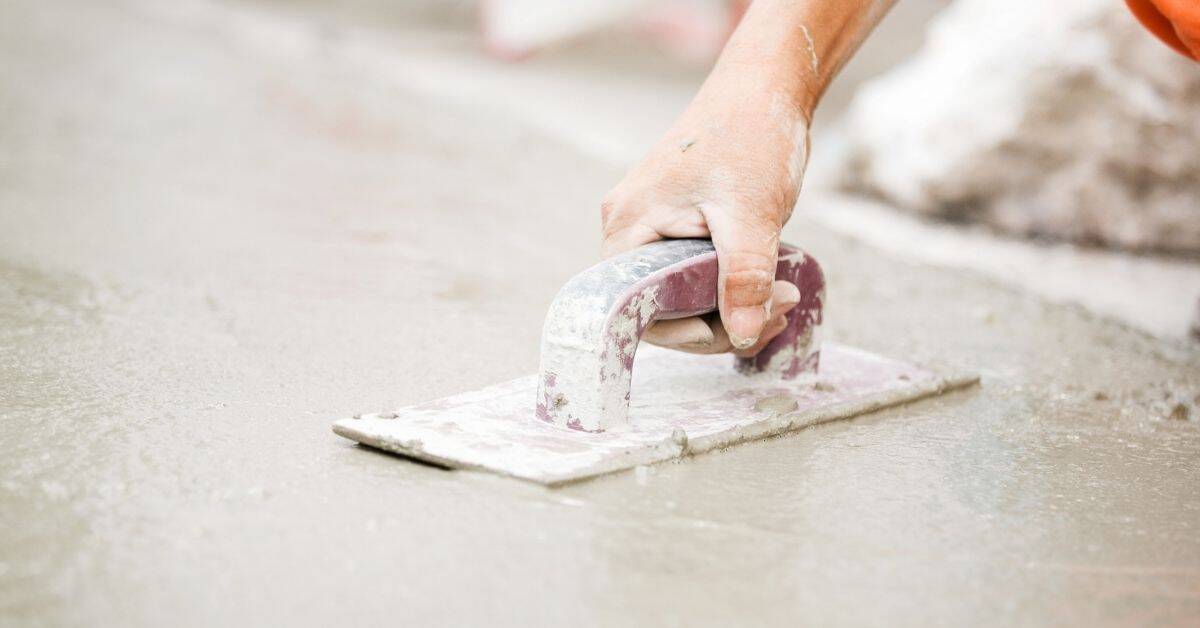
Check: Mix has consistent texture and color. - Apply the mixture using a trowel or shovel, leveling as you go.
Reason: Even application prevents weak spots.
Check: Surface is smooth, no air pockets. - Finish the repair to match surrounding concrete’s texture.
Reason: Prevents tripping hazards, improves aesthetics.
Check: Repair blends in with existing surface. - Cure the repair properly using plastic sheeting or specialized curing compounds.
Reason: Proper curing prevents cracking and strengthens the repair.
Check: Repair is kept moist for recommended time (usually 7 days). - Inspect your work after curing, ensure it’s sound and level.
Reason: Early detection of issues saves time and money.
Check: Repair looks good, feels solid.
Fixing non-structural cracks
Tackle minor cracks with these steps to prevent moisture ingress and further damage.
Start by cleaning the crack using a wire brush or compressed air. This removes any dirt or debris that could hinder adhesion.
Tip: A narrow, deep crack may need routing (widening) for better filler penetration.
Apply your chosen sealant or filler according to package instructions. Use a caulking gun or trowel depending on the product.
Reason: Filling cracks prevents water from entering and causing further damage.
Check: Crack is fully filled, no gaps remain.
Finish by tooling the repair to match surrounding concrete’s texture. This helps prevent tripping hazards and improves aesthetics.
Reason: A smooth, even surface reduces trip risks and looks better.
Check: Repair blends in with existing surface.
Patching spalls and surface repairs
Follow these steps to repair concrete spalls and other surface defects, restoring strength and appearance.
Remove any unsound or loose concrete using a chisel and hammer. This ensures a stable base for your repair.
Reason: Removing weak material prevents further deterioration.
Check: Area is clean, stable, and free of loose pieces.
Prepare the substrate by cleaning it thoroughly with a wire brush or pressure washer. This removes dirt and dust that could hinder adhesion.
Select a suitable repair mortar or concrete mix based on your needs (fast-setting, high-strength, etc.).
Apply the mixture using a trowel or shovel, ensuring even coverage and proper compaction.
Finish by tooling the repair to match surrounding concrete’s texture. This helps prevent tripping hazards and improves aesthetics.
Cure the repair properly using plastic sheeting or specialized curing compounds. This allows the patch to gain full strength.
Reason: Proper curing prevents cracking and ensures a strong, durable repair.
Check: Repair is kept moist for recommended time (usually 7 days).
Repairing exposed or corroding reinforcement
Exposed rebar can lead to corrosion and structural issues. Follow these steps for effective repairs.
Remove any rust using a wire brush, grinding wheel, or other suitable tool. This exposes clean metal for better adhesion.
Treat the rebar with a suitable primer or inhibitor to prevent further corrosion.
Apply a corrosion-inhibiting product according to package instructions. This helps protect the rebar from future damage.
Note: If rust is extensive, consult a professional before proceeding.
Select a repair mortar designed for structural integrity and apply it according to package instructions. Ensure proper compaction to avoid weak spots.
Finish by tooling the repair to match surrounding concrete’s texture. This helps prevent tripping hazards and improves aesthetics.
Cure the repair properly using plastic sheeting or specialized curing compounds. This allows the patch to gain full strength.
Regularly inspect your repairs for signs of further corrosion or damage. Early detection saves time, money, and prevents major issues.
Reason: Regular checks help maintain structural integrity and prolong the life of your concrete.
Check: Repair looks good, feels solid, no signs of recurring rust.
Preventive Care, Cleaning, and Sealing Strategies
Regular cleaning prevents buildup that hides damage and accelerates wear. Use appropriate cleaners and avoid harsh scrapers on the surface.
Consider penetrating sealers for moisture control or topical coatings for wear resistance, and weigh the difference. Reapplication depends on product guidance and observed performance.
Safe cleaning and stain removal
Concrete is durable, but harsh cleaners can damage it. Here’s how to tackle common stains safely:
Oil stains: Use a degreaser designed for concrete. Apply, let it soak, then scrub and rinse.
Mold or mildew: Mix 1 part bleach with 3 parts water. Spray on, let it sit, then scrub and rinse. Avoid acid-based cleaners as they can damage the surface.
Pressure washing: Use low pressure (under 1200 PSI) to avoid etching or damaging the concrete. Keep the nozzle at least 6 inches from the surface.
Choosing and applying sealers or coatings
Sealers protect your concrete, but not all are created equal. Here’s how to choose:
Penetrating sealers: These soak into the concrete, protecting from within. They’re breathable, good for driveways and patios.
Acrylic sealers: These form a film on top of the surface. They’re affordable but less durable than urethanes or epoxies. Good for indoor use.
Urethane/Epoxy coatings: These are tough, long-lasting, and ideal for high-traffic areas like garages or industrial settings. They can trap moisture if not applied correctly, so ensure your concrete is dry and clean first.
Seasonal and Climate-Specific Guidance
Adapt care plans to climate stresses like freeze-thaw, heat, or coastal salt exposure. Prioritize drainage and timely repairs in tougher environments.
Verify product options with local requirements and test patches before wide use. Choose techniques and materials that tolerate your climate.
Winter and Freeze-Thaw Precautions
In regions with freezing temperatures, water can expand and contract concrete, causing damage. Here’s how to protect your concrete:
Ensure proper drainage. Water should flow away from the slab. If it pools, consider installing a French drain or regrading.
Use temporary covers during extreme cold. This can help insulate the concrete and prevent freeze-thaw cycling.
Be cautious with de-icers. While they melt ice, some can damage concrete over time. Use sparingly or opt for alternatives like sand or gravel.
Time your repairs wisely. Avoid pouring new concrete in freezing temperatures. If you must, use accelerators and protect the curing slab from freeze-thaw cycles.
Hot, Sunny, and Coastal Considerations
Concrete in hot, sunny, or coastal areas faces unique challenges. Here’s how to adapt your care:
UV exposure can dry out and crack concrete. Apply a UV-resistant sealer to protect the surface.
High temperatures cause thermal stress. Ensure proper curing and consider using heat-reflective coatings.
Coastal areas with salt spray need extra care. Regularly clean off salt deposits. Use a sealer designed for coastal environments. Consider using corrosion-resistant reinforcement if rebuilding.
Long-Term Maintenance Plan and When to Call a Professional
Create a simple multi-year maintenance schedule with regular inspections and routine tasks. Keep records of work, warranties, and contractor notes.
Know the indicators for engaging a structural engineer or licensed contractor, and document work for warranties or claims. Build a plan you can follow and adjust as conditions change.
Building a Personalized Maintenance Schedule
Every concrete structure is unique, so your maintenance plan should be too. Start by considering these factors:
Traffic: High-traffic areas like driveways and walkways need more frequent inspections and repairs.
Climate: Extreme temperatures, humidity, or freeze-thaw cycles can speed up deterioration. Adjust your schedule accordingly.
Age: Older concrete may require more attention. Inspect it annually after the first five years.
Red Flags That Require Professional Evaluation
Some issues can’t wait for your next scheduled maintenance. If you spot any of these, call a pro immediately:
Rapidly widening cracks: Cracks growing quickly or wider than 1/4 inch need professional attention.
Sagging or uneven slabs: Uneven settling or sloping could indicate structural issues.
Exposed or advanced rebar corrosion: If you see rust stains or exposed rebar, it’s time to call a pro. Active water infiltration also requires immediate attention.
Conclusion
Safety first and a practical plan pay off in the long run. When you care for concrete properly, you keep people safe, preserve appearance, and avoid costly repairs.
Do an on-site check for cracks, spalling, and moisture; pick the repair method that fits the damage; assemble the appropriate tools and materials; test the patch on a small area; apply repairs with clean surfaces, then protect with sealing, and plan seasonal checks and preventive care.
Avoid common missteps: never rush a repair or skim over the prep stage; don’t mix repair materials unless the product instructions allow it; don’t seal or coat a wet or dirty surface, and don’t ignore persistent moisture or movement—these shortcuts wreck results and ice the bill.
If you face wide or structural cracks, exposed steel, or movement beyond a simple patch, call in a professional. For everything else, stay disciplined, follow your checklist, and finish with a solid maintenance plan—you’ll see the concrete stay solid and look good for years to come.
FAQ
How do I decide between patching vs replacing damaged concrete?
Look at how large and deep the damage is. Small cracks and worn spots can usually be patched. Big hollow areas or widespread deterioration may need replacement. If in doubt, check the patch product instructions and local guidelines before moving forward.
What surface prep is needed before patching?
Remove any loose material and debris from the area. Dampen the surface so it isn’t dry, but don’t leave standing water. Clean with a stiff brush to help the patch grab.
How long should I wait after repair before sealing or finishing?
Follow the patch product’s cure time guidance. In general, you want the repair to cure enough to hold its shape before applying a sealer or finish. If the surface feels tacky, give it more time and recheck the manufacturer instructions.
What steps help prevent future damage from moisture and freeze-thaw cycles?
Ensure water drains away from the repair and the slab edges. Keep surfaces clean so water doesn’t trap dirt. Use proper joint filling where required and patch correctly to minimize water ingress.