
Introduction
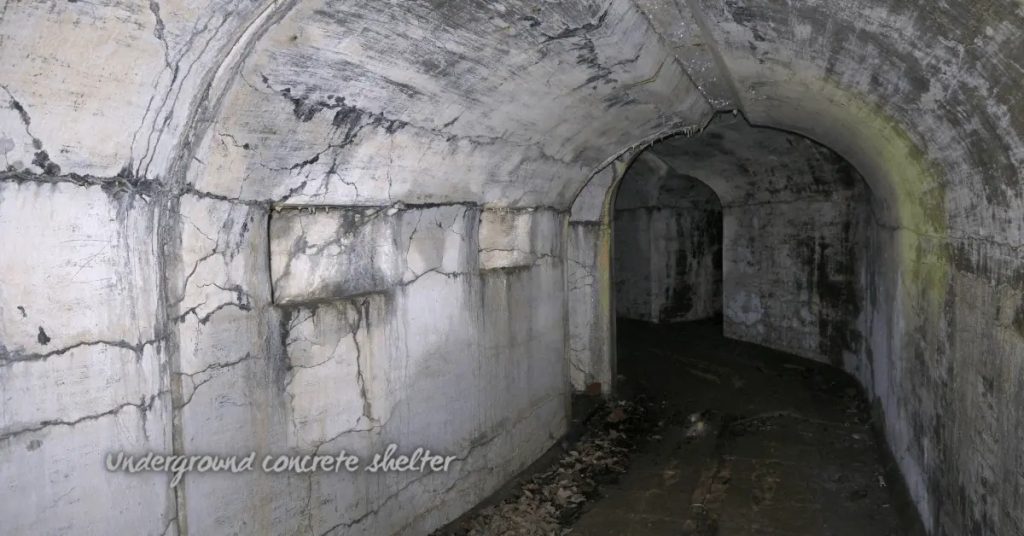
Worn concrete is concrete that has lost surface quality or strength and should be checked and repaired rather than ignored. Look for cracks, spalling, scaling, discoloration, and any movement or moisture behind the slab.
Repair options vary from clean patches and crack sealing to resurfacing, depending on how deep and widespread the wear is. Always follow manufacturer instructions and local rules, and check labels to pick safe methods and materials for your project.
Key takeaways
- Inspect wear type (spalling, scaling, cracks) to choose patching, resurfacing, or replacement.
- Verify surface cleaning, moisture, and surface profile before any patch or overlay.
- Use manufacturer instructions and local codes for products plus safety gear.
- Non-structural wear: pressure wash, dry, and use compatible patching material.
- Structural repairs require proper crack remediation, reinforcement, and professional review.
- Plan for maintenance: reseal, clean, and monitor for new cracks yearly.
Table of Contents
- Introduction
- Key takeaways
- Quick Assessment — Determine Severity and Type of Wear
- Common Causes of Concrete Wear and How to Spot Them
- Surface Repairs: Cleaning, Sealing, and Patching Non-Structural Wear
- Resurfacing, Overlays, and Levelers — When and How to Choose
- Structural Repairs — Crack Remediation, Reinforcement, and Slab Replacement
- Tools, Materials Checklist and Material Specs to Verify
- Step-by-Step Repair Workflows for Common Scenarios
- Costs, Lifespan, Maintenance Schedule, and Hiring a Contractor
- Conclusion
- FAQ
Quick Assessment — Determine Severity and Type of Wear
Walk the area and note whether wear is on the surface, localized spalling, or signs of deeper deterioration. Look for cracks, hollow sounds, exposed aggregate, or map-like patterns that betray movement. Record locations, extent, and any changes since the last inspection.
Use these observations to decide urgency and scope. If signs point to structural concerns, plan a deeper evaluation before planning any patching. When in doubt, verify with the product label, manufacturer instructions, or local rules to confirm acceptable remedies.
Visual checkpoints and documentation
Before you start any repairs, use this visual checklist to assess your concrete’s condition. It’s best to do this on a dry day with good lighting.
- Discoloration: Check for stains or patches of different colors. These could indicate efflorescence (salt deposits) or other issues.
- Scaling: Look for flaking or peeling surface layers. This is often a sign of weak concrete or improper curing.
- Delamination: Check for areas where the concrete seems to be lifting or separating from its base. This could indicate a bond failure.
- Cracks: Inspect for hairline cracks or larger ones. Note their width, length, and any patterns.
- Spalling: Check for chipping or flaking of the concrete’s surface. This can be caused by freezing/thawing cycles or improper mixing.
- Uneven surfaces: Look for areas that are higher or lower than surrounding sections. These could indicate settling or other structural issues.
- Exposed reinforcement: Check if any steel bars or wires are visible. This is a serious issue as it can lead to corrosion and further deterioration.
- Photograph and map: Take pictures of affected areas from different angles. Also, mark their locations on a sketch or use GPS coordinates for larger properties.
Quick rule: Always document your findings. This helps in tracking progress and making informed decisions during repairs.
Simple functional tests and probes
After your visual inspection, perform these non-destructive tests to gauge the severity of damage. They’re quick, easy, and don’t require any special tools.
Sound testing: Tap the concrete with a hammer or even a coin. Listen for a dull thud instead of a clear ringing sound. A dull thud indicates delamination or other internal issues.
Probing: Use a screwdriver or a small chisel to gently probe any cracks or areas of concern. If the concrete crumbles easily, it’s a sign of weak or damaged concrete.
Tapping: Tap along the edges and corners of your concrete structure. A hollow sound could indicate that the concrete has separated from its base.
When to escalate to a professional inspection
While you can perform many repairs yourself, there are times when it’s best to consult a structural engineer or qualified contractor. Use this checklist to determine when to seek professional help.
- Movement: If your concrete is moving or shifting in any way, it could indicate serious structural issues that need immediate attention.
- Large cracks: Cracks wider than 1/4 inch (6 mm) should be inspected by a professional. They could signal significant damage or settlement problems.
- Exposed reinforcement: If you see any exposed steel bars or wires, it’s crucial to get professional advice as soon as possible.
- Cracking at corners: Cracks that start or widen at corners are often a sign of serious structural issues. Don’t attempt repairs yourself in these cases.
- Diagonal cracks: These can indicate that your concrete is under excessive stress and needs professional evaluation.
- Sinking or lifting: If any part of your concrete is sinking or lifting, it could be a sign of soil settlement or other structural problems. Get it checked by a pro.
- Water damage: Persistent water issues can lead to serious deterioration over time. If you suspect water damage, consult a professional.
Quick rule: When in doubt, always err on the side of caution and consult a professional. It’s better to be safe than sorry when it comes to structural integrity.
Common Causes of Concrete Wear and How to Spot Them
Identify environmental, mechanical, and chemical influences such as freeze–thaw exposure, load stress, and corrosive exposure. Look for wind or vehicle abrasion, scaling on sidewalks, or chemical staining that hints at exposure types. Correlate damage patterns with likely causes for better repair decisions.
Match observed clues to probable mechanisms to guide repair choices. If unsure, check the substrate conditions, adjacent materials, and any applicable code or guidance from manufacturers. Verify any environmental or exposure specs on product data sheets before proceeding.
Weather and Freeze-Thaw Related Damage
Concrete’s enemy number one is moisture. When it freezes, water expands, putting pressure on the concrete. This can cause scaling – small flakes or chips breaking off from the surface.
Look for these signs: surface pop-outs, small cracks, and flaking. Check for moisture cycles too – if water’s pooling on your concrete, it’s a problem waiting to happen.
In winter, watch out for snow melt refreezing at night. That’s a classic freeze-thaw cycle right there. Keep an eye on those areas.
Abrasion and Mechanical Wear from Traffic
Heavy foot or vehicle traffic can wear down your concrete over time. You’ll see this as surface loss, with the top layer wearing away, exposing the aggregate underneath.
Look for these signs: exposed aggregate, shallow grooves from tires or feet, and worn-down edges. Check high-traffic areas like driveways, walkways, and around heavy equipment.
Abrasion’s a tough one to fix. You’ll likely need to resurface or replace the affected area with a tougher mix.
Chemical Attack and Deicing Salts
Salts, acids, and other chemicals can corrode your concrete. You’ll see this as scaling, where a white, powdery layer forms on the surface. It might also cause cracks or discoloration.
Look for these signs: white patches, stains, and unusual odors. Check areas where chemicals are used, like garage floors or driveways with heavy salt use in winter.
If you suspect chemical attack, take a sample. Send it to a lab for testing. They can tell you what’s causing the damage and how to fix it.
Surface Repairs: Cleaning, Sealing, and Patching Non-Structural Wear
Begin with thorough cleaning to remove loose material and contaminants. Choose patching or resurfacing products appropriate for foot traffic and expected wear, and apply per the prep and application instructions. Emphasize that a sound substrate is essential for long-lasting results.
Assess the expected performance difference between sealing, patching, and light resurfacing. If the substrate is compromised, consider more substantial remedies after confirming suitability with manufacturer guidance or local codes. Always verify product labels and installation guidelines before mixing or applying.
Cleaning and surface preparation best practices
Before you start any repairs, you need to clean the concrete surface. Remove all contaminants like dirt, grease, or loose material.
Use a wire brush, pressure washer, or even a stiff broom for light cleaning. For tougher jobs, use muriatic acid diluted with water (follow safety guidelines).
Important: Ensure you remove laitance – the weak, fuzzy layer on new concrete. It must go to ensure proper bond.
Patching spalls, chips, and shallow defects
For small to medium surface defects like spalls or chips, use repair mortars or patch products. These are easy to apply and durable.
First, clean the area thoroughly. Remove all loose material and ensure the edges are sound.
Moisten the substrate lightly before applying the patch. This helps prevent suction that could cause the patch to dry too quickly.
Apply the patch according to the manufacturer’s instructions. Use a trowel or squeegee for even application.
Sealers, cures, and protective coatings
After patching, seal the surface to protect it from further damage. Sealers can be either penetrating (soak into the concrete) or film-forming (create a barrier on top).
Penetrating sealers are good for preventing water intrusion. Film-forming sealers provide better protection against chemicals and abrasion.
Compatibility is key: Ensure your sealer is compatible with your patch material and the existing concrete.
Apply sealers according to manufacturer’s instructions. Usually, this involves applying a thin, even coat using a roller or sprayer.
Resurfacing, Overlays, and Levelers — When and How to Choose
Compare thin resurfacing options, decorative overlays, and self-leveling products based on substrate condition and traffic. Consider finish requirements, slip resistance, and ease of maintenance when selecting a path forward. Note any limitations that could affect durability or adhesion on your slab.
Match the chosen method to your needs and site conditions, not just appearance. If you’re unsure about substrate compatibility, consult the manufacturer instructions or a local pro for clarification. Always verify allowable substrates and preparations per the data sheet or label.
Thin overlays and micro-toppings for cosmetic renewal
Micro-toppings are your go-to when you want to freshen up that old concrete. They’re thin, they’re quick, and they don’t break the bank. But before you grab your trowel, let’s make sure you’re on the right track.
When to use micro-toppings: If your concrete is still structurally sound but looks tired – cracks, stains, or just plain dull – micro-toppings can give it a new lease on life. They’re not meant for fixing major issues like settling or spalling.
Substrate criteria: First, check the base compaction. It needs to be solid; no soft spots. Next, look at the surface. If it’s rough and porous, you might need to grind it first to improve adhesion. Also, make sure there are no active cracks – they’ll just show through your new topcoat.
Remember, micro-toppings are thin – usually around 1/8″ to 1/4″. They’re not a fix-all. If you’ve got major issues, you might need to look into resurfacing or overlays instead. But for minor touch-ups and cosmetic renewal, they’re just the ticket.
Cementitious and polymer-modified overlays
Alright, listen up. You’ve done the prep work, now it’s time to choose your overlay. Here’s what you need to know about cementitious and polymer-modified ones.
Polymer modification is like giving concrete a boost. It improves performance – strength, durability, and flexibility. Expect better resistance to cracking, scaling, and chemicals. But check compatibility with your existing concrete. Not all overlays play nice together.
Cementitious overlays are thick (1/4″ to 2″) and great for leveling minor imperfections. They’re tough, but can crack if not applied right. So, make sure you’ve done a good job with your base compaction and follow the manufacturer’s instructions.
Polymer-modified overlays are thinner (1/8″ to 3/4″), more for cosmetic renewal like we talked about earlier. They’re flexible, so they move with the concrete instead of cracking. But remember, they’re not a fix-all. If your concrete is bad, you’ll still need to address that first.
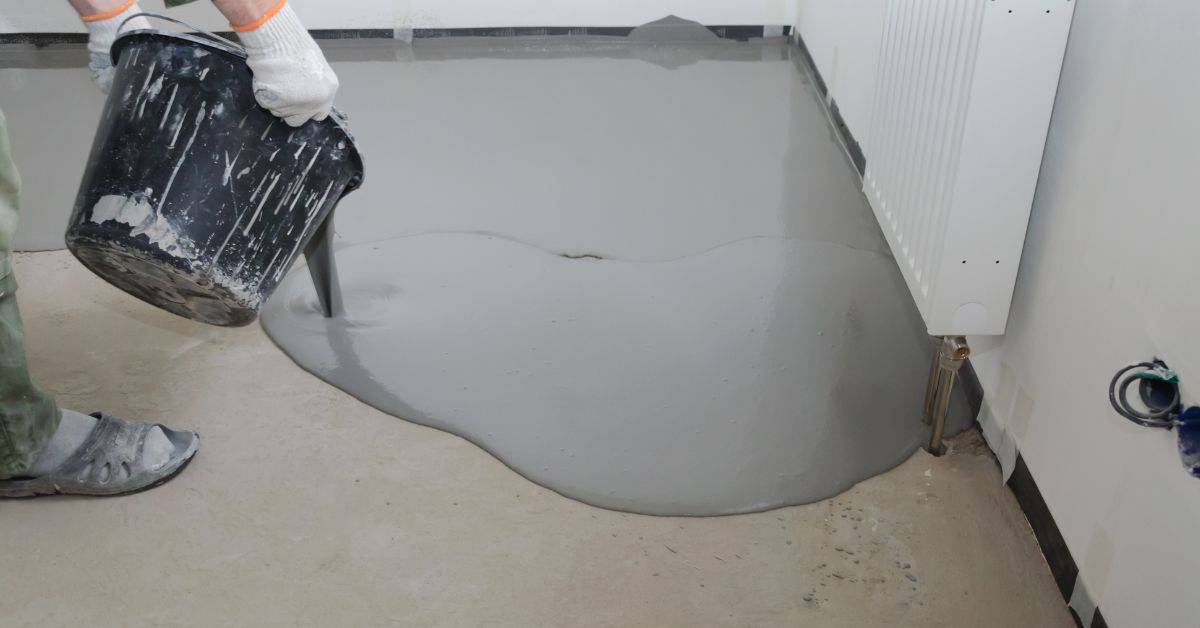
Self-leveling compounds and correcting uneven slabs
Self-levelers are your go-to when you’ve got minor dips or humps in your concrete slab. They’re not for major repairs, mind you – that’s a job for mucking out and replacing. But for those little imperfections, they’ll do the trick.
First things first, check your base compaction. If it’s not sound, no amount of leveler will help. Prime that slab too – self-levelers need a good bond to work right. Follow the product label for the best primer to use.
Now, mix your self-leveler according to the manufacturer’s instructions. Don’t be stingy with water; you want it fluid enough to level out nice and smooth. Pour it on, spread it around with a trowel or squeegee, and let it do its thing.
Remember, these compounds set fast – usually within an hour or so. So don’t dilly-dally. And once it’s set, you can top it off with a thin overlay or micro-topping for that final finish. But that’s a story for another time.
Structural Repairs — Crack Remediation, Reinforcement, and Slab Replacement
Outline methods for cracks, spalled sections, and deteriorated reinforcement, including when partial repairs are appropriate versus full replacement. Assess whether exposure or corrosion demands surface treatment, epoxy or injected remedies, or reinforcement replacement. Plan around potential structural implications and safety concerns.
Make sure the intervention chosen aligns with the observed condition and structural risk. Do a thorough assessment before committing to repair or demolition decisions. Verify applicable methods and any code requirements on product literature or local guidelines.
Crack repair options and selection guidance
Concrete cracks are inevitable, but they needn’t spell disaster. The key is choosing the right fix based on crack width, movement, and structural significance.
Narrow cracks (less than 0.2mm) can be sealed with a flexible sealant after routing to create a V-shaped groove. This prevents water intrusion and further cracking.
For wider cracks (up to 5mm), consider injection grouting. Drill holes along the crack, insert ports, then pump in an expansive foam or resin to fill and stabilize.
If a crack is structurally significant (over 0.6mm wide, shows movement, or affects load-bearing elements), dowelling might be needed. This involves drilling holes, inserting steel bars, and grouting them in place to reinforce the structure.
Exposed reinforcement and corrosion treatment
Exposed rebar or mesh is a red flag. Corrosion can weaken concrete, leading to costly repairs or even collapse. Here’s how to treat it:
First, clean the exposed steel. Remove any loose rust, scale, or contaminants using wire brushing, sandblasting, or grinding.
Next, apply a corrosion inhibitor. These chemicals prevent further corrosion. Common types include zinc-rich primers, phosphates, and inhibitive pigments mixed into new concrete cover.
Finally, restore proper concrete cover. Replace any missing or damaged concrete to protect the steel from oxygen and moisture. The ideal cover is at least 2 inches (50mm) for rebar and 1 inch (25mm) for mesh.
When partial repair is enough vs full replacement
Before deciding between a partial repair or full slab replacement, consider these factors:
The extent of deterioration. If damage is localized and doesn’t affect the entire slab’s integrity, a partial repair might suffice. But if it’s widespread, replacement may be more cost-effective in the long run.
Load requirements. Assess how much weight the concrete bears. If it’s critical to structure’s stability, full replacement ensures no compromise on safety.
Long-term service expectations. Consider how long you want the repair to last. A partial repair might be fine for a temporary fix, but if you’re planning to stay put, full replacement could save money in the long run by preventing repeated repairs.
Tools, Materials Checklist and Material Specs to Verify
Prepare a concise list of essential tools and consumables for both DIY and professional work. Include cleaning gear, patching compounds, sealers, levelers, and protective gear. Ensure you have the right mixing containers and application tools for the products you plan to use.
Clarify which material specifications matter for your substrate, such as adhesion, compatibility, and curing conditions. Check manufacturer instructions and local code requirements to confirm acceptable options and installation steps. If in doubt, verify label data and datasheets before purchase.
Essential tools for typical repairs
Before you start any repair work, make sure you have the right tools. This checklist will help you verify that your tools are in good condition and suitable for the job.
- Tape Measure: Ensure it’s accurate by measuring a known distance (e.g., 10 feet) and checking if it matches. A broken or inaccurate tape measure can lead to incorrect measurements and costly mistakes.
- Level: Check that the bubble is centered when placed on a flat surface. Using a crooked level can result in uneven surfaces, sloppy work, and rework.
- Hammer: Inspect for cracks or damage. A damaged hammer can cause injury or damage to materials.
- Screwdriver Set: Verify that you have both flathead (straight) and Phillips (crosshead) screwdrivers in the sizes needed for your project. Using the wrong screwdriver can strip screws, damaging them and making it difficult to complete the repair.
- Drill: Check that the battery is charged and all bits are accounted for. A dead drill or missing bit can halt progress and delay completion of the job.
- Safety Glasses: Inspect for cracks or damage. Wearing damaged safety glasses can put your eyes at risk of injury.
- Work Gloves: Ensure they fit well and are suitable for the task (e.g., heavy-duty gloves for handling rough materials). Poorly fitting or unsuitable gloves can lead to injuries or make tasks more difficult.
- Ladder: Check that all legs are secure, locks are functioning, and it’s rated for your weight. A faulty ladder can result in falls and serious injury.
Quick rule: Always prioritize safety when choosing tools. If a tool is damaged or unsuitable, don’t hesitate to replace or upgrade it.
Repair materials, admixtures, and bonding agents
Use this checklist when selecting repair mortars, polymer additives, and bonding primers to ensure you’re getting the right products for your job.
- Repair Mortar Type: Check if it’s suitable for your repair type (e.g., surface, deep, or structural).
- Cement Type: Verify it matches the original concrete (e.g., Type I, II, III, etc.).
- Sand Size: Ensure it’s within safe ranges (usually #20 to #50) for your repair.
- Admixture Type: Confirm it’s compatible with the cement and aggregates you’re using.
- Polymer Additive: Check if it improves strength, flexibility, or other properties needed for your repair.
- Bonding Primer: Ensure it’s designed to bond well with both old and new concrete surfaces.
- Performance Claims: Verify they match your job requirements (e.g., strength gain, setting time, etc.).
- Manufacturer Instructions: Always follow them for safe handling, mixing, and application.
Quick rule: Always check the product labels and manufacturer instructions to avoid costly mistakes. Skipping this can lead to poor bond, weak repairs, or even structural failures.
What material specs and standards to check
Before you start any concrete repair job, use this checklist to ensure your materials are up to snuff. This’ll save you time, money, and headaches down the road.
- Cement type: Check it matches the original or recommended type for your repair (e.g., Type I, II, III). Wrong cement can lead to weak repairs.
- Aggregate size: Ensure it’s within the right range (usually 3/8″ to 1-1/2″) and clean. Too large or dirty aggregate can cause issues.
- Water-cement ratio: Confirm it’s within the recommended range (0.45 to 0.6, typically). Wrong ratio means weak concrete.
- Admixtures: Verify they’re compatible with your cement and aggregates. Check labels for proper usage and dosages.
- Bonding agents: Ensure they’re suitable for the substrate and repair type. Wrong bonding agent can result in poor adhesion.
- Curing conditions: Check local standards or manufacturer guidelines for required curing time and methods (e.g., water, plastic sheeting). Inadequate curing causes weak concrete.
- Structural repair materials: Confirm they meet local structural codes. Skip this and you might end up with unsafe repairs.
- Concrete mix design: If using a ready-mix, ensure it matches the required strength (e.g., 3000, 4000 psi). Wrong mix can lead to weak or strong concrete, both bad.
Quick rule: Always check and follow manufacturer guidelines. They know their products best, and ignoring them can lead to costly mistakes.
Step-by-Step Repair Workflows for Common Scenarios
Adopt a simple diagnostic-to-protect workflow: diagnose the problem, prepare the surface, perform the repair, cure, and then seal or protect. Keep each step focused on the specific scenario like spalls, surface wear, or shallow cracks. Build in quality-control checks at the end of each stage.
Apply the same structure across scenarios to stay consistent and thorough. If you encounter an unfamiliar condition, verify procedures with manufacturer guidance or local regulations. Confirm any required curing times or conditions from the product label or data sheet before moving forward.
Step-by-Step Repair Process
Follow these practical steps to tackle common concrete repairs safely and effectively.
- Inspect the area, wear safety gear. Why: Safety first, assess damage.
- Clean the repair site. Why: Remove dirt for better bonding.
- Prepare the surface (grind, chip, or saw). Why: Create a rough texture for better adhesion.
- Mix and apply patch material. Why: Follow mix specs, apply evenly.
- Cure properly, check results. Why: Protect the repair, ensure it’s right.
Workflow: repairing small spalled areas on walkways and patios
Assess the damage, clean well, then patch and cure.
Tip: Use a wire brush to remove loose material.
Apply your chosen patch, ensure it’s level. Cover with plastic, keep moist for 72 hours.
Workflow: addressing worn garage floors and driveways
Degrease, patch, then protect from future damage.
Tip: Use a degreaser suitable for concrete.
Choose a patch that can handle traffic. Apply a coating or overlay for protection.
Workflow: resurfacing an aged porch or decorative slab
Evaluate bond, choose overlay/topping, consider texture and finish.
Tip: Test your chosen material on a small area first.
Apply the overlay, create desired texture. Finish with a protective sealant.
Costs, Lifespan, Maintenance Schedule, and Hiring a Contractor
Discuss factors that influence repair cost and expected life such as material choice, repair extent, and site access. Emphasize ongoing maintenance steps that help extend service life and prevent recurring issues. Frame maintenance as a regular, proactive task rather than a one-off fix.
Use clear criteria and questions when hiring a contractor, including experience with your specific repair type and verification of licenses or insurance. Avoid committing to numbers here; instead, verify available options, warranties, and expectations with the contractor and references. Always check contractor guidance against local rules and manufacturer recommendations.
Factors affecting cost and expected longevity
The price and durability of your concrete repairs depend on several factors. Let’s break them down.
Extent of damage: Minor cracks or small spalls will be cheaper to fix than large areas of delamination or extensive corrosion. Partial repairs are usually less expensive than full replacements, but they might not last as long if the underlying cause isn’t addressed.
Materials selected: High-quality materials and admixtures can increase upfront costs but extend service life. For instance, using a polymer-modified concrete for resurfacing will cost more initially but provide better durability than standard concrete.
Prep work and access: The easier it is to access the repair area, the less labor will be involved in prep work like cleaning, chipping, or grinding. Removing obstacles or setting up proper safety measures can add to the cost.
Traffic loading: Areas subject to heavy traffic, like driveways or loading docks, require stronger, more durable repairs. This might mean using heavier reinforcement or thicker concrete sections, increasing costs.
Routine maintenance checklist to prevent recurrence
Preventing issues is cheaper than fixing them. Use this seasonal checklist to keep your concrete in top shape.
- Spring: Inspect for winter damage. Check for cracks, spalls, or signs of corrosion. Seal any new cracks to prevent water intrusion.
- Summer: Monitor for heat-related issues like scaling or popping. Ensure expansion joints are functioning properly to relieve stress from thermal expansion.
- Fall: Clean leaves and debris from surfaces. Apply a fresh seal coat to protect against winter elements.
- Winter: Remove snow promptly to prevent ice buildup. Use sand or salt sparingly, as they can damage concrete over time.
- Annually: Inspect and repair any minor cracks or chips before they grow larger.
- Every 2-3 years: Pressure wash surfaces to remove dirt and stains. Reapply sealant if necessary.
- Every 5-10 years: Consider resurfacing or partial replacement for heavily worn areas.
Quick rule: Regular cleaning, sealing, and minor repairs go a long way in preventing recurrence.
Selecting and vetting a repair contractor
When hiring a professional for structural or major work, it’s crucial to choose wisely. Here are some tips to help you select the right contractor.
Check credentials: Ensure they have valid licenses, insurance, and certifications relevant to concrete repair. Ask for copies of these documents.
Ask about experience and past projects: A proven track record is essential. Inquire about similar jobs they’ve done in the past and ask for references or examples of their work.
Warranty expectations: Ensure they offer a warranty on their workmanship. This shows confidence in their abilities and provides recourse if issues arise after the job is completed.
Questions to ask: What methods will they use? How long will the repair take? What materials will they use, and why? What prep work needs to be done? How will they protect your property during the repair process?
Conclusion
Fixing worn concrete is about durability, safety, and a good-looking finish you can trust. Do the work in layers you can test, and stop before you risk damage or costly mistakes.
Start by checking the area in a logical order: assess wear type and severity, clean and dry the surface, seal or patch non‑structural spots, and decide if resurfacing, overlays, or a leveler is needed. If it’s structural, plan crack remediation and reinforcement first, then confirm the slabs and joints are stable before proceeding with any patching or replacement steps. Test each step on a small area, use the right materials, and verify compatibility with the existing concrete and loads.
Avoid common mistakes like skipping a proper cleaning, applying products over damp surfaces, or pushing aggressive repairs without a plan. Always wear eye protection and gloves, work in good light, and keep a clear work path. Don’t rush if you’re uncertain about a crack, hollow spot, or load-bearing issue—take time to verify with the recommended workflows and safety checks before moving forward.
If the wear is deep, widespread, or affects structural integrity, or you’re unsure about the steps, call a qualified contractor. When in doubt, pause and consult a pro to avoid bigger damage and higher costs. With careful testing, clear steps, and smart material choices, you can restore safety, appearance, and value to your concrete surfaces.
FAQ
How do I tell if wear is just a surface issue or something structural I should worry about?
Start with a quick poke test: push on edges and soft spots to see if the concrete flexes or crumbles. Look for wide cracks that keep widening, or hollow sounds when you tap with a hammer. If you notice movement or hollow feeling under the surface, stop and get an expert opinion.
When is it okay to patch or reseal, and when should I consider full resurfacing or replacement?
Use patching for small, non-structural chips and lightly worn areas. For extensive scaling, dishing, or many cracks, consider resurfacing or a slab replacement rather than trying to patch every spot. Check the product labels and manufacturer instructions to confirm what the material can fix.
What should I check before choosing a patch or overlay product?
Read the label for compatibility with your concrete type and moisture level. Look for cure times, surface prep needs, and any restrictions on temperature during application. If unsure, ask the product maker or a local supplier what to use for your conditions.
How do I judge if I can DIY a repair or I should hire someone?
Assess your comfort with surface prep, mixing, and proper curing. If you’re dealing with large areas, active cracking, or structural concerns, plan to bring in a pro. Always follow manufacturer instructions and local rules for any product you use.