
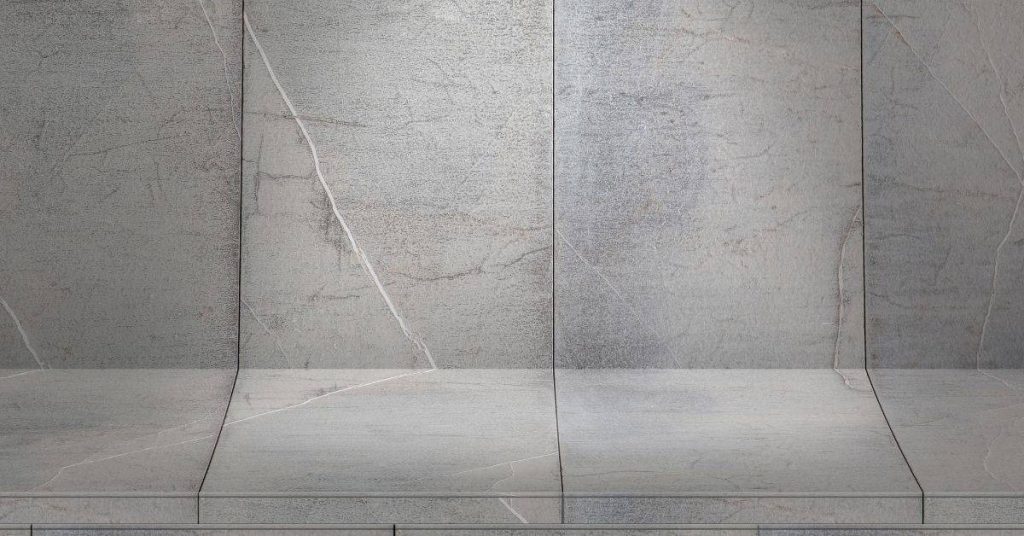
Introduction
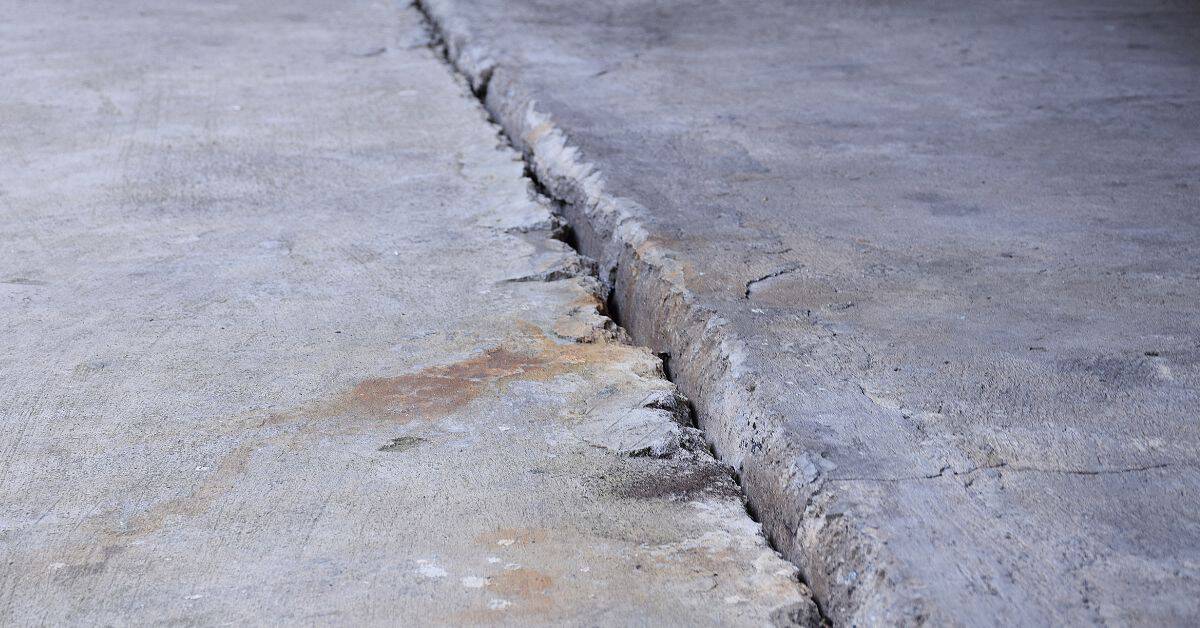
Routing and sealing cracks means cutting a V-shaped groove along the crack and sealing it to prevent further movement. It’s a technique that can help when the crack is stable and the substrate is sound, but it isn’t right for every crack or situation. Consider crack size, movement, and the surrounding material before choosing this method.
Steps to route and seal include marking the crack, routing a clean V-groove with the appropriate tool, cleaning out debris, and applying a suitable crack sealant. What you’ll need: a router or a sharp scoring tool, a vacuum or brush, backer material, sealant compatible with your concrete or masonry, and a putty knife. Always consult the product label and follow local rules for curing times and weather considerations.
Key takeaways
- Understand when a V-Groove is appropriate for routing cracks in concrete.
- Prepare the surface, clear dust, and remove loose material before routing.
- Tools and materials: chisel, routing bits, sealant, brushes, and cleaner.
- Follow step-by-step technique: mark, route, clean, prime, and seal properly.
- Choose sealants compatible with substrate, temperature, and movement demands.
- Safety first: wear eye protection, gloves, and ventilate work area.
Table of Contents
- Introduction
- Key takeaways
- Quick Overview: What a V-Groove Repair Is and Why It Matters
- Assessing the Crack: Decision Criteria for Repair Method Selection
- Tools, Materials, and Safety Checklist
- When a V-Groove Helps: Ideal Scenarios and Benefits
- When a V-Groove Doesn’t Help and Better Alternatives
- How to Route a V-Groove: Step-by-Step Technique and Best Practices
- Sealant Selection and Application for Long-Lasting Repairs
- Long-Term Durability, Costs, and Seasonal Timing
- Conclusion
- FAQ
Quick Overview: What a V-Groove Repair Is and Why It Matters
A V-groove repair uses a routed channel that follows the crack line to hold sealant and create a defined seating plane. This approach contrasts with surface-only repairs that sit on top of the joint without deep engagement with the substrate.
The primary goals are to improve adhesion, create predictable sealant geometry, and reduce capillary paths. These elements contribute to longer-term durability, easier inspection, and maintainable aesthetics when the routing is done correctly. Check the product label, manufacturer instructions, or the data sheet for allowable routing depths and sealant compatibility before starting.
Purpose and basic mechanics of a V-groove
A V-groove repair is like converting an irregular crack into a controlled joint profile. It’s done using a router with a specific bit to create a ‘V’ shaped groove along the crack line.
The purpose? To increase the contact area between the sealant and the concrete, giving it more surface to grip onto. This improves adhesion significantly.
Another benefit is creating a consistent tooling surface – the V-groove provides a defined seating plane for the sealant, ensuring predictable geometry once filled.
When a V-groove is not the right fix
A V-groove isn’t always the answer. If the crack’s due to active structural movement, routing can make things worse – it might even cause new cracks.
If you’ve got thin concrete veneers or hidden substrate deterioration, think twice before routing. You could end up damaging the structure or making a small problem bigger.
In these cases, consider alternative approaches. It’s better to address the root cause and use repairs that won’t exacerbate the issue.
Assessing the Crack: Decision Criteria for Repair Method Selection
Establish a visual triage by noting crack size, pattern, and whether widening occurs with temperature changes or loads. This helps separate non-structural from potentially active issues.
Assess structural signals and moisture clues to gauge underlying causes. Document signs of movement and water intrusion, and map how these factors influence repair choices. Always verify guidance in manufacturer instructions or local codes when selecting a method.
Visual checkpoints and measurement cues
Before you decide on a repair method, walk the area with your checklist. This helps avoid costly mistakes.
- Crack width: Measure cracks. Hairline (less than 1/8 inch) often needs only sealing. Wider gaps (>1/4 inch) may need routing and sealing or more.
- Pattern: Vertical, horizontal, or stair-step? Each suggests different causes.
- Delamination: Check for peeling or flaking around cracks. It could mean bigger issues.
- Staining: Dark spots near cracks hint at moisture intrusion.
- Crack edges: Sharp, clean edges suggest fresh damage. Rounded, crumbly edges indicate aging deterioration.
- Crack length: Longer cracks often need more than just sealing.
- Crack direction: Diagonal or zigzag cracks may signal structural issues.
- Crack behavior: Do they open and close with temperature changes or loads? If so, note it.
Quick rule: Skipping visual checks can lead to underestimating damage and using wrong repair methods.
Structural vs cosmetic concerns
Cracks aren’t all the same. Some are just eyesores, others signal serious problems.
Cosmetic cracks: These are usually hairline, don’t widen over time, and have no structural cause. Seal them with a flexible sealant.
Structural cracks: Wider than 1/4 inch, they often align with foundation movement or door/window frames. Consult an engineer if you suspect structural issues.
Remember, if in doubt, consult a pro. It’s better to be safe than sorry.
Signs of moisture, movement, and ongoing deterioration
Water intrusion and active movement can worsen cracks. Look for these signs before routing.
Efflorescence: A white, powdery deposit on concrete surfaces hints at water intrusion. Routing alone won’t fix this.
Recurring wetness: Constant damp spots near cracks suggest ongoing moisture problems. You might need to manage ground moisture.
Seasonal opening/closing: Cracks that widen and narrow with seasons may need more than just sealing. They could signal active movement or settlement issues.
Spalling, rebar exposure: These signs mean concrete is failing. Routing won’t help; you’ll likely need to replace the damaged area.
Tools, Materials, and Safety Checklist
Gather essential tools for routing and sealing, including appropriate router bits, dust control attachments, a grinder or vacuum, and basic edge-finishing tools. Include PPE such as eye protection, a respirator, gloves, and hearing protection.
Choose sealant chemistries that suit the crack and substrate, and check compatibility with existing coatings. Follow substrate prep steps and readiness checks, and review cure times and surface treatments per the manufacturer data sheet.
Tools and consumables checklist
Before you start routing and sealing cracks, make sure you have the right tools and materials. This checklist helps ensure you’re prepared.
- Router: Carbide-tipped bits designed for concrete. Check tool manuals for suitable sizes (usually 1/4″ or 3/8″).
- Dust control: Use a dust extractor or shroud to keep your workspace clean and safe.
- Grinder/vacuum: For edge finishing and cleaning. Choose one with suitable power and capacity.
- Scraper/trowel: To remove old sealant and prepare the surface.
- Edge-finishing tools: Rounded or square edges? Use appropriate tools to condition edges.
- Sealant applicator: Gun, caulking tube, or trowel. Choose based on sealant type.
- Router bit guide: For consistent routing depth and width. Check manufacturer recommendations.
- Backer materials: If needed, have fiberglass mesh, foam backer rod, or other support materials ready.
Quick rule: Always check tool manuals for proper selection and usage to avoid damage and injury.
Sealant chemistries and material compatibility
Choosing the right sealant is crucial. Here’s a quick guide to common types and their uses.
- Polyurethane: Good for exterior, high-movement joints. Check adhesion data and movement capability on tech sheets.
- Silicone: Flexible, good for small, static cracks. Not suitable for heavy-duty applications.
- Hybrid MS polymer: Balances flexibility and durability. Good for medium-sized joints with moderate movement.
- Epoxy: Rigid, strong bond. Ideal for wide cracks and heavy-duty repairs. Not flexible enough for high-movement joints.
- Latex/Cementitious caulk: Inexpensive, easy to use. Suitable for small, static joints. Not durable or flexible like other options.
Quick rule: Always verify adhesion and movement capability on product technical sheets to avoid failures.
Personal protective equipment and safe work practices
Safety first! Here’s what you need to protect yourself while routing and sealing cracks.
- Eye protection: Wear safety glasses or goggles to shield from debris and chemicals.
- Hearing protection: Use earplugs or earmuffs when using power tools.
- Dust/respiratory protection: Wear a respirator or dust mask to prevent inhalation of concrete dust.
- Gloves: Protect your hands from cuts, chemicals, and heat. Choose appropriate material for the task.
- Secure workholding: Clamp or brace surfaces to prevent movement while routing.
- Dust control: Use a dust extractor or wet cutting to minimize airborne particles.
- Electrical/tool inspection: Check power tools for damage before use. Ensure cords are in good condition and properly grounded.
- Fall draft precautions: If working at heights, secure your work area and use fall protection if necessary.
Quick rule: Always prioritize safety. Don’t take shortcuts or skip PPE to avoid injuries and accidents.
When a V-Groove Helps: Ideal Scenarios and Benefits
Identify concrete situations where routing a V-groove meaningfully improves repair performance, such as crack width, substrate type, and anticipated movement. These factors guide the decision to route.
Explain how the groove supports sealant bond and joint geometry, creating a stable seating and a controlled path for water. Note substrate-specific considerations like rebar presence and edge conditions, and verify compatibility with common sealants per product instructions.
Improving sealant adhesion and geometry
A clean V-groove exposes fresh substrate, enhancing sealant bond. It creates a stable seating surface for patches, controlling joint geometry.
Proper sealant depth is crucial. A V-groove helps achieve this by providing a predictable path for the sealant to follow.
Note: Over-routing can compromise structural integrity and create grooves that trap moisture or debris.
Managing capillary action and through-crack sealing
Routing breaks capillary paths, preventing water migration. A filled groove blocks further ingress when combined with the right backer and sealant.
This is particularly effective in scenarios where cracks are wide enough for significant water flow but not so wide that they require structural repair.
Tip: Always use a compatible backer rod to support the sealant and prevent over-compression.
Substrate-specific advantages
Concrete: V-grooves are ideal for controlling joint geometry in new pours or repairing cracks. They help prevent water ingress and spalling.
Masonry: Grooving helps control crack propagation and prevents further damage to the masonry units. It also improves sealant bond on rough surfaces.
Wood: V-grooves are useful for controlling expansion/contraction joints in wood substrates, preventing cracking and improving paint adhesion.
Drywall: Routing helps control hairline cracks and prevents them from growing wider. It also improves the bond of joint compound or spackling.
When a V-Groove Doesn’t Help and Better Alternatives
Define decision criteria for abandoning routing, including crack behavior, moisture, load, and the crack’s role in the structure. Use professional judgment to determine if routing is appropriate.
Identify scenarios where routing is counterproductive and outline viable alternatives such as injectable systems, stitching, patches, or full-depth replacement. Consider cure times, durability, and aesthetics, and consult guidelines from the product data sheets when in doubt.
Situations where routing worsens damage
Routing can sometimes do more harm than good. It’s crucial to know when to stop and reassess.
Cutting into structural elements: Routing too deep can compromise the structure’s integrity, especially if you hit reinforcement or other hidden components.
Exposing corroded reinforcement: If your crack exposes rusted rebar, routing could spread corrosion and weaken the steel. Stop and consult a pro before proceeding.
Creating thin edges that spall: Routing can leave thin edges that are prone to chipping or spalling. Be careful not to make cracks worse by overrouting.
Alternative repair strategies
Routing isn’t always the best solution. Here are some alternatives and when to use them.
Injectable adhesives: For deep, confined cracks where routing isn’t feasible, inject epoxy or polyurethane resins. These seal from within, stopping movement at its source.
Mechanical stitching: When a crack is under load and needs support, use stainless steel bars or mibers for reinforcement. This helps transfer loads across the crack face.
Surface-only sealants: For purely cosmetic gaps, surface sealants like silicone or acrylic caulks can do the trick. They won’t stop movement but will hide minor imperfections.
Common mistakes to avoid
Even with good intentions, DIY repairs can go wrong. Here are some frequent errors and how to steer clear of them.
- Overrouting: Going too deep or wide weakens the substrate and makes cracks worse.
- Wrong sealant choice: Using incompatible materials can lead to failed seals, staining, or even structural damage over time.
- Inadequate cleaning: Not properly preparing the surface leads to poor adhesion and quick failure of your repair.
- Skipping backer rod: Without a backer rod, sealant can’t be applied evenly or at the right depth, leading to sagging or incomplete fills.
Take your time, choose the right materials, and follow best practices to avoid these common pitfalls.
How to Route a V-Groove: Step-by-Step Technique and Best Practices
Clarify marking strategy and bit selection to achieve a clean, uniform groove along the crack line. Use guides or templates if available to reduce drift.
Describe depth, speed, and bit choice, along with a practical sequence from start to finish. Include transitions at bends and how to verify the groove profile before sealing.
Step-by-Step Process
Follow this clear sequence to route a V-groove safely and effectively.
- Mark the crack line with a pencil, using templates or guides for wider grooves. Ensure marks are clean and uniform.
- Select your router bit based on joint width: typically 1/8″ to 3/8″ for mineral/epoxy joints. Test fit the bit in the crack to ensure it fits snugly.
- Set the routing depth: aim for half the joint width, or about 1/4″ to 5/16″. Mark this depth on your router’s depth guide.
- Secure the workpiece, using clamps or a jig. Test stability by gently pushing and pulling on it.
- Start routing at a 45-degree angle to the crack, then follow the line. Keep the bit centered in the crack to avoid undermining adjoining material.
- Make multiple shallow passes if needed, maintaining consistent speed (18,000-24,000 RPM) and depth. Check progress after each pass.
- Stop routing before reaching the end of the crack to avoid damaging edges. Complete the last bit by hand with a chisel or knife.
- Clean the routed groove: remove dust, debris, and moisture using compressed air, brushes, or damp cloths. Verify groove profile before sealing.
- Prime the groove if required for your chosen sealant. Allow drying time as per manufacturer’s instructions.
Bit selection, setup, and test cuts
Choosing the right router bit is crucial for a clean V-groove. Consult tool and bit manufacturers for guidance.
Select a cone or straight bit depending on your joint width: cone bits are better for wider grooves (1/2″ to 3/4″), while straight bits work well for narrower ones. Always use a new, sharp bit.
Set the routing depth: aim for half the joint width, or about 1/4″ to 5/16″. Mark this depth on your router’s depth guide. Test cuts on scrap material can help verify profile and fit, ensuring a smooth operation on your actual workpiece.
Routing technique and controlling damage
Proper routing technique minimizes chipping and keeps the cut centered in the crack.
Always route in the direction of the grain or fibers, if applicable, to avoid tearing out material. Maintain a consistent speed (18,000-24,000 RPM) and depth for smooth cuts.
Make multiple shallow passes instead of one heavy cut: this minimizes chipping and allows better control over the routing process. Keep the bit centered in the crack to avoid undermining adjoining material, which can weaken the sealant bond.
Cleaning, backer material, and pre-seal prep
Proper cleaning and preparation of the routed groove ensures optimal sealant adhesion.
- Remove dust and debris: use compressed air, brushes, or damp cloths to clean the groove thoroughly. Avoid using water if it can cause damage to your material.
- Choose backer rod or filler: select a material that matches your joint width and provides adequate support for the sealant. Look for products with good compression recovery and adhesion ratings.
- Insert backer rod: push it into the groove, ensuring it’s centered and fully seated. Trim excess if needed.
- Prime the groove: apply a suitable primer to enhance sealant adhesion. Follow manufacturer’s instructions for application and drying times.
- Avoid using incompatible materials: ensure your chosen backer rod, filler, and sealant are compatible with each other and your substrate. Mismatches can cause cracking, staining, or weak bonds.
Sealant Selection and Application for Long-Lasting Repairs
Match sealant chemistry to substrate and movement by considering the typical joint behavior and exposure. Select polyurethane, silicone, epoxy, or hybrids based on the context documented for the project.
Outline adhesion strategies and application techniques, including surface prep, backer rods, and priming needs. Provide guidance on bead sizing, smoothing, curing, and tool choices to achieve a durable seal.
Choosing the right sealant for movement and adhesion
The first step in selecting a sealant is understanding your substrate. Concrete, masonry, and wood each require specific chemistries.
Concrete and Masonry: Opt for polyurethane, silicone, epoxy, or hybrid formulations that can accommodate joint movement and adhere well to these substrates. Check technical data sheets for percent elongation claims.
Wood: Choose acrylic latex sealants or urethanes for their good adhesion and flexibility with wood’s natural expansion and contraction.
Application tips: dispensing, tooling, and curing
Proper application is key to a durable seal. Here are some practical tips:
- Bead shape: Apply sealant in a smooth, continuous bead along the joint. Use a caulking gun with adjustable settings for consistent flow.
- Tooling: Use a putty knife or trowel to tool the sealant into the joint, removing voids and ensuring full contact with the substrate.
- Avoid trapped air: Work from one end of the joint to the other, allowing air to escape as you go. Consider using a wetting agent to help release trapped air.
- Cure time: Follow manufacturer’s guidelines for cure times. Most sealants require 24-72 hours before exposure to moisture or traffic.
- Optional tools: Rentable tools like caulking guns with adjustable settings and putty knives can help achieve a professional finish at an affordable price.
Finishing and paint compatibility
Once the sealant is cured, you may want to paint it to match your decor. Not all sealants are paintable, so check the manufacturer’s specifications.
Paintable sealants: Silicone, acrylic latex, and hybrid formulations are typically paintable. Apply paint using a brush or roller, following the manufacturer’s instructions for best results.
Before painting, ensure the sealant is fully cured and clean. Mask off any areas you don’t want painted to achieve a clean finish. Always verify paint compatibility with the sealant manufacturer.
Long-Term Durability, Costs, and Seasonal Timing
Compare the long-term durability of routing-plus-sealant against other approaches such as injections or patches, with attention to how substrate movement and climate affect performance. Avoid hard numbers without checking local guidance.
Discuss material and method choices, maintenance needs, and how weather windows influence cure and adhesion. Offer practical decision guidance for when routing is appropriate versus alternatives based on crack behavior and exposure.
Durability, Inspection Intervals, and Maintenance Tips
Once your crack repair is complete, regular checks ensure longevity. Here’s a simple checklist to follow.
- Visual Inspection: Check for any signs of re-cracking or movement every 6 months.
- Moisture Check: Ensure no water is trapped behind the sealant, which can cause rot. Tap gently around the area to listen for hollow spots.
- Sealant Condition: Inspect the sealant itself. If it’s cracked, peeling, or discolored, re-sealing may be needed.
- Joint Movement: Gently push and pull on the joint to ensure it’s still secure. Any movement could indicate a problem.
- Surrounding Concrete: Look for any new cracks forming nearby, which might indicate underlying issues.
- Drainage: Ensure water is draining away from the repaired area properly to prevent pooling and further damage.
- Cleanliness: Keep the area clean. Dirt and debris can trap moisture and cause issues.
- Paint Condition: Check the paint around the repair. If it’s peeling or flaking, it might be a sign of underlying problems.
Quick rule: Regular checks help catch small issues before they become big problems.
Cost Comparison and Resource Trade-Offs
The cost of routing and sealing a crack depends on several factors. Let’s break them down.
Labor time is a significant factor. Routing takes time, as does proper surface preparation and sealant application. The deeper the groove, the longer it takes.
Tooling costs can add up if you don’t already have the necessary equipment. Rentals can be expensive, especially for specialized tools like routing machines.
Materials also contribute to the cost. Sealants vary in price depending on type and quality. You’ll also need backer material and possibly primer or accelerator.
Quick tip: Always compare the upfront costs with the long-term benefits. Sometimes, a more expensive solution is cheaper in the long run due to reduced maintenance and extended lifespan.
Seasonal and Weather Considerations for Best Results
Weather plays a significant role in the success of your crack repair. Here’s what to consider:
Avoid extreme temperatures: Both very hot and very cold temperatures can affect adhesion and cure time. Most sealants perform best between 50°F and 90°F (10°C and 32°C).
Watch the humidity: High humidity can cause moisture to get trapped under the sealant, leading to poor adhesion and potential rot. Keep an eye on humidity levels, especially in damp areas.
Rain forecasts: Avoid applying sealants when rain is expected within 24-48 hours of application. Rain can wash away sealant before it cures, leaving you with a failed repair.
Check product limits: Always consult the technical data for your chosen sealant. It will specify the ideal temperature and humidity ranges for application and cure.
Conclusion
The core idea is simple: do not push a repair beyond its limits. A well-placed V-groove and proper sealing protect structure, keep water out, and look right for years when you respect safety, testing, and the right method for the crack.
First, proceed with a practical check: choose the repair method based on the crack’s size and location, route and seal only if the crack fits the tested scenario, prep the area, verify your tools, and apply sealant in clean, dry conditions. Always test in a small area first, and work in a logical sequence from measured routing to sealing, then cure with the weather and season in mind. If the crack worsens or you’re unsure, pause and reassess before continuing.
Common mistakes to avoid are rushing the routing, using the wrong sealant for the substrate, and skipping the safety steps that protect you and the material. Always wear proper PPE, keep dust and debris clear, and clean the joint before sealant application. If you’re unsure about moisture, hidden damage, or load-bearing concerns, don’t push forward alone; testing, patience, and the right product choice matter.
If the crack is bigger than a pilot test can handle, or the surface is heavily stressed, consider calling a professional for a precise routing and reliable seal. Stay disciplined, follow the checklist, and you’ll finish with a durable, visually solid repair. You’ve got this—steady work now saves headaches later.
FAQ
When is a V-Groove technique the right choice for routing cracks?
Use it when cracks are narrow and need controlled widening to accept sealant without pulling apart. It’s not a cure-all for all cracks; if the base material is moving a lot or the crack is wide, other methods may be needed. Check manufacturer guidance, product labels, and local rules before committing.
What are the essential steps to route and seal cracks effectively?
Clean the crack and remove loose material first. Use a proper router or utility knife to create a clean V-shaped groove along the crack, keeping steady depth. Fill with the recommended sealant, tool it smooth, and allow curing per the product instructions.
What materials and tools do you need for V-grooving and sealing?
You’ll need a sharp cutting tool for the groove, a guide or straightedge to keep lines true, and a compatible crack sealant. Have a brush or cloth for cleanup, masking tape if you want clean edges, and a damp rag for smoothing. Always verify choices against the product label and any local guidance.
Where do cracks commonly appear, and how should you design the groove for best crack management?
Cracks tend to show up in high-traffic or structural transfer areas, joints, and where movement happens. Design the groove to follow the crack line and stay within the joint width; don’t over-cut or under-cut. If in doubt, consult the sealant manufacturer’s instructions or a local pro for the best groove geometry.