
Introduction
Polyurethane and silicone are two sealing options for concrete joints, each suited to different jobs. Polyurethane tends to be tougher and more resistant to movement, while silicone seals stay flexible longer in some conditions. This article compares when to use each, in plain terms you can apply at home.
There are practical restrictions to check, like what the substrate is and how much movement the joint will see. Optional color and packaging details matter for a finished look and for how you order enough material, so read the label. If in doubt, compare manufacturer instructions and local rules, and choose polyurethane or silicone based on the project needs.
Key takeaways
- Consider related products: KASTAR 733 Super Acetoxy Adhesive Sealant, and KASTAR 730 Acetoxy Silicone Sealant.
- Restriction of usage: polyurethane not ideal for submerged joints or high UV exposure.
- Optional color: silicone offers more color choices; polyurethane often remains natural.
- Packing specification: ensure proper backer rod, sealant bead width, and joint depth.
- Applications where polyurethane performs better: movement, impact resistance, and moisture barriers.
- Safety: wear eye protection, gloves, and ventilate; acetoxy silicones can irritate skin.
Table of Contents
- Introduction
- Key takeaways
- Quick Comparison — Side-by-Side Overview
- Material Characteristics and Performance
- Application Conditions and Cure Behavior
- Where Each Belongs — Use Cases for Concrete Joints
- Installation Best Practices, Common Mistakes, and Safety
- Product Selection, Colors, and Packaging
- Cost, Lifespan, and Maintenance
- Practical Next Steps and Trusted Sources
- Conclusion
- FAQ
Quick Comparison — Side-by-Side Overview
Polyurethane and silicone each bring distinct strengths to concrete joints. You’ll notice differences in elasticity, elongation, cure behavior, and expected service life that affect performance in expansion and control joints. This section highlights the core tradeoffs you should weigh as a DIYer.
We’ll cover typical applications and what they imply for exterior versus interior use, weather exposure, and movement tolerance. Practical constraints such as surface prep, adhesion to concrete, and common installation pitfalls are called out with quick takeaways. Look for guidance on adhesion, UV resistance, chemical exposure, and cleanup to help you choose with confidence.
Headline differences
Polyurethane and silicone sealants differ in their movement capability, adhesion behavior, and cure chemistry. Understanding these key differences helps you choose the right one for your concrete joint sealing project.
Elasticity & Elongation: Polyurethanes are more elastic, stretching up to 300% of their original length without breaking. Silicones have lower elongation, typically around 150-200%.
Cure Time & Service Life: Polyurethanes cure quickly and provide a longer service life (up to 25 years) but require more careful timing for installation during the construction season. Silicones take longer to cure but are more forgiving with installation timing and offer good longevity (10-15 years).
When to pick which material
The choice between polyurethane and silicone sealants depends on the specific needs of your concrete joint. Here are key factors to consider:
- Movement Amount: For joints with high movement, choose polyurethane. It can accommodate more movement without failing.
- Exposure to Weather & Elements: Both materials offer good UV/weather resistance, but for submerged or highly exposed areas, opt for silicone due to its better chemical exposure tolerance.
- Paintability: If you plan to paint the sealed joint, choose polyurethane. It adheres well to paint and provides a better surface for painting.
- Installation Timing: For projects with tight deadlines or during off-seasons, go with silicone. It’s more forgiving with installation timing and temperature ranges.
- Avoid Common Pitfalls: Using the wrong material can lead to cracking, staining, or weak bonds. Always match the sealant to your specific joint needs.
Material Characteristics and Performance
Understand elasticity and elongation at break for polyurethane versus silicone and how these properties translate to real joint movement on concrete slabs. The takeaway is how each sealant type accommodates expansion and contraction without tearing.
Adhesion strategies depend on whether the concrete is dry or damp, and primers or surface prep steps can make or break long-term seal integrity. We also compare hardness and flexibility to help you pick for typical DIY slabs like sidewalks and patios, then touch on cure mechanisms and environmental influences that affect odor and handling before final performance.
Elasticity, Movement Capability, and Bond Strength
Polyurethane and silicone sealants differ in their ability to handle joint movement. Understanding this is crucial for real-world performance on your concrete joints.
Silicone has higher elongation at break (up to 400%) compared to polyurethane (around 150%). This means silicone can stretch more without breaking, making it ideal for larger joint movements. However, silicone’s bond strength is lower than polyurethane.
For reliable adhesion, primers are typically needed with both materials. Use a concrete primer for dry surfaces or a damp surface primer if the concrete is wet. Proper cleaning and profiling of the substrate is also crucial for good adhesion.
Weathering, UV and Chemical Resistance
Both polyurethane and silicone offer good weathering resistance, but they differ in their response to UV exposure and chemical attack.
Polyurethane has better UV resistance and can withstand prolonged exposure without degrading. It’s a good choice for outdoor applications where the sealant will be exposed to sunlight. However, it may not perform as well with ozone exposure.
Silicone, on the other hand, is more resistant to chemicals like solvents, acids, and alkalis found near concrete joints. It’s a good choice for areas prone to chemical exposure, but it may degrade faster under UV exposure compared to polyurethane.
Paintability and Finishing
Both polyurethane and silicone sealants can be painted, but the process differs slightly between the two.
Polyurethane sealants typically require a primer before painting. This helps to improve paint adhesion and prevent tainting of the paint. Ensure the sealant is fully cured (at least 24 hours) before priming and painting.
Silicone sealants do not usually require a primer, but it’s recommended for better paint adhesion. Always ensure the sealant is clean, dry, and free of contaminants before painting. Use a good quality exterior paint designed for use on sealants.
Application Conditions and Cure Behavior
Ambient conditions impact cure differently for polyurethane and silicone, with temperature and humidity affecting open time and final set. Expect variations in cure windows that influence when you can tool and when the joint becomes traffic-ready. Refer to product datasheets for exact limits.
Surface prep, moisture considerations, and porosity determine adhesion and cure quality. Damp or damp-dusty conditions can alter backing and joint depth requirements, so verify substrate compatibility and cure guidance before proceeding.
Cure mechanisms and environmental needs
Silicone sealants primarily cure through a reaction with moisture in the air. This means they’re ideal for damp environments but can take longer to cure in dry conditions.
Polyurethanes, on the other hand, can cure via moisture or chemical reaction depending on their formulation. Moisture-curing polyurethanes are great for wet jobs as they cure quickly, while chemically curing ones are better suited for dry environments due to their slower but more predictable cure rate.
Tip: Always check the product datasheet to understand your specific sealant’s cure mechanism and adjust your application plan accordingly.
Typical temperature and humidity considerations
Both polyurethane and silicone sealants have optimal temperature and humidity ranges for application and cure. Generally, these are between 50-90°F (10-32°C) and 40-70% relative humidity.
Apply sealant outside these ranges, and you risk extended cure times, incomplete cure, or reduced performance. For example, applying in high heat can cause the sealant to skin over too quickly, preventing proper curing.
Rule of thumb: Check the surface and ambient temperature and humidity before starting work. If unsure, consult the manufacturer’s datasheet for exact limits.
Joint geometry and depth: tooling and backer rod use
Proper joint width-to-depth ratio is crucial for correct sealant deformation and adhesion. A good rule of thumb is a 1:3 or 1:4 ratio, meaning the joint should be three to four times deeper than it is wide.
- Backer rod placement: Insert backer rods into wider joints (over 0.25 inches) before applying sealant. This helps control depth and prevents over-application. You can rent or buy backer rods at most hardware stores, with prices ranging from $1 to $3 per foot.
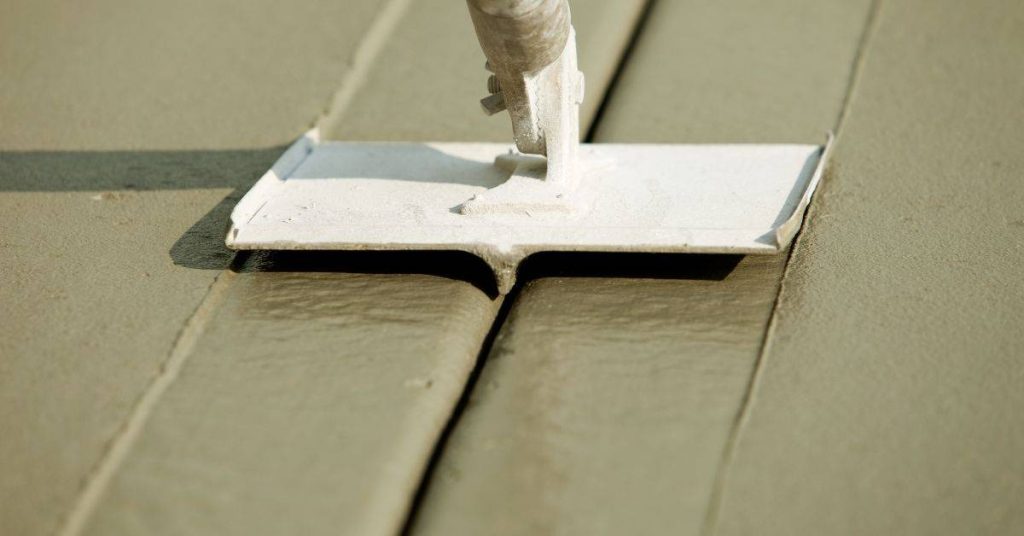
- Tooling: Use a joint sealer tool to apply even pressure across the sealant bead. This ensures consistent depth and helps remove excess material. These tools are relatively inexpensive, costing around $10-$20 each.
- Joint cleaning: Ensure joints are clean and dry before application. A simple wire brush or vacuum can help remove debris, while a moisture meter can check for excessive dampness.
- Sealant depth: Aim for sealant to be level with the surrounding surface after tooling. This helps prevent water pooling and promotes proper curing.
- Joint width: Narrower joints (under 0.25 inches) can usually be sealed without backer rods, but they may require more frequent reapplication due to increased UV exposure.
Where Each Belongs — Use Cases for Concrete Joints
We map common joint types to the preferred sealant family, including expansion joints, control joints, pavement joints, and precast connections. Each pairing is based on movement tolerance and exposure conditions you’re likely to encounter on DIY projects.
Decision criteria like joint width, load cycling, and UV or chemical exposure help you decide which sealant to use. We discuss surface prep, cure times, and bonding considerations to keep you on the right track without overpromising results.
Expansion and Dynamic Movement Joints
For high-movement joints like expansion and dynamic movement cracks, choose polyurethane. Why?
Polyurethanes stretch and compress more than silicones. They handle joint widths changing due to temperature shifts or building settlement better.
They also bond well to concrete, reducing the risk of sealant popping out during movement. For dynamic joints with frequent load cycling, polyurethane’s superior elasticity is crucial.
Wet, Submerged, and Marine-Exposed Concrete
For continuously wet or submerged joints, pick silicone. Here’s why:
Silicones tolerate moisture better than polyurethanes. They don’t degrade as quickly when exposed to water, making them ideal for below-grade applications and marine environments.
However, ensure proper surface preparation. Clean the joint thoroughly to remove any dirt or debris that could compromise adhesion. Consider using a silicone primer for enhanced bonding.
Structural vs Non-Structural Joints
Most sealants are non-structural. They’re not designed to bear weight or support the structure itself. Here’s what to avoid:
Don’t use sealants on joints that need to carry loads. Stick to certified structural silicone or polyurethane systems for such applications.
Avoid applying sealants over uncured paints, plasticizers, or continuously soggy substrates. These can compromise adhesion and performance. Always ensure the substrate is clean, dry, and free of contaminants before application.

Installation Best Practices, Common Mistakes, and Safety
A practical setup starts with clean, dry surfaces and a suitable joint profile. Verify no contaminants or moisture blocking adhesion, and mask edges as needed to keep lines neat. This keeps your joint uniform during dispensing and curing.
Know when primers are required, use the correct nozzle and backer rod, and tool the bead properly. Safety notices cover ventilation and PPE, and we call out common missteps like over-priming or applying on damp surfaces so you can avoid them.
Surface preparation and primer guidance
Before applying any sealant, concrete surfaces need thorough cleaning. Remove dust, dirt, and any old sealants using a wire brush or pressure washer.
Ensure the surface is completely dry. Moisture can hinder adhesion and cause sealant failure. Use a moisture meter if unsure.
A primer might be needed for better adhesion and to prevent troweling issues. Check your chosen sealant’s (polyurethane or silicone) manufacturer guidelines. If required, apply evenly and allow the recommended tack time.
Common application mistakes to avoid
Even with the right materials, improper application can lead to sealant failure. Here are common mistakes to steer clear of:
- Improper joint sizing: Incorrect joint width or depth can cause sealant to fail under movement or traffic.
- Skipping backer rod: Not using a backer rod in wide joints can lead to overfilling and excessive material usage.
- Painting too soon: Painting before the sealant is fully cured (as per manufacturer’s guidelines) can cause peeling or delamination.
- Over-priming or skipping primer: Both can affect adhesion and lead to premature failure.
- Applying on damp surfaces: Moisture can prevent proper curing and adhesion.
Take your time, follow guidelines, and double-check your work to avoid these pitfalls.
Safety and handling precautions
Working with sealants requires proper safety measures. Always consult the product’s Safety Data Sheet (SDS) before use.
Wear appropriate PPE: This includes gloves, goggles, and a respirator if needed. Good ventilation is crucial to avoid inhaling fumes.
If sealant gets on your skin or in your eyes, wash immediately with plenty of water. For chemical burns, seek medical attention. Always store chemicals safely and dispose of them responsibly.
Product Selection, Colors, and Packaging
Interpreting packaging options helps match job scale to product form, such as cartridges, sausage packs, or drums. Use guidance on typical yields and application volume to plan purchases.
Polyurethane versus silicone differ in handling and curing behavior, so check how each format fits your project and cleanup method. Color options, colorfastness, and storage considerations are noted to help you decide what best matches your joints and climate.
Optional colors and finishing options
When it comes to concrete joint sealant, color isn’t just about aesthetics. It’s also about UV stability and visibility for maintenance.
Most sealants come in neutral, grey, black, or white. Neutral tones blend best with most concretes. But if you want a specific look, consider the overall design of your project.
UV stability is crucial. Dark colors absorb heat and can degrade faster under prolonged sun exposure. So, for outdoor use, lighter colors might be better.
Packing specifications and formats
Sealant packaging comes in various sizes to suit different job scales. Small cartridges (around 10 oz) are great for touch-ups or small repairs. They’re easy to store but have a shorter shelf life once opened.
Medium-sized sausages (around 30 oz) are good for larger jobs. They offer better value and longer shelf life, but they require a sealant gun for application.
Large drums (up to 5 gallons) are ideal for professionals or large-scale projects. They’re cost-effective but need proper storage conditions to maintain the product’s integrity.
Related products and common brands to consider
Besides sealant, you’ll need primers for surface preparation. They improve adhesion and protect the substrate. Popular brands include Red Devil, Sika, and Custom Building Products.
For wide joints, use backer rods. These provide a base for the sealant to adhere to. Common materials are foam or polyethylene. Brands like 3M, Tremco, and Polyguard offer these.
Lastly, consider tooling compounds for creating smooth joint profiles. They’re available from brands such as MAPEI, Laticrete, and Custom Building Products.
Cost, Lifespan, and Maintenance
Cost considerations center on material choice, primers, and any special dispensing gear. Labor time for surface prep, filling, and curing also influences total project cost. Prime candidates and setup steps affect speed and expense, so verify your plan against product instructions.
Service life depends on environment, movement, and substrate compatibility. We outline maintenance tasks and re-sealing needs while flagging how substrate movement can drive frequency and cost considerations for DIY projects.
Upfront cost vs life-cycle cost
When choosing between polyurethane and silicone sealants, consider both upfront costs and long-term expenses. Upfront, material costs vary – polyurethane is generally cheaper per tube, but silicone offers more coverage.
Labor: Polyurethane requires surface priming, adding time and cost. Silicone often doesn’t need a primer, speeding installation.
Movement and exposure: Quality installation and expected joint movement impact long-term costs. Better initial sealing reduces future repairs. Harsh conditions like UV or chemicals may shorten lifespan, increasing life-cycle costs.
Expected lifespan and inspection intervals
Inspect your sealant regularly to catch issues early. Here’s a quick checklist:
- Adhesion: Check if sealant is still bonded to both sides of the joint. Loss of adhesion leads to water intrusion.
- Cracking: Look for hairline cracks or gaps. Cracks allow water and debris in, leading to further damage.
- Elasticity: Gently press the sealant. It should return to its original shape. Loss of elasticity means it can’t handle joint movement anymore.
- UV exposure: Check for discoloration or brittleness, especially on outdoor surfaces.
- Moisture: Inspect for mold, mildew, or a musty smell – signs of water intrusion.
- Chemical exposure: Look for signs of degradation near chemical sources.
- Joint movement: Check if the sealant can still accommodate joint expansion and contraction.
- Substrate condition: Ensure concrete is sound, with no cracks or crumbling.
Quick rule: Inspect annually for normal exposure, every 6 months for harsh conditions. Address issues promptly to prevent bigger problems down the line.
Repair and re-sealing strategies
If sealant shows signs of failure, act quickly to prevent water damage. First, decide if you need to repair or replace. If the issue is minor (e.g., small crack), repair might suffice. Widespread issues or severe damage require replacement.
To reseal, follow these steps:
1. Clean the joint thoroughly, removing old sealant and debris.
2. Inspect and address any underlying concrete issues.
3. Apply primer if required (polyurethane).
4. Fill the joint with new sealant, following manufacturer’s instructions.
5. Tool the sealant smooth and allow it to cure according to package directions.
Practical Next Steps and Trusted Sources
A pre-installation checklist helps you confirm joint type, substrate compatibility, movement, and environmental conditions for polyurethane versus silicone. This keeps you aligned with project requirements before you buy.
Looking up codes and standards is essential. Check local building codes and applicable standards, and know where to find official documents and which sections govern sealant selection and application. Use trusted sources to validate choices before purchasing.
Project planning checklist
Before you start, tick off this list to ensure a smooth installation.
- Confirm joint dimensions: Measure width and depth. Wrong size can cause sealant failure.
- Check substrate condition: Inspect for cracks, holes, or weak spots. Inadequate surface prep leads to poor adhesion.
- Assess expected movement: Joints expand/contract with temperature changes. Ignoring this causes cracking.
- Review product datasheets: Understand sealant’s capabilities before applying.
- Choose colors/packaging: Select compatible colors and packaging formats for your project.
- Check primer needs: Some substrates require priming. Skipping this can cause adhesion issues.
- Gather safety gear: Safety glasses, gloves, and respiratory protection are essential.
- Plan application schedule: Consider weather conditions to avoid rain or extreme temperatures.
Quick rule: Use this checklist before starting any project. It saves time and prevents costly mistakes.
Material specs and testing standards to verify
Ensure your chosen sealant meets required performance levels.
- Movement capability: Ask for elongation ratings. Low movement allowance can cause cracking.
- Adhesion test results: Check peel/tear strength. Weak adhesion leads to delamination.
- UV/weathering tests: Look for exposure class rating. Inadequate UV resistance causes discoloration/cracking.
- Chemical resistance: Ensure sealant withstands expected chemicals. Incompatibility can cause staining or degradation.
- Substrate compatibility: Check if sealant bonds well with your surface material. Wrong match weakens bond.
- Exposure class: Select indoor/outdoor rated sealant based on application area.
- Fire resistance: For fire-rated areas, ensure sealant meets relevant standards (e.g., ASTM E84).
Further reading, related articles and feedback channels
Stay informed with these resources to make better decisions.
Keep a folder for recent articles, technical bulletins, and manufacturer datasheets. Regularly update it to stay current on best practices.
Join online forums or groups for installers. Share experiences, ask questions, and learn from others’ successes/failures.
Feedback channels: Many manufacturers welcome installer feedback. Report field performance to help improve products and installation techniques.
Conclusion
Protect the joint now by choosing the right sealant for the movement, exposure, and finish you want, because a correctly chosen and cured sealant keeps water out, looks clean, and lasts longer. Safety comes first, and testing a small area before full-scale work prevents costly mistakes.
First, confirm the joint type, exposure, and movement, then decide which material fits: use polyurethane where elasticity and moisture resistance matter, or silicone where sustained flexibility and weathering are key; prep the surface, backer rod the joint properly, apply with the right tooling, cure without stress or contamination, and inspect after curing to ensure a solid seal. test in a small area first and follow the manufacturer’s cure times and recheck periodically to catch issues early.
Common mistakes to avoid include skipping surface prep, not using a backer rod, overfilling or underfilling the joint, and ignoring ventilation or skin contact risks. Safety rules are simple: wear gloves and eye protection, work in a well ventilated area, keep residues off skin and off finished surfaces, and never rush cure times or expose fresh sealant to traffic or moisture.
If the crack is structural, the joint is very large, moisture is actively present, or edges are irregular or difficult to mask, call a professional rather than forcing a DIY fix. With the right materials, proper prep, and careful curing, you’ll have a durable, neat joint that performs and looks good for years. You’ve got this—plan, test, and seal with confidence.
FAQ
What are the key properties of polyurethane sealants for concrete joints?
Polyurethane sealants are flexible and bond well to concrete. They handle movement and UV exposure better than many other sealants when fully cured. They can be more resistant to abrasion and weather, but check the product label for cure times and compatibility with concrete.
What are the main benefits of silicone sealants for concrete joints?
Silicone sealants stay highly flexible over a wide temperature range and resist aging from sun and weather. They form a smooth, long-lasting seal that remains elastic with little shrinkage. Look for silicone products that are designed for exterior concrete and read the label for cure and surface prep guidance.
When should I choose polyurethane over silicone for a concrete joint?
Choose polyurethane when you expect significant movement or load at the joint and you need strong adhesion to concrete. It’s usually the tougher, more abrasion-resistant option for exterior joints that will flex with seasonal shifts. Always verify are the surfaces prepared and that the product is rated for concrete and the expected movement, per manufacturer instructions.
When does silicone have the edge over polyurethane for concrete joints?
Silicone is a good choice in high UV or long-term outdoor exposure where you want low maintenance and easy clean-up. It’s often preferred for joints where the sealant needs to remain flexible for many years with minimal color change. Check product data for weather resistance and any surface prep notes before applying.