
Introduction
Corrosion inhibitors in garage slabs are additives that help slow rusting of metal embedded in concrete. They work by interfering with the chemical reactions that cause oxidation when moisture and salts are present. For a DIY project, read the product label carefully to understand the intended use and dosage guidance.
A common mistake is guessing or eyeballing amounts, which can leave metal vulnerable or affect the concrete cure. Look for clear instructions, and follow them with the proper mixing or application method on the slab surface. If you see rust stains or suspect under-specified protection, check the label for compatibility with your concrete mix and climate, and consult the manufacturer or a local pro if in doubt.
Key takeaways
- Understand how corrosion inhibitors interact with water, cement, and reinforcing steel in slabs.
- Avoid common dosage mistakes by aligning product instructions with slab conditions.
- Control dosing timing during placement and early curing to prevent inconsistencies.
- Check interactions with other admixtures and reinforcement to avoid clashes.
- Detect rust stains early; inspect with PPE and treat concrete safely.
- Implement prevention through design choices, placement, and proactive maintenance.
Table of Contents
- Introduction
- Key takeaways
- How Corrosion Inhibitors Work in Concrete Garage Slabs
- Common Dosage Mistakes and How They Manifest
- Correct Dosing: Calculations, Measurement, and Timing
- Interactions with Other Admixtures, Cements, and Reinforcement
- Detecting and Treating Rust Stains on Garage Slabs
- Prevention Strategies: Design, Placement, and Maintenance
- Tools, Materials Checklist and Material Specs Explained
- Troubleshooting, Monitoring, and Long-Term Performance
- Conclusion
- FAQ
How Corrosion Inhibitors Work in Concrete Garage Slabs
Corrosion inhibitors are formulated to interact with the pore solution and reinforcing steel inside concrete. They create a protective environment that slows or blocks the initiation of rust on steel bars. In garage slabs, this translates to better guard against moisture and chlorides reaching the rebar during service life.
Practically, you should understand that inhibitors are part of the chemistry of the mix, not a standalone repair. They influence how steel behaves under humidity, exposure, and traffic. Always confirm that the product instructions align with reinforced concrete intended for garage use.
Types of inhibitors and delivery methods
Corrosion inhibitors come in different types, each working differently to protect steel reinforcement. The main classes are:
Migratory Inhibitors: These move through the concrete’s pores to reach the steel surface. They’re usually added as a liquid admixture during mixing.
Contact Inhibitors: Applied on the surface, they create a protective layer over the concrete. They can be used for both new and existing slabs.
Anodic/Cathodic Modifiers: These change the corrosion chemistry at the steel-concrete interface. They’re typically added as admixtures or applied topically.
Mechanisms of action relevant to slabs
Inhibitors work by modifying the conditions that cause corrosion. Here’s how:
Changing Pore Solution Chemistry: Some inhibitors alter the concrete’s pore solution, making it less corrosive.
Creating a Protective Layer: Others form a physical barrier on the steel surface, preventing oxygen and water from reaching it.
Modifying Corrosion Processes: Certain inhibitors slow down or stop the corrosion process altogether by changing the electrochemical reactions at the steel-concrete interface.
When to choose inhibitors vs other measures
Inhibitors are just one tool in preventing corrosion. Here’s when to use them:
New Slab Mixes: Inhibitors can be added as admixtures during mixing for new garage slabs. This provides protection from the start.
Retrofit Treatments: For existing slabs, surface-applied inhibitors can be used to protect against corrosion and staining.
Influencing Factors: The decision to use inhibitors depends on several factors, like budget, accessibility, and the severity of corrosion. Always consider these when choosing a prevention method.
Common Dosage Mistakes and How They Manifest
Common field errors include under-dosing and skipping uniform mixing of the inhibitor with the batch. Inconsistent dosing leads to uneven protection across the slab. You may see premature staining or localized corrosion where protection falters.
Over-dosing or deviating from the label can also cause trouble, such as excessive air entrainment or altered set behavior. If you notice unexpected surface changes or finish issues, review the product data sheet and manufacturer recommendations for the correct dosage range.
Overdose effects on concrete properties and appearance
Too much corrosion inhibitor can cause more harm than good. It can slow down the setting time, making your slab take longer to cure.
Surface defects might appear, like a rough or patchy finish. This can make it harder to clean and maintain your garage floor over time.
Excess inhibitor can also stain the surface. It might leave a discoloration that’s hard to remove, ruining the aesthetic of your fresh concrete slab.
Underdose risks and false security
Not using enough inhibitor can give you a false sense of protection. Your slab might look fine at first, but corrosion could still be happening underneath.
Premature reinforcement corrosion can lead to cracks and structural issues down the line. This can cost you big in repairs later on.
The inhibitor’s job is to protect your rebar from rusting. If there’s not enough, it can’t do its job properly. So, even if your slab looks okay now, it might not be as durable or long-lasting as you’d hoped.
Frequent causes of dosing errors in the field
Mistakes happen, but knowing what to look out for can help you avoid them. Here are some common pitfalls:
- Miscommunication of units: Make sure everyone’s on the same page about whether we’re talking ounces, liters, or parts per million.
- Forgetting to adjust for batch size: A little goes a long way. Don’t just use the same amount for every batch without checking if it’s right.
- Variability in component concentrations: Check your inhibitor’s concentration before you start mixing. It might not be what you expect.
- Poor QA: Regular checks can catch dosing errors early. Don’t skip them just because everything seems fine.
Communication, attention to detail, and regular checks are key to getting your inhibitor dosage right every time.
Correct Dosing: Calculations, Measurement, and Timing
Start with the dosage guidance on the product label or data sheet, then adapt for your batch size and slab design. Keep records of the calculated amount and how it was mixed into the batch. Verify that the timing matches the placement method you are using.
Decide whether to add the inhibitor during batching, pre-dissolve in the water, or introduce it with a dedicated mixer. Always confirm with the manufacturer instructions and local rules before altering the sequence. Double-check the final mix before concrete is placed.
How to calculate dose for bagged cement and ready-mix
The first step in getting the dosage right is knowing your materials. For bagged cement, you’ll need to know its inhibitor concentration, usually given as a percentage by weight. Ready-mix concrete will have this information on the delivery ticket.
Next, determine the amount of cementitious material in your mix. This includes cement and any supplementary cementitious materials like fly ash or slag. The dosage is typically based on the total cementitious content.
Finally, consider the water content. Inhibitors are usually dosed by weight of water. Make sure to account for any admixtures that may affect the water demand.
Measuring tools and on-site verification
Accurate measurement is key to getting your dosage right. Here are some tools and checks you can use:
- Volumetric Measuring: Use a measuring scoop or bucket for bagged cement, or ask the ready-mix plant to provide pre-measured inhibitor packages.
- Gravimetric Measuring: Weigh out the inhibitor using a scale. This is the most accurate method but requires access to scales.
- Check Product Data Sheets: Always verify the recommended dosage and mixing instructions on the product data sheet or supplier guidance.
- Field Checks: Take samples of the mixed concrete and test for inhibitor concentration using a colorimetric test kit. This can be rented from most concrete testing labs.
- Inspect Delivery: When using ready-mix, inspect the delivery ticket to ensure the correct amount of inhibitor was added at the plant.
Best practice for timing of addition and mixing
The timing of inhibitor addition can affect its performance. Here are some best practices:
Add at the Plant: Some inhibitors, like those added by the ready-mix plant, are incorporated during batching. This ensures even distribution but may limit your control over dosage.
Add During Batching: If you’re mixing on-site, add the inhibitor to the dry materials before adding water. This allows for better dispersion and prevents segregation.
Surface-Applied Treatment: Some inhibitors can be applied to the surface of the slab after placement. This is typically done with liquid inhibitors using a sprayer or roller. Make sure to follow the manufacturer’s instructions for application rates and timing.
Mixing Time: Regardless of when you add the inhibitor, ensure it has adequate time to mix evenly into the concrete. This usually takes 2-5 minutes in a ready-mix truck or on-site mixer.
Interactions with Other Admixtures, Cements, and Reinforcement
Inhibitors can interact with water reducers, retarders, and supplementary cementitious materials. These interactions may change setting times or workability if not accounted for. Check compatibility charts in the product literature before combining products.
Compatibility with different cement formulations and reinforcement types matters too. Some mixes behave differently when inhibitors are present. Verify guidance from the manufacturer and consider a small trial batch if you are unsure.
Compatibility testing and supplier coordination
Before any large pour, it’s crucial to check if your chosen corrosion inhibitor plays nice with other admixtures. Simple compatibility checks can save you from costly mistakes.
Contact your admixture suppliers. They should provide data on interactions with their products. If not, ask for lab trial mixes. It’s a small investment for peace of mind.
Remember: What works in one mix might not in another. Always verify before you pour.
Influence of supplementary cementitious materials
Fly ash, slag, and silica fume can change the game when it comes to corrosion inhibitors. They alter pore chemistry, so mix-specific evaluation is a must.
- Fly Ash: Look for Class C or F. Inhibitors work well with both, but Class C sets faster.
- Slag: ASTM Type I/II. Inhibitors perform as expected, but watch for delayed setting times.
- Silica Fume: High silica content boosts strength and durability. Inhibitors work well, but expect a shorter working time.
Effects on rebar coatings and embedded elements
Corrosion inhibitors can interact with rebar coatings and other embedded elements. It’s essential to verify chemical compatibility.
Epoxy-coated rebar: Inhibitors usually don’t affect the bond, but always check. Overdosing can cause discoloration or reduced bond strength.
Stainless reinforcement: Inhibitors won’t harm stainless steel, but they might not be necessary. Consult with your supplier to decide if inhibitors are needed.
Detecting and Treating Rust Stains on Garage Slabs
Look for rust-colored stains that may indicate active corrosion or leaching from embedded metalwork. Early signs include discoloration that follows rebar patterns or tool paths. Note if staining worsens with moisture exposure or cleaning attempts.
When treating stains, start with gentle cleaning methods and progress to appropriate remediation options. Use recommended cleaners and sealers per product instructions and consult the data sheet for any safety precautions. If stains persist, re-evaluate mix design and inhibitor compatibility with the slab system.
Visual checkpoints and condition assessment
Use this checklist when inspecting your garage slab for rust stains. Early detection helps prevent further damage.
- Reddish-brown staining: Rust’s telltale sign. Check if it’s surface-level or penetrating.
- Cracking around stains: Active corrosion may be causing cracks. Inspect for width and depth.
- Flaking or spalling: Severe corrosion can cause concrete to delaminate, exposing rebar.
- Rebar exposure: Visible rebar means the concrete cover is compromised. Check for rust on exposed areas.
- Wet spots or efflorescence: Moisture encourages corrosion. Investigate water sources and penetration depth.
- Uneven surfaces or popouts: These could indicate underlying corrosion-related damage.
- Delamination sounds: Tap the slab with a hammer. A dull sound may indicate delamination.
- Magnetic test for rebar: Use a magnet to confirm rebar presence and condition beneath stains.
Quick rule: If you notice any of these signs, further testing is recommended to assess the severity and extent of corrosion.
Cleaning methods and stain removal best practices
Safely removing rust stains involves mechanical cleaning and mild chemical agents. Avoid aggressive etching on thin overlays.
Mechanical cleaning: Use wire brushing, sandblasting, or grinding to remove loose material and expose the stain. Be careful not to damage the concrete.
Mild chelating cleaners: Apply a solution of citric acid or other mild chelators to break down rust stains. Always patch test first to ensure compatibility with your slab’s finish.
Never use muriatic acid or other strong acids on thin overlays, as they can cause excessive etching and damage the concrete.
Repair and remediation for corroded reinforcement
Addressing corrosion involves localized repairs, inhibitor reapplication, or more extensive work. Structural assessment may be needed.
Localized patching: For small areas with minor corrosion, remove damaged concrete, clean the area, apply a corrosion inhibitor, and patch with fresh concrete.
Inhibitor reapplication: If corrosion is active but not severe, applying a new layer of corrosion inhibitor may slow or stop it. This works best when combined with other repairs.
Extensive repairs: Severe corrosion may require replacing damaged concrete and reinforcing bars. Consult a structural engineer before proceeding to ensure the slab’s integrity is maintained.
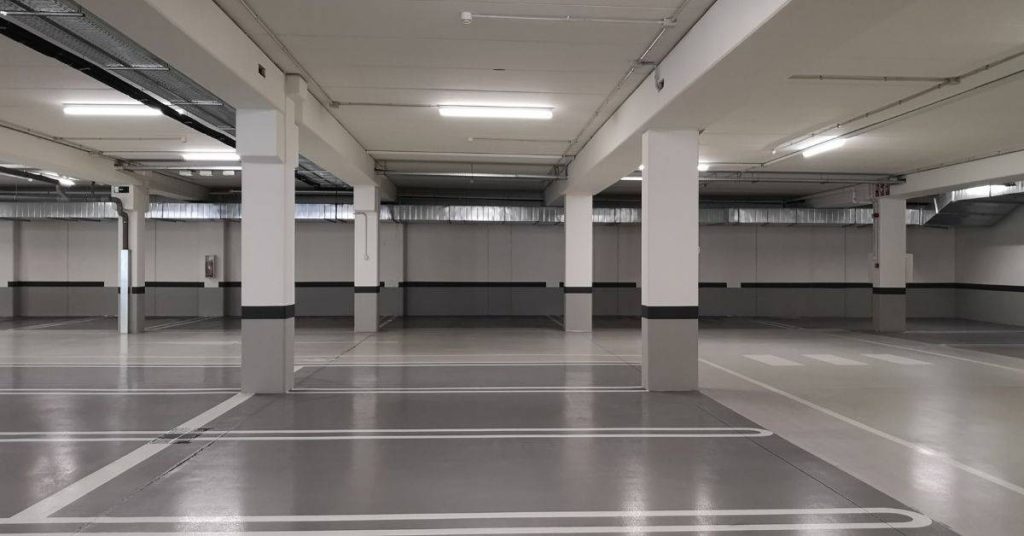
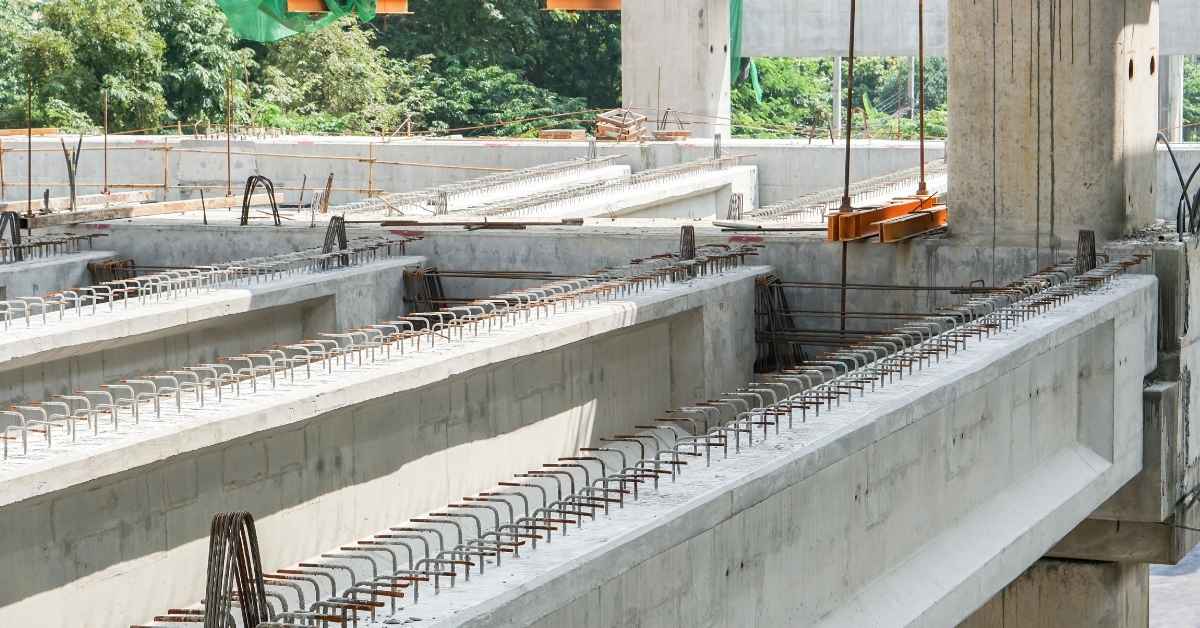
Prevention Strategies: Design, Placement, and Maintenance
Preventive measures begin with design choices that reduce corrosion risk. Consider reinforcement layout, cover depth, and drainage to limit moisture exposure. Complement design decisions with proper curing and sealing practices.
Maintenance is part of long-term protection. Schedule periodic inspections and address cracks or water intrusion promptly. Rely less on inhibitors alone by combining good design with sound placement practices and timely upkeep.
Durable detailing, cover depth, and drainage
Adequate concrete cover is your first line of defense against corrosion. It keeps moisture and chlorides away from the rebar.
Minimum 2-inch cover is recommended for garage slabs. More in areas prone to deicing salts or splash zones.
Slope your slab 1/4 inch per foot towards drains to keep water moving off the surface. This reduces wetting time and limits chloride ingress.
Detail joints properly with expansion joints, control joints, and proper spacing. This helps manage cracking and keeps moisture out.
Sealers, membrane systems, and maintenance routines
Topical protection complements inhibitors by creating a physical barrier against moisture and chlorides. Apply sealers or membrane systems at the end of construction.
Reapply every 2-5 years, depending on traffic, weathering, and garage conditions. Regular inspection helps determine reapplication frequency.
Maintain your slab with regular cleaning to remove dirt and debris that can trap moisture. Sweep or blow off the surface periodically.
Address any cracks promptly with appropriate crack sealers to prevent water intrusion and further damage.
Material choices as preventative measures
The right materials can significantly reduce corrosion risk. Here are some options:
- Coated Reinforcement: Zinc or epoxy coatings protect rebar from direct contact with concrete and moisture. Look for G90 zinc coating or 3-4 mils thick epoxy. Avoid thin coatings that can wear off quickly.
- Stainless Steel Reinforcement: Type 304 or 316 stainless steel offers excellent corrosion resistance. Use where chlorides are present, like in garage slabs near deicing salt storage areas.
- Corrosion-Resistant Concretes: High-performance concretes with low water-cement ratios and air-entraining admixtures can improve long-term durability. Look for strength class 4000 psi or higher and air content of 6% or more.
- Galvanized Reinforcement: Zinc coating on rebar provides temporary protection until the concrete’s alkalinity activates. Not recommended for long-term corrosion prevention in garage slabs due to limited lifespan.
- Fiber-Reinforced Polymer (FRP) Rebar: Non-corrosive and strong, FRP is an excellent alternative to steel rebar in corrosive environments. It’s more expensive but can be cost-effective in the long run by reducing maintenance and repair costs.
Tools, Materials Checklist and Material Specs Explained
Assemble a DIY-friendly toolkit: PPE, mixing tools, calibrated measuring devices, and appropriate containers for dosing. Have a plan to verify product data sheets and safety data sheets before use. Keep a log of batch details and instructions consulted.
Know which technical information to verify: dosage ranges, mixing requirements, cure times, and compatibility notes. Always cross-check label details with manufacturer instructions and your local regulations. Don’t proceed without confirming these specifics in writing.
Tools and PPE for Dosing and Stain Treatment
Before you start, make sure you have all the necessary tools and personal protective equipment (PPE) to ensure a safe and efficient job.
- Tape measure: To accurately measure dosage and application areas.
- Mixing paddle: For blending inhibitors into concrete mix.
- Concrete mixer: To thoroughly combine ingredients.
- Dosage pump or sprayer: For precise application of inhibitors and stain removers.
- Safety glasses: To protect eyes from splashes and debris.
- Gloves: To prevent skin contact with chemicals.
- Respirator: For protection against harmful fumes during application and cleaning.
- Protective clothing: To cover skin and avoid chemical exposure.
Quick rule: Always wear appropriate PPE when handling chemicals to prevent injuries and health issues.
Material Specs and Standards to Check
Before purchasing corrosion inhibitors or stain removers, review the product data sheets and confirm with suppliers to ensure you’re getting the right products for your needs.
- Active ingredient type: Confirm it’s compatible with your concrete mix and reinforcement.
- Recommended dosage range: To avoid under- or over-dosing, which can lead to ineffectiveness or damage.
- Compatibility notes: Check for any interactions with other admixtures, cements, or supplementary materials in use.
- Certifications: Look for relevant industry standards and approvals (e.g., ASTM C1582 for corrosion inhibitors).
- Safety Data Sheet (SDS): Review to understand potential hazards, handling, storage, and disposal.
Quick rule: Always verify product specifications and consult with suppliers to ensure you’re using the right materials for your project.
Safe Storage, Handling, and Disposal
Proper storage, handling, and disposal of corrosion inhibitors and stain removers are crucial to maintain safety and comply with regulations.
- Storage temperature: Keep products within their recommended storage temperatures (usually between 40°F – 80°F or 5°C – 27°C).
- Ventilation: Store in a well-ventilated area to prevent the buildup of harmful fumes.
- Separation from other chemicals: To avoid unwanted reactions, keep inhibitors and stain removers away from other chemicals.
- Spill precautions: Have absorbent materials ready to contain and clean up spills promptly.
- Disposal considerations: Follow local regulations for disposing of chemical waste. Never pour chemicals down drains or into the ground.
- Safety Data Sheet (SDS) guidance: Always follow disposal instructions provided in the SDS.
Quick rule: Always prioritize safety and follow local regulations when storing, handling, and disposing of chemicals.
Troubleshooting, Monitoring, and Long-Term Performance
Develop a simple troubleshooting flow for common issues like staining, premature setting, or unexpected finish changes. Identify whether the root cause is dosing, mixing, or material incompatibility. Use a practical, stepwise approach to isolate the problem.
Monitoring can include visual inspections and periodic tests or measurements recommended by the product data sheet. If performance concerns persist, consider retrofit options or replacement and consult a qualified professional if needed. Always document findings to guide future pours.
Troubleshooting checklist for mixed symptoms
Use this checklist when you’re seeing multiple issues on your garage slab, like rust stains and delayed setting or efflorescence.
- Check for staining and delayed set: Both could indicate inadequate inhibitor dosage or poor concrete mix design.
- Inspect cracks for signs of active corrosion. Cracks can expose rebar, leading to rusting and further cracking.
- Look for efflorescence on the surface. This white powdery substance indicates excess water in the concrete, which could be causing other issues.
- Test pH levels in affected areas. Low pH can indicate acid attack or carbonation, while high pH suggests alkali-silica reaction (ASR).
- Check for delamination by tapping the slab. A hollow sound indicates a loss of bond between concrete and reinforcement.
- Inspect joints for signs of deterioration or leakage, which could be causing underlying issues.
- Examine the slab’s edges for signs of spalling. This could indicate corrosion of the reinforcement at the edge.
- Test for chloride content if you suspect contamination or inadequate inhibitor dosage.
- Check the slab’s overall condition to assess if there are other underlying issues contributing to the problems.
Quick rule: If multiple issues persist after initial troubleshooting, consider consulting a specialist for further assessment and guidance.
Long-term monitoring methods and performance indicators
Regularly monitor your garage slab to ensure the corrosion inhibitor is working effectively. Here’s how:
First, conduct visual inspections every six months to a year. Look for signs of staining, cracking, or spalling. These could indicate that the inhibitor is no longer effective.
Next, perform chloride testing annually. This will help you determine if there’s been any contamination or if the inhibitor dosage was inadequate. A simple field test kit can be used for this.
Lastly, check carbonation depth every three to five years. Carbonation reduces the pH of concrete, making it vulnerable to corrosion. By measuring the depth of carbonation, you can determine if additional measures need to be taken to protect your slab.
When retrofit inhibitors, cathodic protection, or replacement are warranted
Sometimes, even with proper maintenance, garage slabs may require additional measures to protect against corrosion. Here’s when:
If staining and corrosion persist despite regular cleaning and maintenance, it might be time to consider a retrofit inhibitor application. This involves drilling holes into the slab to inject the inhibitor directly onto the reinforcement.
For extensive damage or widespread corrosion, cathodic protection may be necessary. This involves installing an anode bed beneath the slab and connecting it to the reinforcement, creating a protective electrical circuit.
If structural integrity is compromised, replacement might be the only option. Consult with a structural engineer before proceeding with any major repairs or replacements. They can assess the damage and provide guidance on the best course of action.
Conclusion
Keep the slab safe and long-lasting by sticking to proper dosing, careful timing, and early detection of signs of trouble. The goal is to prevent rust stains, preserve strength, and avoid costly fixes down the line.
Follow these steps in plain language: verify the design and placement plan, confirm material specs and inhibitor compatibility, run the calculations for dosage based on cement content and slab area, measure accurately with the right tools, apply as the pour cures or when the slab is still workable, do a small test patch to check for reactions, and monitor the surface for any rust staining or changes over time.
Two or three common missteps to avoid are over-dosing or under-dosing the inhibitor, and mixing instructions that contradict other admixtures or reinforcement requirements. Always test in a small area first, read and follow the material specs, and keep safety at the top of the list—protect skin, eyes, and ventilation, and never rush a cure or skip inspection.
If the project starts pushing beyond simple patch work, or you see stubborn rust stains that keep coming back, call in a professional to review design, dosing, and long-term maintenance. Stay practical, stay focused, and you’ll have a garage slab that holds up without surprises. Stay on it and you’ll finish with confidence.
FAQ
Is it safe for a DIYer to apply a corrosion inhibitor in a new garage slab?
Yes, but follow the product label exactly. Read manufacturer instructions and any local rules before you start. If in doubt, contact the supplier or a pro for guidance.
How do I know I’m using the right amount or dosage?
Compare what you’re applying to the label’s directions. If you’re unsure, don’t guess—check the manufacturer instructions and the product datasheet. If needed, test a small area first and observe for any adverse effects.
Can corrosion inhibitors conflict with other concrete products I’m using?
They can clash with other admixtures or finishes. Always check compatibility on the label or with the supplier. If you’re combining products, do a small trial batch and follow the instructions exactly.
What signs show improper dosing or risk of rust stains later?
Look for unexpected discoloration, staining, or surface issues after curing. If you see rust stains or corrosion-related marks, stop and verify product compatibility and application with the manufacturer instructions. Recheck your pour and curing plan against the label guidance.