

Table of Contents
- Introduction to Overlay Debonding
- Top 5 Reasons Why Overlays Fail to Bond
- Common Causes of Overlay Debonding
- Types of Overlays and Their Specific Challenges
- Testing Methods for Overlay Adhesion
- Material Compatibility Issues
- Environmental Factors Affecting Overlay Adhesion
- Cost Implications of Overlay Debonding
- Safety Precautions During Overlay Application
- Knowing When to Call in the Pros for Overlay Projects
- Conclusion
- FAQ
Introduction to Overlay Debonding
Overlay debonding often occurs due to inadequate surface preparation, improper application techniques, or environmental factors. In this article, we explore the top five causes of overlay debonding and the essential tests to diagnose and prevent these issues, ensuring the longevity and performance of your overlays.
Definition and Importance
Overlay debonding happens when the new layer of material doesn’t stick properly to the existing surface. This can lead to cracks, potholes, and a shorter lifespan for your pavement. Ignoring this issue means you’ll be dealing with more frequent repairs and higher costs down the line.
Addressing overlay debonding is crucial for maintaining a durable and safe surface. You need to check base compaction and ensure the surface is clean and dry before applying the new layer. Skipping these steps is asking for trouble. A well-bonded overlay not only looks better but also performs better under traffic and weather conditions.
Don’t underestimate the importance of using the right materials and techniques. Poor choices here can lead to early failures. Investing time in proper preparation and application will save you headaches and money in the future. Remember, a solid foundation is key to a long-lasting overlay.
Overview of Affected Industries
Overlay debonding isn’t just a minor inconvenience; it can be a major headache for several industries. The construction industry is at the forefront. Whether you’re dealing with roads, bridges, or buildings, a poorly bonded overlay can lead to costly repairs and safety hazards. Contractors need to pay close attention to the materials and methods they use to avoid these issues.
The automotive industry also feels the impact. Manufacturing plants often use overlays in machinery and flooring. If these overlays fail, it can halt production and lead to expensive downtime. Regular maintenance checks and ensuring proper installation can save a lot of trouble down the line.
Even the aerospace industry isn’t immune. Aircraft surfaces rely on overlays for protection and performance. A debonded overlay here isn’t just costly; it can be dangerous. Regular inspections and adherence to strict installation protocols are non-negotiable to ensure safety and efficiency.

Top 5 Reasons Why Overlays Fail to Bond
Overlay debonding can be a frustrating and costly issue, but understanding the main reasons it happens can help you avoid it. Whether you’re working on a driveway, a patio, or an industrial floor, knowing these causes will save you time and money. Here are the top culprits behind overlay debonding and how to tackle them.
- Poor Surface Preparation: A dirty or uneven surface is a recipe for disaster. Always clean thoroughly and roughen the surface to help the overlay grip better.
- Moisture Issues: Moisture trapped between layers can weaken the bond. Ensure the surface is dry and use moisture barriers if needed.
- Incompatible Materials: Using materials that don’t work well together can lead to debonding. Always check compatibility before starting your project.
- Temperature Extremes: Applying overlays in extreme temperatures can cause them to expand or contract too quickly, leading to failure. Aim for moderate weather conditions.
- Improper Application Techniques: Rushing the job or using the wrong tools can result in a weak bond. Follow the manufacturer’s instructions and use the right equipment for the job.
Common Causes of Overlay Debonding
Overlay debonding is often caused by inadequate surface preparation, which is crucial for ensuring strong adhesion. Common mistakes include failing to properly clean the substrate or not addressing moisture levels, both of which can compromise the bond. Additionally, improper mixing or application of overlay materials can lead to weak spots that eventually result in debonding.
Understanding these factors is essential for anyone involved in overlay projects, whether on a DIY or professional level. Proper preparation and application techniques can significantly enhance the longevity and performance of overlays. Being aware of environmental conditions, such as temperature and humidity, and choosing compatible materials can prevent costly repairs and ensure a successful outcome.
Material Incompatibility
When materials don’t match well, overlays can start peeling off. It’s like trying to glue plastic to metal without the right adhesive. You need the right combo to avoid debonding.
- Concrete Mix – Use a mix that’s compatible with your existing surface to ensure a strong bond.
- Bonding Agent – This acts like a glue between layers. Make sure it suits both materials.
- Sealer – Protects the overlay and helps it stick. Choose one that matches the overlay’s properties.
- Primer – Prepares the surface for the overlay. It should be compatible with both the substrate and the overlay.
Pro tip: Always check material specs for compatibility. A little time spent on this can save you a lot of hassle later.
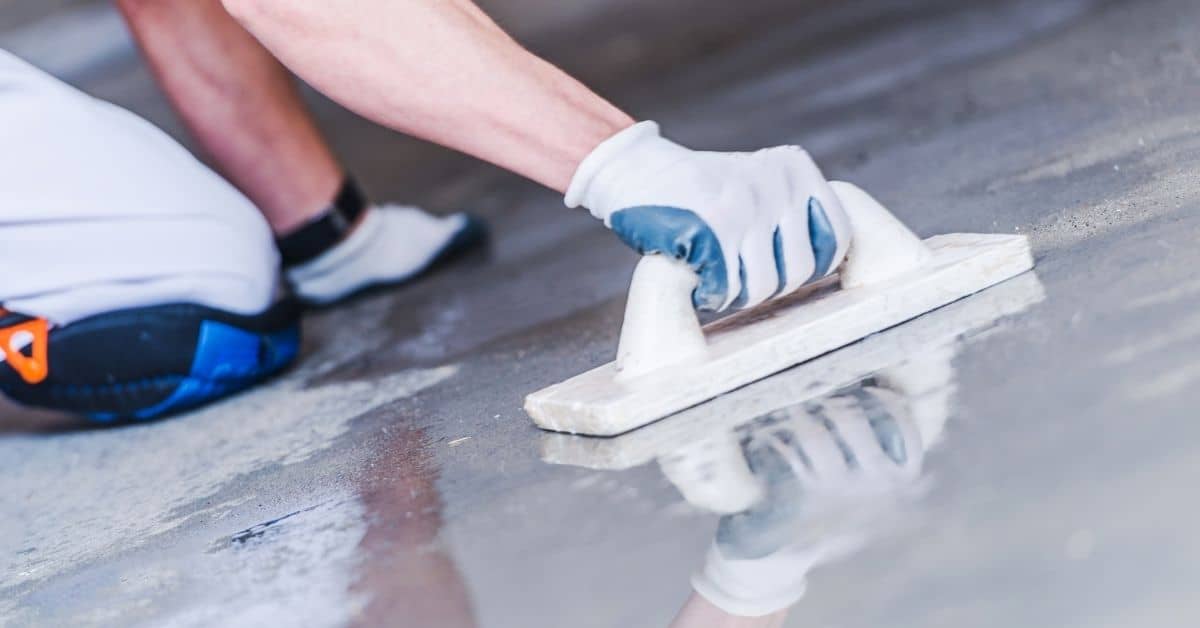
Poor Surface Preparation
Overlay debonding often starts with poor surface preparation. If you skip or rush this step, you’re setting up your project for failure. The surface must be clean and free of debris, oil, or old paint. These contaminants can prevent the overlay from sticking properly. Always make sure to thoroughly clean and dry the surface before applying any new material.
Another critical factor is ensuring the surface is properly roughened. A smooth surface might seem ideal, but overlays need something to grip onto. Use a grinder or sandblaster to create a texture that promotes adhesion. This is not the place to cut corners; a well-prepared surface is the foundation of a successful overlay.
Finally, check base compaction. A poorly compacted base can lead to movement and cracking, which will compromise the overlay. Make sure the base is solid and stable. Remember, a little extra time spent on preparation can save you a lot of headaches down the road.
Environmental Factors
Temperature swings can wreak havoc on your overlay. If it’s too hot or too cold, the materials might not bond properly. Always aim to apply overlays when the temperature is mild. Extreme temperatures can cause the overlay to expand or contract too quickly, leading to cracks or debonding. Stick to the recommended temperature range specified by the material manufacturer.
Humidity is another culprit. High humidity can slow down the curing process, while low humidity might speed it up too much. Both scenarios can lead to weak bonds. Monitor the humidity levels before starting your project. If the conditions aren’t right, wait it out. It’s better to delay than to deal with a failed overlay.
Other environmental factors like wind and rain should not be ignored. Wind can blow debris onto your wet overlay, and rain can wash away the materials before they set. Always check the weather forecast and plan your work accordingly. If the forecast looks bad, reschedule your project. A little patience can save you from a lot of headaches down the road.
Addressing Surface Preparation
Getting the surface ready is crucial. Start by removing all debris, oil, and old paint. Use a grinder or sandblaster to create a textured surface that the overlay can adhere to. This step is non-negotiable if you want a long-lasting bond.
Managing Environmental Factors
Keep an eye on the weather. If the forecast predicts rain or extreme temperatures, postpone your project. Always aim to work in conditions that are favorable for the materials you’re using. This foresight can prevent many common issues related to debonding.
Types of Overlays and Their Specific Challenges
Concrete overlays, such as microtoppings, stampable overlays, and self-leveling overlays, each come with their own adhesion challenges. These challenges often stem from factors like substrate preparation, environmental conditions, and material compatibility. Selecting the right overlay type based on the existing surface conditions and intended use is crucial for successful application.
Proper surface preparation is key to preventing debonding, involving techniques like cleaning, profiling, and priming. Understanding these processes helps ensure the overlay adheres well and lasts longer. Testing adhesion strength for each type of overlay can further guarantee durability, making it essential knowledge for anyone working on a concrete project.
Ceramic Overlays
Ceramic overlays can add a sleek, modern look to your space, but they come with their own set of challenges. One of the main issues is debonding, which often happens due to improper installation. Make sure the surface is clean and free of dust or grease before you start. Any contamination can prevent the adhesive from sticking properly.
Another common problem is insufficient adhesive coverage. Don’t skimp on the adhesive; apply it evenly across the entire surface. Gaps in the adhesive layer can create weak spots, making the overlay more likely to lift or crack over time.
Temperature changes can also affect ceramic overlays. If the substrate expands or contracts significantly, it can lead to debonding. To avoid this, ensure that the base is stable and well-prepared. Check base compaction and make sure it’s suitable for the environment where the overlay will be applied.
Composite Overlays
Composite overlays are a mix of different materials, often combining the strengths of each to create a durable surface. However, this blend can lead to unique challenges, especially when it comes to adhesion. The different materials can expand and contract at different rates, causing stress at the joints. To avoid problems, ensure that the base is stable and well-prepared.
Before applying a composite overlay, check base compaction. A poorly compacted base can lead to uneven settling, which might crack the overlay. Also, make sure the surface is clean and free of debris. Any dirt or oil can prevent the overlay from sticking properly, leading to delamination.
Another challenge is moisture. Composite overlays can trap moisture between layers, leading to deterioration over time. Use a moisture barrier if necessary, and ensure proper drainage to keep water from pooling. A little attention to these details can save you a lot of hassle down the road.
Testing Methods for Overlay Adhesion
Testing the adhesion strength of overlays is crucial to prevent debonding, which can lead to costly repairs and safety hazards. Various methods, such as the pull-off test and shear test, are employed to assess how well an overlay adheres to a surface.
For DIY enthusiasts and jobsite professionals, understanding these testing methods helps ensure the longevity and reliability of their projects. By interpreting test results accurately, potential adhesion issues can be identified early, saving time and resources in the long run.
Pull-Off Test
The pull-off test is a straightforward way to check how well your overlay sticks to the surface. You start by gluing a metal or plastic disc to the overlay. Once the glue sets, you use a machine to pull the disc away from the surface. This measures the force needed to break the bond. If the disc pops off easily, you’ve got a problem with adhesion.
What you learn from this test is crucial. It tells you if the overlay is going to stay put or if it’s likely to peel away. A strong bond means the overlay is well-applied. A weak bond suggests issues like poor surface prep or bad materials. If the test shows poor adhesion, check base compaction and make sure the surface was clean before applying the overlay.
Don’t skip this test thinking it’s a waste of time. It’s your best defense against future headaches. Better to find out now than after the overlay starts failing. If you get poor results, take corrective action immediately to avoid costly repairs down the line.
Shear Test
The shear test is another method to check how well your overlay sticks to the surface. Unlike the pull-off test, which pulls the overlay directly away, the shear test measures how much force it takes to slide the overlay along the surface. This is crucial because real-world conditions often involve sideways forces.
To perform a shear test, you’ll need a shear testing machine. It applies a horizontal force to the overlay until it fails. This tells you how strong the bond is under lateral stress. Make sure the overlay and base are properly prepared before testing. Check base compaction and surface cleanliness to avoid misleading results.
Don’t skip this test if you’re working on areas prone to sideways stress, like floors or ramps. It helps ensure your overlay won’t slide off under pressure. Ignoring shear strength can lead to costly repairs or even safety hazards down the line.
Material Compatibility Issues
Choosing overlay materials that are chemically compatible with the substrate is crucial for ensuring proper adhesion. Incompatibility issues, such as differences in thermal expansion rates and moisture absorption, can lead to debonding and failure of the overlay.
Understanding material compatibility is essential for successful applications, whether you’re working on a DIY project or a professional jobsite. Testing for compatibility through small-scale adhesion tests and consulting manufacturer guidelines can prevent costly mistakes. Proper surface preparation, including cleaning, roughening, and priming, further enhances material compatibility. By knowing successful material pairings and common mismatches, you can achieve durable and long-lasting results.
Thermal Expansion Mismatch
When you’re working with different materials, you can’t ignore how they expand and contract with temperature changes. If one material expands more than the other, it can lead to debonding. This happens because the materials pull apart from each other as they heat up or cool down. It’s like trying to fit a square peg in a round hole; eventually, something’s got to give.
Before you start your project, take a good look at the thermal expansion rates of the materials you’re using. You want them to be as similar as possible to avoid problems down the line. If they aren’t, you might need to rethink your material choices or find a way to accommodate the movement. Ignoring this is a recipe for failure.
Also, consider your environment. If you’re in a place with extreme temperature swings, the risk of thermal expansion mismatch causing issues is even higher. Be smart about it. If you can’t change the materials, you might need to add some flexibility to your design to handle the stress. Don’t just hope for the best; plan for the worst and save yourself a headache.
Identifying and Avoiding Material Compatibility Gaps
Before you start your overlay project, make sure your materials are compatible. Overlooking this can lead to debonding and wasted effort. A simple checklist can help you avoid these pitfalls and ensure a strong, lasting bond between your overlay and the existing surface.
- Check the thermal expansion rates of all materials. They should be similar to prevent stress and cracking.
- Ensure the moisture absorption levels are compatible. This prevents water from weakening the bond.
- Review the chemical compatibility of your overlay and substrate. Some materials react poorly when combined.
- Consult manufacturer guidelines for recommended pairings. They often provide valuable insights and warnings.
- Perform a small-scale adhesion test before committing to the full project. This can reveal potential issues early.
- Use a bonding agent that suits both the overlay and the substrate. This acts like glue and is crucial for adhesion.
- Consider the environmental conditions where the overlay will be applied. Extreme conditions can exacerbate compatibility issues.
Creating a Compatibility Checklist
Having a checklist can save you from costly mistakes. Include key factors like thermal expansion, moisture levels, and chemical reactions. Double-check each item before starting your project to ensure everything is in order.
Environmental Factors Affecting Overlay Adhesion
Environmental conditions play a crucial role in the adhesion of overlays, influencing their durability and effectiveness over time. Temperature fluctuations during curing and post-application can cause expansion and contraction, affecting the bond. Additionally, humidity levels can alter the moisture content in concrete overlays, impacting their bonding strength.
Understanding these factors is essential for ensuring the longevity and performance of overlays, especially in variable climates. Wind and air circulation can accelerate drying, increasing the risk of debonding. By recognizing these challenges, you can implement best practices to mitigate environmental impacts, ensuring a successful overlay application and curing process.
Temperature Variations
Temperature changes can play havoc with overlay adhesion. When temperatures swing from hot to cold, materials expand and contract. This movement can weaken the bonds in your overlay. If you’re working in an area with significant temperature shifts, it’s crucial to plan accordingly. Use materials that are designed to handle these changes, and always check base compaction to ensure stability.
Don’t underestimate the impact of extreme temperatures. If it’s too hot, overlays can become too pliable, making them prone to damage. On the flip side, cold conditions can make materials brittle. To avoid these issues, try to schedule your work during moderate weather conditions. If that’s not possible, make sure to use temperature-appropriate adhesives and follow the manufacturer’s guidelines closely.
Finally, keep an eye on the forecast. Sudden temperature drops or heatwaves can catch you off guard. If you’re in the middle of a project, be ready to pause and protect your work. Covering the area or using temporary heating can help maintain a consistent environment, ensuring your overlay bonds remain strong.
Moisture Exposure
Moisture is a sneaky enemy when it comes to overlay adhesion. If water gets trapped between the overlay and the base, it can weaken the bond. This can lead to peeling, bubbling, or even complete failure of the overlay. Before you start, make sure the surface is completely dry. Check the weather forecast and avoid applying overlays on rainy or humid days.
Another thing to consider is the moisture content of the base material itself. Some materials, like concrete, can hold a surprising amount of water. Use a moisture meter to ensure the base is dry enough for adhesion. If the moisture level is too high, wait until it dries out or use a dehumidifier to speed up the process.
Proper drainage is also crucial. If water pools on or around the overlay, it can seep into the edges and compromise the adhesion. Check base compaction and slope to ensure water flows away from the surface. If you’re not sure, pour some water on the area and see where it goes. Fix any issues before you lay down the overlay.
Cost Implications of Overlay Debonding
Overlay debonding can significantly impact the financial landscape of construction projects. Initial costs for overlay installation might seem manageable, but preventing debonding can lead to substantial savings. When debonding occurs, repair and replacement costs quickly add up, encompassing both labor and materials.
Understanding the financial implications of overlay debonding is crucial for project managers and DIY enthusiasts alike. Delays caused by debonding can extend project timelines, increasing overall expenses. Long-term maintenance costs also rise if debonding issues recur, highlighting the importance of proper installation and preventive measures.
Repair and Replacement Costs
Repairing or replacing debonded overlays isn’t just about slapping on a new layer. First, you need to inspect the underlying surface. If the base isn’t solid, you’ll end up with the same problem again. Fixing these foundational issues can add to the cost, but it’s necessary to avoid future headaches.
When you’re calculating costs, consider the price of materials and labor. High-quality materials might cost more upfront, but they save you money in the long run by lasting longer. Skimping on materials is a false economy. Also, don’t forget to factor in the cost of removing the old overlay, which can be a surprisingly big chunk of the budget.
Finally, think about whether you need to hire professionals. DIY might seem cheaper, but if you don’t have the skills, you could end up paying more to fix mistakes. Hiring experienced contractors can be worth it to ensure the job is done right the first time.
Long-Term Financial Impact
Repeated overlay debonding isn’t just a nuisance; it’s a financial drain. If you keep ignoring the root causes, you’ll face escalating repair costs. Each time you patch things up, you’re only buying a little time before the next failure. Think of it like a leaky roof—fixing the ceiling doesn’t stop the rain from coming in.
Beyond the direct costs, there’s the potential hit to your property’s value. A surface that keeps breaking down signals poor maintenance or underlying issues. If you ever plan to sell, this could scare off buyers or force you into expensive repairs to make the sale. It’s better to address the problem early and thoroughly.
Finally, consider the indirect costs. Frequent repairs mean more downtime and disruption. If this is a driveway or a business parking lot, that downtime can mean lost revenue or inconvenience for customers. To avoid these headaches, invest in quality materials and proper installation from the start. It might seem costly upfront, but it’s a smart move in the long run.
Safety Precautions During Overlay Application
Ensuring safety during overlay application is crucial for both personal well-being and successful project completion. Key safety measures include wearing personal protective equipment (PPE) such as gloves, goggles, masks, and protective clothing, as well as ensuring proper ventilation to prevent inhalation of harmful fumes.
Understanding and implementing these safety precautions can significantly reduce the risk of accidents and health hazards. Proper handling and storage of materials, along with preparing the work area, not only protect the individual but also contribute to a cleaner, more efficient application process. In case of emergencies like spills or skin contact, having a clear procedure in place is essential for quick and effective response.
Protective Gear and Equipment
When applying overlays, safety isn’t just a suggestion—it’s a must. The right protective gear keeps you safe from dust, chemicals, and physical injuries. Here’s what you need to have on hand.
- Safety Glasses Protect your eyes from flying debris and chemicals. Always wear them, even for small tasks.
- Dust Mask Keeps harmful particles out of your lungs. Choose a high-quality mask for better protection.
- Gloves Shield your hands from chemicals and sharp edges. Opt for chemical-resistant gloves for best results.
- Ear Protection Essential when using noisy equipment. Use earplugs or earmuffs to prevent hearing damage.
- Steel-Toed Boots Protect your feet from heavy objects and sharp tools. They’re a must on any worksite.
- Coveralls Wear these to keep your clothes clean and provide an extra layer of protection.
Pro tip: Invest in quality gear. Cheap equipment might save you money upfront but can cost you dearly in safety and durability.
Safe Handling of Materials
Handling overlay materials safely is crucial to avoid accidents and ensure a strong bond. Here’s a list of what you’ll need and what to watch out for.
- Ready-mix bag: Choose a high-quality mix for better adhesion and durability.
- Mixing bucket: Use a sturdy container to prevent spills and ensure a uniform mix.
- Mixing paddle: Attach to a drill for efficient and consistent mixing.
- Water source: Clean, cool water is essential for proper mix consistency.
- Measuring tools: Accurate measurements prevent weak spots and ensure the mix sets correctly.
- Application tools: Use trowels or squeegees that are in good condition to apply the overlay evenly.
- Cleaning supplies: Keep rags and a bucket handy to clean up spills immediately.
Pro tip: Always check the expiration date on your materials. Old or expired products can compromise the strength and durability of your overlay.
Knowing When to Call in the Pros for Overlay Projects
Tackling overlay projects can be rewarding, but sometimes it’s best to call in a professional. Knowing your limits is crucial to avoid costly mistakes and ensure a durable finish. Here are some situations where you should consider getting expert help.
- Complex Repairs Needed: If the base is severely damaged or uneven, a professional can assess and fix it properly, ensuring a solid foundation.
- Large Surface Areas: Handling extensive areas requires specialized equipment and expertise to ensure even application and curing.
- High-Stakes Projects: For overlays in high-traffic or critical areas, like commercial floors or driveways, professional installation minimizes risks.
- Persistent Debonding Issues: If you’ve tried fixing debonding problems multiple times without success, a pro can diagnose and resolve underlying issues.
- Specialized Materials: Some overlays require specific skills or tools for proper application, which professionals are trained to handle.
- Time Constraints: If you need the project completed quickly and efficiently, hiring a professional can save time and stress.
- Safety Concerns: If the project involves hazardous materials or conditions, it’s safer to let trained professionals handle it.
Benefits of Professional Expertise
Professionals bring experience and knowledge that can prevent common pitfalls. They have access to high-quality materials and tools, ensuring a longer-lasting overlay. Plus, their work often comes with a warranty, offering peace of mind for the future.

Conclusion
Overlay debonding is a common problem, but it’s often avoidable. Understanding why it happens is your first step to preventing it. From poor surface preparation to ignoring environmental factors, small mistakes can lead to big headaches. Always make sure your materials are compatible and follow the recommended application methods.
Testing your overlay adhesion before committing to the full project can save you time and money. Don’t skip this step. It’s like checking the weather before heading out. If you ignore it, you might end up with a mess on your hands. Remember, shortcuts in preparation lead to long-term problems.
Overlay debonding isn’t just a nuisance; it can be a safety hazard and a costly mistake. Take the time to do things right. Follow the safety precautions and be thorough in your approach. A little extra effort upfront can prevent a lot of frustration down the road.
FAQ
Why did my overlay debond?
Most likely, the surface wasn’t prepared properly. Dust, oil, or moisture can prevent the overlay from sticking. Make sure the base is clean and dry before applying.
Can weather affect overlay bonding?
Absolutely. Extreme temperatures or humidity can mess with the curing process. Always check weather conditions before starting your project.
Is it necessary to use a primer?
Yes, using a primer is crucial. It helps the overlay adhere better to the surface. Skipping this step is asking for trouble.
How can I test if my overlay is bonded well?
Tap the surface lightly with a hammer. A hollow sound means it’s not bonded properly. You want a solid, firm sound.
What should I do if my overlay debonds?
Remove the loose sections and clean the area thoroughly. Reapply the overlay following the correct preparation steps. Don’t cut corners this time.