

Introduction
Old bagged concrete can sometimes be reused after a quick field check. Look for stability in the mix, no foul odor, and no obvious separation or hard clumps. If it’s dusty, crumbly, or smells off, don’t reuse it.
Start by inspecting the bag for damage and checking the label for shelf life and storage notes. Open a bag and do a pinch-and-squeeze test to gauge consistency, then try a tiny test mix to see how it sets. If you’re unsure, follow the manufacturer’s instructions or local rules and err on the side of safety.
Key takeaways
- Inspect bag dates, seals, and damage before opening for safe assessment.
- Visual: check color, clumping, hardened rims; discard suspect bags immediately.
- After opening, sniff for sour odor and sticky texture; avoid handling with bare hands.
- Perform simple field tests: setting time feel, simple consistency, and bond check.
- Store bags upright off ground; rotate stock and use oldest first to reduce waste.
- If uncertain about usability, consult labels, manufacturer guidelines, and local code requirements.
Table of Contents
- Introduction
- Key takeaways
- Why Bagged Concrete Ages and What Affects Usability
- Visual Checkpoints Before You Open a Bag
- Quick Tactile and Smell Tests After Opening
- Simple Field Performance Tests to Run on-Site
- Tools and Materials Checklist for Field Assessment
- Deciding Criteria: When to Use, When to Blend, When to Discard
- Common Mistakes and Misconceptions to Avoid
- Best Practices for Storage to Prevent Future Waste
- Conclusion
- FAQ
Why Bagged Concrete Ages and What Affects Usability
Bagged concrete can change after it leaves the shop. Chemical reactions and moisture loss ride along with time, and that can weaken the mix. You’ll notice performance shifts as storage and handling conditions change.
Environment and storage practices drive deterioration faster than you might expect. Heat, humidity, and repeated temperature swings can speed up moisture loss and contribute to clumping. Improper stacking or exposure to rain can degrade the bag and the material inside.
Cement hydration and moisture exposure
Bagged concrete’s main ingredient, cement, reacts with water over time. This process, called hydration, starts as soon as the bag is opened or exposed to moisture.
Premature hydration ruins the powder’s consistency. It clumps up, making it hard to mix evenly. Worse, it reduces bonding strength with other ingredients and water added later.
Check for lumps or a caked-on appearance on the inside of the bag. If you find any, it’s a sign that hydration has already started.
Contamination and compaction in storage
Bags stored improperly can pick up foreign debris or absorb moisture from the air, leading to contamination. This reduces the concrete’s strength and durability.
Compacted bags are another red flag. When bags get squished, their contents lose their original consistency. This makes it hard for the cement to bind with other ingredients properly.
Before using, inspect each bag. Look for any signs of contamination like dirt or rust on the outside. Gently squeeze the bag to check for compaction. If you feel lumps or a solid mass, don’t use that bag.
Manufacturer shelf life and labeling to check
Every manufacturer has a recommended shelf life for their bagged concrete. This is usually printed on the bag or in the product’s datasheet. Stick to these guidelines to ensure you’re using fresh, high-quality materials.
First, look for the manufacture date. If it’s old, even if the bag hasn’t been opened, the cement may have started hydrating. Check the lot code too. Some manufacturers track batches by lot codes, which can help pinpoint any quality issues.
If you can’t find this information on the bag, look for a product datasheet online using the manufacturer and product name. It should list the recommended shelf life and other useful info.
Visual Checkpoints Before You Open a Bag
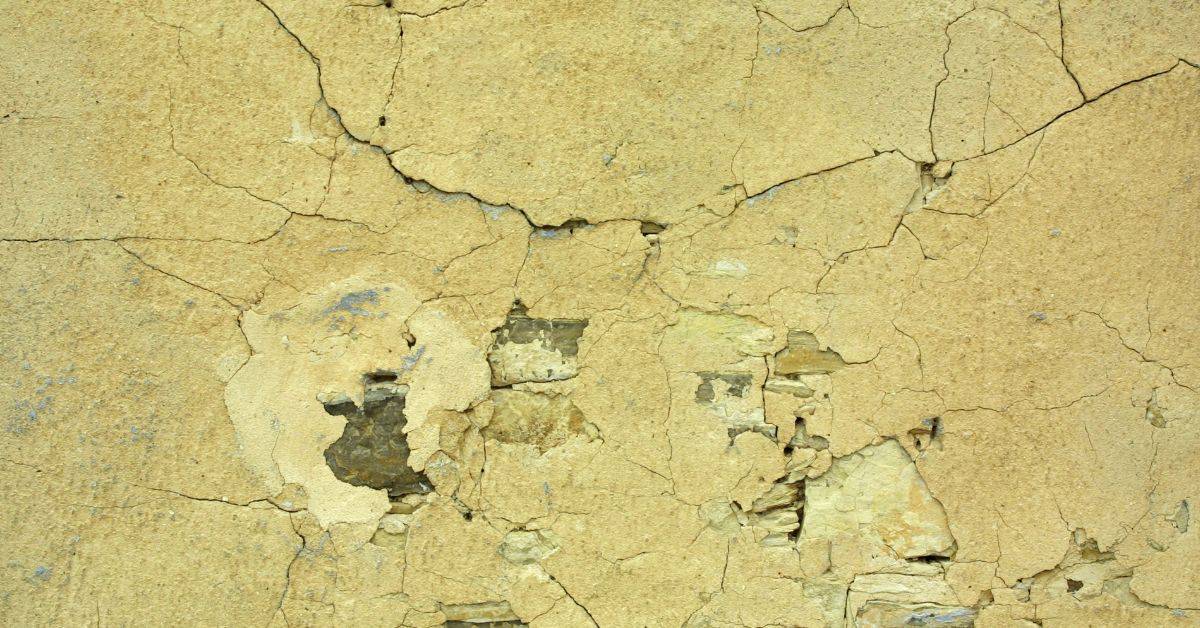
Inspect the bag exterior first for damage or leakage. Look for crusty or damp patches, tears, and broken seals. A bulging bag is a red flag you should address before any further steps.
Also note labeling and any storage notes on the bag. If the label looks unreadable or questionable, verify with the manufacturer instructions before proceeding. Use your judgment based on what you see at the bag before opening.
Bag integrity and signs of water damage
Before you open a bag, check for any signs of water damage. This can help prevent using concrete that’s already been compromised.
- Wet spots: Check for any damp areas on the bag. If found, it may indicate water has seeped in and started setting the cement.
- Slurry stains: Look for discoloration or staining on the bag. This could be a sign of moisture leakage.
- Mold: Check for any visible mold growth, which indicates water has entered and not dried out.
- Softened seams: Feel along the edges where the paper or plastic is sealed. If they’re soft or sticky, it’s a sign of moisture intrusion.
Quick rule: If you spot any of these signs, don’t use the concrete. It’s likely already setting and won’t mix properly.
Evidence of clumping or hard lumps
Before mixing, check for any lumps in the concrete. This can help you avoid using material that won’t mix properly.
- Feel the bag: Gently squeeze and shake the bag to feel for any hard lumps or clumps inside.
- Listen: Shake the bag and listen for any rattling sounds. This could indicate large, hard lumps.
- Visual check: Look through the bag (if it’s transparent) or hold it up to light to see if there are any visible clumps.
Quick rule: If you find large, hard lumps, don’t use the concrete. It won’t mix properly and could cause issues in your final product.
Foreign material and color changes
Before using, check for any signs of contamination or chemical change that could affect the concrete’s performance.
- Color: Check if the concrete is a consistent gray. Any other color could indicate contamination.
- Debris: Look for any foreign material like rocks, sticks, or other debris in the bag.
- Odor: Smell the concrete. An unusual odor could indicate a chemical reaction has occurred.
Quick rule: If you find anything unusual, don’t use the concrete. It may not set properly or could cause issues in your project.
Quick Tactile and Smell Tests After Opening
Feel the material for unusual clumping or dryness. Fresh, uniform texture is expected; obvious lumps can indicate moisture migration. A dusty or powdery surface might signal degradation or exposure.
Smell the contents for sour or moldy notes, which can indicate spoilage. If the material smells off, or you detect any unusual odors, set the bag aside and consult the label or manufacturer guidance. Do not use anything that seems off.
Texture and flow check by hand-sifting
Once you’ve opened the bag, grab a handful of concrete. With gloved hands, feel for any hard lumps or gritty bits. These could be signs of old concrete that’s no longer usable.
The texture should feel powdery, like fine sand. If it feels grainy or has large clumps, it might not mix well and won’t set properly.
Now, try to sift the concrete between your fingers. It should flow easily, like dry sand. If it’s sticky or doesn’t move freely, it could be due to moisture, making it unusable.
Smell and chemical-odor detection
Give the opened bag a good sniff. Fresh concrete has a distinctive smell, but it shouldn’t be overpowering or unusual.
If you detect a strong musty odor, like wet cardboard or mold, this indicates moisture has gotten into the bag. Discard it immediately to prevent contamination.
Also, watch out for any chemical-like smells. These could indicate the concrete has reacted with something in storage, making it unsafe to use.
Small-sample reworkability check
Before mixing a full batch, do a quick test. Take a small handful of concrete and add just enough water to form a paste.
The powder should absorb the water easily, forming a smooth, workable mixture. If it’s lumpy or doesn’t absorb well, it won’t mix properly in larger quantities.
If the test passes, you can proceed with mixing your concrete. But if it fails, it’s best to discard that batch and use fresh materials.
Simple Field Performance Tests to Run on-Site
Set up a small batch as a quick, hands-on check with a basic visual cure observation. Look for surface finish and uniformity as it begins to set. A rough, uneven surface can hint at compromised early strength or workability.
Keep an eye on the consistency and how the mix behaves when worked. If you can perform a simple slump-like check with safe, improvised means, compare to what the label or datasheet suggests; avoid relying on memory alone.
Small batch set test procedure
Mix a pint to quart sample of the old concrete. Use the same water-to-cement ratio as your new mix.
Observe the setting time. It should be similar to your fresh mix. If it’s much faster or slower, that’s a red flag.
Check the hardness after 24 hours. It should be firm but not rock-hard. Too hard too fast might mean the concrete is already set in the bag.
Simple slump/consistency check
Use a small cone form or spoon/spatula to create a mini-slump test. Fill the cone, strike off excess, and lift it up.
The concrete should flow out in a smooth, consistent manner. If it’s too stiff or has lumps, that’s not good.
Compare this with your fresh mix. They should be similar in consistency.
Initial strength check and when to send samples to a lab
Cure a small block of the old concrete under the same conditions as your pour. After 28 days, try to crush it.
The strength should be close to what you expect from fresh concrete. If it’s much weaker, that’s a concern.
For critical pours, always send samples to a lab for compressive strength testing. On-site checks are just rough guides.
Tools and Materials Checklist for Field Assessment
Bring basic PPE: eye protection, gloves, and a dust mask. Have a clean trowel or scoop for handling the bag contents. Include a small container for quick, non-destructive tests.
Carry a tape measure, a moisture or pH test strip if available, and a note pad to record observations. Check the bag label or data sheet for any required tools or steps from the manufacturer or local rules.
Recommended hand tools and mixing gear
Before you start your field assessment, make sure you have these essential tools to handle and mix concrete safely and effectively.
- Small container: Use a small bucket or tub for mixing small samples.
- Trowel/spatula: Essential for spreading and handling concrete, especially during tactile tests.
- Measuring cup: Accurately measure water to maintain the correct concrete mix ratio.
- Bucket: Use a clean bucket for mixing sample batches.
- Gloves: Protect your hands from cement dust and chemicals.
- Dust mask/respirator: Safeguard against inhaling harmful concrete dust during handling and mixing.
- Eye protection: Shield your eyes from debris and splashes while working with concrete.
- Clean work surface: Use a clean, flat surface to prevent cross-contamination of samples.
Quick rule: Always prioritize safety first. Use these tools to protect yourself and ensure accurate test results.
Safety equipment and contamination avoidance
Protecting yourself from concrete hazards and preventing sample contamination are crucial for a successful field assessment.
- Gloves: Wear gloves to prevent skin irritation and protect your hands from cement dust.
- Dust mask/respirator: Use a dust mask or respirator to safeguard against inhaling harmful concrete dust.
- Eye protection: Wear safety glasses or goggles to shield your eyes from debris and splashes.
- Clean work surface: Ensure your workspace is clean and free of contaminants that could affect test results.
- Avoid cross-contamination: Keep old concrete samples separate from new ones to prevent mixing up or contaminating materials.
Quick rule: Always prioritize safety first. Use these tools and follow best practices to protect yourself and maintain the integrity of your tests.
Optional test equipment to consider
While not always necessary, having access to additional test equipment can provide more accurate and definitive results during your field assessment.
- Portable moisture meters: Measure the moisture content in concrete bags to ensure they’re within acceptable limits.
- Small compressive testers: Determine the strength of small concrete samples using a portable compression testing machine.
- Access to a local lab: Send samples to a professional laboratory for comprehensive, accurate testing results.
Quick rule: These optional tools can enhance your field assessment. Consider investing in or accessing them for more precise test results.
Deciding Criteria: When to Use, When to Blend, When to Discard
Use the material if the checks indicate normal condition and the label supports its use for your job. If any red flags appear, consider alternatives rather than forcing a questionable batch to cure.
Blending may be an option for some non-structural applications, but only if allowed by the manufacturer instructions and local guidelines. If the bag fails basic checks, plan to discard or follow proper disposal procedures per local rules.
Acceptable uses for marginal material
Choosing the right material is crucial for your project’s success. Here are some non-structural or cosmetic uses where slightly degraded concrete may be acceptable.
- Pathways and Walkways: Low-traffic areas can handle weaker mixes. Look for a mix with at least 3000 psi strength. Avoid using in high-heel traffic areas to prevent cracking.
- Retaining Walls (Non-Load Bearing): For walls that aren’t supporting heavy loads, marginal concrete can be used. Ensure the mix has good cohesion and avoid using in walls over 4 feet tall.
- Decorative Concrete: Some decorative applications like stamped or colored concrete can hide minor defects. Look for a mix with decent workability. Avoid using in areas prone to heavy foot traffic.
- Backfill and Base Material: For non-structural backfilling, marginal concrete can be used. It won’t compact as well as fresh material, so avoid using in critical compaction areas.
- Temporary Forms: If you’re only using the concrete for a short time (like temporary forms), slightly degraded concrete might work. Avoid using in permanent formwork to prevent weak bonds.
When to blend with fresh cement or additives
Blending old bags with new materials can help revive marginal concrete. However, it’s crucial to understand the risks and precautions.
Risks: Blending can introduce air into the mix, reducing strength and causing voids. It can also lead to inconsistent results if not done properly.
To mitigate these risks, always test blended batches first. Start with a small batch, then scale up based on your results. Use fresh cement or additives designed for concrete revival, following manufacturer guidelines.
Precautions: Always wear appropriate PPE when handling and blending materials. Ensure the old and new materials are compatible to avoid chemical reactions that could weaken the mix.
Clear disposal and recycling options
Safely disposing of or recycling concrete is essential for protecting the environment. Here are some options:
Waste Concrete Recycling: Many waste management facilities accept concrete for recycling. This involves crushing the concrete and reusing it as aggregate in new concrete mixes.
Reuse as Aggregate: You can also reuse old concrete as aggregate in non-structural applications like pathways, retaining walls, or backfill. Ensure the material is clean and free of contaminants before using.
Disposal: If recycling isn’t an option, dispose of concrete responsibly. Never dump concrete into storm drains or waterways. Instead, take it to a licensed landfill or waste facility.
Common Mistakes and Misconceptions to Avoid
A common error is trusting a date alone or ignoring storage history. Don’t assume older means unusable without checks. Always verify by inspection and simple tests when possible.
Myths about equal performance under any condition lead to failed pours. Treat each bag as a separate material with its own data and applicable guidelines. Rely on the label and manufacturer instructions rather than popular beliefs.
Assuming dry-looking bags are fine
Don’t be fooled by bags that look dry on the outside. Moisture can still get in and compromise the cement inside.
Even if a bag feels dry, the contents might have absorbed moisture from the air or been exposed to rain. This can cause the concrete to set improperly or not at all.
Always perform field performance tests as mentioned earlier to ensure the concrete is still good.
Overreliance on smell or single checks
Trusting your nose or a quick visual check isn’t enough. Concrete that smells okay and looks fine might still have issues.
Moisture damage can cause concrete to lose strength over time, even if it initially seems okay. A single positive check doesn’t guarantee durability.
Remember the small batch set test and slump/consistency check from earlier? They’re crucial for ensuring your concrete is still usable.
Ignoring project criticality and code requirements
Not all old concrete is created equal. Some might be fine for a small repair, but not suitable for a major structural pour.
Always consider the criticality of your project. If it’s load-bearing or crucial to safety, use fresh materials that meet local building codes.
Check with your local building department to ensure any old concrete you use complies with current codes. Better safe than sorry!
Best Practices for Storage to Prevent Future Waste
Store bags off the ground and in a dry, well-ventilated area. Keep stacks away from direct sun and water exposure. Use pallets or shelving to reduce moisture contact.
Rotate stock so older bags are used first, and seal bags tightly after partial use. Follow any temperature or handling recommendations on the label or data sheet to extend shelf life and prevent waste.
Ideal storage conditions and bag handling
Keep your concrete bags off the ground to prevent moisture wicking. A simple pallet or rack will do.
Store them under cover, away from rain and snow. Direct sunlight can also degrade the cement, so keep that in mind when choosing a spot.
Rotate your stock using a first-in-first-out system. This ensures you’re using the oldest bags first, reducing waste.
Lastly, keep it dry. Any moisture can cause the cement to set prematurely, ruining the bag’s contents.
Repackaging and short-term preservation techniques
If you’ve opened a bag and can’t use it all at once, repackage the leftovers in a sealed plastic bag or container. This helps keep moisture out.
But remember, this is only a short-term fix. The exposed cement will still start to set over time, even if you’ve resealed it.
Another option is to seal the original bag tightly with duct tape or a clamp. This can work for a few days, but again, it’s not a long-term solution.
Always use your judgment and err on the side of caution. It’s better to waste a little bit than to ruin an entire bag.
Inventory and labeling system suggestions
To keep track of your concrete bags, use a simple inventory system. Note down the date you bought each batch, the lot number, and what project they’re intended for.
You can write this info directly on the bag with a marker or use stickers. Just make sure it’s clear and legible.
This helps you keep an eye on how old your stock is and prevents long-term unknowns. It also makes it easier to plan your projects around your inventory.
And remember, first-in-first-out. Use the oldest bags first to minimize waste.
Conclusion
Safe, durable results come from treating old bagged concrete with discipline: if it shows signs of age or misuse, you protect the project by testing, binning when needed, and choosing the right path rather than guessing.
Run a simple on-site check in a steady sequence: start with visual checkpoints before you open, note any moisture or caked material, then perform the tactile and smell tests after opening, and finish with a small field performance test in a controlled spot. Use the on-site tools and materials you already have, keep the testing area tidy, and follow the deciding criteria to guide you toward using it, blending it, or discarding it.
Avoid common missteps like ignoring obvious damage, relying on smell alone, or pushing a marginal batch into a load-bearing job. Always wear proper PPE, test a tiny batch first, and work in small, reversible steps so you can back off if the results aren’t solid. If you see persistent clumps, sour or rotten odors, excessive separation, or bad slump tests, don’t force it—safely discard and keep the project moving forward.
If the situation is ambiguous or the project is critical to safety, call a professional instead of pressing on. When in doubt, choosing to re-bag or replace the material is the prudent choice. Stay steady, follow the checks, and you’ll finish strong with concrete that looks right and lasts.
FAQ
Can you use old bagged concrete that looks fine but is past its shelf life?
Check the bag label and manufacturer guidance for shelf life. If the mix clumps, segregates, or has a stale smell, it’s safer to discard rather than risk a poor result.
What quick checks can I do on site before opening a bag?
Inspect the bag for moisture damage, tears, or signs of mold. If the contents feel gritty or crumbly when you scoop some out, or if the bag is unusually swollen, don’t use it.
Can I blend old concrete with fresh mix?
You can blend if the old material hasn’t deteriorated and you’re following the bag’s instructions. If there’s any doubt about quality, moisture, or setting behavior, it’s safer to discard the old portion and use a full new mix.
How should I store bagged concrete to maximize life?
Keep bags off the ground and in a dry, shaded area. Protect them from moisture and direct rain; if you see moisture intrusion or mold, reassess or discard affected bags.