
Introduction
A proper stair tread slope is a deliberate, small downward pitch on each step so water flows off rather than sits on the surface.
Keep it simple: plan the slope as you form each tread, test by eye and with a straight edge, and adjust before the concrete sets. Check the material mix, compaction, and joint details to minimize ponding, and clarify how drainage around the stairs will be directed away from the home based on your site conditions.
Key takeaways
- Ensure tread slope directs water away from house and seating areas without pooling.
- Plan a conservative pitch: subtle rise that still sheds runoff between steps.
- Use damp-resistant concrete mixes and proper drainage mats on base layer.
- Install weep holes or gaps to prevent water buildup behind treads.
- Verify surface finish is non-slip and combs water toward drains.
- Regularly inspect after freezes, clean debris, and repair cracks promptly.
- Wear PPE and follow form-work safety; avoid over-tamping near edges.
Table of Contents
- Introduction
- Key takeaways
- Why Stair Tread Slope Matters for Drainage and Durability
- Slope Principles for Concrete Stair Treads — How Subtle Is Subtle?
- Materials, Surface Finishes, and Base Layers That Support Drainage
- Integrating Stair Treads with Patios, Retaining Walls, and Yard Slope
- Step-by-Step Installation Checklist for Sloped Concrete Treads
- Tools and Materials Checklist
- Common Mistakes, Troubleshooting, and When to Call a Pro
- Inspection, Maintenance, Seasonal Checks, and Cost Considerations
- Conclusion
- FAQ
Why Stair Tread Slope Matters for Drainage and Durability
A subtle slope on stair treads is about guiding water where you want it to go. It helps prevent pooling that accelerates wear and damage over time. A practical slope also keeps runoff from splashing onto nearby surfaces.
Think of slope as the first line of defense for comfort and durability. It improves traction when wet and reduces the chance of erosion behind the steps. Consistent, gradual pitch matters for long term performance and maintenance, not just initial feel.
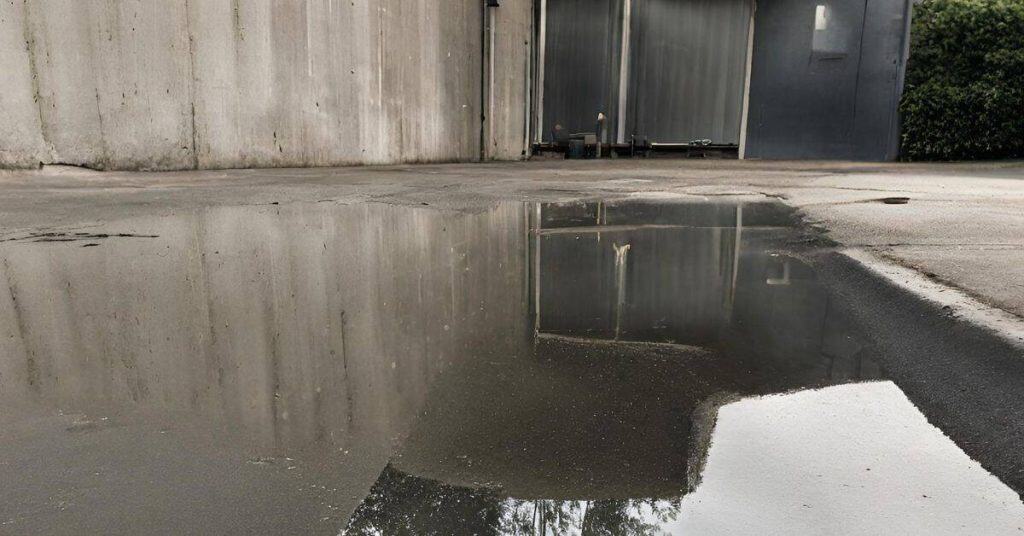
How standing water damages treads and surrounding hardscape
Standing water on stair treads is more than just an annoyance. It accelerates wear, staining, and can lead to serious damage.
Water seeps into joints and cracks, weakening the concrete over time. This process, called spalling, causes chunks of concrete to break off, leaving a rough, uneven surface.
Staining occurs as dirt and debris in the water settle on the treads, creating unsightly marks that are difficult to remove. Additionally, water migrating into soil around hardscapes can cause erosion, leading to settling or shifting of structures over time.
Safety and building-code considerations
The slope of stair treads directly impacts safety. A proper slope ensures water drains away, reducing the risk of slips and falls, especially on wet days.
Building codes often specify a minimum nosing (the part that overhangs) to prevent tripping. The slope of the tread works in tandem with this geometry to ensure safe foot placement. Always check local building codes or consult an engineer if you’re unsure about these requirements.
Moreover, a subtle pitch is crucial for user comfort. It provides smoother foot traction and predictable water shedding during rain, making stairs easier and safer to navigate.
Slope Principles for Concrete Stair Treads — How Subtle Is Subtle?
The design goal is a controlled drainage path without creating a noticeable trip hazard. Exact slope should align with local codes, weather, and project context. Note that variations may be needed for front nosing versus the middle of the tread.
Consider how the pitch distributes across the tread. Aim for a uniform, gentle incline that moves water toward the nosing or away from thresholds while staying perceptually flat underfoot. Test with a straightedge or water to confirm there’s no edge pooling.
How to express and measure slope on a tread
The slope of a stair tread is typically expressed as a rise over run, or ‘x inches per foot’. For example, a 1/4 inch per foot slope means the tread rises 1/4 inch for every 12 inches of length.
To measure this on-site, use a level or straightedge. Place it across the tread at one end and mark where it meets the other end. Then, measure the distance between that mark and the top of the tread. That’s your rise. Divide by the tread length to find your slope.
You can also use a site transit for more accuracy. Set up a line from the low end of the tread to a point directly above the high end. The transit will show you the angle, which you can convert to a slope percentage.
Balancing drainage with walkability and nosing detail
The ideal stair tread slope encourages water flow without creating a trip hazard. A subtle pitch, like 1/4 inch per foot, is usually sufficient.
Consider the nosing detail too. A rounded or beveled nosing helps water drain off, but it shouldn’t be so sharp that it catches your toe. Test with a straightedge to ensure no pooling at the edge.
Non-slip finishes can also help safety, especially in wet conditions. But remember, they should complement, not replace, proper drainage and slope.
Materials, Surface Finishes, and Base Layers That Support Drainage
Choose a concrete mix and slump that support drainage without making the surface too porous. Use a coarse aggregate that won’t clog pores and a mix that tolerates a slight slope for water shedding. These choices set the foundation for long-term performance.
Texture and finishing matter for runoff. Favor broomed or lightly troweled textures over ultra-smooth finishes. Plan for a protective sealant that breathes and preserves texture to maintain drainage efficiency.
Concrete finish and anti-slip options that aid runoff
The finish of your concrete stair treads plays a crucial role in water drainage. Here are some options:
Broom finish: This textured surface is created by dragging a broom over the wet concrete. It provides excellent traction and encourages water to run off.
Light aggregate exposure: Exposed aggregate finishes, achieved by washing away the surface cement layer, create a rough texture that promotes runoff while providing slip resistance.
Trowel plus texture: After troweling for a smooth finish, embed small pebbles or use a textured mat to add grip and facilitate water movement.
Base preparation and subdrainage below stair runs
A solid, well-draining base is vital for your concrete stairs. Here’s how to prepare it:
Compacted base: Start with a well-compacted subgrade, typically made of soil or gravel, to provide stability and support.
Gravel blankets: Lay down a layer of 3/4-inch minus gravel on top of the compacted base. This allows water to drain freely beneath your stair treads.
Underdrains/perforated pipe: Install underdrains or perforated pipes at the bottom of your stair run to collect and direct water away from the base, preventing pooling and soil erosion.
Integrating Stair Treads with Patios, Retaining Walls, and Yard Slope
Map water paths so stair slope ties into adjacent patio pitch, channel drains, and wall drainage. The goal is a continuous drainage network that protects foundations and minimizes erosion risk. Treat the system as an integrated whole, not isolated pieces.
Keep cross-slope and run compatible across surfaces. Ensure drainage components connect cleanly with edges, drains, and backfill so water moves rather than pool. Regularly review soil and slope interactions to prevent future issues.
Matching Patio Slope and Using Channel Drains
When integrating your concrete stair treads with an adjacent patio, it’s crucial to match their slopes. Your patio should have a slight pitch towards the stairs, usually around 1/4 inch per foot. This ensures water flows off the patio and onto the stairs as intended.
Channel drains can be your best friend here. If you’ve got a long run of patio or heavy runoff, use linear channel drains to intercept water and direct it towards your stair treads. For smaller areas or lighter runoff, point drains will do the trick.
Remember, the goal is to create a continuous flow path from patio to stairs. Matching slopes and using the right drains helps achieve this with minimal effort.
Retaining Wall Drainage and Outlet Planning
When you’ve got a retaining wall near your stairs, proper drainage is a must to prevent hydrostatic pressure from building up behind the wall. This can cause serious issues like wall failure or water seeping into your stair system.
Gravel backfill is key here. It allows water to drain freely through the retaining wall. Combine this with a perforated pipe at the base of the wall, and you’ve got a solid drainage system. The pipe should slope slightly downwards towards your stair treads or a nearby collection point.
Don’t forget about gravity outlets. These let water escape from the top of the retaining wall. Make sure they’re positioned so water flows onto your stairs or into a suitable collection area, like a dry well or rain garden.

Step-by-Step Installation Checklist for Sloped Concrete Treads
Establish slope targets and geometry before forming. Use reliable instruments to check cross-slope and run during layout and after forming. Keep deviations within reason and document how you verified them.
Prepare the site with proper drainage paths and stable sub-base. Set forms to the correct height and angle, then secure them for a steady pour. Verify the slope during pouring and finishing, addressing low spots promptly.
Step-by-Step Installation Process
Use this checklist once you’ve planned your stair layout and gathered materials.
- Safety first: Wear appropriate gear, clear the area, and secure forms.
- Check sub-base: Ensure it’s stable and compacted properly to support the slope.
- Set up forms: Place them at exact height and angle for your target pitch. Secure firmly.
- Apply release agent: Coat forms to prevent concrete from sticking.
- Place reinforcement: Add any needed rebar or mesh without compromising slope or form integrity.
- Pour concrete: Do so in consistent batches, following your mix design.
- Screed and strike off: Maintain uniform depth and slope. Check with straightedge and water level.
- Finish surface: Use a gentle trowel pass or broom finish to preserve the subtle slope.
- Cure concrete: Follow your planned moisture-curing regime to prevent cracks during cure.
Quick rule: Always double-check your measurements and levels before pouring. A little extra time upfront saves rework later.
Prep and Layout Tips to Set Consistent Slope
Follow these steps before setting your forms to ensure a consistent slope across all treads.
- Stake out stringlines: Mark the outer edges of your stair run with stakes and strings.
- Set batter boards: Establish accurate reference points for your formwork.
- Calculate slope: Determine the rise and run needed to achieve your target pitch.
- Test screed: Use a straight piece of lumber to verify your forms are set at the correct angle.
- Check cross-slope: Ensure each tread is level from side to side using a laser level or water level.
- Verify longitudinal slope: Check that the stringline runs at the correct angle to achieve your target fall per tread.
Quick rule: Take your time with layout. A few extra minutes here can save hours of rework later.
Pouring, Finishing, and Immediate Checks
Use this checklist while pouring and finishing your concrete to ensure a consistent slope across all treads.
- Pour in sections: Start at the bottom of the stair run, working upwards. Pour in manageable sections.
- Screed and strike off: Maintain uniform depth and slope. Check with straightedge and water level every few feet.
- Aggregate settlement: Allow time for any aggregate to settle before checking the surface.
- Check for low spots: Use a straightedge or 2×4 to find and fill any dips in the concrete’s surface.
- Texture finish: Apply your chosen texture (broom, trowel, etc.) to help with runoff.
- Check for levelness: Ensure each tread is level from side to side using a laser level or water level.
- Verify longitudinal slope: Check that the stringline runs at the correct angle to achieve your target fall per tread.
Quick rule: Keep an eye on your concrete as it sets. Address any issues promptly before they become major problems.
Tools and Materials Checklist
Gather measurement tools and methods: a level or laser level, straightedge, chalk line, and tape measure. Ensure you have a clear target slope to set the tread pitch accurately. Use these to verify both cross-slope and longitudinal slope.
Prepare formwork, substrate prep, and concrete mix essentials. Include release agents, edging, and a compacted sub-base. Have curing supplies and safety gear ready to protect the job and the finish.
Essential Measuring and Forming Tools
Before you start, ensure you have the right tools to measure slope accurately and form your concrete treads correctly.
- Level (or laser level): To set and check your slope. A laser level ensures accuracy over long distances.
- Long straightedge: For transferring your slope line across the form.
- Chalk line: To mark out your slope line on the forms.
- Tape measure: To ensure your treads are the right size and slope consistently.
- Small transit or digital level: For precise setting of your slope, especially for longer staircases.
- Form boards: Durable and straight to create a solid formwork.
- Stakes and braces: To secure your forms in place and prevent movement.
- Edging strips: To create a clean edge on your treads.
- Release agent: To prevent the concrete from sticking to the formwork.
Quick rule: Always double-check your level before pouring. A slight error in setting can lead to a significant difference in slope.
Materials and Safety Gear to Have On Hand
Gather all your materials and safety gear before you start. This ensures a smooth workflow and minimizes risks.
- Concrete mix: A balanced mix of Portland cement, sand, aggregate, and water for strength and durability.
- Rebar or reinforcement: To strengthen your concrete treads, especially for longer staircases.
- Form boards: Durable and straight to create a solid formwork. Ensure they’re in good condition to prevent leaks.
- Curing compound: To protect the surface of your concrete from rapid drying, which can cause cracking.
- Gloves: To protect your hands from cement burns and other hazards.
- Eye protection: Safety glasses or goggles to protect your eyes from debris and chemicals.
- Ear protection: Earplugs or earmuffs to protect against loud noises, like power tools or heavy machinery.
- Non-slip boots: To prevent falls on wet surfaces.
- Knee pads: For comfort and protection when working on your knees.
- Anti-slip additives: Optional, but helpful for improving traction on your treads.
Quick rule: Always prioritize safety. Wear appropriate PPE and follow safe handling procedures for all materials.
Common Mistakes, Troubleshooting, and When to Call a Pro
Identify common missteps with slope, drainage, and compaction that lead to standing water or erosion. Pay attention to signs of uneven pitch and edge loss. These issues often show up after rain or heavy use.
Use quick fixes for small adjustments but know when to escalate. If pooling persists, cracks widen, or movement occurs, consult a professional for evaluation and possible redesign. Rework decisions should weigh safety and long-term integrity.
Typical installation errors and quick remedies
Here are some common mistakes to avoid when installing concrete stair treads, along with quick fixes:
- Excessive or uneven slope: Regrade adjacent surfaces or adjust nosings to direct water away from steps.
- Insufficient drainage: Add channel drains at low points or where water tends to pool.
- Poor compaction: Use a vibrating plate compactor on the sub-base before pouring concrete.
- Missing weep holes: Drill small holes in the treads and landings to allow water to escape.
Regularly inspect your stairs for any signs of these issues and address them promptly to maintain safety and longevity.
When erosion or complex drainage needs a professional
While DIY projects can save you money, there are times when it’s best to call in a pro. Here’s when:
Unstable slopes: If the ground around your stairs is unstable, a professional engineer can assess and address the issue before starting any work.
Significant runoff: If you’re dealing with large amounts of water, a professional may need to install complex drainage systems or retaining walls to manage it effectively.
Structural retaining needs: If your stairs require structural support from a retaining wall, it’s crucial to hire a pro to ensure the structure is sound and compliant with local building codes.
Inspection, Maintenance, Seasonal Checks, and Cost Considerations
Set up routine checks for drainage outlets, direction of slope, and surface condition. Look for standing water, cracking, or joint wear after weather events. Document deviations to plan timely repairs.
Seasonal care includes debris cleanup, resealing when needed, and addressing freeze/thaw concerns promptly. Gather multiple quotes for complex drainage work and track factors that affect costs and timelines.
Visual checkpoints and routine maintenance tasks
Regularly inspect your concrete stairs to ensure they remain safe, functional, and looking good. Use this checklist every quarter.
- Check drainage outlets: Ensure water flows freely through them. Clogs can cause pooling and damage.
- Verify downspouts: Make sure they’re clear and directing water away from the stairs.
- Assess water slope: Water should run off treads, not sit on them. Check for proper pitch.
- Look for standing water: Any pools can indicate drainage issues or incorrect slope.
- Inspect tread surface: Cracks or spalling could mean structural damage or freeze/thaw cycles.
- Monitor joint washout: Loss of mortar between treads weakens the structure and allows water intrusion.
- Check settling/alignment: Any changes might indicate foundation issues or improper support.
- Clean debris from surfaces: Remove dirt, leaves, etc. to prevent clogs and maintain traction.
Quick rule: Regular cleaning and inspection keep your stairs looking good and functioning properly.
How seasonal changes affect performance and budget planning
Understand how different seasons impact your concrete stairs to plan maintenance effectively and avoid unexpected repairs.
- Freeze/thaw cycles: Winter’s freeze/thaw can cause cracking, spalling, or joint damage. Inspect after each thaw.
- Heavy rain seasons: Spring showers and autumn storms test drainage. Ensure water flows off treads quickly.
- Root growth (spring/summer): Tree roots can lift or crack slabs, damaging joints. Inspect for signs of root intrusion.
- Autumn leaf drop: Leaves can clog drains and cause pooling if not cleared regularly.
- Summer heat: High temperatures can cause concrete to expand slightly, potentially leading to minor cracking. Monitor closely.
Quick rule: Plan maintenance around seasonal changes to keep your stairs in top shape and avoid costly repairs.
Conclusion
Getting the slope right matters for safety, durability, and how good the stairs look after rain or freeze cycles. If you nail the subtle pitch and the base, water stops sitting and the treads stay solid for years.
Run through this practical check as you finish: verify the target rise and run with a level and straightedge, confirm a proper base layer that drains away from living spaces, set forms and temporary slopes confidently, pour and compact in small batches while maintaining a consistent slip plane, cure correctly and protect surfaces during the first week, test drainage by simulating a light rain or hose run-off, and finish with a surface treatment or texture that handles water and foot traffic—all in a logical, sequential flow and with clean site safety in mind.
Common mistakes to avoid are pushing on when the slope isn’t proven, skipping the base or drainage layer, and rushing curing or sealing. Keep safety gear on, test a small area first, and never ignore drainage paths or nearby structures. If the project runs into uncertain soils, improper backing, or conflicting grades with patios or walls, it’s time to call a pro and get a quick assessment before irreversible damage occurs. Stay steady, follow the checks, and you’ll end up with a stair that sheds water and lasts much longer than a slapdash pour.
FAQ
How do I prevent water from running onto and pooling on a concrete stair tread?
Keep the tread slightly crowned so water runs off the edge rather than sitting. Ensure proper drainage at the top and bottom with clear paths for runoff and avoid creating low spots that trap moisture. Check local guidance on drainage and surface slope if unsure.
What’s the right way to estimate the pitch for a stair tread without making it look odd?
Aim for a gentle, consistent slope that matches adjacent surfaces. Use a level or a straightedge and check across several treads to keep spacing even. Verify with the manufacturer’s instructions or local guidelines if you’re using any special concrete mixes or additives.
What materials help keep damp stairs durable and resistant to water damage?
Choose concrete mixes formulated for durability in damp conditions and compatible sealers or surface finishes. Look for product labels that mention water resistance and surface grip. Always follow the label, datasheet, and local rules for installation specifics.
What are common mistakes when setting stair tread slopes and how can I avoid them?
Avoid creating flat spots or over-sloping that directs water toward the house. Don’t skip check points with a level across multiple treads. If in doubt, verify with the product instructions and your local site requirements before pouring.