
Introduction
Understanding concrete slab costs is crucial for planning your project and budgeting effectively. This guide delves into the detailed pricing factors that affect the cost of concrete slabs, helping you make informed decisions and create a realistic budget.
We’ll explore how size, thickness, reinforcement, subbase, finishes, and other factors influence the price per square foot, ensuring you’re well-equipped to estimate your project’s costs accurately.
Detailed Cost Factors That Affect Concrete Slab Price
The cost of a concrete slab is determined by various factors that can significantly impact your budget. Let’s break down these pricing elements to help you understand and calculate the total cost of your project.
- Size and Thickness: Larger slabs and increased thickness drive up costs due to material requirements. Expect to pay more for wider, thicker slabs.
- Reinforcement: Reinforced slabs are stronger but come at a higher cost due to the additional materials (rebar, wire mesh) and labor required for installation.
- Subbase Preparation: A well-prepared subbase ensures slab longevity. However, poor soil conditions may necessitate additional site preparation, increasing costs.
- Finishes and Add-ons: Decorative options like stamped concrete, colored concrete, or specialized coatings can significantly enhance the appearance of your slab but also add to the overall cost.
By considering these factors and adjusting them according to your budget and project requirements, you can create a more accurate estimate for your concrete slab project.
Key takeaways
The total cost of your concrete slab project is influenced by both material and labor costs. Keep this in mind as we explore the various slab types and their specific cost drivers in the following section.
- Concrete slab costs vary: $4-$8 per sq ft (DIY), $6-$15 pro.
- Factors affecting price: size, thickness, reinforcement, subbase.
- Slab types: plain ($4-$7), reinforced ($6-$9), insulated ($8-$12).
- Finishes add cost: sealers ($0.50-$3/sq ft), coatings ($2-$10/sq ft).
- DIY cheaper, but pros ensure quality and code compliance.
- Regional costs vary; get local estimates for accuracy.
- Avoid common mistakes: poor subbase prep, inadequate reinforcement, rushing pours.
Table of Contents
- Introduction
- Key takeaways
- Quick Cost Overview and Typical Price Ranges
- Detailed Cost Factors That Affect Concrete Slab Price
- Slab Types and Their Specific Cost Drivers
- Reinforcement, Subbase, and Design Specs That Change Price
- Finishes and Add-ons: Decorative Options, Sealers, and Coatings
- DIY vs Professional: Cost Comparison and Decision Guide
- Regional Cost Variations and How to Get Local Estimates
- Permits, Inspections, and Code Requirements
- Tools, Materials Checklist and Prep Guidance for DIYers
- Common Mistakes That Drive up Cost (and How to Avoid Them)
- Budgeting Worksheet and Step-by-step Estimation Method
- Long-term Costs, Maintenance, and Lifespan: DIY vs Pro
- Decorative Finishes
- Conclusion
- FAQ
Quick Cost Overview and Typical Price Ranges
Quick cost ranges for common slabs come from per-square-foot numbers you can translate into rough total bands for real projects: typical plain concrete runs about 4–8 per sq ft for simple patios, 5–9 for a shed pad, 6–12 for a garage, 7–14 for driveways, and 8–15 for basement slabs. Higher ends apply if you add reinforcement, high-end finishes, or special moisture barriers.
Use small, medium, and large sizes as quick benchmarks: patios around 150–300 sq ft, shed pads 80–180 sq ft, garages 400–900 sq ft, driveways 600–1400 sq ft, and basement slabs 600–1500 sq ft. Low/avg/high examples help you budget without a formal quote: a 150 sq ft patio might run roughly 600–1200, a 300 sq ft patio 1200–2400, a 600 sq ft driveway 4200–8400, and a 900–1200 sq ft basement slab 7200–13500.
Core drivers are thickness, reinforcement, concrete type, finish, prep, and local labor rates. DIY puts some costs in your hands but adds time, risk, and potential warranty questions: skip or skimp on sub-base or moisture barriers, and you’ll pay later in cracks or frost issues. Estimate per sq ft, multiply by project size, adjust for strength and finish choices, then add a buffer for permits or subcontracted prep work. Regional price swings matter, so use these bands as rough guides rather than exact quotes and plan for surprises like site grading or drainage needs.
Cost Ranges by Project Type
A small shed pad costs around $4 to $8 per square foot; a medium patio might run between $6 to $10 per square foot, while a large garage could cost anywhere from $7 to $12 per square foot.
These ranges vary based on slab thickness, reinforcement needs, and finish type. A simple plain finish is cheaper than stamped concrete or decorative finishes. Also consider regional labor rates and material costs which can significantly impact your budget.
A quick mental model: a small shed pad (8×10) could cost $320 to $640; a medium patio (12×20) might range from $864 to $1,440; and a large garage (24×24) could be priced between $1,728 and $2,880. Remember these are rough estimates and actual costs will depend on your specific project details.
How Size, Thickness, and Load Change Price
The size of the concrete slab directly impacts its cost: larger projects require more materials and labor, driving up expenses. For example, a small shed pad is cheaper than an expansive driveway.
What to check:
- Measure the area that needs coverage to estimate material requirements.
- Consider any additional costs for cutting and shaping the slab to fit your space.
- Factor in delivery fees, which may increase with larger orders.
Thickness influences costs too: thicker slabs are stronger but pricier due to increased material usage. A standard 4-inch slab is common for patios and sheds; driveways often need at least 6 inches of concrete for durability.
What to check:
- Check local building codes or consult with a professional to determine the required thickness for your project’s intended use.
- Consider the load-bearing capacity needed: thicker slabs can handle more weight but cost more.
Load-bearing requirements also influence costs: areas like garages or heavy machinery pads might require additional reinforcement with rebar or wire mesh to handle the weight. This adds both material and labor costs but ensures long-term stability and safety.
Common mistake: Not reinforcing slabs in high-load areas can lead to cracking, settling, or even failure over time.
Detailed Cost Factors That Affect Concrete Slab Price
The Detailed Cost Factors section breaks down what drives concrete slab bids: labor rates and crew size, material grades, and subcontractor fees for digging, drainage, and setup. It also covers site prep, access limitations, finishing, curing, protective steps, reinforcement choices (rebar or mesh), slab thickness, joint spacing, permits, disposal, weather delays, and mobilization charges.
Use this as a practical guide to question bids and spot hidden costs. Compare line items against your plan for finishes, thickness, and joint layout, and ask for clarifications on any unexplained charges. Finishes can add value but may trade durability and price.
Material Costs: Cement, Aggregate, Admixtures
The cost of concrete materials varies based on mix design and ingredient quality.
- Cement: Higher-grade cement is stronger but more expensive. Check the type (e.g., Type I, II, III) to ensure it meets your project’s strength requirements.
- Aggregate: Gravel or crushed stone reduces costs per cubic yard. Inspect for cleanliness and proper grading to maintain concrete quality.
- Admixtures: These improve durability, workability, and set times. Consider climate conditions and project specifics when choosing admixtures.
Plasticizers make mixing easier but add to material expenses. A common mistake is not accounting for these additional costs in the initial budget. This oversight can lead to unexpected project delays or cost overruns.
A typical mix design might involve a 5-to-1 ratio of aggregate to cement by volume, adjusted based on specific project needs. If you’re unsure about your mix design, consult local building codes or a professional concrete supplier for guidance.
Labor, Equipment, and Job Complexity
Labor costs vary based on local wages and skill levels. Larger crews mean higher hourly wages but can speed up completion times. Skilled workers ensure a better-quality pour.
What to check:
- Verify workers’ licenses and certifications for concrete work.
- Ask about their experience with similar projects.
- Ensure they follow local building codes and safety standards.
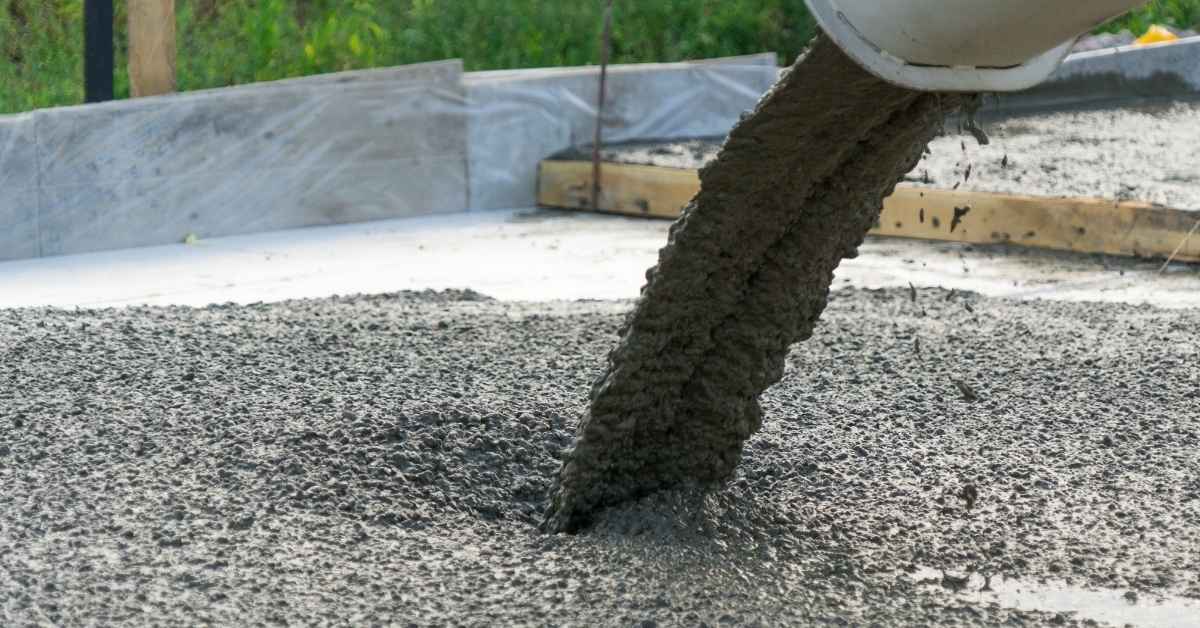
Equipment considerations: The type of equipment needed depends on the slab’s size and complexity. For large pours, a concrete pump may be necessary to efficiently deliver the mix. Smaller jobs might use wheelbarrows or buckets. Compactors are essential to eliminate air pockets in the mix.
Job complexity: Pouring intricate details like decorative finishes increases labor hours compared to a simple flat surface. Understanding these factors helps estimate realistic project timelines and budgets.
Common mistake: Not accounting for site access issues, which can increase equipment rental costs or slow down the pour process.
Site Conditions and Access
The site condition significantly affects costs. Poorly graded land requires leveling before pouring, adding time and expense.
What to check:
- Look for any significant slopes or depressions that may require grading.
- Check for large rocks or uneven terrain that might need excavation.
When you see these conditions, consider:
- Hiring a dozer or grader to level the land.
- Renting an excavator to remove rocks and create a flat surface.
Tight access points limit equipment use and require more manual labor, increasing costs through longer wheelbarrow runs or specialized equipment needs.
Common mistake: Not considering the size of concrete mixing trucks and their ability to maneuver in tight spaces. This can lead to additional fees for smaller, more maneuverable trucks or manual mixing on-site.
Poor soil conditions like clay or soft ground require additional preparation such as gravel bedding or geotextile fabric to ensure proper drainage and prevent settling issues. These steps are crucial for long-term durability but add upfront costs that must be factored into the budget.
Slab Types and Their Specific Cost Drivers
Thickness affects material and labor costs, usually around 2-4 inches for patios, 4-6 inches for driveways. Reinforcement choices (rebar or wire mesh) and subbase selection (gravel, crushed stone, compacted subgrade) significantly impact costs.
Regional conditions dictate the need for frost protection, drainage systems, and soil testing, which can dramatically influence pricing and long-term maintenance. Finish options—plain broom, smooth trowel, or decorative stamps—and edge treatments add labor time and material costs.
DIYers must plan for site prep, grading, drainage, and frost protection, considering regional soil types and climate variations that affect performance over decades. Identify tasks you can handle safely versus those requiring professional help; anticipate timeframes, permit needs, and common pitfalls to avoid budget blowouts.
Garage and Driveway Slabs
These slabs typically range from 4 to 6 inches or more due to vehicle loads. Reinforcement is crucial; rebar offers better support for larger areas compared to wire mesh.
The subbase must be carefully prepared with compacted gravel layers to ensure stability against soil shifts and frost heave. Proper drainage around edges prevents water damage, which can lead to costly repairs.
When planning, check local building codes for slab thickness requirements based on vehicle loads and soil conditions. You’ll see that these often dictate minimum thicknesses for safe support.
- For garage slabs, consider a thicker slab (6″ or more) to accommodate heavier vehicles and equipment.
- Driveway slabs should be at least 4″ thick but may need to be thicker depending on the weight of vehicles using it.
What you’ll see: Slab thickness requirements vary based on local codes, vehicle loads, and soil conditions. Always consult your local building department for specific guidelines.
DIY installation is possible but challenging due to precise leveling and reinforcement placement needs. Call a professional if you encounter complex issues like frost-protected foundations or vehicle lifts.
Common mistake: Skipping proper compaction of the subbase can lead to slab settlement over time, causing cracks and potential structural damage.
Patio, Walkway, and Decorative Slabs
These slabs are typically thinner (2 to 4 inches) and feature decorative finishes like stamped patterns or colored aggregates for enhanced curb appeal.
What to check: Inspect the slab’s edges for proper reinforcement, usually rebar or wire mesh. Ensure the finish matches your expectations, as variations can occur during the casting process.
- Check for consistent thickness across the entire slab.
- Ensure the reinforcement is evenly distributed and properly secured.
- Verify that the finish is uniform and free from defects or inconsistencies.
When installing, slope the slab: Towards a drain or away from buildings to manage runoff effectively and prevent water pooling. Failure to do so can lead to structural damage due to freeze-thaw cycles.
Common mistake: Neglecting to account for proper drainage. This can result in water accumulation, causing the slab to crack or lift over time.
The cost varies based on finish complexity and additional materials needed for decorative touches. DIY installation is possible but demands attention to detail to achieve desired aesthetics without compromising structural integrity.
Basement and Interior Slabs
Interior slabs, especially below grade like basements, require vapor barriers and insulation to manage moisture. Rigid foam is commonly used for insulation due to its effectiveness in preventing condensation.
The subbase preparation involves thorough soil testing and grading to ensure a stable foundation. Below-grade conditions often necessitate additional site prep work:
- Installing waterproof membranes
- Laying drainage systems
- Applying sealants around the perimeter
- Ensuring proper slope for water runoff
What to check: If soil is expansive or unstable, consider a geotechnical engineer’s report. When preparing the subbase, ensure it’s compacted and level.
Common mistake: Skipping proper subbase preparation can lead to slab settlement, cracking, or even structural damage over time.
DIY installation can be complex due to the need for precise moisture management and structural integrity. If you encounter issues requiring engineered drawings or radon/vapor mitigation measures, call a professional.
Reinforcement, Subbase, and Design Specs That Change Price
Rebar, welded wire mesh, and fiber each change strength, corrosion risk, ease of install, and total cost. Rebar is the sturdiest for footings and thick slabs, mesh helps control cracking in larger pours, and fiber is a cheap, quick add-on for early crack control in less critical areas.
Subbase depth and design specs for footings, walls, and frost exposure drive material choices, reinforcement needs, and budget. For DIY jobs, match the spec to the task and be honest about labor time, waste, and future repairs. Subbase options like 4–6 inches of compacted granular material, asphalt treated base, or recycled aggregates change stability and moisture, affecting price and long-term performance.
Control joints, reinforcement spacing, and edge detailing matter for labor and potential future crack repair; proper spacing can push costs up or down. Plan around local codes, expected loads, and any decorative finishes with a simple budgeting mindset to compare DIY vs pro options rather than chasing every feature.
Rebar, Wire Mesh, and Fiber Options
When reinforcing your concrete slab, consider rebar, welded wire mesh, or fiber reinforcement. Each has its pros and cons.
What to check:
- Rebar: Look for #3 or #4 rebar for most slabs; #5 is typically used for footings and thick slabs with heavy loads.
- Wire Mesh: Check for mesh sizes like W1.7, W2.9, or W4.8; larger sizes are stronger but harder to work with.
- Fiber Reinforcement: Ensure the fibers are randomly distributed and well-mixed into the concrete.
Decision rule: If your slab is thick (over 5 inches) or supports heavy loads, opt for rebar. For thinner slabs or patios, wire mesh is usually sufficient. Fiber reinforcement can be used in combination with either for added strength and crack resistance.
Common mistake: Not spacing rebar or wire mesh properly. Insufficient spacing can lead to weak points in the slab, increasing the risk of cracking under load.
Subbase, Compaction, and Geotextile Considerations
The subbase layer is crucial for stability. A typical depth of 4 to 6 inches of compacted gravel or crushed stone works well for most residential projects.
Properly compacting the subbase is crucial for stability, usually needing multiple passes with a plate compactor…
In areas with high water tables or poor soil conditions, consider using geotextiles or geogrids under the subbase layer to improve drainage and stability.
Thickness and Control/Expansion Joint Planning
The thickness of your concrete slab affects durability and resistance to cracking. Thicker slabs are more resistant but come with higher upfront costs.
What to check:
- Slab function: thicker for heavy loads, thinner for lighter ones (e.g., 4″ for patios, 6″ for driveways).
- Local building codes and standards may dictate minimum thickness.
What you’ll see:
- Thinner slabs may crack more easily under heavy loads or extreme temperatures.
- Thicker slabs provide better insulation and reduce the risk of cracking but are more expensive.
Control joints or expansion joints manage thermal movement, guiding where the concrete will crack naturally for easier repair if needed. Tight spacing may reduce cracking but increases costs; proper spacing depends on slab thickness and environmental conditions.
Common mistake: Not considering frost heave when planning joint spacing in cold climates. This can lead to excessive cracking and costly repairs.
Finishes and Add-ons: Decorative Options, Sealers, and Coatings
Adding finishes to your concrete slab can enhance its appearance and durability. Consider the costs and applications of each option:
Decorative Finishes: Costs and Typical Applications
Stamped concrete adds a unique look with natural stone or brick patterns for $5 to $10 more per square foot. To ensure quality, check that the stamps are in good condition and the pattern aligns consistently.
Integral color enhances your slab’s appearance, adding vibrant hues at an extra cost of $2 to $4 per square foot. When choosing a color, consider the overall design and any existing structures. Popular choices include earth tones for a natural look or bold colors for a statement piece.
Acid staining provides rich variegated colors but can be labor-intensive and costs around $3 to $6 more per square foot. Before applying, ensure the surface is clean and free of contaminants. A common mistake is not properly preparing the slab, leading to inconsistent results or damage.
Exposed aggregate finishes reveal small stones or pebbles for a rustic look, typically costing about $2 to $4 extra per square foot. Proper finishing techniques are essential for this process. To achieve the best outcome, ensure the aggregates are evenly distributed and the surface is properly sealed to prevent moisture damage.
- Always test stain colors on a small area first to ensure they meet your expectations.
- Consider the maintenance requirements of each finish when making your decision.
- Check local building codes for any restrictions or requirements regarding decorative finishes.
- Consult with a professional if you’re unsure about the best finish for your project.
Epoxy, Polyaspartic, and Floor Coatings
Epoxy coatings provide durability in high-traffic areas, typically priced around $2-$5 per sq ft…
Polyaspartic coatings dry faster than epoxy, making them ideal for busy spaces with costs ranging from $3 to $7 per square foot. They provide excellent chemical resistance.
Sealing, Curing Compounds, and Long-term Protection
Concrete sealers protect against water damage and staining at a cost of about $1 to $2 per square foot, offering long-term savings by extending the slab’s life.
Curing compounds are essential for new pours, helping retain moisture during curing. They cost around $0.50 to $1 per square foot and ensure optimal strength development.
Regular sealing every 2-3 years prevents deterioration from UV rays and chemicals, keeping your slab looking good and performing well over time.
DIY vs Professional: Cost Comparison and Decision Guide
This section compares material-only DIY costs versus full-service professional pricing, with rough per-square-foot ranges for cement/mix, rebar, forms, edging, and sealers. Hidden costs like site prep, permits, disposal, rental gear, delivery fees, and curing time are highlighted to avoid surprises.
Professionals handle design input, site prep, formwork, rebar placement, finishing options, inspections, cleanup, and long-term warranties. Use decision criteria to weigh financial sense against code compliance and quality; plan for equipment, batching, and phased work to save. Treat it as a risk and value decision: count the long-term savings of proper curing and finishes against upfront cash flow and safety.
Typical DIY Material Costs and Hidden Expenses
For a basic concrete slab, expect material costs around $1 to $2 per square foot. Grading your site might add extra costs, while sub-base preparation can be significant.
Disposal fees for leftover concrete or formwork waste vary based on local regulations and volume generated. Rent necessary tools like cement mixers or screed boards, which increase costs.
Factor in curing time and potential overages due to mistakes or unexpected site conditions. Proper curing can take several weeks; protect the slab from traffic and weather during this period.
Professional Installation: What You Pay For
A professional concrete pour includes site preparation like grading and sub-base installation, ensuring longevity. Costs cover labor for setting forms, placing rebar or wire mesh, pouring concrete, finishing it properly, and cleaning up afterward.
Specialized equipment such as pumps and vibrators guarantee quality work, adding to overhead costs. Custom finishes or special coatings can increase total cost but offer better durability and aesthetics.
What to check/what you’ll see:
- Professionals should arrive with a clear plan, including measurements and calculations for the required concrete volume.
- They’ll assess the site’s condition and prepare it accordingly, ensuring proper drainage and stability.
- You’ll see them setting forms accurately to contain the concrete and achieve desired dimensions.
Decision rule: If you notice any of these signs during preparation or pouring, consider hiring a pro: improper site assessment, inadequate form setting, or lack of rebar/wire mesh installation.
Common mistake + consequence: Skimping on sub-base installation can lead to an unstable slab that cracks over time. Professionals ensure a solid foundation for your concrete investment.
When DIY Makes Sense — and When to Hire a Pro
DIY concrete work is practical for small projects like patios or walkways if you have experience, but consider these factors:
- Project size: For larger slabs such as driveways or garage floors, hiring professionals ensures compliance with local building codes and structural integrity.
- Site conditions: If your site has complex grading issues or requires precise slope for drainage, professional help is essential to avoid costly mistakes later on.
- Reinforcement needs: Reinforcement beyond basic rebar should be handled by pros who can provide proper engineering input.
A common mistake is underestimating the complexity of the project or overestimating one’s skills, leading to costly repairs and replacements. Consider your skill level and time investment. If confident in abilities and have necessary tools, DIY might save money. Otherwise, professional installation offers peace of mind with warranties covering defects for several years after completion.
Regional Cost Variations and How to Get Local Estimates
Regional pricing is influenced by geography, local labor rates, climate conditions, material availability, and permitting regulations. To get accurate estimates, consult sources like RSMeans, local ready-mix yards, and trade unions to convert national rates into local costs.
To compare bids effectively, request detailed quotes from at least three local contractors or suppliers. Include project specifics such as slab size, thickness, reinforcement type, finish requirements, site access, and any hidden constraints. Use online calculators for initial estimates but verify with local professionals.
How Climate and Season Affect Price and Scheduling
Cold weather can slow down concrete work, increasing costs due to special curing needs and shorter working days. In areas with harsh winters, expect higher prices for materials that resist freeze-thaw cycles.
The best time to pour a slab is usually in spring or fall when temperatures are mild. Pouring during summer might mean dealing with heat-related issues like rapid drying, while winter pours can be delayed by weather conditions.
Off-season scheduling can save money but comes with risks. Plan ahead and factor in potential delays due to unexpected weather changes.
What to check:
- Check local building codes for minimum temperature requirements for concrete pouring.
- Ensure materials used are suitable for the climate, e.g., using air-entraining admixtures in cold regions.
- Monitor weather forecasts and have a backup plan for unexpected changes.
Common mistake: Not considering the effect of temperature on concrete curing speed. Rapid drying can lead to weak, cracked slabs.
Getting and Comparing Accurate Local Quotes
To get accurate quotes, provide detailed specs like slab size, thickness, reinforcement type, finish requirements, and site access details. Use online calculators as a starting point but verify with local contractors.
When comparing bids, look for consistency in material lists and labor hours. Be wary of unusually low bids that might lack essential items or have hidden costs. Ask each contractor about their contingency plans and lead times.
Essential questions to ask include experience with similar projects, warranty terms, and references from past clients. A well-detailed bid should cover all aspects of the project without leaving out critical steps.
Urban vs Rural Price Considerations
In urban areas, labor rates and scheduling can drive up costs due to higher demand and competition among contractors. Permit fees may also be more expensive due to stricter regulations.
Rural projects might incur additional expenses such as travel and mobilization costs for contractors, along with potentially higher material delivery fees if suppliers are farther away.
What to check:
- Labor rates: Urban areas often have higher labor costs due to demand and local wage standards.
- Permit fees: Stricter regulations in cities can result in more expensive permits.
- Contractor travel/mobilization expenses: Rural projects may require contractors to travel from distant locations, adding to their costs.
- Material delivery fees: Suppliers farther away from rural project sites may charge higher delivery fees.
Common mistake: Not accounting for these regional differences can lead to underestimating your total project cost and potential delays in scheduling contractors or receiving materials.
Permits, Inspections, and Code Requirements
Permits are not optional paperwork, they’re your safety net. You need permits for new slabs, patios, driveways, and any structural work, and rules differ for residential, commercial, and HOA projects with different permit types and fees. Skipping permits can mean fines, stop-work orders, required removal or retrofit, and impacts on insurance or resale.
Know who issues them (municipal building department, zoning, fire or flood authorities), expected plan-review timelines, and the key inspection checkpoints like footing and rebar, formwork, slab thickness, compaction, curing, finishing, setbacks, and drainage. Fees vary by city and project size, so budget upfront and document changes to avoid delays. If in doubt, have a licensed pro handle permitting to keep the job moving and protect your investment.
Typical Permit Costs and Timeline
Permit fees vary based on location, project size, and type. Expect to pay between $50 and over $1,000 for a concrete slab permit.
- Check with your local building department: They provide specific fee details and requirements.
- Submit detailed drawings and specifications: This ensures your project meets code standards.
Review and approval typically takes 2-4 weeks. Some areas may charge additional fees for expedited processing.
- Keep track of all permit-related documents and receipts.
- Follow up regularly to avoid delays in your project timeline.
- Be prepared to make adjustments based on feedback from inspectors.
Common mistake: Not understanding that some permits may need reissuance if changes are made during construction. This can lead to additional fees and delays.
If you notice any movement or issues with the slab, stop work immediately and consult a professional.
Building Code and Engineering Requirements
Before pouring your concrete slab, ensure it aligns with local building codes and engineering standards to guarantee structural integrity and longevity.
- What to check: Inspect the site for any specific soil conditions that might affect slab design, such as expansive soils or high water tables. Additionally, verify if your project requires a frost-protected foundation due to cold climate conditions.
- Decision rules: If your project exceeds basic guidelines (e.g., slab size, load-bearing requirements), contact a professional engineer for a detailed design. When encountering unexpected challenges during construction, halt work to assess the situation properly.
Common mistake: Skimping on materials or not incorporating reinforcement bars (rebar) as needed can lead to cracking and structural issues down the line.
- Consequences: Cracking can compromise the slab’s integrity, leading to costly repairs or even replacement. Inadequate drainage may result in water pooling, causing frost heaving or soil erosion.
To avoid these issues, use quality rebar and concrete mix, ensure proper drainage, and maintain setback requirements as per local codes.
How to Document Work for Permits and Resale
Maintaining thorough documentation is crucial not only for obtaining permits but also for future resale or maintenance purposes. Keep all relevant documents organized and accessible.
- Photograph the site: Before starting, capture wide shots of the area to show existing conditions. During construction, focus on key stages like formwork setup, reinforcement placement, and concrete pouring. After completion, take photos of the finished slab from various angles.
When documenting permit-related items, ensure you:
- Keep copies of all permit applications and approvals.
- Note any changes made to original plans and document why they were necessary. This helps in tracking deviations from the approved plan and provides context for future reference.
Maintain detailed records of materials used, including:
- Brand names and quantities.
- Mix designs and concrete strengths.
- Dates of delivery and usage.
Store inspection reports from each phase of the project, and record conversations with inspectors and building officials to:
- Track progress and ensure compliance with codes and standards.
- Address any issues or required corrections promptly.
Keep receipts for all expenses related to your concrete slab project, as they serve as:
- Proof of purchase for materials and services.
- A record of costs incurred for future reference or resale purposes.
Common mistake: Neglecting to document changes made during construction. This can lead to:
- Inconsistencies between approved plans and actual work performed.
- Difficulties in obtaining future permits or making additions/alterations.
If you notice any movement or issues with the slab after pouring, stop work immediately and consult a professional to prevent:
- Further damage to the slab or surrounding structures.
- Potential safety hazards and increased repair costs.
Tools, Materials Checklist and Prep Guidance for DIYers
Drive this project with a practical tools and materials checklist you can actually use: rent the heavy gear when it makes sense—excavation and ground prep gear, mixing tubs or wheelbarrows, compaction and float tools, forms, a level, a tape measure, and solid safety PPE—versus buying it outright depending on how many jobs you have lined up, and plan rental windows that match the pour day to avoid delays; for mixes, use typical concrete ratios like 4-sack, 5-sack, and 6-sack, translated into per-square-foot and per-100–200 sq ft requirements with waste allowances, so you don’t guess and end up short or overstocked.
Then lock in site prep steps that save money and extend durability: check the subgrade, lay a moisture barrier, establish a proper base with gravel, align and brace forms, set the correct drainage slope, and decide between wire mesh or rebar with spacing that suits the thickness and load; follow a simple, scalable workflow from site prep to pour to finish and cure, while watching weather and timing like a hawk; know common mistakes to avoid and when to hire for complex or critical structural work to avoid costly errors.
Essential Tools and Rental Options
Before you start pouring your concrete slab, ensure you have the right tools for a successful job. Renting is often cost-effective if you only need them once.
What to check before using:
- Inspect tools for any signs of damage or wear.
- Ensure all parts are securely attached and functional.
When renting, ask about maintenance and safety guidelines specific to each tool.
Common mistake: Using damaged or poorly maintained tools can lead to improperly compacted concrete with air pockets, resulting in a weak slab that may crack over time.
- Plate compactor to vibrate out air pockets
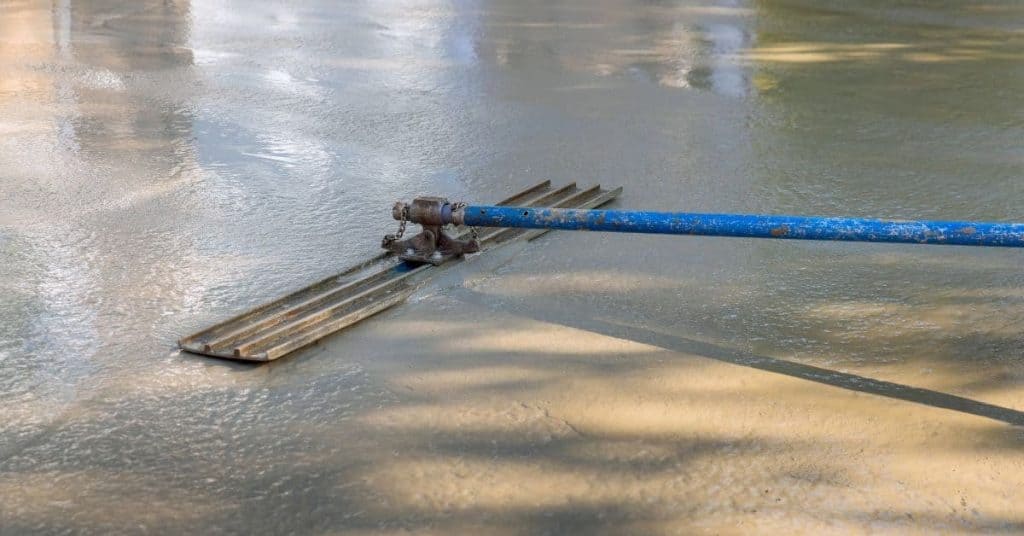
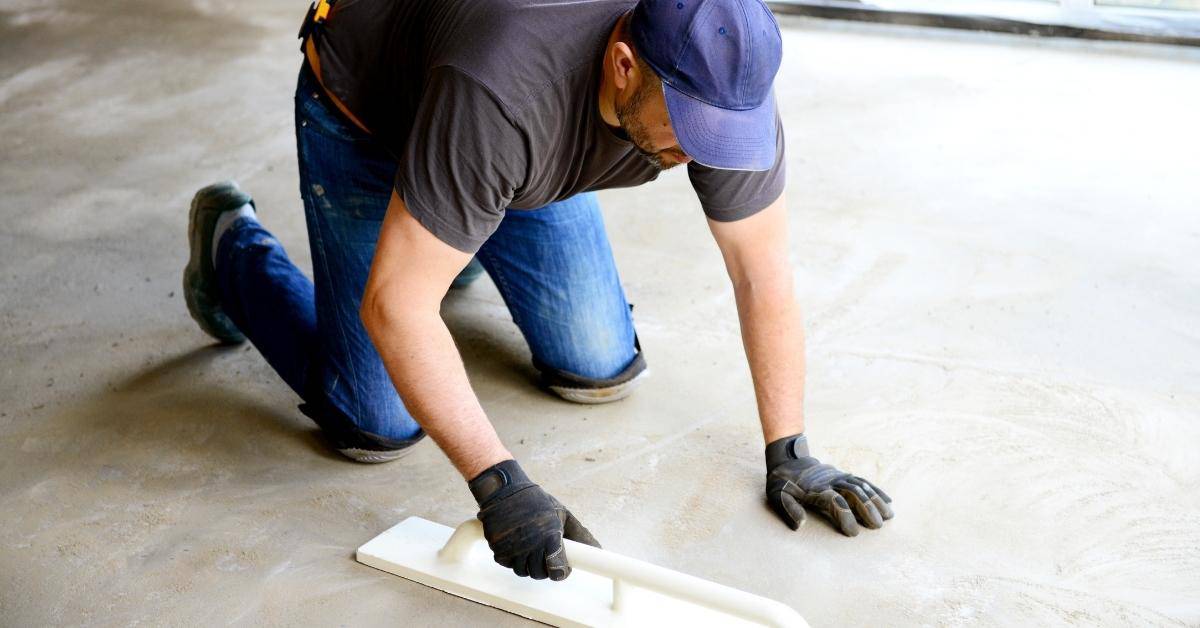
- Screed board and floats for leveling
- Bull float for smoothing surface
- Concrete saw for cutting control joints
- Tape measure, level, and chalk line
- Hammers, chisels, and pry bars
- Wheelbarrow or concrete mixer
- Safety glasses, gloves, and respirator
If any tool shows signs of movement during use, stop immediately to prevent damage.
Material Quantity Estimators and Mix Guidelines
To estimate concrete needed for your slab, consider dimensions and thickness, using a mix ratio that suits load-bearing needs.
- Calculate volume: Length x Width x Height (in feet)
- Check consistency: Concrete should have a slump of 4-6 inches for most slabs
- Estimate coverage: 1 cubic yard covers about 80-90 sq ft at 4 inches thick
- Plan materials: For every 100 sq ft, consider 6 bags of concrete mix or 0.35 cubic yards ready-mix
- Add reinforcement: Include mesh or rebar based on slab thickness and load requirements
Before pouring, ensure the concrete mixture is consistent and meets your project’s needs.
Common mistake: Not accounting for waste. Order extra materials to avoid delays due to running out mid-pour.
Safety Equipment and Best Practices
Concrete work presents various hazards. Always wear appropriate safety gear, follow best practices, and be aware of your surroundings to ensure a safe working environment.
- Hard hat: Protects against falling objects; wear when there’s risk of overhead work or tool drops.
- Safety glasses: Shields eyes from concrete debris and other potential hazards.
- Gloves, steel-toed boots: Essential for handling materials and protecting feet from heavy objects.
Additionally, consider the following:
- Use hearing protection when operating noisy tools like plate compactors to prevent hearing damage.
- Wear protective clothing to guard against concrete burns and dust inhalation, which can cause respiratory issues.
- Implement a buddy system to ensure someone is present in case of emergencies or accidents.
Common mistake: Ignoring safety signs or warnings. Consequences include injuries, property damage, and potential legal liabilities.
If you notice any safety hazards, stop work immediately, assess the situation, and address them before continuing. If unsure, consult local regulations or a professional.
Common Mistakes That Drive up Cost (and How to Avoid Them)
Common mistakes that drive up cost include underspecifying the subbase, skipping reinforcement, poor joint planning, and bad scheduling. Fix them by diagnosing ground conditions, choosing the right subbase, and locking in reinforcement and joint layout before you pour.
Know your ground, moisture, drainage, and how they affect slab longevity and price. Decide on reinforcement type and spacing, plan joints early, and specify slab thickness and mix to suit the job; add a solid curing and protection plan. Get site prep and formwork right, avoid leaks, and balance DIY tasks with when to hire pros to stay on budget.
Underestimating Site Prep and Soil Problems
Before pouring concrete, it’s crucial to understand the ground beneath your slab. Hidden issues like soft soils or organic matter can cause major problems down the line. If you don’t address these early, fixing them later will cost a lot more.
Start by testing soil compaction and moisture levels. This helps ensure that your concrete will sit on a stable base. Also, check for groundwater issues which can weaken the slab over time. Proper preparation is key to avoiding costly repairs in the future.
Poor Drainage and Grade Errors
Inadequate drainage and incorrect grading can lead to water pooling around your concrete slab, causing deterioration, cracks, and structural issues over time.
What to check:
- Look for low spots where water collects; fill with gravel or sand before pouring concrete.
- Inspect the ground’s slope; it should be at least 1 inch per foot away from the foundation.
What you’ll see:
- Standing water near walls or around the perimeter of your slab.
- Cracks in the concrete, especially around the edges.
- Eroded soil or soft spots around the foundation.
Common mistake: Not installing drainage channels or gutters. This allows water to seep under the slab and cause cracks.
Consequence: Hydrostatic pressure can build up, leading to uplift in the slab and potentially causing it to shift or crack.
The fastest on-site correction is to install a French drain around the perimeter of your slab if you notice standing water issues after construction. However, prevention through proper grading and drainage installation before pouring concrete is key.
Choosing Cheap Materials or Skipping Permits
Cutting corners with materials can lead to long-term problems and higher costs. Similarly, skipping permits might save money upfront but could result in fines and structural issues.
- Material: Concrete mix that lacks proper additives like air entrainment. This makes the concrete more prone to cracking due to freeze-thaw cycles. Choose a mix with appropriate additives for your climate.
- Material: Rebar or mesh that is too thin or improperly placed. This can lead to cracks and reduced durability of the slab. Ensure proper spacing and integration with control joints.
- Material: Low-quality gravel or sand for subbase preparation. This weakens the foundation, leading to settling issues over time. Use high-quality aggregates that are clean and free from organic matter.
- Material: Cheap concrete forms that don’t hold up well under pressure. This can lead to uneven slabs or leaks during pouring. Invest in durable forms for a better finish.
- Material: Skipping proper curing compounds. This exposes the slab to weathering and reduces its lifespan. Apply a curing compound immediately after pouring to protect it.
What to check: Inspect concrete mix for proper additives; rebar/mesh spacing should match local codes; subbase aggregates should be clean and free from organic matter; forms should hold up under pressure.
What you’ll see:
- Concrete mix with no air entrainment additive will have a uniform, unmodified appearance.
- Rebar/mesh improperly placed or too thin may not be visible but can cause cracks over time.
- Low-quality subbase aggregates may contain organic matter or appear discolored.
- Cheap forms may bend, warp, or leak during pouring, leading to an uneven finish.
Common mistake: Using unsealed concrete. Consequence: Increased water absorption and reduced lifespan due to weathering.
Budgeting Worksheet and Step-by-step Estimation Method
This budgeting workflow gives homeowners a repeatable, end-to-end method to build a project budget for any slab job, starting with accurate measurement and finishing with a ready set of costs you can compare to local quotes. Measure the area precisely, translate it into square footage, and account for edge irregularities and shape lines, then convert those numbers into cumulative board-foot or cubic-yard quantities as needed. Then decide on thickness and finish options—common slabs run 3.5 to 4 inches, garages around 4 inches, with finishes like stamped, broom, or smooth and compatible sealers—and map these choices to a clear line-item cost framework.
The line-item framework should cover materials, reinforcement, formwork, base and subbase, finishing, curing, edging, corners, tools, and disposal, plus any local permit or utility considerations that drive price. Add a contingency of roughly 10–20 percent to cover surprises, and keep a simple record of local drivers such as labor rates, fuel costs, and material price shifts to justify changes. Finally, use a straightforward method to compare your DIY estimates against multiple local quotes so you can make an informed decision and avoid underestimating time or overpaying for quick, bad workmanship.
Sample Budget for a 12×20 Patio and 24×24 Garage
A typical 12-foot by 20-foot patio with a standard four-inch thickness might cost around $600 to $800, including materials like concrete mix and reinforcing wire mesh. For the larger 24-foot by 24-foot garage slab at the same depth, expect costs in the range of $1,500 to $2,000, factoring in extra labor for formwork and additional material needs.
Local permits can add another $50 to $150 depending on your city’s requirements. Don’t forget a 10% contingency buffer to cover unexpected issues like uneven ground or weather delays. This method helps you stay within budget while allowing room for adjustments as the project progresses.
How to Add Contingency and Track Changes
A good rule of thumb is to add a 10% to 20% contingency to your initial budget. This buffer helps cover unforeseen expenses like extra materials or labor due to site conditions.
To track changes, keep detailed records of all project modifications and their costs. Update your budget regularly as you make decisions during the build process. This way, you can stay on top of any cost overruns early and adjust your plans accordingly.
Long-term Costs, Maintenance, and Lifespan: DIY vs Pro
Long-term costs, maintenance, and lifespan depend on who installs the slab and how well it’s prepped and cured. DIY installations can save upfront money, but curing quality, load endurance, and exposure often shorten lifespan and raise maintenance and repair costs versus professionally installed slabs and coatings, which typically offer more predictable durability, longer seal intervals, and faster downtime recovery.
This matters on the jobsite because it frames decisions about coatings (epoxy, polyaspartic, or decorative toppings), routine upkeep, and when a DIY approach is still worth it. If you’re in a climate that accelerates wear or you’re dealing with foundation movement, the cost and hassle of frequent repairs can overwhelm initial savings, so understanding lifecycle costs helps you decide when to call a pro and when to stick with DIY.
Routine Maintenance and When Repairs Are Needed
Maintaining a concrete slab involves regular sealing to protect against water damage, joint maintenance to prevent cracking, and periodic inspections for any signs of wear or structural issues.
What to check:
- Cracks: Inspect for new cracks every few months. If they’re wider than a credit card, repair immediately.
- Joints: Ensure joints remain filled and undamaged to prevent water intrusion and cracking.
- Surface: Look for stains, discoloration, or soft spots that could indicate moisture damage.
When repairs are needed:
- If cracks appear, use a concrete crack filler to prevent further damage. Choose one that can expand and contract with temperature changes.
- When joints become damaged or missing, refill them with a flexible joint sealer to prevent water intrusion.
Common mistake: Neglecting to address small cracks promptly. This allows water to enter, causing further damage and potentially leading to costly repairs or slab replacement.
Long-term Value of Professional Installation and Warranties
Hiring a professional ensures better preparation of the subbase and use of high-quality materials, reducing long-term repair costs. Professionals also provide warranties that cover defects in workmanship for a period of time, typically one to two years.
When considering a warranty, look for:
- Coverage duration (length of the warranty)
- What is covered (workmanship, materials, or both)
- Any exclusions or limitations
- Who provides the warranty (contractor or manufacturer)
- Transferability (can it be transferred to a new owner?)
One common mistake is not thoroughly checking the warranty before hiring. This can lead to unexpected costs and repairs that are not covered.
These warranties can save you money if issues arise within their coverage period, as repairs are covered without additional cost. This reduces the total lifecycle cost and provides peace of mind knowing your investment is protected against unexpected failures or defects.
When to Resurface or Replace vs Repair
The decision to resurface, repair, or replace a concrete slab depends on its age and condition.
- Minor cracks (less than 1/4 inch wide) or wear: Patching or resurfacing may be sufficient. If the crack is less than 10 years old, this option can extend its lifespan at a lower cost.
- Significant cracking patterns (more than 3 cracks per 10 sq ft): This indicates structural issues that require replacement to prevent further damage and maintain safety.
- Heaving or sinking: These signs point to a deeper problem, such as soil instability, which requires full removal and reconstruction rather than surface treatments alone.
Common mistake: Ignoring small cracks can lead to larger ones that compromise the slab’s structural integrity and increase repair costs significantly.
Decorative Finishes
Decorative finishes give slabs color, texture, and protection, with stamps, integral color, stains, epoxy or polyaspartic coats, polished concrete, and stencil overlays as the main options you’ll see on a job. Think of them in terms of aesthetics, durability, and cost, then plan surface prep, moisture checks, crack repair, and substrate readiness before you commit to any finish. This section walks through what to expect, how to choose, and how to install or supervise each option without getting burned by adhesion issues or hidden costs.
Costs vary by region and approach, but you should budget per square foot for materials, labor, and curing time, and decide early whether DIY is feasible or you’ll hire a pro. A solid workflow matters: proper curing, base coats before topcoats, ventilation, and protecting finishes during curing to avoid peeling, hazing, or staining that ruins what you planned. Maintenance matters too—re seals, slip resistance, cleaning, UV exposure, and traffic all influence long term look and value, so test patches and read warranties before you buy.
Surface Preparation for Decorative Finishes
Before applying decorative finishes, inspect your concrete slab for any cracks or damage. Use a flashlight to check for hairline fractures that may not be visible to the naked eye.
- If cracks are less than 1/8 inch wide, fill them with a concrete crack filler.
- For wider cracks, use a concrete repair mortar and follow manufacturer’s instructions.
- Remove any loose or crumbling material using a wire brush or chisel.
Thoroughly clean the surface to ensure proper adhesion of your chosen finish. Use a degreaser or similar cleaner to remove dirt, oils, and stains. If necessary, etch the concrete with an acid solution to improve bonding.
Wear appropriate safety gear including gloves, goggles, and a respirator during preparation. A common mistake is not properly cleaning the surface, which can lead to poor adhesion and peeling of the decorative finish over time.
Choosing and Applying Decorative Finish Types
Select from options like epoxy coatings, integral stains, dye/stain combinations, or stamp overlays based on your aesthetic preference and durability needs. Epoxy provides a glossy look but requires careful application.
What to check when choosing:
- Colorfastness: Ensure the finish maintains its color under sunlight exposure.
- Slip resistance: Check for non-slip properties, especially for outdoor or high-traffic areas.
- Cure time: Consider how long you can afford to wait before using the surface again.
Application tips:
- Prepare the surface by cleaning and allowing it to dry completely.
- Use tools such as brushes, rollers, and squeegees for even application.
- Maintain proper thickness—too thin can lead to poor coverage; too thick may cause bubbling or cracking.
Common mistake: Not allowing the surface enough time to cure before walking on it or subjecting it to heavy traffic. This can result in damage, such as scuffs or scratches, and may even lead to premature failure of the finish.
Follow manufacturer’s guidelines closely for mixing ratios and application methods. Wear protective gear like gloves and masks during application. Be patient and avoid walking on the surface until fully cured.
Sealing, Curing, and Maintenance to Maximize Lifespan
After applying your decorative finish, seal the surface with a penetrating or film-forming sealer. Penetrating sealers soak into the concrete for deep protection, while film formers create a protective layer on top.
Cure times depend on the product used but typically range from 24 to 72 hours. Follow up with regular cleaning using mild detergent and water. Avoid harsh chemicals that can damage the finish.
Common mistakes include applying too much sealer or not sealing at all, which can lead to premature wear and tear. Regular maintenance keeps your decorative finish looking new for longer.
Conclusion
The bottom line is to plan for safety, durability, and a finish that matches your budget, and then follow a concrete, repeatable process so you don’t miss key steps or overpay.
Proceed with a quick, practical checklist in one smooth line: verify permit and code requirements, get local price estimates, decide slab type and reinforcement, confirm subbase and design specs, choose finishes or coatings, prep tools and materials, run a budgeting worksheet, and schedule inspections before pouring. Then lock in your plan with a 1-page checklist you can reference every day during prep and construction.
Two common mistakes to avoid are skipping the subbase or proper reinforcement and underestimating the curing and seaming steps, both of which invite cracking and early repair. Always test mixes and workmanship on a small section first, keep reinforcement clean and properly spaced, and protect fresh concrete from wind, sun, or extreme temperatures while it cures. stay safety-focused: wear eye and skin protection, follow manufacturer instructions, and never pour over a compromised form or poorly prepared site.
If complexities like permits, code requirements, or structural needs start to pile up, it makes sense to call a professional rather than pushing through alone. A pro can verify scope, ensure proper reinforcement and subbase, and handle inspections so your slab lasts decades. With clear steps and smart choices, you’ll finish strong and move on to the project’s real payoff—a solid, professional-looking slab you can trust.
FAQ
How much does a concrete slab cost?
The price ranges from $4 to $8 per square foot. Remember, cheaper isn’t always better; beware of lowbids that seem too good to be true.
DIY or pro? Which is better?
For the average homeowner, hiring a pro is usually best. Concrete work looks easy but it’s tricky – a bad pour will cost you dearly. If you’re determined to DIY, educate yourself thoroughly first.
Can I use just water and sand in my concrete mix?
No! You need Portland cement and aggregate (gravel, crushed stone) too. Using wrong materials weakens the slab, risking failure under load. Don’t try to cut corners here.
How thick should my concrete slab be?
That depends on what’s going on top – cars, heavy machinery, or just your dog? For most home uses, 4″ is standard. Always go thicker rather than too thin; it’s cheaper and safer in the long run.