

Introduction
Concrete and asphalt driveways differ in cost, durability, and maintenance, and this article helps you choose the right option.
You’ll see how each material performs in weather, how long it lasts, and what trade-offs to expect in upfront versus long-term spending.
The guide walks through practical steps to assess your needs, budget, and local conditions so you can pick with confidence.
Key takeaways
- Concrete lasts longer but requires higher upfront cost and longer curing time.
- Asphalt is cheaper initially and easier to repair with patch and seal coats.
- Proper drainage prevents standing water and reduces freeze-thaw damage risks.
- Concrete needs expansion joints and may crack with ground movement.
- Asphalt lifecycle includes regular sealants every 2-5 years for longevity.
- Contractor selection matters; verify licenses, warranties, and recent project photos.
Table of Contents
- Introduction
- Key takeaways
- What Are Asphalt and Concrete Driveways?
- Key Physical Characteristics and Performance
- Cost Comparison: Upfront and Lifecycle
- Maintenance, Repair, and Care
- Aesthetics, Design Options, and Curb Appeal
- Climate, Site Conditions, and Regional Considerations
- Environmental and Sustainability Considerations
- Common Mistakes, Red Flags, and How to Choose the Right Contractor
- Conclusion
- FAQ
What Are Asphalt and Concrete Driveways?
Asphalt and concrete are the two main driveway options you’ll see on a job site. Asphalt is a mix of aggregates bound with bitumen and is usually laid as a on-site mix or delivered pre-mixed, while concrete is a cementitious mix with aggregates that’s poured and finished on site. In many regions, people call asphalt “blacktop,” and terminology can vary by area; both materials have typical base and subbase needs to support proper drainage and stability.
Knowing the basics helps you plan for drainage, base preparation, and curing times, which drive long-term performance. This matters because base quality, moisture control, and how you join and finish the surface affect durability and maintenance later on. It also flags common challenges like temperature sensitivity, settling, and jointing that can bite you if you skip the proper steps or misjudge local conditions.
Asphalt driveway definition and how it’s installed
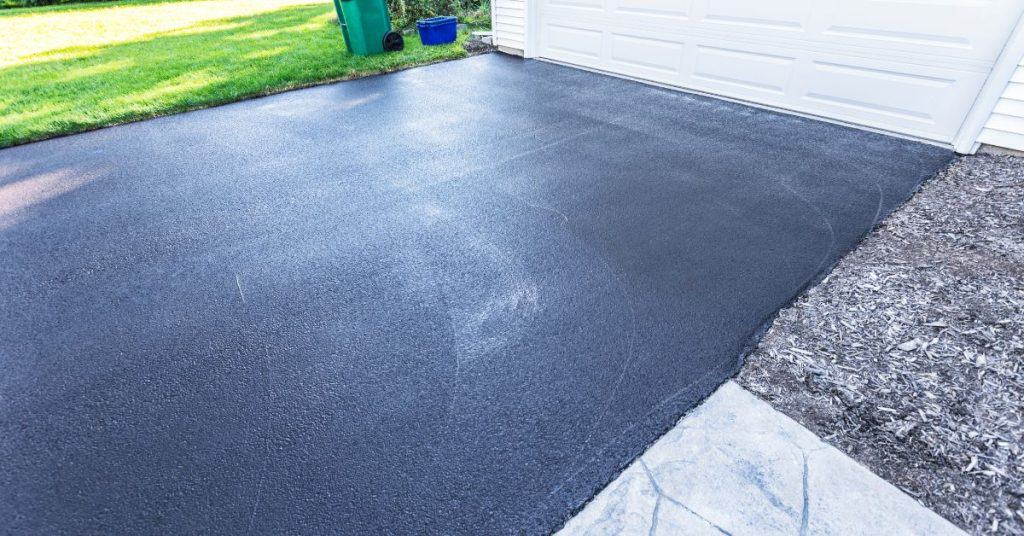
Asphalt driveways are made from a mix of aggregates like gravel or crushed stone bound together with bitumen, a sticky black liquid. This mixture is heated to make it pliable before being spread out on-site and rolled flat.
The base for an asphalt driveway typically consists of compacted gravel or aggregate that provides stability and drainage. After laying the base, the asphalt mix is poured in layers and then compacted using heavy rollers to ensure a smooth surface. The curing process takes about 24 hours before it’s ready for light use.
Asphalt driveways are known for their flexibility and ability to withstand temperature changes without cracking. However, they require regular maintenance like sealcoating every few years to keep them in good shape.
Concrete driveway definition and how it’s installed
A concrete driveway is made from a mixture of cement, sand, gravel, and water. This mix is poured on-site into forms that are set up to create the desired shape and dimensions.
To reinforce the concrete, rebar or wire mesh can be added before pouring to prevent cracking due to expansion and contraction. Once poured, the surface needs to be smoothed out and then left to cure for several days before it’s ready for use. Curing time is crucial as it allows the concrete to harden properly.
Concrete driveways are durable but require careful attention during installation to ensure proper curing and joint placement to avoid cracking over time.
When each material is typically specified (residential use cases)
The choice between asphalt and concrete depends on factors like budget, traffic load, aesthetics, and maintenance needs. Each has its own set of advantages.
- Long drives: Asphalt can handle longer stretches better due to its flexibility and ease of installation over large areas.
- Heavy vehicles: Concrete is preferred for driveways that need to support heavy trucks or RVs because it’s more durable under high loads.
- Budget builds: Asphalt offers a cost-effective solution, especially in regions where materials and labor are less expensive.
- Decorative front drives: Concrete can be stamped or colored for an attractive look that enhances curb appeal. Avoid asphalt if you want a more permanent aesthetic improvement.
Key Physical Characteristics and Performance
Concrete and asphalt look and feel matter as much as what they can endure. You’ll see color options from the typical concrete gray with pigment choices to darker asphalt tones, plus texture choices like smooth, broomed, or stamped. Hardness, resilience, and how they handle heat, wear, and visibility all hinge on these traits, along with how well the surface resists polishing or scratching over time.
As a DIY homeowner, you should understand how these materials behave under temperature swings and traffic, because that drives cracking risk and joint needs. Practical checks include cure or age baselines, surface smoothness and ridges, edge and joint condition, and sealant or patch integrity, plus watching for early wear. Aligning these observations with your budget and climate helps you pick a solution that minimizes maintenance, lasts longer, and accommodates your planned vehicle loads without overdoing it. Check product labels and manufacturer guidance for any specific testing steps or acceptance criteria to follow.
Durability and load capacity
Concrete driveways are known for their high compressive strength, typically around 2500 to 4000 psi. This makes them durable under heavy loads like trucks and RVs without cracking or deforming easily. Concrete’s brittleness means it can crack over time from traffic wear or freeze-thaw cycles, but proper jointing helps manage this.
Asphalt driveways are more flexible with a compressive strength around 1000 psi. This flexibility allows asphalt to withstand some movement and cracking without major damage. However, heavy loads like RVs can cause rutting and depressions over time if not properly designed for load-bearing capacity.
When it comes to long-term durability, concrete often outlasts asphalt due to its higher compressive strength and resistance to wear from traffic. Regular maintenance like sealing every few years keeps asphalt in good shape but doesn’t match the longevity of well-maintained concrete.
Thermal behavior and movement (expansion, softening, freeze-thaw)
Asphalt driveways soften in hot weather, which can cause rutting or depressions under heavy loads. This makes asphalt less ideal for areas with extreme heat but more forgiving when it comes to expansion joints.
Concrete driveways are much better at handling cold temperatures and freeze-thaw cycles without cracking. However, concrete’s brittleness means it needs proper jointing to manage thermal expansion and contraction. Without adequate joints, concrete can crack severely in freezing conditions.
The key takeaway is that asphalt performs better in hot climates with less concern for cracks from movement, while concrete excels in cold climates where freeze-thaw cycles are common but requires careful design to prevent cracking.
Traction, skid risk, and surface safety
Concrete driveways generally offer better traction in wet or icy conditions due to their rougher texture. This makes them safer for driving on when it’s slippery outside.
Asphalt surfaces can become slick when wet or icy, increasing the risk of skidding. However, adding a coarse aggregate mix during installation improves grip and reduces skid risks.
Both materials require regular maintenance to keep deicing salts from damaging the surface. Concrete is more resistant to salt damage than asphalt but still needs protection in areas with heavy use of deicing chemicals.
Cost Comparison: Upfront and Lifecycle
This section lays out a simple framework to compare upfront installation costs, ongoing maintenance, and eventual replacement over decades. It covers material choices, subgrade prep, drainage, edge treatments, and any decorative or stamping options, along with how often you’ll seal, crack, patch, or resurface.
You’ll want to bring this to local bids and check the label or manufacturer instructions for any maintenance limits. Climate, soil conditions, lot size, slope, permits, labor rates, and material availability all affect the numbers, so compare itemized bids and ask for a 10–20 year forecast with maintenance and replacement timelines.
Upfront installation costs and variables
The upfront cost of installing a driveway depends on several factors. First, the size of your driveway plays a big role; bigger driveways naturally cost more to install. You also need to consider site preparation, which includes grading and leveling the ground before pouring concrete or laying asphalt.
Another variable is whether you want any special features like decorative stamping for concrete, or if your driveway needs reinforcement with rebar. The slope of your property can affect costs too; a steeper slope might require more work to ensure proper drainage. Don’t forget about local factors such as labor rates and material prices, which vary by region.
When getting quotes from contractors, make sure they break down the cost for each component so you know exactly what’s included in your budget. This way, you can compare apples-to-apples between different bids and avoid any surprises later on.
Maintenance, repair frequency and typical costs
Maintaining a driveway involves regular upkeep to keep it looking good and functioning well. For asphalt driveways, you’ll need to sealcoat every 2-4 years depending on wear and tear. Concrete driveways require less frequent sealing but may need crack repairs more often.
Crack repair for concrete can be done with simple epoxy or silicone-based products that are relatively inexpensive and easy to apply yourself. However, larger cracks might require professional patching which costs more. Resurfacing is another option if the surface gets too worn down; this involves applying a new layer of material over existing surfaces.
Regular maintenance helps extend the life of your driveway by preventing small issues from becoming big problems. Keep an eye out for signs like cracks, potholes, or oil stains that can indicate areas needing attention. By staying proactive with repairs and maintenance, you save money in the long run compared to waiting until major damage occurs.
Long-term total cost of ownership
The total cost of owning a driveway over its lifespan includes both upfront installation and ongoing maintenance. While asphalt driveways are generally cheaper to install initially, they may require more frequent sealcoating and repairs due to their shorter life expectancy compared to concrete.
A concrete driveway might have higher initial costs but offers better durability and less need for regular sealing. Over time, the lower maintenance requirements can make it a cost-effective choice despite its steeper upfront price tag. Consider factors like local climate conditions that affect longevity—areas with frequent freeze-thaw cycles may see quicker wear on asphalt.
When deciding between materials, think about your budget and how long you plan to stay in your home. If you’re looking for a low-maintenance option that holds up well over decades, concrete might be worth the extra investment upfront even though it costs more initially. Always get detailed quotes from local contractors to understand all associated costs before making a decision.
Maintenance, Repair, and Care
Maintenance, repair, and care mean you stay on top of seasonal tasks for both concrete and asphalt driveways: clean regularly, seal or protect as appropriate, and address cracks early before they widen. DIY-friendly steps include simple cleaning, small crack filling, and applying a seal coat within approved windows; save bigger jobs for when you know what you’re doing or call a pro. Know when to hire a pro—large cracks, sunken sections, or drainage problems require professional assessment and likely specialized equipment.
This matters because proper timing and material selection reduce frost damage, prevent water intrusion, and keep surfaces safe and functional year round. You’ll benefit from a practical yearly checklist that covers resealing or reapplying protective coatings, joint maintenance, and reviews of drainage and surface condition, plus a quick winter vs summer planning guide. Use this guidance to prioritize repairs, avoid risky shortcuts, and recognize red flags that warrant expert help or more extensive work.
Routine maintenance schedule for asphalt
To keep your asphalt driveway looking good and functioning well, regular upkeep is key. Start by cleaning the surface with a broom or leaf blower to remove dirt and debris every few months. This prevents damage from embedded materials and keeps water from pooling.
Sealcoating should be done every 2-3 years depending on wear. A fresh coat of sealant protects against UV rays, oil stains, and water intrusion. Look for signs like small cracks or edges that are starting to peel back—these can usually be patched with asphalt filler before they grow into bigger problems.
If you notice large cracks, potholes, or sections where the surface is lifting up, it’s time to call in a professional. These issues indicate deeper damage and require specialized equipment and materials to fix properly. Regular maintenance helps catch these problems early when repairs are cheaper and easier.
Routine maintenance schedule for concrete
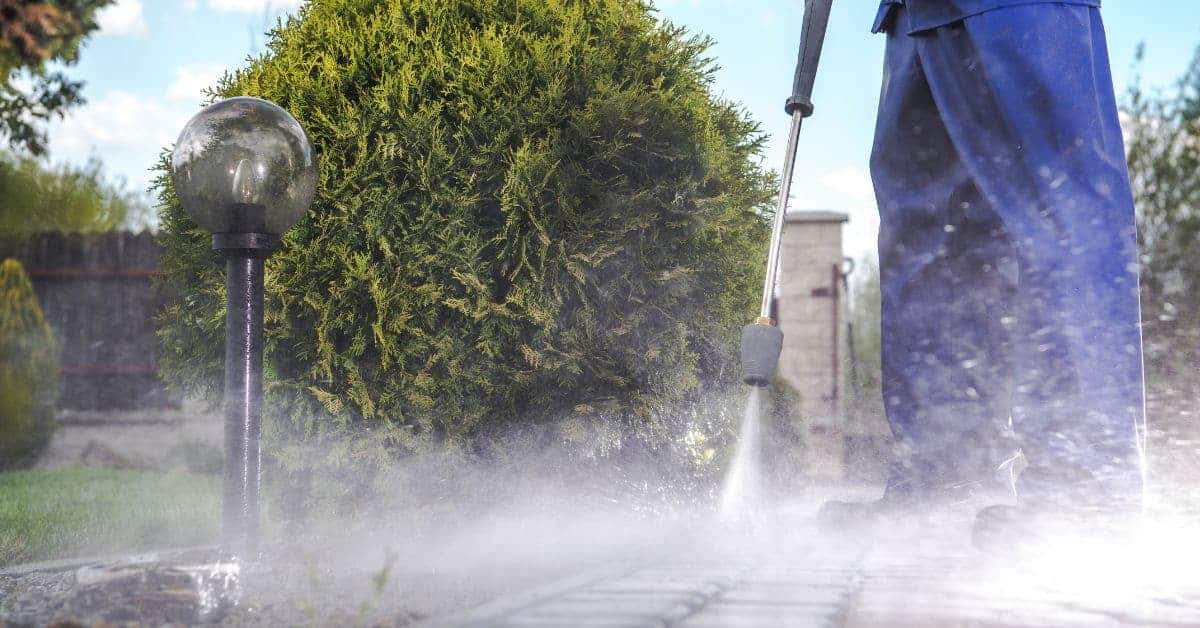
Maintaining a concrete driveway involves regular cleaning, sealing, and joint care. Sweep or power wash the surface twice a year to remove dirt and prevent staining. Use a high-quality sealer every 2-4 years depending on wear; this protects against water damage and keeps your driveway looking fresh.
Joint maintenance is crucial for concrete longevity. Inspect control joints regularly, ensuring they are free of debris and properly spaced. Repair any cracks or spalls as soon as you see them to prevent further deterioration. A good rule of thumb: if a crack is wider than 1/8 inch, it needs attention.
For minor repairs like patching small holes or sealing joints, DIY kits are usually sufficient. However, for larger issues such as slab replacement due to severe cracking or sunken sections, professional help is necessary. Proper repair techniques and materials can save you money in the long run by preventing further damage.
Preventive tips and quick fixes anyone can do
Simple steps like regular cleaning, applying oil barriers, and checking for proper drainage go a long way in extending the life of your driveway. Use a broom or leaf blower to clear debris weekly; this prevents dirt from embedding into the surface.
To protect against oil stains, apply an asphalt sealer over new driveways before they get dirty. For concrete, use a penetrating sealant that blocks water and chemicals without changing the look of your driveway. Both types of seals help prevent damage and keep your surface looking fresh longer.
Regularly check for proper drainage to avoid standing water which can lead to cracking or potholes over time. Ensure gutters direct rainwater away from the driveway, and fix any low spots that collect water immediately. These quick fixes save you money on major repairs down the road by addressing issues early when they’re small.
Aesthetics, Design Options, and Curb Appeal
Visual flexibility matters: color, texture, and finish evolve with time and shape curb appeal. Concrete offers options like integral color, stamping, scoring, decorative aggregates, and overlays, while asphalt uses colored sealants, chip textures, and stamped overlays. How these choices age and weather will influence resale and neighborhood fit.
How it fits your street and HOA rules matters for resale as much as the look. It also affects maintenance, heat reflection, and weather changes you’ll notice over years. Choose finishes that balance appearance with durability, and check the label or instructions for exact costs, durability, and care steps.
Concrete finishes, colors, stamps, and patterns
When it comes to concrete driveways, the sky’s the limit when it comes to customization. You can go with integral color for a uniform look or add texture through stamping, scoring, or exposed aggregate. Stamping, in particular, lets you mimic natural stone or brick without the hassle of laying real masonry.
Stamped concrete is popular because it looks great and adds value to your home. However, keep in mind that while initial costs can be high—ranging from $5 to $10 per square foot—the maintenance is relatively low compared to other finishes. Regular cleaning and sealing every few years will help maintain the look.
Exposed aggregate is another option for a natural stone-like finish. This technique involves exposing small stones or pebbles in the surface of the concrete, giving it an attractive texture that’s also slip-resistant. The upfront cost can be higher due to specialized materials and labor, but it’s worth considering if you want something unique.
Asphalt appearance and practical enhancements
While asphalt is known for its black color, there are ways to enhance its look. Colored sealants can give your driveway a fresh coat of red or green, adding a pop of color that complements your home’s exterior. These sealants not only improve aesthetics but also protect the surface from UV damage.
Edge treatments and borders made with concrete or pavers are another way to dress up an asphalt driveway. They define the edges and can add a decorative touch, especially if you choose contrasting colors or patterns. Landscaping around the perimeter of your driveway can also enhance its appearance by softening the hard lines.
Adding chip seal is another practical enhancement for asphalt driveways. This involves laying small stones over the surface before sealing it, creating a textured finish that’s both attractive and durable. It’s an affordable way to improve curb appeal while adding grip and longevity to your driveway.
Resale value and neighborhood compatibility
The choice of material for your driveway can significantly impact its resale value. In upscale neighborhoods, a well-maintained concrete or stamped asphalt driveway might be more appealing than plain blacktop. Conversely, in areas where simplicity is key, a clean, smooth asphalt surface could fit right in.
HOA guidelines often dictate the materials and colors allowed for driveways. Make sure to check these rules before making any changes. For instance, if your HOA prefers neutral tones, an asphalt driveway with a light-colored sealant might be more acceptable than bold patterns or bright colors on concrete.
Buyers typically expect driveways that are in good condition and complement the overall look of the property. A well-designed driveway can enhance curb appeal, making your home stand out positively among others in the neighborhood. This is especially true if it aligns with local architectural styles and trends.
Climate, Site Conditions, and Regional Considerations
Climate, site conditions, and regional factors drive how concrete or asphalt behaves. Hot, cold, and wet conditions affect expansion, contraction, curing, and cracking risk, so pick materials and joints to match those patterns.
Consider soil bearing, drainage, sun exposure, and freeze/thaw cycles; check local frost depth, seasonal temperatures, average rainfall, and humidity data from municipal records or local weather sources. These factors shape subgrade prep, drainage, color choice, and maintenance, so know what your site actually does before you pour.
Choosing by climate: hot vs cold regions
In hot climates, asphalt tends to soften and become more pliable under high temperatures. This can lead to rutting and uneven surfaces over time. To mitigate this issue, opt for a thicker layer of asphalt or consider adding a reflective coating to reduce heat absorption.
For cold regions with frequent freeze-thaw cycles, concrete is often the better choice due to its durability against cracking from expansion and contraction. However, proper curing and joint placement are crucial to prevent damage during winter months. Ensure you have adequate drainage around your concrete slab to avoid water pooling that can exacerbate freezing issues.
When choosing between materials in extreme climates, always consider local conditions like frost depth and seasonal temperature ranges. These factors will help determine the best thickness for your driveway and whether any special reinforcement is needed to withstand harsh weather patterns.
Site-specific issues: slope, drainage, and soil stability
Poorly drained sites can lead to water pooling on your driveway surface. This is especially problematic for asphalt, which can deteriorate faster when exposed to standing water. Ensure proper grading and installation of a French drain or gravel base to direct runoff away from the driveway.
Expansive soils pose another challenge as they expand and contract with moisture changes, potentially causing heaving under your driveway. For concrete, this means installing a thicker slab with expansion joints to accommodate soil movement without cracking. With asphalt, you might need to add a geotextile fabric layer between the subgrade and base course.
Steep slopes also impact material choice. Asphalt is generally easier to install on sloped surfaces due to its flexibility, while concrete requires careful planning for proper drainage channels and slope stabilization techniques. Always check local regulations regarding minimum slope requirements to ensure your driveway meets safety standards.
Local codes, permits, and HOA rules
Before starting any driveway project, verify the necessary building permits with your local municipality. This includes checking for specific zoning laws or setback requirements that may apply to your property.
If you live in a planned community or have an HOA (Homeowners Association), review their guidelines carefully. Many HOAs have strict rules about driveway materials, colors, and even the type of edging allowed around the perimeter.
Additionally, consider any regional maintenance practices that might affect your choice. For instance, some areas mandate salt usage during winter months, which can be harsh on both asphalt and concrete but may require special sealants or treatments for longevity.
Finally, understand warranty implications tied to climate zones. Some manufacturers offer extended warranties in colder climates where freeze-thaw cycles are more common, ensuring your investment is protected against unexpected damage.
Environmental and Sustainability Considerations
Concrete and asphalt both have end-of-life options and recycling pathways, but availability and programs vary by material and region. Look for what programs exist for reclaimed asphalt pavement (RAP) and concrete recycling, and understand typical recycling rates in your area. Also compare embodied energy and emissions from production, transport, and mixing, plus how reuse or longer life can shift overall impact.
Why this matters to you: choosing materials and practices that lower energy use and emissions saves money and reduces hassle over time. Prioritize options with recycled content, local sourcing, and design choices that ease repairs or extend life—like permeable layouts and proper drainage. Check labels and datasheets for heat and mix recommendations, and follow local disposal rules for waste, since rules vary and some setups require special handling.
Recycling and lifecycle environmental impact
When it comes to the end of a driveway’s life, both concrete and asphalt offer recycling options. For asphalt, Recycled Asphalt Pavement (RAP) is widely used in new mixes, reducing the need for virgin materials by up to 25%. Concrete has its own program called Concrete pavement Recycling System (CPS), where crushed concrete can be reused as aggregate or base material.
The recycling rates vary depending on local programs and market demand. In areas with strong recycling initiatives, asphalt RAP rates can reach over 70%, while concrete CPS rates are around 50%. This reuse significantly cuts down the environmental impact by reducing waste in landfills and conserving raw materials.
However, the lifecycle environmental impact also depends on how well the material is maintained. Proper sealing and repair work for asphalt can extend its life by decades, making it a more sustainable choice over time. For concrete, regular inspections and timely repairs are key to maintaining longevity without major replacements.
Materials sourcing and emissions
The materials you choose for your driveway have a big impact on the environment during production and installation. Bitumen in asphalt comes from petroleum, which is not only non-renewable but also has high carbon emissions. On the other hand, concrete’s main ingredient, cement, produces significant CO2 emissions due to its manufacturing process.
- Bitumen use: Opt for warm-mix asphalt that uses less energy and emits fewer fumes during production. Ask suppliers about recycled content options like RAP.
- Cement spec: Look for low-carbon cement alternatives or blended cements with fly ash to reduce emissions. Ensure your supplier can provide environmental impact data.
- Local sourcing: Choose materials from nearby sources to cut down on transportation emissions and support local businesses.
Permeability, runoff, and stormwater impacts
The way your driveway handles water is crucial for both environmental sustainability and site stability. Permeable surfaces allow rain to soak into the ground rather than running off, reducing erosion and flooding risks.
Porous asphalt and permeable concrete pavers are great options that mimic natural landscapes by letting water pass through. This not only helps manage stormwater but also reduces the urban heat island effect by cooling surfaces naturally.
Making sure your driveway has proper drainage is key to preventing issues like ponding, which can weaken foundations over time. Use gravel layers or perforated pipes under permeable materials to ensure efficient water flow and prevent pooling.
Common Mistakes, Red Flags, and How to Choose the Right Contractor
Homeowners often pick contractors and materials by price alone, overlook site prep, and underestimate drainage or subgrade needs. Look for red flags like proper licensing, insurance, written estimates, clear warranties, proven track records, references, and a realistic project timeline. A solid plan uses a stepwise contractor evaluation, with a detailed scope and material specs.
This approach helps you avoid costly regrets and align on scope, materials, and payment terms before work starts. A practical process includes pre-bid checks, utility locates, a clear drainage plan, and a post-install inspection. Focusing on these elements keeps projects on track and protects your investment.
Top mistakes to avoid when choosing materials
Picking the right material is crucial for a driveway that lasts. A poor choice can lead to cracking, staining, and weak bonds.
- Underestimating base thickness: Use at least 6 inches of compacted gravel under concrete; asphalt needs less but still requires proper subgrade prep.
- Skip permits: Always get the necessary permits to avoid legal issues down the line. Check local codes for specific requirements.
- Picking by price alone: Cheaper materials often lead to higher long-term costs due to frequent repairs and replacements.
- Neglecting drainage needs: Ensure proper slope and drainage channels to prevent water damage and erosion around the driveway edges.
- Ignoring reinforcement: Use rebar or wire mesh in concrete driveways for added strength, especially in cold climates where freeze-thaw cycles can cause cracking.
How to vet contractors and bids
Choosing the right contractor is key. Start by checking their licensing and insurance status before even considering a bid.
Ask for references from past clients, especially those who had similar projects like yours. This will give you an idea of their work quality and reliability.
Require detailed written estimates that specify materials, labor costs, project timelines, and warranty terms. Compare these bids carefully to ensure you’re getting the best value without compromising on quality.
Visual checkpoints and acceptance criteria at job completion
Before final payment, use this checklist to inspect your driveway’s condition:
- Base compaction: Ensure the subgrade is well-compacted. Loose soil can lead to settling issues.
- Slope accuracy: Check that the slope directs water away from the house and towards drainage areas.
- Joint placement: Verify joints are properly placed and sealed to prevent cracking.
- Smooth surface: The driveway should be smooth with no bumps or uneven spots. Rough surfaces can cause tripping hazards.
- Cleanup: Ensure the job site is clean, with no leftover materials or debris.
Quick rule: Don’t sign off until everything looks right and meets your expectations.
Conclusion
Pick the option that keeps safety and durability first, then plan around how you live and what the local climate will do to the surface year after year.
Consider this checklist as you proceed: confirm the site drains properly and has a solid base, verify you understand the expected lifespan and needed maintenance, compare upfront and lifecycle costs, and gather a clear plan for expansion joints and edge details. Start with the simplest test areas, check local codes or permits, choose a finish that fits your climate, and map a realistic maintenance schedule before you pour or pave.
Avoid these common missteps: rushing work or skipping drainage and base preparation, neglecting expansion joints, and overwriting the proposed slope or grade. Remember safety first and keep copies of any tests, measurements, and manufacturer or code guidelines. Protect utilities, keep clear access for vehicles during curing, and never cut corners on critical joints or compaction.
If you run into structural concerns, big drainage redesigns, or you’re unsure about base material and compaction, call a professional. A solid decision now saves hours of trouble later, and a properly installed driveway will look good and last longer with far less hassle.
FAQ
Which is cheaper to install, concrete or asphalt?
Asphalt usually costs less upfront than concrete. Concrete may save you money in the long run if you value durability and low maintenance. You’ll pay more now for concrete, and more later for repairs with asphalt if it cracks.
Which lasts longer under normal use?
Concrete typically lasts longer with less maintenance if it’s installed correctly. Asphalt needs more frequent resealing and may require more repairs over time. Expect concrete to outlive asphalt in many climates.
Which one handles heat and cold better?
Concrete reflects heat and stays cooler in hot weather. Asphalt absorbs heat and softens in high temps, which can speed up wear. In cold climates, both need proper drainage and cracking control.
What should I know about maintenance?
Concrete needs little maintenance beyond sealing every few years in some areas. Asphalt needs regular sealing and crack repair. Poor installation beats any amount of maintenance, so hire a competent crew.