
Introduction
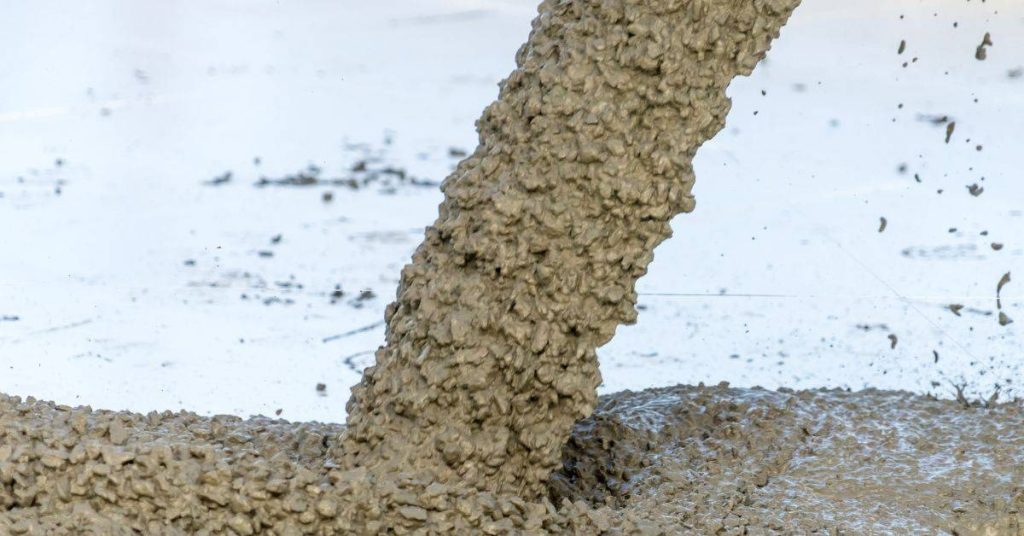
Pouring concrete against existing asphalt requires a proper joint detail that keeps the concrete edge from chipping and lets the two materials move independently. In plain terms: create a clean separation with a compressible filler and a small gap so freeze‑thaw, traffic, or settling don’t break the concrete edge. Check product labels and local rules for recommended materials and widths before you buy or install anything.
A practical DIY approach uses an asphalt‑compatible foam or bituminous strip tucked between the asphalt and fresh concrete, with the concrete edge formed so it can be tooled and cured without bonding to the asphalt. Choose a joint material rated for pavement use and follow manufacturer instructions for compression, depth, and installation; if unsure, ask a supplier or inspector for guidance.
Key takeaways
- Plan joint placement early to prevent edge spalling when pouring against asphalt.
- Use expansion joint options that suit concrete-asphalt interfaces to allow movement.
- Choose backer rods and sealants compatible with both materials and climate.
- Install proper fill materials to bridge gaps without trapping moisture.
- Inspect joints after curing and maintain with timely resealing when needed.
- Safety: follow PPE guidelines and avoid working near traffic or hot surfaces.
Table of Contents
- Introduction
- Key takeaways
- Why Proper Joint Detailing Matters for Concrete Poured Against Asphalt
- Site Assessment and Planning Before You Pour
- Joint Design Principles for a Lasting Concrete-Asphalt Edge
- Material Selection: Fillers, Backer Rods, and Sealants
- Step-by-Step Installation and on-Site Best Practices
- Tools and Materials Checklist for Diyers and Contractors
- Common Mistakes and Troubleshooting Tips
- Long-Term Maintenance, Inspection, and Cost Considerations
- Conclusion
- FAQ
Why Proper Joint Detailing Matters for Concrete Poured Against Asphalt
Concrete and asphalt behave differently: concrete is relatively rigid, asphalt is flexible and moves with temperature and traffic. That differential movement concentrates stress at the interface and drives edge break, cracking, and spalling if the joint isn’t detailed to accommodate it.
Water entering the joint via capillary action or surface runoff worsens damage, especially where freeze–thaw cycles occur, so drainage and a watertight seal are part of the fix. Proper load transfer and edge support also matter—concentrated loads near the asphalt edge can cause settlement or indentation unless the joint geometry, backer material, and edge restraint distribute bearing and prevent plastic failure; maintenance and periodic reseal keep the interface durable and serviceable.
How asphalt and concrete move differently
Asphalt and concrete behave differently under various conditions, leading to stress at their interface. Here’s why:
Thermal expansion: As temperatures rise and fall, both materials expand and contract. Concrete does so rigidly, while asphalt flexes. This difference causes stress.
Moisture-related shrinkage: When concrete loses moisture, it shrinks. Asphalt doesn’t shrink like this but can soften with heat or become brittle with cold. These changes don’t match up, creating more stress.
Traffic-induced deflection: Vehicles cause asphalt to deflect more than concrete. This means the asphalt moves more under load, again causing stress at the interface.
Typical failure modes at the interface
Poor joint detailing can lead to several problems at the concrete-asphalt interface:
Edge spalling: Stress from differential movement can cause chunks of concrete to break off, or ‘spall’, near the edge against the asphalt.
Cracking: Cracks may form in the concrete, starting at the joint and propagating into the slab. These cracks can let water in, leading to further damage.
Undermining: Water intrusion can soften the underlying soil, causing it to wash away. This leaves the concrete unsupported, leading to settlement and more cracking.
Site Assessment and Planning Before You Pour
Start by inspecting the asphalt edge and the subbase under where the concrete will sit: look for cracking, spalling, soft spots, or moisture that could undermine the new concrete. Evaluate drainage and slope so water runs away from the joint rather than pooling at the interface.
Document asphalt age and condition to decide if cutting back a straight, clean edge or installing a backer is needed, and plan joint spacing and timing around that decision. Prepare a surface-prep plan (cleaning, tack or primer options, and any grinding) and select joint materials that are chemically and physically compatible with both surfaces; confirm product limits on the label or data sheet as needed.
Inspecting the Existing Asphalt and Subbase
Before you pour, take a close look at your existing asphalt and concrete subbase. You’re checking for signs of wear and tear that could cause issues later.
Asphalt: Look for rutting, oxidation (that chalky look), loose edges, or soft spots. These can indicate it’s time for patching or even full replacement before you pour your new concrete.
Subbase: Check for cracks, spalling (flaking off), washout (loss of material), and any signs of moisture that could affect adhesion and curing of your new concrete. If you find major issues, consider fixing them before proceeding.
Permits, Codes, and When to Consult an Engineer
Don’t forget about the paperwork and professional help that can save you from costly mistakes.
Permits: Check with your local building department for any required permits. They’ll let you know what’s needed based on your project’s size and scope.
Codes and Standards: Familiarize yourself with local codes and design standards to ensure your project meets all safety and structural requirements.
Engineer Consultation: If your project involves heavy loads, complex drainage issues, or significant grade changes, consider consulting a professional engineer. They can provide expert advice tailored to your specific situation.
Joint Design Principles for a Lasting Concrete-Asphalt Edge
Choose the joint type to match the function: isolation joints to separate concrete movement from asphalt, expansion joints where wide movement is expected, and contraction/saw-cut joints to control crack locations. The primary design goals are to isolate differential movement, control cracking with correct spacing and saw timing, and shed water away from the interface to limit infiltration.
Select backer rod and sealant systems that bond or compress correctly with both materials and install them to create a low-permeability line at the edge; verify product compatibility from the manufacturer before use. Place joints at planned distances from the asphalt edge, protect the edge from chipping during construction, and sequence pours and cures so the joint materials are installed and inspected before traffic returns.
Choosing the right joint type (isolation, control, expansion, keyway)
At the concrete-asphalt interface, different types of joints serve specific purposes to prevent edge break. Let’s dive into each:
Isolation Joints: These are used when you want to completely separate the concrete from the asphalt. They’re typically saw-cut after the concrete has cured. Use them where you need to isolate movement, like at expansion joints in the asphalt.
Control Joints: These help control cracking by allowing the concrete to shrink and contract as it cures. They should be saw-cut into the concrete before it dries out. Use them when you want to manage where cracks form, preventing random cracking that could lead to edge break.
Expansion Joints: These allow for movement due to temperature changes or loads. They’re typically filled with a compressible material like closed-cell foam or backer rod. Use them where you expect significant movement, like at the end of long concrete slabs or where there are heavy traffic loads.
Keyway Joints: These are used when you want to tie the concrete and asphalt together. They’re formed by cutting a groove into the existing asphalt before pouring the concrete. Use them when you need additional strength at the joint, like in areas with high traffic or heavy loads.
Geometry, spacing, and depth guidance
The geometry of your joints plays a crucial role in their effectiveness. Here are some guidelines:
Joint width should be around 1/4 to 1/2 inch for isolation and control joints, and up to 1 inch for expansion joints. Always check local standards for specific requirements.
Depth is typically around 1/3 to 1/2 of the slab thickness. For example, in a 4-inch thick slab, your joint depth should be between 1.33 and 2 inches.
Placement strategy depends on the joint type:
– Isolation joints are typically placed near the edge of the asphalt.
– Control joints are spaced evenly across the concrete, usually around 30 to 60 feet apart.
– Expansion joints are placed where movement is expected, like at the end of long slabs or near buildings.
Accounting for anticipated movement and loads
Understanding how your concrete slab will move and the loads it will bear is key to choosing the right joints:
Traffic Loads: Heavier traffic means more stress on the joint. Use wider, deeper expansion joints with robust fill materials in high-traffic areas.
Freeze/Thaw Cycles: In colder climates, water can freeze and thaw in the joint, causing it to expand and contract. Use joint fillers that can withstand these cycles, like closed-cell foam or silicone sealants.
Seasonal Movement: Concrete expands in hot weather and contracts in cold. Account for this by using expansion joints spaced appropriately (usually around 50 to 100 feet apart) and filled with compressible materials.
Material Selection: Fillers, Backer Rods, and Sealants
Backer rods and compressible fillers provide the compressibility and depth control; sealants provide the watertight surface. Compare options—closed-cell foam backer rods versus compressible open-cell materials and sealants such as urethanes, silicones, or asphalt-compatible products—by how they move, their adhesion, and their resistance to water and UV.
Check product instructions for adhesion to asphalt and concrete and for primer requirements; some pavements or seal coats may interfere with bonding. Install to the specified joint width/depth ratio, clean and prime surfaces per product guidance, and run test spots if adhesion or chemical compatibility is uncertain.
Joint filler and compressible inserts
When it comes to filling joints, you’ve got options. But remember, the best choice depends on your specific job.
Asphaltic fillers are great for driveways and parking lots. They’re cheap, easy to apply, and can handle heavy traffic. But they ain’t pretty, so keep that in mind for visible areas.
For a more polished look, consider foam or cork. They come in various colors and finishes, making them ideal for sidewalks and patios. But they’re not as durable as asphaltic fillers, so keep that in mind.
Now, you might need to use compressible inserts or preformed strips. These are useful when you’ve got expansion joints – places where the concrete can move without cracking. Check your joint width and choose a size that’ll fit snug but allow for movement.
Always check base compaction before installing. You don’t want your fancy new filler sitting on a weak foundation. And remember, every job’s different, so always check local rules and manufacturer instructions.
Sealants and compatibility issues
When choosing a sealant, you want something that’s flexible (elastic), sticks well to surfaces (adhesion), and can handle sun exposure (UV resistance). Check the product label for these properties.
Asphalt and sealants don’t always play nice. Asphalt can break down some sealants over time. To check compatibility, look at the manufacturer’s instructions or ask your local hardware store pro. Some good options are silicone, polyurethane, or butyl rubber sealants.
Also, make sure your chosen sealant is compatible with the joint filler you’ve picked (refer to the earlier section on fillers). You don’t want one breaking down the other. Again, check manufacturer instructions for this.
Step-by-Step Installation and on-Site Best Practices
Establish a straight, true asphalt edge by saw-cutting or grinding where needed, remove loose material, and ensure the substrate is clean and dry before forming. Set formwork and backer rod so the concrete edge has the intended geometry and support without pressing asphalt fluids into the joint.
Place concrete in a sequence that avoids cold joints at the interface, finish carefully to prevent edge lift, and allow proper cure time before installing sealant per manufacturer directions. Protect the joint from traffic and weather during cure, verify drainage alignment, and follow up with a visual checklist for joint integrity and seal continuity before opening to regular use.
Step-by-Step Installation Process
The following is a clear, numbered sequence of practical steps for step-by-step installation and on-site best practices. It starts with preparation and safety checks, then moves to the main work, and finishes with cleanup or final checks.
- Safety first: Wear appropriate PPE (Personal Protective Equipment) including hard hat, safety glasses, gloves, and steel-toed boots.
- Verify existing asphalt edge: Inspect for any damage or instability. If unsure, consult a professional.
- Create control line: Use a saw-cut or grinder to create a straight, true line along the asphalt edge. This is your guide for forming.
- Prepare substrate: Clean and dry the area. Remove loose particles using a wire brush or broom. Seal any oils with a bonding agent to prevent release into the joint.
- Form installation: Set forms according to planned geometry, ensuring they’re level, plumb, and aligned with existing pavement grades and drainage.
- Sub-base prep: Compact the sub-base material beneath the form to provide a stable base for your concrete pour.
- Pour sequence: Begin at one end of the form, pouring concrete in small sections. Use an initial screed pass to level the concrete, followed by intermediate trowel finishing to minimize cold joints and hairline cracks along the interface.
- Finishing details: Avoid overworking the edge during final finishing. Tool control joints as needed once the concrete has reached the desired consistency.
- Cleanup and final checks: Remove forms, clean up any debris, and perform a visual inspection of your work to ensure it meets your standards.
Preparing the edge and installing backing/fillers
To obtain a sound vertical edge in asphalt, follow these steps:
1. Asphalt edge verification: Inspect the existing edge for any damage or instability. If necessary, repair or replace before proceeding.
2. Create a clean bonding surface: Use a wire brush or broom to remove loose particles from the asphalt edge. Apply a bonding agent to seal oils and prevent them from releasing into the joint.
3. Install backing/filers: Cut backer rod or filler material to the correct depth. Insert it along the prepared asphalt edge, ensuring it’s level and flush with the surface. This provides a stable base for your concrete pour and helps prevent edge chipping during forming.
Placing concrete, forming the joint, and finishing details
When placing concrete against existing asphalt, consider the following:
1. Mix selection: Choose a concrete mix designed for edge pours with bonding additives to promote adhesion. Target a medium slump (4-6 inches) for better control near the joint.
2. Proper consolidation: Ensure thorough compaction of the concrete, especially near the joint. Use a vibrator or poker vibe to remove air pockets and ensure a strong bond with the asphalt.
3. Finishing without overworking: Avoid overworking the edge during final finishing. This can cause edge lift or weaken the bond between the concrete and asphalt. Tool control joints as needed once the concrete has reached the desired consistency, typically when it’s firm enough to hold a tool imprint but still soft enough to be tooled.
Safety, traffic control, and immediate curing/protection
After pouring concrete against existing asphalt, follow these safety and protection measures:
1. Traffic control: Implement traffic control measures to prevent premature damage while the concrete gains strength. This may include signage, barriers, or temporary closures.
2. PPE and safety: Wear appropriate PPE (Personal Protective Equipment) when working around fresh concrete, including hard hat, safety glasses, gloves, and steel-toed boots.
3. Immediate curing/protection: Cover the poured concrete with a plastic sheet or burlap to prevent rapid moisture loss near the asphalt. Use barriers or other protections to shield it from traffic and weather until it reaches sufficient strength (typically 28 days).
Tools and Materials Checklist for Diyers and Contractors
Gather the right tools: a masonry or circular saw for edge cutting, grinders or chisels for profiling, hand tools for cleaning, a mixer or wheelbarrow for concrete, floats and trowels for finishing, and tools to install backer rod and sealant. Include forms, bracing, compaction tools, and safety gear appropriate for cutting and concrete work.
Stock materials: joint backer rod in the required diameter, compatible joint sealant, form material and release agent, concrete mix suitable for exterior use, curing compound or wet-curing supplies, and any bonding agents or primers required by the sealant or filler manufacturer. Double-check product data sheets for installation depth, temperature limits, and surface-prep requirements before you start.
Essential tools for edge work and joint formation
Before you start, make sure you have all the necessary tools to prepare the asphalt edge, form joints, and finish your concrete pour.
- Edge saw or cold-cutting tool: To cut into the asphalt cleanly. Skip this and you’ll struggle with a messy, uneven edge.
- Jointing tools (jointing saw, router): For creating expansion joints in the concrete. Without these, your slab could crack unpredictably.
- Trowels (bull float, magnesium float, steel trowel): To smooth and finish the concrete surface. Don’t skip these; they’re crucial for a professional-looking finish.
- Compaction tools (compactor, tamper): To remove air pockets from the concrete. Without proper compaction, your slab could be weak and prone to cracking.
- Formwork and bracing: To shape and support the concrete as it sets. Inadequate formwork can lead to a misshapen or poorly supported slab.
- Wheelbarrow or mixer: For transporting and mixing your concrete. Without these, you’ll struggle with manual labor and inconsistent mix quality.
- Rebar/ties (if required): To reinforce the concrete and prevent cracking under stress. Neglecting reinforcement can lead to early slab failure.
- Cutting tools for expansion joint materials: To cut backer rod and other joint materials to size. Without these, you’ll waste material and risk improper joint installation.
Quick rule: Always inspect your tools before starting. Damaged or missing tools can cause delays and poor results.
Materials and quantities to estimate
Before ordering materials, use this checklist to ensure you have everything needed for a successful pour and proper jointing.
- Concrete mix: Order exterior-grade concrete with frost resistance and a target slump of 4-6 inches. Wrong mix can lead to poor performance in harsh conditions.
- Bonding or bonding-admixture: To ensure proper adhesion between the new concrete and existing asphalt. Without this, your edge could delaminate over time.
- Expansion joint material (backer rod, sealant): To accommodate movement in the slab. Skipping expansion joints can cause cracking under stress.
- Form release agent: To prevent the concrete from sticking to your forms. Without this, you’ll struggle to remove forms and may damage the edge.
- Curing compound or moisture-retention measures: To protect the concrete as it cures. Neglecting curing can lead to weak, cracked, or discolored concrete.
- Joint sealant and compatible filler: To fill and seal expansion joints after the concrete has cured. Without proper sealing, water and debris can enter the joint, causing damage over time.
- Reinforcing options (if specified): To strengthen your slab and prevent cracking under load. Neglecting reinforcement can lead to early slab failure.
Quick rule: Always verify coverage and waste factors with your supplier before ordering. Overestimating or underestimating materials can lead to costly mistakes.
Common Mistakes and Troubleshooting Tips
Common failures include pouring directly against asphalt without an isolation gap, using incompatible sealants, or neglecting to account for thermal movement—each leads to edge break. Prevent these by keeping a defined joint width and depth, choosing materials rated for the expected movement, and preparing the asphalt surface thoroughly.
If edge break appears, inspect whether the failure is at the sealant, backer rod, or substrate; remove and replace failed filler or sealant, correct drainage, and consider adding a compressible joint or edge support. Keep a short pre-pour checklist and post-pour inspection schedule to catch small issues before they become full-depth failures.
Errors in placement and workmanship
Even with the right materials, poor placement and workmanship can ruin your concrete project. Here are common mistakes to avoid.
- Shallow joints: Joints too close together or not deep enough cause cracking. Refer back to ‘Proper jointing’ section.
- Poor compaction: Inadequate vibration leads to voids and weak spots. Use a vibrator as instructed, ensuring all air bubbles escape.
- Inadequate surface prep: Uneven or dirty surfaces cause delamination. Clean, prime, and level the base before pouring.
Double-check these points to ensure your concrete project stands the test of time.
Compatibility and moisture-control pitfalls
Here are some common mistakes to avoid when dealing with sealants and moisture control.
- Using incompatible sealants. Don’t mix different types of sealants. Stick to one type per project, like silicone for bathrooms or polyurethane for wood. Check product labels before buying.
- Trapped moisture in slabs. Ensure concrete slabs are dry before applying sealant. Use a moisture meter (check local hardware store) and wait until readings are below 4 lbs/1000 sq ft/day.
- Failing drainage. Make sure water can drain away from your project. Check gutters, downspouts, and grading around the structure. Fix any issues before applying sealants.
Double-check these points to avoid costly mistakes. It’s better to spend time preparing than rushing through and ending up with a failed sealant job.
Long-Term Maintenance, Inspection, and Cost Considerations
Schedule regular inspections for sealant condition, edge spalling, hairline cracks, and any ponding at the joint after wet seasons. Simple maintenance—cleaning debris, re-sealing when the sealant shows weathering, and removing vegetation—greatly extends joint life.
Material choices at installation affect lifecycle costs: lower-permeability concrete and more durable sealants typically reduce reseal frequency but may cost more up front—confirm expected service life from manufacturer guidance. Keep a log of inspections and repairs to plan replacement windows and budget for reseal or joint replacement before edge failures escalate.
Maintenance schedule and visual checkpoints
Regular maintenance is key to extending your concrete joint’s life. Use this checklist to inspect and maintain your joint effectively.
- Sealant condition: Check for cracks, peeling, or discoloration. Skipping this can lead to water ingress and freeze-thaw damage.
- Joint separation: Measure the joint width. Excessive widening may indicate settlement or movement.
- Edge spalling: Look for chipped or broken edges. Prompt repair prevents further deterioration.
- Cracking near joint: Inspect for hairline cracks. Early detection helps prevent bigger issues.
- Ponding water: Check for standing water. Remove to prevent freeze-thaw damage and root intrusion.
- Vegetation/roots: Inspect nearby plants or trees. Roots can intrude, causing joint damage.
- After freeze-thaw cycles: Check for unusual movement. Prompt attention can prevent costly repairs.
- Debris accumulation: Remove any buildup in the joint. Debris traps water, leading to damage.
Quick rule: Inspect your joint every 3-6 months for best results.
Comparing upfront costs vs. lifecycle performance
When choosing materials, consider both initial cost and long-term performance to minimize expenses.
- Concrete mix: Compare low-permeability mixes for better durability. Higher upfront cost but reduces maintenance over time.
- Sealant type: Evaluate urethane, silicone, and asphalt-based sealants. Urethane and silicone offer superior performance but higher initial costs.
- Backer rod selection: Choose a size that reduces joint opening. Smaller backer rods cost less but may not provide adequate protection.
- Joint width: Narrower joints require less sealant, reducing upfront costs. However, wider joints accommodate more movement and have lower long-term maintenance needs.
- Protective coatings: Consider applying to extend joint life. Higher initial cost but reduces repair frequency.
- Adjacent asphalt condition: Assess the impact on your joint’s performance. Poorly maintained asphalt can cause joint issues, leading to costly repairs.
- Reseal frequency: Estimate how often you’ll need to reseal based on material choice. More frequent reseals mean higher long-term costs.
- Full-depth replacement: Consider potential future full-depth joint replacement. Better upfront materials can delay this costly procedure.
Quick rule: Investing in better-quality materials upfront often pays off with lower long-term maintenance costs.
Conclusion
Face the edge detail like a critical startup: you want a clean, durable joint that keeps water out, resists cracking, and stays neat as traffic hits it. Safety first, then follow the plan so you don’t end up chasing costly fixes later.
Double-check your plan in plain words as you work: verify good site access and drainage, confirm the right fillers, backer rods, and sealants, set your forms and joints to the correct depth and alignment, test mix and cure in a small area, and proceed with a disciplined, step-by-step installation—keeping the edge protected until the concrete cures and the seal is in place.
Common mistakes to avoid include skipping a proper joint depth or leaving gaps that invite edge spalling, using the wrong filler or sealant for the climate, and rushing the cure or not cleaning interfaces before sealing. Safety rules are simple: wear eye protection and gloves, keep the area clear of trip hazards, mix and place in workable weather, and never bridge a moving joint without proper backer material. Do a small test patch first and verify a water seal before full-scale work.
If the site is crowded, the slope is tricky, or you’re unsure about your plan, call a pro. It is better to invest in a quick, correct setup than to chase leaks and cracks later. Stay disciplined, stay safe, and you’ll get a durable edge that looks solid for years to come.
FAQ
What role do expansion joints play when pouring concrete against asphalt?
Expansion joints allow both materials to move with temperature changes without cracking. They reduce edge break where concrete and asphalt meet. If you skip them, cracks and edge spalling are likely over time.
What types of expansion joints should I consider for this edge?
Two common options are asphalt joints and plastic joint inserts. Asphalt joints blend with the existing surface, while plastic joints are easier to install and replace. Check which type your project calls for in the product label or manufacturer’s instructions.
What materials and components are used in expansion joints between concrete and asphalt?
Joint filler material, a backer rod, and sealant are typical parts. Choose fillers and sealants rated for exterior use and for movement. Always verify compatibility with both concrete and asphalt per the label or datasheet.
How should I design and install the joint for a durable edge?
Place the joint where the concrete sits flush with the asphalt, allowing room for joint movement. Install the filler, backer rod, and sealant according to the manufacturer’s directions. If in doubt, check local guidance or the product instructions before proceeding.