
Introduction
Time management is crucial when it comes to concrete screeding on small slabs. Each step in the process has a specific duration and sequence, and understanding this timeline can help you complete your project efficiently and accurately.
In this guide, we’ll break down the concrete screeding process into a clear, time-focused timeline, ensuring you stay on track from start to finish.
For the full guide, see Concrete Screeding on Small Slabs: Straightedge Choices and How to Check Flatness.
The Concrete Screeding Timeline: From Prep to Final Checks
Follow this detailed timeline to ensure your small slab project stays on schedule and meets the desired flatness and levelness standards.
- Preparation (1-2 hours): Clean and prepare forms, check straightedge tools, plan screed route, and gather materials.
- Concrete Placement (30 minutes – 1 hour): Pour concrete into the forms, ensuring even distribution and minimal segregation.
- Initial Strike-Off (5-10 minutes per square foot): Use a shovel or rake to remove excess concrete and create an initial flat surface.
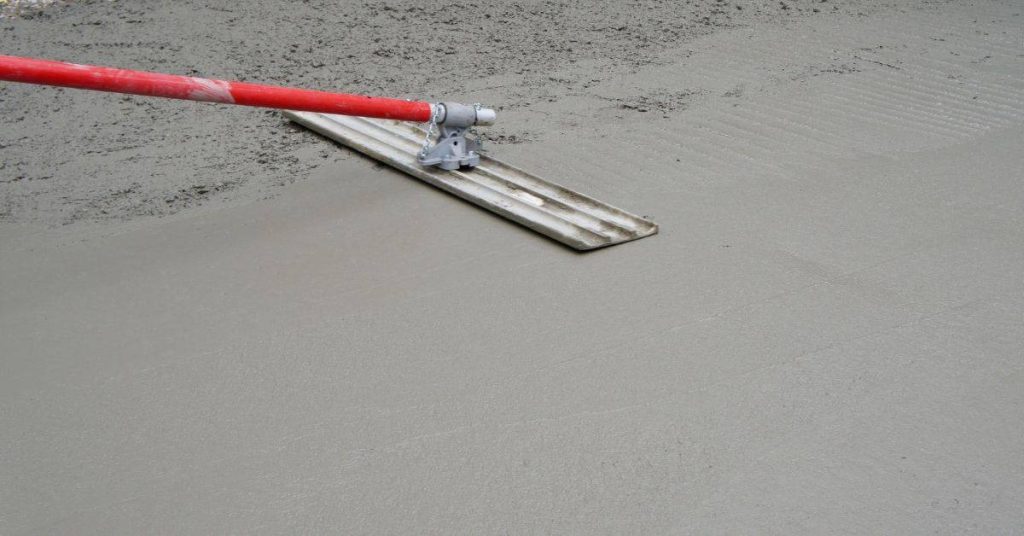
- Screeding (3-5 minutes per square foot): Employ your chosen straightedge to level the concrete, working from one side of the slab to the other in manageable lengths. Keep the straightedge clean and free of debris to avoid creating low spots.
- Finishing (10-20 minutes per square foot): Use a bullfloat or magnesium float to smooth out any remaining imperfections, then switch to a steel trowel for final finishing.
- Checking Flatness and Levelness (5-10 minutes): Inspect the slab using simple, jobsite-friendly methods like a long straightedge, a small level, or walking the slab and looking for light gaps under the edge. Make any necessary adjustments before the concrete sets.
- Final Checks and Cleanup (30 minutes – 1 hour): Verify that the slab meets the desired tolerances, clean up tools and materials, and allow the concrete to cure according to manufacturer guidelines or local conditions.
Key takeaways
The time spent on preparation directly impacts the overall screeding timeline. Ensuring forms are clean, rigid, and properly aligned before pouring concrete can save you valuable time and effort during the screeding process.
- Confirm slab corners are square and forms are rigid before screeding begins.
- Choose a straightedge length that covers the slab width with room for wiggle.
- Keep straightedge edges clean and free of debris to avoid catching high spots.
- Backfill and compact beneath forms to minimize settling and deflection during screed.
- Use proper joint placement and control joint timing to prevent random cracking.
- Safety: wear eye protection, gloves, and sturdy footwear during mixing and screeding.
Table of Contents
- Introduction
- Key takeaways
- Why Screeding Small Slabs Matters
- Choosing the Right Straightedge for Small Slabs
- Other Screed Tools and Accessories for Small Slabs
- Preparing the Slab and Forms for Accurate Screeding
- Screeding Techniques Tailored to Small Slabs
- How to Check Flatness and Level on Small Slabs
- Interpreting Results and Deciding on Rework
- Tools and Materials Checklist and Maintenance
- Conclusion
- FAQ
Why Screeding Small Slabs Matters
Accurate screeding sets the slab plane that determines how finishes sit, how joints align, and how loads transfer through the slab. Poor screeding on a small job often leads to visible surface issues, premature wear of finishes, and extra cutting or grinding work.
Small slabs still respond to the same physics as larger pours, so measured methods prevent rework and wasted material. If you need exact flatness or load criteria, check the project drawings, engineer notes, or the finish manufacturer’s instructions before you begin.
Risks of poor screeding
Inadequate screeding can lead to a host of problems. First off, you’ll get pooling – water sitting in low spots on your slab. This can weaken the concrete over time.
Uneven wear is another issue. Floors won’t last as long if they’re not level. You might see cracks or chips forming where the slab bears too much weight.
Installing floor coverings becomes a nightmare, too. Tiles won’t lay flat, and you’ll struggle to get a smooth finish with any type of flooring.
Project factors that change screeding priorities
The use of your slab affects how precise the screed needs to be. For heavy machinery, you’ll want a super flat surface to distribute weight evenly.
Finish requirements play a big role too. If you’re going for a high-end polished look, you need a very flat surface. But if it’s just a simple utility slab, you can get away with less precision.
The schedule matters as well. If you’re on a tight timeline, speed might take precedence over perfection. But remember, rushing now could mean rework later.
Choosing the Right Straightedge for Small Slabs
Pick a straightedge whose length and stiffness suit the slab span so it bridges forms without excessive sag or bounce. Material and section shape affect how it flexes under load, so match tool stiffness to the pour width and how you intend to handle it.
For critical tolerances, confirm tool specs against the project’s requirements or the manufacturer’s recommendations. If unsure about a tool’s capacity, test it over a known span or consult the product data sheet before use.
Straightedge length and stiffness considerations
The straightedge’s length should span your pour area without being too unwieldy. Too short, you’ll struggle to cover the slab; too long, it’s hard to handle.
Stiffness matters. A stiff section reduces sag during strike-off. Sag means a wavy finish, which is no good for small slabs where every millimeter counts.
Think about your pour size and choose accordingly. For tiny slabs, 6 to 8 feet might do. Larger ones, you’ll need 10 to 12 feet.
Material options: aluminum, wood, magnesium, composite
Material choices affect your result. Here’s what you need to know:
- Aluminum: Lightweight, durable, won’t rust. But it can dent and bend if not cared for.
- Wood: Cheap, easy to find. But it warps, wears out fast, and can stain the concrete.
- Magnesium: Super light, stiff, and strong. But expensive and prone to corrosion.
- Composite: Light, durable, won’t rust or warp. But pricier than wood.
When to use a lightweight vs heavy straightedge
Lightweight tools are easier to maneuver, great for tight spaces or when you’re working solo. But they lack momentum, so you’ll feel more fatigue.
Heavy straightedges, on the other hand, have more oomph. They’re better for larger pours where you need that extra push. But they’re harder to handle and can tire you out quicker.
It’s a trade-off. For small slabs, lightweight might be your best bet. But if you’ve got a big area to cover, heavy could be the way to go.
Other Screed Tools and Accessories for Small Slabs
Complementary devices—guide rails, short power screeds, floats, darbies, and tensioned wires—can speed work and improve consistency on compact pours. Each accessory has a role: rails and wires for control, floats for surface finish, and small power screeds for quick strike-offs in repetitive small slabs.
Decide which items help your workflow based on slab size, finish type, and crew size, and follow the manufacturer’s setup instructions where provided. When a tool’s use or limit is unclear, refer to the product label or instruction manual to avoid damaging the slab or the tool.
Setting and using screed rails and guide wires
Screed rails and guide wires are essential for maintaining consistent elevations and protecting your forms during the screeding process. Here’s how to use them:
Installing Screed Rails: Place these adjustable aluminum or steel rails along both sides of your slab, resting on the formwork. Adjust their height to match your desired slab thickness.
Guide Wires: Run guide wires between the screed rails at regular intervals (every 2-3 feet) to maintain a straight line and prevent the screed from wandering off course. Secure them tightly with wire clamps or zip ties.
Finishing tools: bull floats, darbies, hand trowels
After screeding, use these finishing tools to smooth and compact the concrete surface.
- Bull Float: Use this large, flat tool with a long handle to remove excess water and level out any remaining high spots. Work in wide, overlapping strokes.
- Darby: A darby is a smaller, rectangular float used for edging and finishing corners. It helps to remove any remaining imperfections left by the bull float.
- Hand Trowel (Margins): Use this small, handheld tool to finish the edges of your slab, known as the margins. Work in a circular motion to create a smooth, even surface.
- Finishing Trowel: Once the concrete has started to set and lose its sheen (around 15-30 minutes after placing), use this tool to give your slab a final, smooth finish. Work in overlapping, circular motions.
- Optional: Power Trowel: For larger slabs or when you need a super-smooth finish, consider renting a power trowel. These machines can save time and effort but require some practice to use effectively.
Small power or vibrating screeds
In certain situations, using a compact powered screed or vibratory attachment can significantly speed up your work and produce a more even strike-off.
When to Use: Consider renting or purchasing one of these tools when working on large slabs (over 10′ x 10′), tight deadlines, or when you need an exceptionally smooth finish. They’re also great for leveling out uneven surfaces before final screeding.
Types and Costs: Small power screeds range from $50 to $200 per day to rent, while vibrating screed attachments can be found for around $100 to $300. Always ensure you have the proper safety gear (gloves, eye protection, etc.) when operating these tools.
Preparing the Slab and Forms for Accurate Screeding
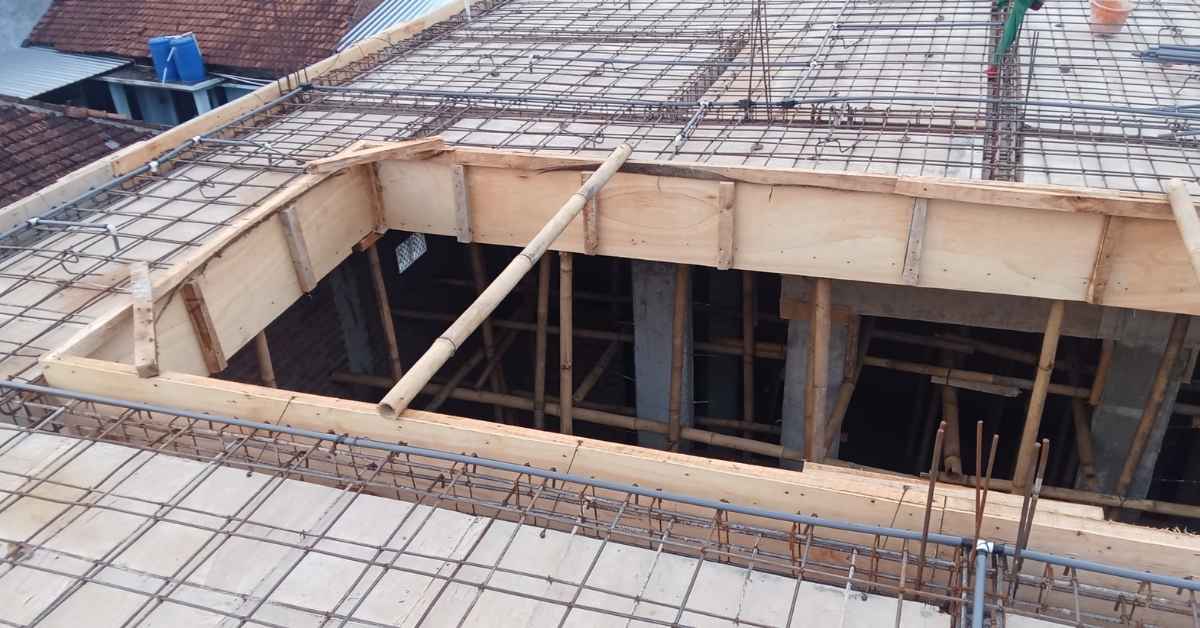
Preparation determines how well you can screed: a compacted subgrade, precisely set forms, and correctly placed reinforcement all reduce variables during strike-off. Loose soil, misaligned forms, or poorly tied rebar translate directly into surface irregularities.
Check form lines and levels as part of your setup and make sure rails are locked to the correct elevation before pouring. If a toleranced elevation is required, verify against the project’s control points or survey benchmarks ahead of the pour.
Subgrade and reinforcement checks
The subgrade is your slab’s foundation. Before pouring, check it’s stable and uniform.
Look for: any soft spots, voids, or Settlement. If found, address them before proceeding.
Check reinforcement too. It should be well-placed, evenly distributed, and properly secured. Ensure proper cover to protect it from the concrete surface.
Form setup and alignment tips
Proper formwork is crucial for accurate screeding. Here’s how to set them up:
Elevation: Ensure forms are at the right height using leveling tools.
Straightness: Use a straightedge or laser level to check forms aren’t bowed or twisted.
Bracing: Secure forms with braces at regular intervals. This keeps them from shifting during concrete placement.
Managing mix consistency and placement technique
The concrete’s consistency and how you place it impact your screeding job.
Slump: Aim for a medium slump (around 4-6 inches) for small slabs. Too wet or too dry makes screeding harder.
Aggregate spread: Ensure aggregates are well-spread in the mix to avoid voids and inconsistencies.
Placement sequence: Pour concrete in sections, working from one side of the slab to the other. This helps maintain a consistent surface level for screeding.
Screeding Techniques Tailored to Small Slabs
On small slabs, short controlled pull or push motions, combined with gentle sawing where needed, usually produce the most consistent strike-off. Work in short sections so the edge you finish against stays true and you can manage concrete bleed and slump.
Plan how to handle openings, embedded items, and transitions before you start so you can maintain a straight screed line around them. If special finish tolerances apply, check the finish supplier’s or engineer’s guidance and adapt your technique accordingly.
Proper strike-off motions and rhythm
The key to a smooth, flat slab is consistent motion. Here’s how:
Hold your straightedge at a 45-degree angle to the slab. This lets you see any low spots or high points.
Move it in a steady, smooth pulling motion. Start from one end of the slab and pull towards you. Keep the blade in contact with the concrete at all times.
If you’re working with an assistant, coordinate your movements. One person pulls while the other pushes from behind to keep pressure even.
Handling corners, edges, and constrained areas
Tight spots need special attention. Here’s how to tackle them:
For corners, use a shorter straightedge or even a trowel. Work the concrete into the corner with a sawing motion. Be careful not to damage the form.
At edges, use the same technique as corners. You might need to support the straightedge with your free hand to keep it level.
For constrained areas like around pipes or other openings, use a flexible straightedge if possible. If not, work the concrete by hand, using a trowel or even your fingers to fill in any gaps.
Transitioning from screed to float and trowel
Timing is crucial when switching tools. Here’s when to make the change:
After initial strike-off, switch to a bull float. This tool helps level out any remaining high or low spots.
Once the slab starts to set up, around 15-30 minutes after placing the concrete, it’s time for darbies and hand trowels. These tools help smooth out the surface and give it that final finish.
Remember, less is more at this stage. Overworking the slab can cause it to lose its smoothness.
How to Check Flatness and Level on Small Slabs
Use a combination of methods—long straightedge checks, stringlines or laser/optical levels, and simple dipstick or rolling tests—to reveal different types of deviation. Each method shows specific issues: straightedges spot high/low spots, levels give elevation, and rolling tests reveal rideability or deflection.
Compare your measurements to the project’s acceptance criteria or engineer directions and record the readings for later review. When a measuring device’s accuracy matters, consult its calibration certificate or manufacturer instructions before relying on results.
Step-by-Step Process
Follow this clear, numbered sequence to effectively check flatness and level on small slabs.
- Preparation: Ensure the slab is dry enough for testing. Wear safety gear like gloves and eye protection.
- Start at one corner: Begin your checks from a known good point, usually a corner or edge.
- Main tests: Use straightedges, stringlines, laser levels, and other methods as needed (see below).
- Check project requirements: Compare your results with the project’s flatness/level specs or engineer instructions.
- Cleanup & final checks: Remove all testing tools and recheck a few spots to ensure no damage was done during testing.
Using a straightedge to test flatness
A straightedge is the most basic tool for checking flatness. Here’s how to use it effectively:
Place your straightedge on the slab, spanning at least 6 feet (1.8m) if possible. Press down gently but firmly.
Look along the edge of the straightedge. If you see light between it and the slab, that’s a high spot. If the straightedge touches the slab all along its length, that’s a low spot. Mark these with chalk or a marker.
For more precise measurements, use feeler gauges or depth rods to measure the gap between the straightedge and the slab at various points.
Stringline, spirit level, and laser checks
These tools help ensure your slab is at the correct elevation. Here’s how to use them:
Stringline: Stretch a taut stringline along the desired elevation. Hold it against the surface of the slab. If the string touches the slab all along its length, you’re level. If not, mark high and low spots.
Spirit Level or Laser Level: Place these on the slab to check for level in specific areas. Follow the manufacturer’s instructions for use. Discrepancies indicate where to add or remove material.
Remember, these tools only show you where you are out of level. They don’t tell you if your slab is flat (see straightedge checks). Use both methods together for best results.
Quick field tests and visual checkpoints
These simple on-site checks can help catch obvious issues early:
- Rolling a ball: Roll a small, smooth ball across the slab. It should roll smoothly along flat areas but catch or slow down in low spots.
- Walking the slab: Walk across the slab with your eyes level and focused on the horizon. Your body will naturally follow the contours of the slab, helping you feel any undulations.
- Checking corners: Ensure all corners are square and have no dips or high spots.
- Edge checks: Check edges for proper slope (usually 1/4 inch per foot away from the center) and no low spots.
- Transition checks: Ensure transitions between different areas of the slab are smooth and level.
Quick rule: If you find any issues, recheck them with your straightedge or other tools to confirm before making adjustments.
Interpreting Results and Deciding on Rework
Turn measurement results into action by asking whether deviations affect safety, finish performance, or contract tolerances and then choose patching, grinding, re-screeding, or acceptance accordingly. Minor surface blemishes may be repairable; structural or profile failures usually need corrective work.
Document deviations and the corrective plan for the client or engineer and follow any specified remediation procedures. If you’re unsure which repair meets the project’s standards, check the engineer’s instructions or the finish manufacturer’s requirements before proceeding.
Documenting flatness checks and common notation
Keep a record of your flatness checks to track progress and address any issues. Here’s how:
Use a simple grid or plan view of the slab. Mark each test point with a dot. Next to it, note the deviation found (e.g., +2mm, -3mm). Take photos of each test area for reference.
Example notation: ‘A1 (+2), A2 (-1), B3 (-3)’ means you’ve tested three points: A1 with a 2mm high spot, A2 with a 1mm low spot, and B3 with a 3mm low spot.
Repair and remediation options for small slabs
If your flatness checks reveal deviations, consider these repair options:
Localized patching: For minor issues (e.g., <2mm), remove the affected area, rebar if needed, and replace with fresh concrete. This is quick and cheap but may leave visible patches.
Grind-and-polish: For medium deviations (e.g., 2-5mm), grind down high spots and fill low ones. This requires specialized equipment and can be labor-intensive but provides a smooth, durable finish.
Surface overlays: For significant issues (>5mm) or when the subgrade is suspect, consider an overlay. Consult a structural engineer first to ensure the existing slab can support it. Always check with your flooring manufacturer for compatibility and warranty implications.
Tools and Materials Checklist and Maintenance
Before each pour, verify you have the essential straightedges, rails, floats, measuring tools, and consumables on site and that they are in good working order. A pre-pour checklist reduces downtime and helps prevent improvising with the wrong tool during the strike-off.
Keep metal tools clean, store straightedges straight, and address bent or nicked edges promptly to preserve accuracy. When you suspect a tool is out of tolerance, consult the manufacturer’s guidance or replace it rather than risk producing a defective slab.
Pre-job checklist: what to bring
Before you start any small-slab screeding job, make sure you’ve got all the right tools and gear. Here’s a quick checklist.
- Tape measure: To ensure your slab dimensions are correct before pouring.
- Straightedge (2m & 3m): For checking flatness during and after screeding.
- Stringline: To set up level lines for screeding.
- Spirit level (1m & 2m): For checking levels at various points on the slab.
- Laser level (optional): For quick, precise level checks.
- Safety glasses: To protect your eyes from debris and concrete splash.
- Work gloves: For handling tools and materials safely.
- Ear protection: If using power tools nearby.
Quick rule: Always double-check you’ve got the right straightedge lengths for your slab size. Missing one can lead to inaccurate flatness checks.
Care, calibration, and storage of straightedges and levels
Proper care and storage of your tools ensure accurate readings and a longer tool life. Here’s how to maintain them.
- Check for warp: Lay your straightedge on a flat surface. Place a level on top. If it rocks, the straightedge is warped.
- Calibrate laser/level: Before each use, check and calibrate your laser or spirit level against a known true level.
- Clean tools: Wipe off any concrete residue after use to prevent damage from drying.
- Store straightedges: Stack them carefully, with the longest edge up. Never store them flat, as this can cause warping.
- Store levels/lasers: Keep in their original cases or purpose-built holders when not in use to prevent damage.
Quick rule: Always verify tool condition before each pour. Using a warped straightedge or uncalibrated level can lead to rework and wasted time.
Conclusion
Getting a small slab to lay flat and hold up long term hinges on choosing the right straightedge, using the tools properly, and sticking to a solid check plan. Do it right and you save effort, time, and potential costly repairs later.
First, confirm the basics in plain language: the forms and slab surface are clean and dry; the straightedge and screed tools are ready; you have a plan to start at the high points and work toward low spots; you keep the motion steady and consistent, and you recheck with the straightedge for uniform height. Move step by step: set the forms, lay the concrete, screed with smooth, deliberate passes, and check flatness and level as you go. If you see high spots or dips, address them before moving on and repeat the checks until the surface reads true. Finish with a clean edge and a visible, durable surface finish plan.
Common mistakes to avoid include riding the straightedge too hard and creating new high spots, trying to rush the first pass and letting concrete sag out of level, or skipping cleanliness and joint planning which invites weak edges and cracks. Safety rules are simple: wear eye and respiratory protection as needed, keep hands clear of moving tools, and never work on a freshly poured slab when it’s not rated for walk-on or screed timing. Test in a small area first to verify your technique and the mix’s workability before committing to the whole slab.
If the slab is large, the forms are complex, or repeated rework is required to hit level and flatness, consider bringing in a pro for a final check or to tune the finish. When in doubt, pause and reassess rather than forcing a shape you can’t uniformly hold. Stay disciplined, stay safe, and you’ll end up with a small slab that looks right, feels solid, and lasts. You’ve got this.
FAQ
What should I look for when choosing a straightedge for a small slab?
Look for a straightedge that is rigid, easy to grip, and not too heavy to lift. A straightedge with a flat edge and smooth ends helps prevent dug-in corners and snagging. Check the manufacturer’s instructions for recommended lengths and maintenance tips.
How do I quickly check flatness while screeding a small slab?
Drag the straightedge across the surface and look for light gaps or high spots. Use a quick pass with a level or a calibrated checker if you have one, and re-screed only where you see deviations. Don’t chase every tiny bump; fix the obvious highs and recheck.
What are common mistakes to avoid with straightedges on small slabs?
Avoid dragging too aggressively, which can pull too much mortar and create hollows. Don’t pry at edges or corners with the straightedge and damage forms. Store the straightedge clean and dry to prevent rust or rust spots on the concrete.
What steps should I take if I find high and low spots after the initial screed?
Address high spots first with a light pass to bring them down, then recheck. For low spots, fill with patch material or backer rod and re-screed once it sets enough to hold. Always confirm the surface remains workable and won’t gouge the form work.