

Introduction
Concrete formwork for curves means shaping temporary molds that guide wet concrete into a smooth, accurate curved edge, using techniques like kerfing plywood or flexible liners to follow the radius you need. In plain terms: kerfing lets stiff sheets bend by cutting relief slots, liners conform with support framing, and both need bracing to resist concrete pressure and keep edges true.
For a DIY job, pick the method that matches the curve tightness, finish you want, and what tools you have, and check product labels or manufacturer instructions for material limits and tie spacing. Expect to test-fit, adjust bracing, and plan pour sequence so forms don’t deform; if you’re unsure about loads or drainage, check local building rules or consult a pro.
Key takeaways
- Plan kerf spacing and liner curvature before cutting plywood sheets.
- Secure plywood with backing supports to prevent springback during pour.
- Test flexible liners for wrap around curves without wrinkles or gaps.
- Keep edges true by using string lines and consistent form ties.
- Control surface quality with careful joint treatment, patching, and gentle vibration.
- Wear eye protection and gloves; verify manufacturer instructions before materials use.
Table of Contents
- Introduction
- Key takeaways
- Overview: Methods for Forming Curves
- Planning and Design Considerations
- Kerfing Plywood: Materials and Technique
- Flexible Liners and Skins: Selection and Use
- Keeping Edges True and Corners Crisp on Curves
- Surface Quality, Finishing, and Patching on Curved Forms
- Tools, Materials Checklist and Material Specs Explained
- Conclusion
- FAQ
Overview: Methods for Forming Curves
Curved concrete can be formed three practical ways: kerfing plywood into bent panels, using flexible liners or skins, and combining both into hybrid systems. Each approach trades off cost, finish control, and ease of setup—kerfed plywood gives structural support, liners offer smooth seamless textures, and hybrids aim to balance both.
Match the method to the project: small-radius features, long sweeping bends, exposed finish requirements, and site constraints all matter. Check product data sheets, manufacturer instructions, or an engineer’s input when a material’s limits or structural role could affect safety or performance.
Kerfing vs. Liners: Quick Comparison
When it comes to forming curves, you’ve got two main methods – kerfing plywood and flexible liners. Each has its own strengths and best use cases.
Kerfing Plywood: This method excels when cost is a priority. Kerfed panels are cheaper than liners. They also provide a smooth, consistent finish for your concrete. But they’re not as flexible, so tight radii might be tricky.
Flexible Liners: These shine when you need to create really tight curves or complex shapes. They can be reused, making them cost-effective in the long run. But they require more skill to install and may not provide the same level of finish as kerfed panels.
Hybrid and Modular Approaches
Sometimes, you need a bit more flexibility in your formwork. That’s where hybrid and modular methods come in.
Hybrid: Combine kerfed panels with liners for the best of both worlds. Use kerfing for larger, simpler curves to keep costs down, then add liners for those tight radii or complex shapes.
Modular: Prefabricated curved modules can speed up your work, especially if you’re doing repeat jobs. They provide a consistent finish and can be reused. But they might not be as cost-effective for one-off projects.
Planning and Design Considerations
Start by laying out the curve full scale or snapping guide lines so you can visualize radii, transitions, and where forms will connect. Plan the sequence of forming, pouring, and stripping to avoid trapped pieces or access problems during concrete placement.
Decide which form method suits the radius, finish, and load-bearing needs and run a mock-up or trial bend before committing to the full build. If the element is structural or the layout affects reinforcement, consult structural guidance and verify with drawings or the product label.
Translating curves to the site: templates and layout
Before you start building your forms, ensure the curve matches your design. Here’s a checklist:
- Create full-size templates: Draw and cut out full-scale shapes of your curve. This helps visualize the final product.
- Use batten lines: Attach battens to your template, then transfer the curve onto the formwork surface using a pencil or marker.
- Check for accuracy: Measure and double-check the transferred curve against your design. Any discrepancies need fixing before proceeding.
- Test fit: Assemble a small section of your forms to ensure they follow the curve accurately.
- Adjust as needed: If the test fit isn’t perfect, adjust your templates or formwork until it is. Skipping this step can lead to costly mistakes later on.
- Mark formwork sections: Number and mark each section of your formwork for easy assembly and disassembly.
- Plan for sequencing: Determine the order in which you’ll assemble and pour your forms. This helps maintain a smooth workflow.
- Consult structural guidance: If unsure about any aspect, consult with a structural engineer or expert before proceeding.
Quick rule: Always test fit your formwork before pouring to avoid costly mistakes.
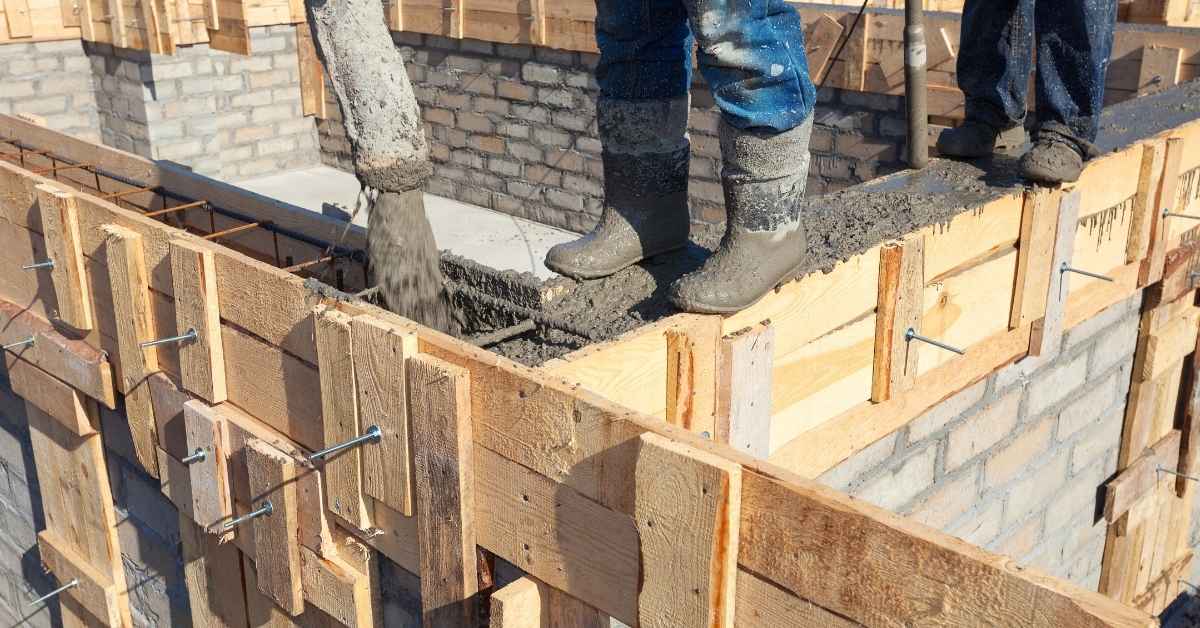
Structural loads and bracing strategy
Concrete exerts significant lateral pressure on forms. Here’s how to manage it:
Understand concrete pressure: Wet concrete pushes outwards, so your forms need to withstand this force.
Use backbracing and strongbacks to reinforce your formwork. These help distribute loads evenly and prevent bulging or failure.
Consult an engineer: If you’re unsure about wall height, pour rate, or unusual loads, consult a structural engineer. They can provide specific guidance for your project.
Pour strategy and concrete behavior
How you place and consolidate concrete affects form choice and surface quality:
Placement method: Consider the best way to pour your concrete. Top-down or bottom-up placement can affect how well it flows into your forms.
Consolidation: Vibrate or otherwise consolidate the concrete to remove air pockets and ensure full form contact. Inadequate consolidation can lead to bulging or surface defects.
Mix characteristics: Different mixes have unique properties. Some may be more prone to segregation or bleeding, which can affect your forms’ ability to maintain their shape.
Kerfing Plywood: Materials and Technique
Select plywood that is straight, the right veneer grade for the intended finish, and compatible with wet conditions if it will contact concrete. Lay out kerf spacing and depth so panels bend smoothly without snapping; trial cuts and bending on scrap pieces tell you how the sheet will behave.
Cut kerfs, bend and clamp panels to the template, and trial-fit the assembly before adding stiffeners or bracing to hold the shape. Refer to manufacturer guidance or test pieces for kerf depth/spacing instead of guessing dimensions from memory.
Choosing Plywood and Kerf Patterns
Selecting the right plywood is crucial for successful formwork. Go for exterior-grade, with veneer direction running lengthwise to maximize strength.
Panel thickness affects flexibility – thinner panels bend easier but may not hold shape as well. Aim for 1/2″ or 5/8″.
Kerf patterns dictate flexibility and strength. Tighter spacing (e.g., 3/4″ to 1″ apart) gives more flexibility, while deeper kerfs (e.g., 1/4″ to 3/8″) increase bending but reduce panel strength.
Cutting Kerfs Safely and Accurately
Use a circular saw with a fine-tooth blade for clean cuts. Clamp a straightedge as a guide to ensure consistent kerf spacing.
Wear safety gear – goggles, gloves, ear protection. Keep the work area clear and use proper dust control methods.
Before full production, test-cut a scrap piece to confirm kerf depth and spacing. Adjust as needed before proceeding with your panels.
Installing Kerfed Panels and Fastening
Apply construction adhesive along the edges of each panel for added strength. Use temporary fasteners like nails or screws, placed every 12″ to 16″. Avoid pinning through kerfs to maintain flexibility.
For permanent fastening, use staples or nails with large heads that won’t pull through. Space them evenly along the panel edges and through the form ties.
Support panels every 4′ to 6′ vertically using stakes or braces. This helps maintain a true curve and prevents sagging under concrete weight.
Flexible Liners and Skins: Selection and Use
Flexible liners come in rubber, thermoplastic, and fabric-backed varieties; choose based on how much stretch, rebound, and surface texture you need. Consider durability against construction traffic, compatibility with release agents, and whether the liner will produce the aesthetic you want on the cured concrete.
Mock up a section and attach the liner to its backing or frame, checking for wrinkles, slack, and consistent contact with the form around the full curve. If you’re unsure about a product’s elongation, tear resistance, or chemical compatibility, review the product data sheet or ask the supplier.
Material behavior and finish effects
Choosing the right flexible liner material is crucial for achieving a smooth, durable concrete surface. Different liners influence texture, edge sharpness, and how well they accommodate compound curves.
- Rubber Liners: Provide a smooth, non-porous finish. Look for high rubber content (70% or more) to avoid cracking. Avoid sharp bends to prevent weak spots.
- Thermoplastic Liners: Offer a consistent, slightly textured surface. Check the durometer rating (lower is softer) for easy forming. Avoid low-quality materials that stain easily.
- Fabric-Backed Liners: Give a slight texture and better edge definition. Look for durable fabrics like polyester or fiberglass. Avoid excessive stretching to prevent delamination.
Securing liners and forming seams
Properly securing flexible liners and sealing seams ensure a strong, leak-free form. Here’s how:
Attaching Liners: Use staples or nails for rubber, and adhesive backed tape or screws for thermoplastics. Keep them close together but not too tight to avoid tearing.
Sealing Seams: Overlap liners by 2-3 inches and seal with specialized seam tape or flexible caulk. Avoid gaps that can trap air or water.
Forming Tight Bends: Use a form roller to press out wrinkles. Work slowly, applying even pressure to avoid voids. Never stretch liners too tight as it may cause them to tear or delaminate.
Liner care, release agents, and reuse
Maintaining flexible liners extends their life and saves you money. Here’s how to care for them:
Release Agents: Use a light coat of form release agent to ease demolding. Avoid heavy applications that can clog pores or cause staining.
Cleaning Procedures: After each use, clean liners with mild soap and water. Remove any concrete residue promptly to prevent damage.
Inspection and Storage: Inspect liners for damage before reuse. Store them flat, away from sunlight and extreme temperatures to prolong their life. Fold or roll carefully to avoid creases that can cause weak spots in the next pour.
Keeping Edges True and Corners Crisp on Curves
Defined edges on curves rely on firm termination points, proper bracing, and attention to how the forming material is cut and supported at the ends. Use sacrificial edge strips or shaped blocking to create a crisp line while preventing the molding material from rounding-off under concrete pressure.
Control concrete flow at terminations with proper vibration and placement so pressure doesn’t push the form out of alignment or create waviness. If the edge detail is critical for fit or appearance, build a test piece and adjust support spacing and stops until the result holds under placement conditions.
Edge battens, splines, and chamfers
To keep edges true on curved forms, use rigid edge members like battens or splines. These help maintain a consistent line for your finished concrete.
Battens are simple to install – just nail them along the form’s edge. They work best with gentle curves.
Splines are more complex but offer superior control for tight radii. Cut them using your curve template, then secure in place.
For sharp corners or transitions, use chamfer strips. These create crisp 45-degree angles at the edge of your form.
Stiffeners and backbracing to prevent deformation
Curved forms need extra support to resist lateral pressure from concrete. Use stiffeners, wales, and strongbacks strategically.
Stiffeners are narrow strips placed perpendicular to the form’s surface. Install them along both sides of your curve, spacing evenly.
Wales run parallel to the form’s edge. They provide additional support at the top and bottom of your curve.
Strongbacks are horizontal members that span the width of your form. Place them every 4-6 feet along the length, securing with screws or nails.
Monitoring and corrective actions during the pour
While pouring concrete, keep an eye on your forms. Early detection of issues helps prevent costly repairs.
Check for bulging or misalignment. If you spot any, slow down the pour immediately to reduce pressure.
Tensioning cables can help correct minor deformations. Tighten them gently while someone else monitors the form’s profile.
If a section starts to bow, add temporary additional bracing. Use 2x4s or other scrap lumber to shore up weak points until you can reinforce permanently.
Surface Quality, Finishing, and Patching on Curved Forms
Protect the intended texture by choosing form materials and release agents that match the desired finish and by minimizing handling that creases liners or scuffs plywood faces. Finish work on curves uses the same principles as flat work, but allow extra time to reach into the curve and maintain consistent tooling strokes.
When stripping reveals minor defects, prepare a repair plan that preserves the curve—use appropriate patching mortars and follow manufacturer instructions for adhesion and curing. If a defect suggests a form or placement problem, inspect the formwork and placement method before repeating the pour.
Preventing blowouts, honeycombing, and grout loss
To avoid these issues on your curved forms:
- Seal the formwork thoroughly to prevent water from escaping through leaks.
- Brace the forms properly. Use edge battens and splines as mentioned earlier to keep them true.
- Avoid over-vibrating the concrete. Too much vibration can cause blowouts and honeycombing.
During pouring, watch for:
- Excessive water bleeding on the surface, which could indicate a weak mix or too much water.
- Air pockets forming, suggesting insufficient vibration or poor form preparation.
Repairing defects and blending patches on curves
After stripping the forms, inspect for any defects:
- For small holes or cracks, use a concrete patching compound. Apply it with a trowel, following the curve of the surface.
- To match texture on curves, use a flexible rubber float or magnesium float to smooth and finish the patch.
- For larger defects or when the texture can’t be matched, consider using a surface overlay. Apply it after the patch has cured, following the curve of the form.
If the defect is severe, you might need to rework the area. Strip the form, repair the issue, and pour again.
Tools, Materials Checklist and Material Specs Explained
Gather the basics: cutting tools, clamps, spreaders, bracing, release agents, fastening hardware, and PPE; add a template or full-scale layout material to guide bends. Include consumables like caulk, tape, and sealants for edge control and liner attachment, and have repair mortars on hand for post-strip touch-ups.
Don’t guess critical material specs—verify plywood grade, liner elongation, concrete compatibility, and fastener types with supplier data or product labels. When structural capacity or durability is at stake, ask for technical data sheets or professional guidance rather than relying on general rules of thumb.
Essential tools and safety gear
Before you start kerfing or installing liners, make sure you have all the right tools and safety gear. Here’s a quick checklist.
- Circular saw: For cutting plywood. Make sure it’s in good condition and has the right blade for kerfing.
- Jigsaw: For making curves and fine-tuning cuts.
- Drill: With screwdriver bits for fastening battens and stiffeners.
- Tape measure: To ensure accurate cuts and measurements.
- Speed square: For marking straight lines and angles.
- Hard hat, safety glasses, gloves, and ear protection: Essential PPE for any concrete work.
- Scaffolding or ladders: To reach high places safely.
- Wheelbarrow or mixing cart: For transporting materials around the site.
Quick rule: Always double-check your tools before you start. A faulty tool can ruin a good form.
Consumables, adhesives, and release agents
These are the consumables you’ll need to keep your forms in tip-top shape. Check them off before you start.
- Galvanized nails or screws: For attaching battens and stiffeners. Stainless steel for coastal areas.
- Construction adhesive: To bond liners to plywood. Make sure it’s compatible with your chosen materials.
- Duct tape: For sealing seams and preventing leaks.
- Release agent: To prevent concrete from sticking to the forms. Choose one that’s suitable for your chosen liner material.
- Plastic sheeting: To protect forms from rain or dew.
- Zip ties and cable ties: For securing liners and battens in place.
- Form oil or form release agent spray: For applying a thin, even coat to the forms before pouring concrete.
Quick rule: Always follow manufacturer guidelines for application and safety when using adhesives and release agents.
Material specs and when to check them
Before you buy, make sure your materials are up to the task. Here’s what to check with suppliers.
- Plywood grade: Look for exterior-grade plywood with a smooth surface for better finish quality.
- Liner stretch rating: Ensure it can handle the required amount of stretch without tearing or losing shape.
- Tensile strength: Check it can withstand the pressure of wet concrete without deforming.
- Recommended bending radius: Make sure it’s suitable for your curve’s radius to prevent cracking or wrinkling.
- Concrete mix design: Consult with a concrete supplier to ensure the mix is suitable for your formwork and reinforcement.
- Formwork-to-concrete ratio: Check you have enough formwork to support the volume of concrete being poured.
Quick rule: If in doubt, consult a structural engineer. They can provide specific advice for your project’s unique requirements.
Conclusion
Curved concrete holds shape best when you lock in a solid plan, test your setup, and keep your edges true from the first pour. Safety and attention to detailing now save time and money later by avoiding costly remakes.
First, confirm your curve design and measurements, then choose kerfing plywood or flexible liners that fit the curve, cut and fit them secure but not over-tight, assemble the form with solid edge support, check every joint for gaps, and run a small test pour or leak test before you commit to a full batch. Set and cure per the plan, vent where needed, and finish with the agreed surface and patching approach so the final finish matches the plan.
Avoid common mistakes: skipping measurements and test fits, using the wrong liner or kerf spacing, and letting joints crack or sag under load. Safety rules are simple—work with solid supports, keep hands and feet clear of the pour, test on a small area first, and never force a form into a shape that distorts. If you’re unsure about the curve or the load on a tricky edge, pause and check the plan, then call a pro before proceeding.
When in doubt about complex curves, large pours, or high-precision edges, don’t push solo; a skilled contractor or formwork specialist can save time and material. Stay patient, follow your plan, and you’ll get a durable, true-edged curve without drama.
FAQ
When should I choose kerfing plywood vs. flexible liners for a curve?
Kerfed plywood is best for tighter curves or when you want a solid, reusable form. Flexible liners work well for larger radii or quick layouts where a rigid sheet would be hard to fit. Check the manufacturer instructions for bend radius limits and any suggested support or release requirements.
How do I keep the edges true and straight on a curved form?
Use a straightedge or a temporary template along the curve and clamp it firmly. Check that the form is plumb and the curve line matches your layout before pouring. If the edge shifts, stop and re-secure before tightening the release or sealant.
What are common kerfing mistakes I should avoid?
Avoid kerfs that are too shallow or spaced too far apart; both grab the plywood’s integrity and make the edge wavy. Don’t cut into corners or remove material near the top or edge where the form bears load. Always follow the kerf pattern recommended by the plywood supplier or manufacturer instructions.
How do I finish and release curved forms without damaging edges?
Apply the release method recommended by the product label or manufacturer before pouring, and allow proper cure time per instructions. When stripping, work slowly and evenly to prevent edge chips or hairline cracks, and inspect edges for any damage before reuse. If in doubt, check the release product label and any local guidance.