

Introduction
Steel trowel finish is a smooth, hard surface created by pulling steel blades across fresh concrete to close the surface. It yields a dense, glassy look when done correctly. Use it carefully, as over-troweling can trap moisture or create a brittle surface.
Magnesium float finish is a light, textured surface achieved by smoothing with a magnesium float before the concrete fully sets. It tends to be more forgiving and easier to blend small imperfections than steel. Use steel trowel when you need a very hard, smooth surface and plan for controlled burnishing; always check product labels and local rules to match the finish to your project.
Key takeaways
- Steel trowel finish creates hard, dense surface ideal for non-porous floors.
- Magnesium float finish: smoother initial set; prone to knockdowns and pinholes if overworked.
- Use steel trowel for final dense skim; magnesium for first pass and control.
- You might also like: see all Related Variants (2/3 competitors) and Related Products.
- Material specs and standards help choose the right product; check labels and local codes.
- Safety: wear eye protection, gloves, and avoid overworking the surface to prevent cracks.
Table of Contents
- Introduction
- Key takeaways
- At a Glance — Choose the Right Finish Fast
- What Is a Steel Trowel Finish?
- What Is a Magnesium Float Finish?
- Tools and Materials Checklist (All Related Variants and Related Products)
- Material Specs and Standards Explained (How to Choose the Right Product)
- Application Techniques: Step-by-Step for Troweling and Floating
- Performance, Durability, Maintenance, and Cost Comparison
- Common Mistakes, Safety, and Planning Considerations
- Conclusion
- FAQ
At a Glance — Choose the Right Finish Fast
Use this as a quick decision aid before diving into the details. It helps you decide when to reach for a steel trowel versus a magnesium float based on the project type and the surface you want.
You’ll notice visual cues too: a steel trowel finish tends to be tighter and glassy, while a magnesium float yields a more matte, open texture with fewer swirl marks. Timing and set considerations also matter, since cure speed and surface moisture affect your best approach.
Quick decision criteria
Choosing between a steel trowel and magnesium float depends on your project’s needs. Here are quick, no-nonsense guidelines.
For smooth, hard surfaces: Reach for the steel trowel. It’s ideal for floors with heavy traffic like garages or workshops. It leaves a tight, glassy finish.
For more textured, less shiny surfaces: Opt for the magnesium float. It’s great for driveways, patios, or overlays where you want a more natural look with fewer swirl marks.
Visual checkpoints for finished concrete
Before you sign off on the job, use this checklist to ensure your finish meets expectations. Do this after the final pass with either tool.
- Shine: Steel trowel should leave a glossy sheen; magnesium float, a matte finish.
- Texture: Magnesium float has fewer swirl marks than steel trowel.
- Hardness: Steel trowel produces harder surfaces.
- Cracks or Pop-outs: Check for any hairline cracks or popped-out aggregates. If present, redo the area.
- Delamination: Tap the surface; it should sound solid. Any hollow spots need reworking.
- Crazing: Look for fine cracks in the surface. If present, the concrete may be too dry or curing too fast.
- Bleed Water: Ensure all bleed water is gone before finishing to avoid weak spots.
- Moisture Content: Check that the slab has enough moisture for a proper finish.
Quick rule: If something doesn’t look or feel right, recheck your work and consider consulting with an expert.
What Is a Steel Trowel Finish?
This defines a dense, smooth surface created by hand or power troweling with steel blades. It contrasts with mag float or broom finishes in texture and sheen.
Hand versus power troweling changes the finish quality and application method. Both have their place for interior or exposed applications, depending on visibility and wear expectations.
How a steel trowel finish is produced
A steel trowel finish is achieved by using a steel trowel tool to smooth and densify the concrete surface. The key steps involve:
1. Timing: Wait until the concrete has set enough to support your weight, usually around 4-8 hours after pouring.
2. Technique: Hold the trowel flat against the surface and use a sweeping motion to spread and level the concrete paste. Work from the middle of the slab towards the edges, overlapping each pass slightly.
3. Consistency: Maintain even pressure on the trowel and keep your passes consistent to avoid leaving marks or uneven spots.
Typical outcomes and where it’s best used
A well-executed steel trowel finish results in a smooth, dense surface with a slight sheen. The slip resistance is moderate to high, making it suitable for various applications:
Interior Floors: Steel trowel finishes are ideal for interior concrete floors due to their durability and ease of cleaning.
Polished Surfaces: The smooth surface created by steel troweling makes it an excellent base for polished or sealed decorative surfaces.
Exposed Applications: In outdoor or exposed areas, a steel trowel finish can provide a durable, low-maintenance surface that’s resistant to weathering and wear.
What Is a Magnesium Float Finish?
A magnesium float finish produces a textured, consolidated surface that is often preferred for exterior slabs and non-slip areas. The float leaves a distinctive, closed texture compared with steel trowel finishes.
Understanding pressing, dragging, and circular passes helps you plan when to start and stop floating based on set and bleed. This finish supports traction and outdoor durability when used correctly.
How a Magnesium Float Finish Is Produced
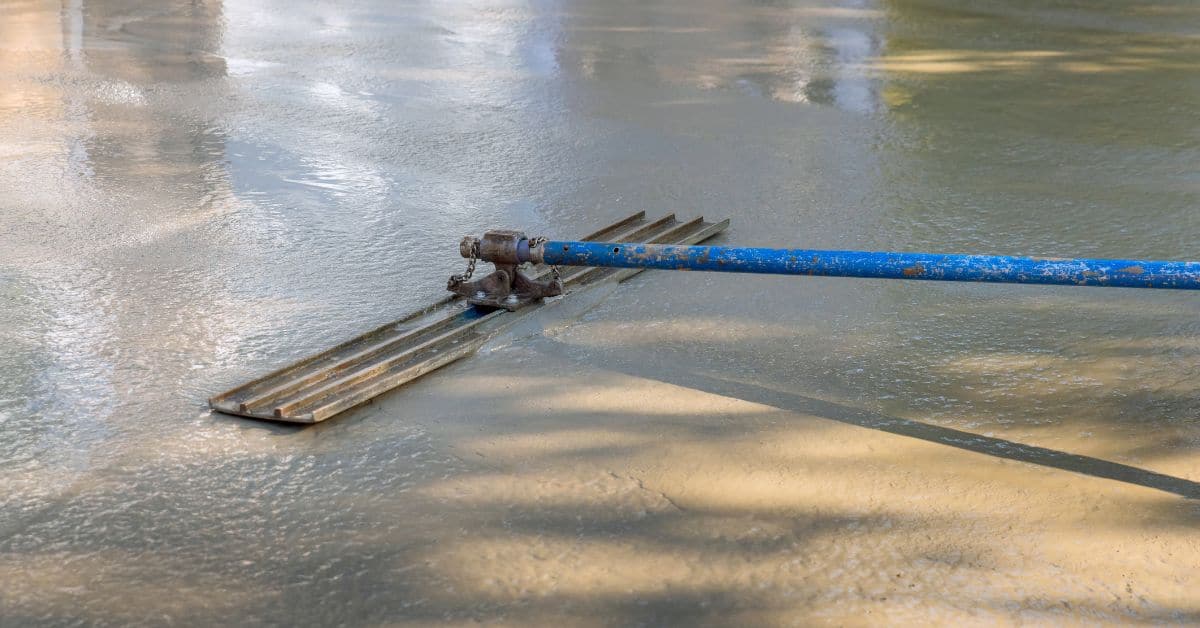
A magnesium float finish is created by using a magnesium float tool, which has a flat, smooth surface with rounded edges. The float is pressed and dragged across the concrete surface in circular or overlapping passes.
The float’s motion consolidates the concrete, pushing excess water (bleed) to the surface while leveling and texturizing it. This creates a closed, non-porous surface that resists water absorption.
Timing is crucial. Floating should start when the concrete has set enough to support the float without leaving footprints but before it becomes too hard. Typically, this is around 30-50% of final set.
After floating, you may need to follow up with additional finishing steps, such as brooming or brushing, depending on your desired finish and project requirements.
Typical Outcomes and Where It’s Best Used
A magnesium float finish results in a textured surface with a low sheen. The texture is created by the float’s motion, which leaves small ridges and valleys, providing excellent traction.
This finish is ideal for exterior slabs, ramps, sidewalks, pool decks, and other areas where slip resistance and durability are crucial. It helps prevent water from pooling on the surface, reducing the risk of ice buildup in colder climates.
Compared to a steel trowel finish, which has a smooth, glossy appearance, a magnesium float finish offers better traction but less sheen. It’s often preferred for outdoor areas where aesthetics are secondary to functionality and safety.
However, it may not be suitable for indoor floors or areas where a smooth, seamless look is desired. Always consider your project’s specific needs when choosing a finish.
Tools and Materials Checklist (All Related Variants and Related Products)
This section covers practical tool categories you’ll rely on, including hand tools like trowels, floats, edgers, and their handles. It also references power equipment and common replacement blades or plates and their compatibility notes.
Then you’ll see consumables and wear items, plus indicators that items need replacement due to wear or contamination. Look for variant selection factors that influence tool choice and blade/plate type without listing specific part numbers.
Steel trowel tools and common variants
Use this checklist when selecting steel trowels for your project. Steel trowels are ideal for creating a smooth, dense surface.
- Hand trowels: Check sizes (12″ to 48″) and blade thickness (1/8″ to 3/8″). Thicker blades last longer but may be heavier.
- Finishing blades: Consider blade width (6″ to 12″) and shape (square, rounded). Wider blades cover more area, while rounded edges help prevent damage.
- Power trowel configurations: Choose between walk-behind or ride-on models based on slab size. Check blade sizes and power (HP) to match your project needs.
- Blade material: Steel blades are durable but can rust. Stainless steel offers better corrosion resistance.
- Blade attachment: Ensure compatible mounting system for easy blade changes.
- Handle length: Consider handle length (36″ to 72″) based on user height and comfort.
- Vibration control: Check if the trowel has vibration reduction features to minimize operator fatigue.
- Weight distribution: Ensure even weight distribution for better maneuverability and stability.
Quick rule: Match blade size to slab thickness, and choose a power trowel that fits your project’s scale.
Magnesium float tools and common variants
Use this checklist when selecting magnesium floats for your project. Magnesium floats create a textured, non-slip surface.
- Hand floats: Check sizes (12″ to 48″) and float plate material (magnesium, aluminum). Magnesium is lighter but more expensive.
- Long-handled floats: Consider handle length (36″ to 72″) based on user height and reach requirements.
- Float plates for power equipment: Ensure compatible mounting system and check plate sizes (12″ to 48″).
- Plate shape: Choose between square, rounded, or beveled edges based on desired texture.
- Plate thickness: Thicker plates are more durable but may be heavier. Consider plate thickness (1/4″ to 3/8″).
- Float material and shape influence: Softer materials create a smoother finish, while harder materials produce a rougher texture.
- Weight distribution: Ensure even weight distribution for better maneuverability and stability.
- Vibration control: Check if the float has vibration reduction features to minimize operator fatigue.
Quick rule: Match float size to slab thickness, and choose a power float that fits your project’s scale for consistent texturing.
Accessories and complementary tools
Use this checklist to gather essential accessories for a high-quality, long-lasting concrete finish.
- Edgers: Check edger sizes (24″ to 72″) and blade types (square, beveled) based on desired edge profile.
- Brooms: Choose broom sizes (18″ to 36″) and bristle types (polypropylene, stainless steel) for the desired texture.
- Curing covers: Select curing covers based on size, material (plastic, fabric), and insulation properties to maintain slab temperature during curing.
- Mixing aids: Consider using additives (superplasticizers, accelerators) to improve concrete workability and set time.
- Lubricants: Use blade lubricants to reduce friction and prolong blade life during finishing.
- Blade/plate guards: Protect blades and plates with guards when not in use to prevent damage or rusting.
- Replacement blades/plates: Keep extra blades and plates on hand for quick replacements during long projects.
Quick rule: Invest in quality accessories to ensure a consistent, durable finish and prolong the life of your tools.
Material Specs and Standards Explained (How to Choose the Right Product)
Key material properties to consider are wear resistance, hardness, corrosion resistance, and fatigue life. These influence finish quality and tool longevity when selecting blades and plates.
Compare common materials and their typical use cases, including pros and cons for different concrete mixes and environments. Also, note thicknesses, edge profiles, mounting hardware, and how these affect performance and vibration transfer.
What to check on product datasheets
Before you buy, review these key points on the datasheet. It’ll save you time and money.
- Material type: Check if it’s steel, magnesium, or another material. Each has its pros and cons.
- Hardness/wear rating: Look for a Rockwell or Brinell hardness number. Higher is better for longer tool life.
- Compatibility with power equipment: Ensure it fits your trowel machine or float pole.
- Plate/blade thickness: Thicker plates last longer but may cause more vibration.
- Edge profile: Sharp edges give a smoother finish, but they wear faster.
- Mounting hardware: Check if the bolts or screws match your equipment.
- Corrosion resistance: Important for outdoor use or humid conditions. Stainless steel is best here.
- Fatigue life: Look for impact resistance data to prevent sudden failures.
Quick rule: If it’s not clear, ask the manufacturer. Better safe than sorry.
Industry standards and certifications
Certifications ensure your tools meet safety and performance standards. Here are a few to look for:
ASTM International (formerly American Society for Testing and Materials): Their standards cover everything from tool materials to finish quality.
For trowels, look for ASTM C781. For floats, it’s ASTM C506. These ensure your tools are up to snuff.
ISO (International Organization for Standardization): Similar to ASTM, ISO sets global standards. Check for ISO 1922-1 and ISO 1923 for trowels and floats respectively.
Application Techniques: Step-by-Step for Troweling and Floating
Outline the core workflows for floating and troweling, and indicate when to choose magnesium float versus steel trowel. Expect a progression from initial float to final passes without hard timing data.
Include starter, intermediate, and finish sequences, plus pre-wet versus dry edge techniques. Mention practical criteria for tool setup and how these choices affect texture and edge containment.
Step-by-Step Process
The following steps outline the practical workflow for troweling and floating, ensuring a smooth finish on your concrete surface.
- Preparation: Check safety gear (gloves, boots), ensure tools are clean. Inspect the slab’s initial set to avoid overworking or underworking.
- Initial Float Passes: Use magnesium float for first passes when the bleed water is still present. Work from edge to center in wide arcs to distribute material evenly and remove excess water.
- Intermediate Trowel Passes: Once slab starts to set (around 3-5 hours after pouring), switch to steel trowel. Use a dry edge technique, keeping the blade off the surface at edges to prevent overworking and maintain edge containment.
- Final Trowel Passes: As the slab continues to cure (around 6-8 hours post-pour), perform final passes with steel trowel for sheen development. Keep power tool speed consistent to avoid gouging or overworking.
- Cleanup and Final Checks: Clean tools thoroughly, remove any remaining debris from the surface. Inspect slab for flatness, uniform sheen, and consistent texture across edges and joints before leaving it to cure.
Hand techniques and pressure control
Mastering hand techniques is crucial for a professional finish. Here’s how to handle steel trowels and magnesium floats:
Steel Trowel: Hold the handle at a 45-degree angle, apply light pressure, and use smooth, continuous strokes. For sheen development, increase pressure slightly and reduce stroke width.
Magnesium Float: Hold the float vertically for initial passes to distribute material evenly. As the slab sets, tilt the float to around a 45-degree angle to remove excess water and level the surface.
Pressure control is key: too much pressure can overwork the slab, while too little won’t achieve the desired finish. Practice makes perfect – start with light pressure and adjust as needed.
Using power equipment vs hand tools
Power trowels and floats can speed up the process, but they require careful control to avoid damaging the slab.
- Lightweight Power Trowel: Use when slab is firm enough (around 6-8 hours post-pour) for sheen development. Maintain consistent speed (around 120-150 RPM) and keep blades off edges to prevent gouging.
- Power Float: Ideal for large surfaces or where time is a factor. Use when bleed water is still present, applying even pressure across the slab’s surface.
- Darby Boards (Manual/Electric): Great for edging and finishing small areas. Apply light pressure, keep blades off edges, and maintain consistent speed to avoid overworking or underworking.
- Rentable Tools: Consider renting power tools if you don’t have the budget to buy. Prices vary by region but expect to pay around $50-$100 per day for a lightweight power trowel, and $30-$60 for darby boards.
Environmental and mix considerations during application
Temperature, wind, and mix consistency can impact your finishing choices. Here’s what to watch for:
Temperature: Warmer temperatures speed up curing time. Adjust your finishing schedule accordingly – more passes may be needed in cooler conditions.
Wind: Strong winds can cause rapid evaporation of bleed water, leading to a rough surface. Use windbreaks or perform initial floats when wind is minimal.
Mix Consistency: A well-mixed concrete ensures an even finish. Check the mix at the pour – if it’s lumpy or inconsistent, consider remixing before application.
Performance, Durability, Maintenance, and Cost Comparison
Define performance metrics and finish outcomes to compare, including how each tool affects initial float, bleed control, sheen, and potential gouging. Clarify which finishes each tool best supports.
Discuss durability and maintenance, including wear, sharpening needs, cleaning routines, and storage considerations. Consider how exposure and chemicals impact long-term usability when planning replacement or reconditioning.
Durability and upkeep
Steel trowels and magnesium floats both wear over time, but they do so differently.
Steel trowels can rust if not properly cared for. Rust weakens the blade edge, leading to chipping or breaking. To extend their life, clean and dry them after each use, store in a cool, dry place, and sharpen as needed.
Magnesium floats are less prone to wear but can chip under heavy use or improper storage. Keep them clean and dry, avoid excessive pressure when floating, and replace any chipped plates promptly.
Cost drivers and lifecycle thinking
The initial purchase price is just the start of your tool’s cost. Long-term value depends on durability, maintenance needs, and labor time.
Steel trowels are cheaper to buy but require more frequent sharpening or replacement due to rust. They also need regular cleaning and proper storage to prevent damage.
Magnesium floats cost more upfront but last longer with minimal maintenance. However, their plates can’t be resharpened once chipped, so you’ll need to replace them.
Consider your project’s scale and budget when choosing between steel trowels and magnesium floats. For small residential jobs, the lower initial cost of steel might be preferable. But for larger commercial projects, the longer lifespan of magnesium could save money in the long run.
How finish affects maintenance of the concrete surface
The type of finish you choose with your trowel or float impacts how much upkeep your concrete needs.
A trowelled finish, achieved with a steel trowel, requires minimal maintenance. Just sweep and hose down to remove dirt. However, it’s less resistant to cracking and may need occasional repairs.
A burnished or brushed finish, created using a magnesium float, needs more care. Dirt can embed in the textured surface, requiring regular cleaning with a pressure washer. But these finishes are more crack-resistant and hide imperfections better.
For exterior pours or high-traffic floors, consider the finish’s durability and maintenance requirements. A trowelled finish might be best for low-traffic areas, while a burnished or brushed finish could be ideal for heavy use or outdoor exposure.
Common Mistakes, Safety, and Planning Considerations
Cover tool selection and timing, such as when to use steel trowels versus magnesium floats and how surface moisture influences grip and burnisher needs. Plan to minimize rework with a clear finish plan.
Highlight safety basics like PPE and proper lifting techniques, plus safety around power trowels. Include planning steps to catch issues early and maintain a reliable prefinish checklist.
Common selection and application mistakes
Knowing the common pitfalls will help you avoid them. Here are some mistakes to steer clear of.
- Using wrong tool for surface: Steel trowel on soft slab can cause imprinting, magnesium float too early may leave swirl marks.
- Overworking the slab: Too many passes with either tool can lead to dusting and reduced durability.
- Incorrect sequence: Finishing before proper initial set or waiting too long for final pass can result in poor surface quality.
- Neglecting edges/corners: Inadequate attention here leads to uneven surfaces and rework.
Remember, the right tool at the right time is key to a smooth finish.
Safety tips and required PPE
Your safety and your crew’s are paramount. Here are some essential safety practices:
PPE: Wear gloves, eye protection, and non-slip footwear to prevent injuries.
Be aware of concrete dust, it can cause respiratory issues. Wet down surfaces before working to minimize dust.
When using power trowels, follow manufacturer’s guidelines for safe operation. Be mindful of wiring and keep the area clear of debris.
Project planning checklist
Before you start, use this checklist to ensure a smooth process:
- Crew skills: Ensure everyone knows how to use tools and follow safety protocols.
- Equipment readiness: Check all tools are in working order before starting.
- Weather contingency: Plan for delays due to rain or extreme temperatures.
- Concrete delivery: Coordinate with supplier to ensure timely and proper concrete placement.
- Curing steps: Plan how you’ll maintain moisture levels after finishing.
- Finish plan: Align finish method with concrete mix, temperature, humidity, and curing window.
- Pre-finish checklist: Inspect forms, control joints, and test patches before final passes.
- Tool maintenance: Keep blades clean and store them properly to maintain quality.
- Document material specs: Record concrete mix design and standards for future reference.
Quick rule: Planning ahead saves time, reduces rework, and ensures a better final product.
Conclusion
Choose the finish that matches the job, then apply it with care. A proper steel trowel or magnesium float job can deliver a durable, smooth surface, but rushing or skipping safety steps risks cracks, blowouts, or dull finish that lasts only a season.
First, confirm the surface and mix are ready, then proceed in this order: inspect edges and corners, prep with the right tools and moisture level, apply the finish evenly in manageable sections, and feather edges as you go to avoid ridges. Test a small area first, then scale up to the full surface, keeping tools clean and working from a dry, solid edge toward the center to avoid lap marks. Safety first, check your PPE and ventilation, and keep the work area free of trip hazards while you work.
Common mistakes to avoid include rushing the initial set, overworking the surface which can block pores or cause excessive hardness, and choosing the wrong finish for the job type. Stick to the recommended product specs, don’t mix brands without checking compatibility, and always cure or set according to the manufacturer’s guidance. If you’re unsure about substrate conditions, or if the project spans large areas or complex shapes, consider bringing in a pro rather than pushing on and risking costly damage. You’ve got this—finish clean, finish right, and you’ll sleep easy knowing the work holds up under use.
FAQ
What is a steel trowel finish and where should I use it?
A steel trowel finish is a smooth, hard surface created by pulling a steel trowel across set concrete. It’s best for areas that need a shiny, dense finish and where a tight, moisture-resistant surface is desired.
What is a magnesium float finish and when is it the right choice?
A magnesium float finish is a more forgiving, slightly textured surface produced by using a magnesium float. It’s ideal for beginners or for a finish that hides minor imperfections and provides a good surface for sealers or coatings.
What are the main benefits of each finish?
Steel trowel offers a very smooth, durable, and easy-to-clean surface. Magnesium float is quicker to achieve, reduces risk of scorch marks, and leaves a uniform texture that accepts coatings well.
How do I decide which finish to use for a project?
Consider the final look you want and the area’s use. For high-traffic floors or where a flawless look is key, steel trowel may be better. For general pours, decorative textures, or ease of finishing, magnesium float often fits best. Check product instructions and local conditions before choosing.