
Introduction
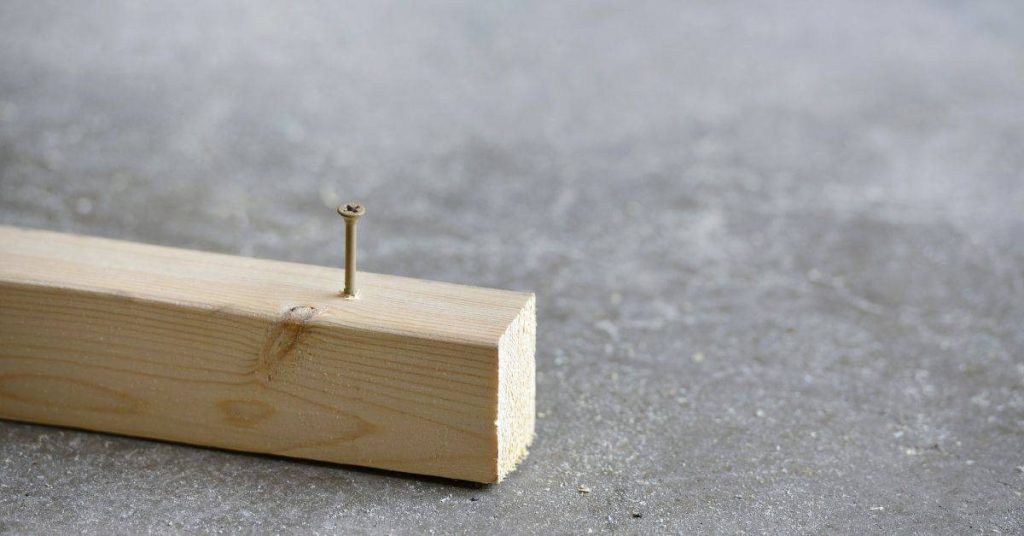
Concrete countertops with inlays are countertops that embed brass, glass, or wood accents into the concrete surface.
This article gives a practical, hands-on look at how to plan, mix, and place those inlays so they stay put. The goal is a durable, smooth surface you can live with, not a museum piece.
We cover bonding techniques and how to zone the inlays so they grip without cracking. You’ll also get tips for handling differential movement between the inlays and the surrounding concrete, plus safety steps during mixing and forming. If you’re unsure about a detail, check the product label and manufacturer instructions for bonding agents, and follow local rules and safe practices.
Key takeaways
- Choose brass, glass, or wood inlays based on appearance and bonding constraints.
- Plan for proper surface prep and edge chamfers to hide movement gaps.
- Use manufacturer guidance for adhesive selection and cure times, follow local codes.
- Test bonded inlays with mockups to assess differential movement before pours.
- Seal and water-proof countertops after cure; recoat as recommended to extend life.
- Document safety: wear eye protection, manage dust, and use proper ventilation.
Table of Contents
- Introduction
- Key takeaways
- Types of Inlays: Brass, Glass, Wood
- Planning and Design Considerations
- Material Specs and Standards Explained
- Bonding Methods and Adhesive Selection Guide
- Preventing and Managing Differential Movement
- Water Resistance, Sealing, and Long-Term Durability
- Safety Precautions and Installation Best Practices
- Cost Considerations and Comparing Bonding Methods
- Conclusion
- FAQ
Types of Inlays: Brass, Glass, Wood
This section defines brass, glass, and wood as the three main inlay options and notes their distinct aesthetics. Brass offers warmth and a reflective surface, glass provides translucence, and wood adds natural texture. Consider how each interacts with concrete color, inclusions, and texture to guide your initial style decisions.
We cover bonding and surface prep, typical adhesive systems, and wipe-on sealers that suit both concrete and the chosen inlay. Prepare the surface by ensuring it is clean and lightly etched if required by the adhesive system. Plan for compatibility with your chosen inlay when selecting primers or sealants to maintain performance and appearance.
Brass inlays
Brass brings a warm, luxurious feel to concrete countertops. It’s soft gold hue complements the gray tones of concrete, creating a striking contrast.
Patina: Brass develops a unique patina over time, adding character and depth. If you want a consistent look, seal it with a clear coat designed for brass.
Thermal behavior: Brass expands and contracts with temperature changes, similar to concrete. This makes it a good fit for countertops and edges. But remember, brass is softer than concrete, so avoid high-impact areas.
Glass inlays
Glass offers a modern, sleek look. It’s available in clear, frosted, or backlit options to suit your style.
Tempering and thickness: Tempered glass is stronger and safer. Thicker glass (1/4″ or 3/8″) looks better and holds up longer.
Stiffness and brittleness: Glass is stiffer than concrete but more brittle. It can crack under sudden impact. Use edge transitions to protect the edges, and avoid sharp objects.
Wood inlays
Wood brings a natural, organic feel to concrete countertops. Choose species like maple, walnut, or bamboo for durability and beauty.
Moisture sensitivity: Wood can swell and shrink with moisture changes. Seal the wood with a penetrating sealer designed for countertops to minimize movement.
Finish and seal needs: Apply a food-safe, durable finish to protect the wood from stains and cuts. Reapply as needed to maintain protection.
Planning and Design Considerations
Define the project scope early by choosing inlay materials, edge profiles, and contrasting colors. Set performance goals for water and stain resistance and surface hardness to inform bonding methods. This upfront decision work guides material selection and detailing.
Establish layout tolerances with full-scale mockups and three-stage checks. Outline the pour sequence, timing for inlay placement, and cure expectations to minimize surprises. Document decisions and acceptance criteria to prevent mid-project changes and scope creep.
Layout, tolerances, and mockups
Before you start mixing concrete, plan your layout carefully. This ensures your inlays fit perfectly and your countertops look great.
Placement: Mark out where each inlay goes on your full-scale template. Consider the overall design and balance of materials.
Tolerances: Allow for slight warpage (up to 1/8″ per 6′ is typical) and specify flatness tolerance (FDM/FF). Plan joint locations based on concrete’s natural cracking pattern.
Build mockups using the same materials and methods you’ll use in your final pour. This lets you check fit, appearance, and any potential issues before committing to the real thing.
Timing and sequencing
The order of operations matters when casting concrete countertops with inlays. Follow this sequence to protect bonds and minimize movement problems:
1. Templating: Create your layout template first, including inlay demarcations.
2. Casting or routing: Pour or route your concrete slab, ensuring it’s flat and level according to your tolerances.
3. Embedding: Once the concrete is at the right consistency (usually when it’s starting to set), carefully place your inlays into the slab. Use spacers to maintain even depth.
4. Curing: Follow a controlled curing process, maintaining consistent temperature and humidity to prevent delamination or crazing.
5. Finishing: After curing, grind, polish, and seal your countertops as needed.
Visual checkpoints and templates
Use this checklist to confirm alignment, depth, and evenness before and after embedding inlays. Do this at key stages: after templating, after casting, and after curing.
- Check template fit: Ensure the template covers the entire slab area accurately.
- Verify inlay placement: Confirm each inlay is centered and aligned within its designated area.
- Measure inlay depth: Use a straight edge and feeler gauge to ensure inlays are level with the concrete surface.
- Inspect joint locations: Check that joints align with your planned layout and aren’t too close to inlays.
- Check for air pockets: Tap the slab gently to release any trapped air under inlays.
- Confirm concrete levelness: Use a long straight edge to check for low spots or high points.
- Inspect edges: Ensure edges are smooth, even, and match your desired profile.
- Check for movement: Gently push on the slab to ensure it’s stable and doesn’t wobble.
Quick rule: If something looks off, don’t ignore it. Address issues early to prevent bigger problems later.
Material Specs and Standards Explained
Key data to extract from datasheets include how materials respond to temperature changes, moisture movement, and finish recommendations. Understanding the relationship between the inlay and concrete helps predict cracking or debonding risks. This knowledge supports a practical compatibility assessment.
Compare concrete mixes with inlay materials by aligning thermal and elastic properties and considering aging effects. Check recommended sealants and bonding agents for compatibility and plan for environmental conditions and indoor use as relevant. Keep a simple decision flow to flag potential mismatches early.
Coefficients of Thermal Expansion and Movement
CTE matters, mate. When concrete gets hot, it expands. When it cools, it shrinks. If you don’t account for this, you’ll get cracks.
Check your product datasheets. Look for the coefficient of thermal expansion (CTE). It’s usually given as a range like 5-10 microstrain/°C. That means for every degree Celsius change, your concrete will expand or contract by that much.
Mismatched expansions cause stress. Say you’ve got a steel reinforcement with a CTE of 12 microstrain/°C and concrete at 7 microstrain/°C. When it heats up, the steel wants to expand more than the concrete can handle. That’s when you get cracking.
To avoid this, use compatible materials. Check your reinforcement’s CTE matches your concrete’s. And always allow for movement joints. These let your slab move freely as temperatures change. They’re cheap to install but can save you a fortune in repairs later.
Concrete mix and reinforcement considerations
The concrete mix you use and how you reinforce it can make or break your inlays. Here’s what you need to know:
Mix Design: You want a strong, durable mix for inlays. Check the label on your bagged mix or ask your supplier for a Type III or High Early Strength mix. These have more cement and less water, making them stronger.
Aggregate Size: Smaller aggregate (sand and gravel) means less shrinkage. For inlays, use a fine or medium aggregate mix. Check the label; it should say something like “1/2” or “3/8” minus.
Reinforcement: Reinforcing your concrete is crucial to prevent cracking from shrinkage and movement. Use steel reinforcement, not fiber mesh. It’s stronger and more flexible. Check local codes for size and spacing, but a good starting point is #4 rebar at 12″ centers.
Inlay material datasheets: what to verify
The right inlay materials ensure your concrete surface is durable, attractive, and long-lasting. Here’s what you need to know when picking them off the shelf.
- Type N mortar: Used for most concrete inlays. Look for flexural strength of at least 750 psi. It’s versatile, affordable, and easy to work with. Avoid cheaper types like Type O or S; they’re weak and prone to cracking.
- Concrete sealer: Protects your inlay from moisture and stains. Check the label for acid resistance. Choose one that’s compatible with your concrete mix. Apply it after the inlay has cured for at least 28 days.
- Expansion joint filler: Prevents cracking due to movement. Look for CTE similar to concrete, around 6-7 microstrain/°C. It should be flexible and durable, like polyurethane or silicone-based fillers.
- Concrete stain: Adds color to your inlay. Check the label for acid strength. Acid stains work best on concrete with a slurry coat, while water-based stains are easier to apply but may not last as long.
- Epoxy grout: Fills gaps in your inlay. Look for flexural strength of at least 1000 psi. It’s more expensive than cementitious grouts but provides better durability and stain resistance. Use it when you want a high-end, durable finish.
Pro tip: Always buy materials from reputable suppliers and check their labels for safety warnings. Store them properly to maintain quality, and follow manufacturer instructions for mixing and application.
Bonding Methods and Adhesive Selection Guide
Define bonding method categories clearly, with straightforward pros and cons for movement, load transfer, and wet conditions. Tailor the method to the inlay type, whether brass, glass, or wood, and to the expected service environment. This helps you pick a likely-suited approach from epoxy, flexible adhesives, anchors, or grout.
Establish material compatibility and movement considerations, including how each inlay term responds to temperature and moisture. Use that insight to inform gaps, shim needs, and joint designs that reduce stress on the bond while maintaining aesthetics.
Epoxy systems (2-part)
Epoxies are tough, rigid adhesives ideal for bonding inlays where minimal movement is expected. They excel in transferring loads and resisting peel forces.
Use cases: Brass inlays, where the thermal expansion of brass closely matches concrete’s.
Surface prep: Concrete must be clean, dry, and free of laitance. Lightly abrade with sandpaper (60-80 grit) to improve epoxy adhesion.
Limitations: Epoxies lack flexibility, making them unsuitable for inlays subject to significant movement or temperature changes.
Flexible adhesives and hybrids
For inlays experiencing movement due to thermal expansion or moisture response, flexible adhesives are crucial. They absorb stress at the interface, reducing the risk of debonding.
Use cases: Glass and wood inlays, where differential movement is expected. Polyurethanes and MS polymers are popular choices here.
Advantages: High elongation and low modulus allow these adhesives to accommodate movement without failing.
Caution: Some flexible adhesives may not be suitable for wet conditions or high loads. Always check the datasheet.
Mechanical anchoring and backer options
Supplementary mechanical fasteners can boost bond strength, resisting peel or shear forces that adhesives alone might struggle with. They’re particularly useful for heavy inlays or areas subject to vibration.
Options: Pins, dovetails, or backer materials like plywood or MDF can be used. Always ensure the backer material is compatible with your adhesive and inlay.
Installation: Drill patterns should be designed to avoid stress concentrations. Use a drill bit slightly smaller than the anchor’s diameter for a snug fit.
Sequence: Apply adhesive, insert anchors, then position and press inlays firmly into place. Allow the assembly to cure undisturbed.
Preventing and Managing Differential Movement
Identify drivers of movement such as temperature changes, moisture exposure, and concrete shrinkage, and set compatibility goals for brass, glass, and wood. Use those goals to guide joint planning and bonding strategies without compromising the look. The goal is predictable behavior without surprises at the joints.
Design detailing that accommodates movement includes expansion joints, staggered or hidden joints, and relief cuts. Plan edge treatments that respect both form and function. A clear bonding plan across dissimilar materials helps manage differential expansion over time.
Allowance gaps and movement joints
Differential movement happens. Don’t fight it, accommodate it. Here’s how:
Compressible gaps: Leave tiny spaces around inlays – like tiles or stone countertops. They need room to move without cracking. Check product labels for recommended gap sizes; usually 1/8″ to 3/16″.
Movement joints: Bigger gaps, filled with a flexible material, let things move more. Use them where movement’s expected – like at corners or where different materials meet. Check local building codes for joint width; typically 1/4″ to 3/8″.
Don’t skip these steps. Tight-fitting inlays look great but can crack under pressure. And that’s a job you don’t want to redo.
Flexible bedding and stress-relief details
Alright, listen up. You’ve got your allowance gaps and movement joints sorted, right? Good. Now let’s talk about making those joints happy campers by distributing the stress they’ll face.
First off, check your base compaction. If it’s not solid, you’re asking for trouble. Then, use a flexible adhesive layer on top of that base. It’ll help absorb any minor movements without cracking up. You can find these in various types – polymer-modified cement, bituminous, or even epoxy-based.
Next, consider using a compressible backer rod in your movement joints. This little guy’s job is to keep the sealant from being squished out when the joint closes. It’s like giving your joint some personal space. You can find these in various materials – foam, felt, or even cork.
Lastly, don’t forget about fillet profiles. They’re like a little buffer between your wall and floor, distributing stress away from those brittle joints. You can buy these pre-formed or make them yourself with some flexible material. Just make sure they’re wide enough to do their job – I’d say around 10-20mm is a good range.
Environmental and installation controls
To keep your concrete slab happy and crack-free, you gotta control its environment. Here’s how:
Temperature and humidity: Check the weather forecast before pouring. Ideal temps are between 50-90°F (10-32°C). If it’s too hot or cold, consider shading, heating, or cooling the slab. Keep humidity around 70% for best results.
Curing: After pouring, keep that concrete moist and happy. Cover it with plastic sheeting if needed. Spray water on it regularly for the first few days. This helps prevent early-age shrinkage and long-term cracking. Don’t let it dry out too fast!
Water Resistance, Sealing, and Long-Term Durability
Outline moisture pathways in concrete and at inlay interfaces, especially around edges and joints. Identifying these paths helps you select a sealing approach that preserves appearance and performance. Consider how seals interact with brass, glass, and wood as part of a long-term plan.
Develop a sealer strategy that suits the inlays and the living environment, including cure and recoat considerations. Address bond durability under moisture exposure and the role of sealants or flexible adhesives. Build an ongoing maintenance mindset with edge and joint protection in daily use.
Sealer types and penetration vs. topical
Concrete countertops need proper sealing to protect against moisture intrusion. Two main sealer types exist: penetrating and film-forming.
Penetrating sealers soak into the concrete’s pores, lining them to repel water while allowing the surface to breathe. These are ideal for inlays like wood and glass that need to maintain their natural look and feel.
Film-forming sealers, on the other hand, create a topical barrier on the surface. They provide excellent protection but can alter the appearance of inlays like brass or dark woods. Apply film-forming sealers sparingly and only after testing on a small area first.
Edge and joint sealing details
Edges and joints are prime entry points for water. Seal them properly to prevent moisture damage.
For edges, use a flexible, high-quality silicone caulk designed for concrete. Apply it along the entire length of the edge, pushing it into any gaps or voids with a damp finger. Smooth out the bead for a clean look.
For joints, use a matching silicone caulk or a specialized joint sealant. Apply it in a continuous bead across the joint, ensuring it fills any voids. Use a damp finger to smooth and compress the sealant into place.
Maintenance and re-sealing recommendations
Regular maintenance is key to keeping your concrete countertops looking their best. Here’s a simple maintenance plan:
Spot cleaning: Wipe up spills immediately with a damp cloth. Use a mild soap and water solution for tougher messes.
Resealing: Every 2-3 years, depending on use and exposure to moisture, apply a fresh coat of sealer. Before resealing, clean the countertop thoroughly and remove any old sealant using a suitable stripper. Inspect the surface for signs of wear or damage, repairing as needed.
Safety Precautions and Installation Best Practices
Outline PPE, dust control, and ventilation needs for cutting, fitting, and bonding inlays. Emphasize wet-cutting and enclosure to minimize airborne hazards and protect workers. Prioritize safety when handling resins, epoxies, and solvents used in the project.
Provide practical guidelines for inlay cutting and fitting, including tool choice, securing pieces, and avoiding pinch points. Cover adhesive handling, mixing, curing, and storage, plus ventilation and fire safety where applicable. Keep a focus on joints, movement considerations, and code references that affect installation.
Dust, Silica, and Respiratory Protection
Working with concrete generates dust, especially when cutting or grinding. This dust contains crystalline silica, a known health hazard.
Protect yourself: Wear a respirator rated for silica dust (N95 or P100). Use wet-cutting techniques and enclosures to minimize airborne silica. Regularly clean up with HEPA vacuums.
Silica exposure can lead to lung diseases like silicosis. Follow OSHA’s guidelines on silica exposure to stay safe.
Handling Adhesives and Solvents
Epoxies, primers, and solvents used in concrete countertop installation require careful handling. Always follow the manufacturer’s guidelines.
Safety first: Work in a well-ventilated area or use a respirator. Wear gloves to protect your skin. Mix chemicals on a drop cloth to prevent spills. Clean up spills immediately with appropriate solvents.
Properly dispose of unused materials and empty containers according to local regulations. Store chemicals safely, away from heat sources and ignition points.
Thermal and Cutting Safety for Metal and Glass Inlays
Cutting brass and glass inlays generates heat and sharp edges. Follow these safety guidelines:
Brass: Wear eye protection. Use a metal-cutting blade or abrasive wheel. Secure the piece during cutting to prevent kickback.
Glass: Wear safety glasses and gloves. Use a water-cooled diamond blade. Enclose the work area to contain shards. Clean up thoroughly after cutting, using a HEPA vacuum if possible.
Always follow manufacturer’s guidelines for specific materials. Keep first aid supplies nearby in case of cuts or burns.
Cost Considerations and Comparing Bonding Methods
Identify major cost drivers such as material choices, substrate prep, inlay fabrication, and edge finishing. Explain how thickness and pattern complexity influence the overall price without giving exact numbers. Use this to guide budgeting and design decisions.
Break out labor as its own line item, from layout through sealing and curing. Compare bonding methods and their long-term value, including maintenance implications. Provide a framework for evaluating durability, repairability, and how to obtain accurate local estimates using clear scope definitions.
Material vs Labor Trade-offs
Choosing the right materials can save you time and money in the long run. Here’s how:
- High-end adhesives: Cost more upfront but reduce labor time, improve bond strength.
- Prefabricated inlays: Save on installation time, easier to handle on-site.
- Brass inlays: Durable and low-maintenance. Avoid cheap alternatives that tarnish easily.
- Glass inlays: Look for tempered glass with high UV resistance. Avoid thin pieces that crack under stress.
- Wood inlays: Use hardwoods like maple or oak. Avoid softwoods prone to scratching and denting.
Typical Cost Ranges and Local Checks
Before you start, get local quotes. Here’s a checklist:
- Adhesives: Check pricing per gallon or liter.
- Inlay materials: Compare prices per square foot or meter.
- Labor: Ask for hourly rates.
- Epoxy/resin carrier: Check coverage rate and pot life.
- Substrate prep: Include surface cleaning, grinding, or leveling costs.
- Inlay fabrication: Consider routing, cutting, or shaping fees.
- Edge finishing: Ask about polishing, beveling, or rounding options and costs.
- Permits: Check if they’re included in the quote.
- Lead time: Confirm when materials will arrive.
Quick rule: Always get itemized quotes to compare apples to apples.
Life-Cycle Cost and Maintenance Budgeting
Factor in long-term costs for a realistic budget:
Resealing: Every 2-5 years, depending on use and material. It’s cheap but time-consuming.
Repairs: Accidents happen. Plan for touch-ups or replacements.
Maintenance intervals: Regular cleaning, polishing, and minor touch-ups keep counters looking new longer.
Conclusion
With the right plan, proper bonding, and careful movement control, your inlaid concrete countertop can be durable, safe, and beautiful for years. Safety and attention to testing now pay off in long-term performance and fewer costly fixes.
Move through this in a practical order: confirm your inlay material compatibility and surface prep, choose a bonding method that matches your substrate, do a small-area test layup, follow the adhesive recommendations, seal and cure as required, and then assemble the full countertop with controlled movement and waterproofing in place. Check fit and drainage first, then verify edge details, and finally apply the right sealer or finishing coat. Test first, seal thoroughly, and document what works so you can reproduce the result reliably.
Common mistakes to avoid are skipping a test panel, ignoring differential movement, and using an adhesive or sealant outside its intended spec. Don’t rush cure times or skip surface preparation, and always wear eye protection and gloves during bonding and sealing. Keep things dry during bonding, work in a clean, dust-free area, and never force a joint that doesn’t want to behave. These safety rules protect the work and your countertop’s longevity.
If the project involves complex inlays, irregular substrates, or you’re unsure about movement management, call in a pro before you commit to irreversible steps. When in doubt, step back, plan again, and keep the workflow small and test-based. Stay focused, stay safe, and you’ll finish with a countertop that performs as good as it looks.
FAQ
What bonding method works best for brass, glass, or wood inlays in concrete countertops?
Match the method to the inlay material and the manufacturer’s instructions. Check labels or datasheets for compatibility with concrete and sealers, and beware any solvent or adhesive that could react with the inlay surface.
How can I minimize differential movement between the concrete and inlays?
Plan for freedom to move. Use proper seating without forcing the inlay in, leave relief gaps if needed, and seal joints to limit moisture transfer. Follow material guidance for expansion or contraction considerations and avoid rigid, continuous bonding across different materials.
What safety steps should I follow during inlay installation?
Wear eye protection, gloves, and a dust mask for cutting or grinding. Work in a well-ventilated area and keep cords and tools tidy to prevent trips. Never bypass manufacturer instructions on adhesives or sealers.
How should I seal and finish an inlaid concrete countertop?
Choose a sealer compatible with both concrete and the inlay material. Follow cure times and reapplication intervals from the label, and test compatibility on a small area first to avoid finish issues.
How can I estimate costs for different inlay materials?
Roughly budget by material type and installation difficulty, then check the product label, data sheet, or manufacturer guidelines for any extra steps. Local rules or shop guidance can affect costs, so verify with a supplier or professional if in doubt.