
Introduction
A heat mark on a concrete countertop may be a changed sealer, altered pigment, exposed or etched concrete, or a crack or bond failure. Diagnose the surface before cleaning, sanding, patching, or recoating: a cloudy or tacky film needs a different response from a smooth color change, a dull rough spot, or a crack.
This procedure uses a documented Ovation Concrete Countertop Sealer application pathway as a clearly labeled example for a known, compatible Ovation finish. It is not a universal procedure for every concrete sealer. If your existing coating is another product, unknown, waxed, repellent-treated, blistered, peeling, greasy, or otherwise failing, do not substitute the Ovation steps; identify the finish and follow the proposed replacement system’s current instructions.
Key takeaways
- Keep hot cookware and heat-producing appliances off bare concrete. Use a purpose-made trivet or stand rated for the cookware and temperature, ideally with an air gap.
- Identify the exact existing sealer before repairing it. A known, intact compatible finish may be recoated; an unknown, contaminated, or failing finish usually requires removal under the replacement manufacturer’s instructions.
- Do not coat over tackiness, blisters, peeling, lifting, or hollow areas.
- Water beading is only a rough sign of repellency. It does not prove coating coverage, adhesion, heat resistance, compatibility, or food-contact suitability.
- Use a documented, product-specific system for mixing, preparation, application, recoat timing, and cure. Do not combine filler, sealer, or cleaning advice from unrelated products.
Table of Contents
- Introduction
- Key takeaways
- Understand Heat Damage on Concrete Countertops
- Preventive Practices: Trivets, Coasters, and Everyday Habits
- Sealing Options: Types, Food-Safety, and Maintenance Intervals
- Daily and Deep Cleaning Without Harming Sealers
- DIY Spot Repair Workflow for Sealer and Minor Surface Damage
- Tools, Materials, and Visual Checkpoints Checklist
- Common Mistakes, Troubleshooting, and When to Call a Pro
- Long-Term Maintenance Plan and Cost-Benefit Considerations
- Conclusion
- FAQ
Understand Heat Damage on Concrete Countertops
Concrete and its finish do not respond to heat in the same way. A topical sealer may show the first visible change, but the result depends on the coating, pigment, moisture, cookware temperature and mass, and exposure duration. Do not assume every dark, dull, or shiny mark is removable staining.
Diagnostic decision tree
- Color change only; smooth, hard surface: This may be moisture darkening, staining, pigment change, or heat-altered sealer. Clean only with the installed sealer’s approved cleaner and let the area dry. Cleaning and polishing will not necessarily restore heat-altered pigment or a permanently discolored film.
- Cloudy, glossy, tacky, soft, raised, bubbled, blistered, or peeling area: Treat it as sealer softening, blush, blistering, or adhesion failure. Do not add a coat over it.
- Dull or rough spot with no raised film: This may be abrasion or chemical etching of the sealer, or etching of exposed concrete. Cleaning cannot replace removed material. Local polishing can create a different sheen and may require blending beyond the visible spot.
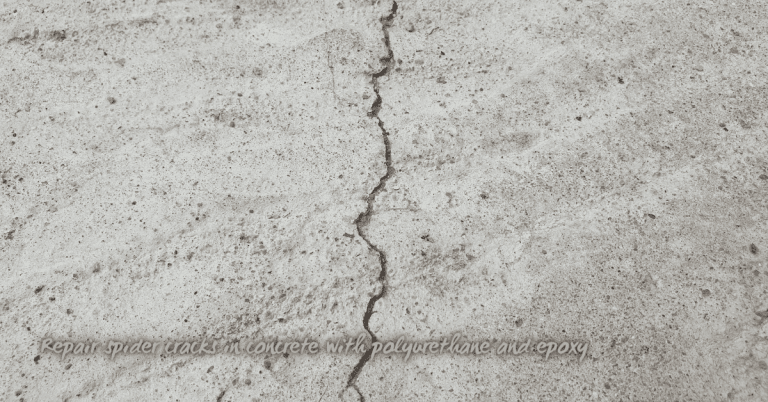
- Crack: Photograph and map its width, length, location, and direction. Record whether it crosses the slab, changes over time, moves, occurs near a sink or support, or has loose or hollow-sounding material beside it. Width alone does not establish whether it is cosmetic.
- Chip or isolated void: A small, stable, clean defect can be a DIY repair only when a filler is specifically compatible with the concrete, existing finish, repair depth, expected heat exposure, and intended food-contact use.
- Hollow, lifting, peeling, or detached section: This is delamination or loss of bond. Stop localized repair and obtain professional assessment.
Inspect under raking light from a flashlight held low to the counter, compare the defect with an undamaged area, and photograph it before cleaning. Do not score the installed finish with a nail. It can create damage and does not identify coating chemistry, adhesion, heat damage, or food-contact status.
Common heat sources
Hot pans, bakeware, slow cookers, electric griddles, and hair tools can concentrate heat. Slow cookers and similar appliances can be especially significant because the exposure lasts a long time. Follow the appliance maker’s placement instructions; where they do not expressly permit direct countertop use, set the appliance on a suitable rated stand or trivet.
Preventive Practices: Trivets, Coasters, and Everyday Habits
Selecting and using trivets and hot pads
Use a purpose-made trivet, pad, or stand that its manufacturer rates for the cookware and temperature involved. Prefer a design that creates an air gap beneath the cookware where possible. There is no universal safe trivet thickness: performance depends on its material, thermal conductivity, air gap, the cookware’s temperature and mass, and contact time.
Put the trivet in place before moving the cookware, center the entire cookware base on it, and leave the cookware there until it cools. Do not use a cast-iron sheet as a heat diffuser; it can store heat and prolong heat transfer. Replace a cracked, compressed, warped, or heat-damaged pad.
Everyday habits that protect the finish
- Lift cookware rather than sliding it across the counter.
- Use cutting boards instead of cutting on the sealed surface.
- Wipe spills promptly with a soft cloth; do not let acids, oils, or cleaners dwell on the finish.
- Keep a trivet near each usual landing place for hot cookware.
Sealing Options: Types, Food-Safety, and Maintenance Intervals
Identify the finish and the repair system
Before buying materials, find the sealer brand, exact product, coating type, purchase or installation date, and current technical data sheet (TDS) and safety data sheet (SDS). Determine whether the existing finish is intact, merely worn, or failing. Then verify in writing that the proposed replacement product permits application over that finish.
For a known, intact, compatible coating, follow the replacement manufacturer’s stated cleaning and abrasion process. For an unknown, waxed, repellent-treated, greasy, stained, blistered, peeling, scratched-through, or adhesion-failed coating, do not assume scuffing is enough. The Concrete Countertop Institute’s resealing guidance warns that unknown coatings, waxes, stone or tile repellents, hardeners, grease, and oil can prevent adhesion.
Use the replacement system’s removal instructions and readiness criteria. As one documented Omega system example, removal is by chemical stripping with paint stripper or abrasive removal using 100–200 grit wet diamond pads; its 320-grit sanding guidance is for surface refinement, not a universal way to remove a failing coating. A water-wetting or beading observation is not proof that a coating has been completely removed or that the surface is compatible. The preparation endpoint is the clean, dry, sound, residue-free surface required by the chosen system’s current instructions.
Heat and food-contact checks
Do not rely on a generic “heat-resistant” claim. Confirm the exact product’s maximum service condition, short-term versus continuous exposure limits, hot-cookware and slow-cooker restrictions, and whether any heat statement applies only to the cured film. For example, Ovation states that it is not heat resistant, directs users to use trivets, and warns against hot pots and slow cookers on the surface. A performance target of 300°F for five minutes in a countertop guideline is not proof that every sealed countertop meets that target or can accept a hot pan directly.
Do not treat “FDA compliant,” “NSF,” “food-safe,” or “100% solids” as interchangeable claims. Verify the exact formulation, cured-film status, direct versus incidental food contact, food and temperature limitations, post-cure period, and whether direct cutting is prohibited. FDA explains that a food-contact authorization is specific to the identified manufacturer and conditions of use; obtain written manufacturer confirmation for the intended countertop use. See FDA guidance on food-contact materials. NSF/ANSI 51 addresses materials and finishes used in food equipment; it does not automatically establish that every product is appropriate for every residential countertop or direct food-contact use.
When to maintain or reseal
- Inspect under raking light for roughness, scratches through the film, dullness, discoloration, bubbles, peeling, stains, chips, and cracks.
- Follow the specific sealer manufacturer’s maintenance schedule and actual observed wear. There is no universal annual or multi-year resealing interval.
- Make a manufacturer-approved trial application on a spare sample or concealed edge before treating a visible area.
- Repair only stable concrete defects before coating; stop for moving, recurring, full-depth, loose, or support-related cracks.
Daily and Deep Cleaning Without Harming Sealers
Use the installed sealer’s approved cleaner, a soft microfiber cloth, and only the water needed. If the manufacturer permits it, mild dish soap and warm water may be suitable; rinse residue and dry with a clean cloth.
Avoid abrasive pads, steel wool, acidic cleaners such as vinegar or lemon juice, bleach, ammonia, solvents, poultices, stain removers, and polishing compounds unless the exact sealer manufacturer authorizes them. These can soften, dull, scratch, or otherwise alter a finish. Do not use a pressure washer on an installed countertop.
If cleaning does not alter a smooth color mark, it may be permanent pigment or sealer change rather than removable soil. Do not escalate to sanding or polishing without a compatible repair plan and a concealed test area.
DIY Spot Repair Workflow for Sealer and Minor Surface Damage
Proceed only when the counter is stable, the coating and repair system are identified, and a spare sample or concealed test area is available. A local repair can remain visible because aged sealer, pigment, porosity, and sheen vary across the slab.
1. Set up, document, and confirm conditions
- Remove food, cookware, and movable items from the work area. Mask adjacent surfaces as required by the selected system.
- Photograph the defect in raking light. Record its dimensions, surface condition, existing sealer product, and intended repair product.
- Read the current TDS and SDS before opening any product. Confirm the required temperature, relative humidity, substrate dryness, dew-point margin, ventilation, mixing, pot life, application tool, coat sequence, recoat interval, cleanup, light-use, water-exposure, food-contact, and full-cure requirements.
- Use ventilation and exposure controls first. Wear eye protection, SDS-specified chemical-resistant gloves, and protective clothing. A P100 particulate filter does not protect against solvent vapors. If respiratory protection is required, use the cartridge specified for the hazard and only within an appropriate respiratory-protection program; do not spray a two-component product unless its instructions and safety controls permit it. See OSHA respiratory-protection guidance.
2. Select the repair branch
Known, intact, compatible sealer with a minor cosmetic blemish: Clean using only the approved cleaner. Let the surface dry completely. Use the replacement system’s stated abrasion method, remove all dust and residue by its specified method, and make a test application before coating the visible area. Related guidance: How Long for Concrete Sealer to Dry Before Rain: Essential Guidelines.
Unknown, contaminated, blistered, peeling, tacky, soft, or adhesion-failed coating: Do not spot-coat it. Locate the replacement manufacturer’s coating-removal and substrate-readiness instructions. If the coating cannot be identified, the required removal method is unclear, or the defect extends beyond a small localized area, stop and use a countertop professional.
Small, stable chip or isolated void: This is a limited DIY scope only when there is no movement, hollow sound, loose surrounding concrete, or crack leading from the defect. Select a repair material that explicitly addresses the needed repair depth and concrete-countertop use. Before use, verify its concrete adhesion, compatibility with the existing sealer, expected heat exposure, staining and color-match behavior, permitted sanding or honing method, cure time, and food-contact limitations. “100% solids” alone does not establish any of these properties. Related guidance: Concrete Countertop Sealer Types: Food Safety, Heat Resistance, and Maintenance.
3. Stable chip or void: bounded filling sequence
- Use the filler manufacturer’s instructions to determine whether the defect may be cleaned, squared, or undercut, and how loose material must be removed. Do not enlarge the chip, grind surrounding sound concrete, or use a generic filler method that the product does not permit.
- Clean and dry the defect exactly as the filler requires. Keep wax, oil, grease, sanding dust, and cleaner residue out of the repair.
- Measure, mix, and place the filler exactly as directed for the defect depth. Do not add pigment, water, solvent, or a second material unless the manufacturer specifically permits it.
- Tool the patch flush only as the filler instructions permit. Avoid smearing uncured filler over the surrounding finish.
- Allow the filler to reach its stated sanding, honing, and coating stage. Sand or hone only with the grit and method that both the filler and final coating system permit. Stop if the surrounding finish begins to change sheen or texture.
- Inspect for a firm, stable fill with no loose edge, pinhole, shrinkage gap, or hollow area. Then apply only the compatible final coating system after the patch has reached its required coating cure state.
4. Example sealer-only pathway: Ovation on a known compatible Ovation finish
This is a product-specific example, not a substitute for the current instructions. The published Ovation procedure uses 2 parts product to 1 part water, 320–400 grit wet/dry sanding for preparation, a foam roller for application, complete drying between coats, and four coats. Follow the current product instructions for the exact drying, recoat, light-use, water-exposure, food-contact, and full-cure milestones; do not assume they are the same.
- Confirm that the existing finish is known, intact, and expressly suitable for this system. Do not use this pathway over an unknown or failing coating.
- Prepare with 320–400 grit wet/dry sanding as directed by the Ovation instructions. Keep the work even; do not isolate a tiny circle if that will create a visible sheen boundary.
- Remove sanding residue completely and allow the surface to dry as the instructions require.
- For each coat, measure 2 parts Ovation and 1 part water. Mix only the amount you can accurately measure and apply within the product’s stated working limits.
- Apply by foam roller, maintain a wet edge, avoid overworking the film, and let each coat dry completely before the next. Apply the described four-coat sequence.
- Keep the counter out of service until the current instructions permit the relevant use. Treat light use, water exposure, food contact, and hot cookware as separate restrictions if the product gives different times. Continue to use trivets after cure.
5. Plan a small-area quantity before mixing
Measure the repair area: length × width = square feet. Multiply by the number of coats, then compare that total with the product’s published coverage and the package’s minimum practical mix quantity. Ovation’s published coverage example is about 25 square feet per 4 ounces of product plus 2 ounces of water on dense concrete; porous concrete may yield about half that coverage.
Worked planning example: A 12-inch by 12-inch area is 1 square foot. Four coats equal 4 square feet of coat coverage. At the dense-concrete published example rate, 4 ounces of product plus 2 ounces of water covers about 25 square feet for one coat, so that stated mixture is more than enough material for four coats on 1 square foot. Do not reduce the 2:1 ratio, guess at a smaller batch, or use the dense-concrete estimate on a porous surface without a test; use the smallest accurately measurable batch and expect a test area and application losses.
6. Completion, cleanup, and aftercare
At each stage, inspect under raking light for bubbles, tackiness, pinholes, peeling, roller marks, residue, or a sharp repair edge. Do not judge success by water beading. The acceptable endpoint is a uniformly cured repair that meets the chosen system’s stated appearance and use requirements.
Clean tools only by the method in the SDS or application instructions. Keep product containers closed when not in use. Treat used solvent, stripper, mixed-product containers, contaminated towels, applicators, dust, and rags according to the SDS and local hazardous-waste requirements; do not put them into household drains. Maintain required ventilation until the product instructions allow normal occupancy and use.
Tools, Materials, and Visual Checkpoints Checklist
Essential tools, materials, and safety gear
- Documentation: Existing sealer label, current TDS and SDS, defect photographs, a measuring tape, and a spare sample or concealed test area.
- Cleaning and preparation: Product-approved cleaner, microfiber cloths, masking materials, and only the abrasive, dust-removal method, stripper, or solvent allowed by the selected system.
- Application: Product-specified measuring containers, mixing tools, foam roller where using the Ovation example, and the compatible sealer or filler.
- PPE: Safety glasses, SDS-specified chemical-resistant gloves, protective clothing, and required ventilation controls. Use heat-rated gloves, rather than chemical gloves, for hot cookware.
- Prevention: Purpose-made temperature-rated trivets or stands with an air gap where available.
Visual checkpoints
- Before repair: The defect is documented, the slab is stable, and the system is identified and compatible.
- Before coating: The surface is clean, dry, sound, free of loose material and residue, and prepared to the selected system’s stated endpoint.
- After filling: The patch has cured to its required next-stage condition and has no loose edge, shrinkage gap, pinhole, or hollow condition.
- After each coat: There are no bubbles, tackiness, peeling, or contamination, and the required drying or recoat condition has been met.
- Before return to use: The system’s separate restrictions for light use, water, food contact, heavy use, and full cure have all been satisfied as applicable.
Common Mistakes, Troubleshooting, and When to Call a Pro
Typical DIY pitfalls to avoid
- Recoating over an unknown or failed finish: Wax, repellent, grease, oil, contamination, or a failed layer can prevent adhesion.
- Using interchangeable-material logic: Thin-set, microcement, epoxy filler, wax, oil, polyurethane, epoxy, and heat-resistant caulk are not interchangeable countertop repairs.
- Over-sanding: Uneven sanding can expose concrete and create a sheen or texture mismatch requiring broader blending.
- Applying outside stated conditions: Incorrect temperature, humidity, substrate dryness, dew-point margin, mix ratio, or coat thickness can lead to defects.
- Returning the countertop to use too soon: Follow product-specific light-use, water, food-contact, and full-cure restrictions; do not expose the repair to hot cookware directly after cure.
Troubleshooting failed repairs
Tackiness: Stop adding coats. Check the exact product’s mix ratio, dilution, environmental limits, film thickness, and recoat window. If the coating remains tacky beyond the product’s stated cure condition, treat it as a failed layer; do not cover it with another coat. Remove and reprepare only under the replacement system’s instructions, or escalate if the failure source is uncertain.
Cloudiness or blush: Compare the defect with a test area and review moisture, temperature, humidity, and application conditions against the TDS. Do not polish or add product blindly. If the cloudiness is in a failing film or does not resolve under the system’s stated cure conditions, stop and follow its removal procedure or seek professional help.
Bubbles or pinholes: Stop at the current coat. Check whether the surface was clean and dry, whether the product was overworked, and whether the application tool and coat sequence matched the instructions. Do not fill bubbles by repeatedly spot-coating; correct the preparation or coating failure as the system directs.
Peeling, lifting, or poor adhesion: Treat this as a bond failure. Check for unknown coating, wax, repellent, grease, oil, residue, incompatible products, or inadequate removal. Do not feather and cover only the edge. Remove the failed material to the selected system’s required sound, clean, dry endpoint, or call a professional if the extent or cause is uncertain.
Roller marks, color mismatch, or sheen mismatch: Stop applying product in a smaller circle. Verify the applicator, coat count, preparation, and application sequence. Local blending may require treatment to a larger natural break, and permanent pigment or aged-finish mismatch may not disappear. Escalate if an acceptable test area cannot be achieved.
A crack returns or grows: Stop cosmetic filling. Have the slab, support, seam, and nearby sink cutout assessed.
When to hire a professional
Get professional assessment for moving, recurring, full-depth, widening, or long cracks; loose or hollow sections; delamination; cracks near a sink, seam, overhang, or support; broad heat damage; an unidentified coating; inability to meet the product’s preparation or environmental requirements; or repeated coating failure. A professional can determine whether the condition is limited to the finish or involves the slab or its support.
Long-Term Maintenance Plan and Cost-Benefit Considerations
Simple maintenance checkpoints
- After cooking: Wipe spills with the approved cleaner and use a trivet for hot cookware.
- When a change appears: Inspect under raking light for dullness, roughness, color change, chips, blisters, peeling, and cracks; photograph a new defect before treating it.
- Before any maintenance coat: Review the exact product instructions, verify compatibility, and test at a concealed edge or on a spare sample.
Keep the sealer label, current TDS and SDS, purchase date, cleaner used, and repair notes. These records are more useful than a generic resealing calendar when a future repair is needed.
Conclusion
First decide whether heat changed the sealer, etched or exposed the concrete, or revealed a crack or bond failure. Clean a stable surface gently, but do not hide blistering, peeling, tackiness, delamination, or structural cracking under a new coat.
For a small sealer-only repair, use one known compatible system from preparation through cure, test it before treating the visible area, and follow its current TDS and SDS. For every countertop, prevent a repeat with a manufacturer-rated trivet or stand and keep hot cookware off the bare surface. Related guidance: Fixing Pinholes in Concrete Countertops Without Regrinding the Whole Surface.
FAQ
How can I tell whether heat damaged the sealer or the concrete?
A cloudy, shiny, tacky, soft, bubbled, raised, or peeling area points to sealer damage. A dull or rough area may be etched sealer or exposed concrete. A crack, hollow condition, loose section, or movement requires assessment beyond cosmetic repair. Inspect in raking light; do not use a nail-scratch test.
Can I put a new sealer over a heat mark?
Only when the existing coating is known, intact, and expressly compatible with the replacement system. Follow that system’s required cleaning, abrasion, mixing, application, recoat, and cure instructions. Do not coat over blisters, peeling, tackiness, unknown coatings, wax, repellents, grease, or other contamination.
What trivet should I use on a concrete countertop?
Use a purpose-made trivet, pad, or stand rated by its manufacturer for the cookware and temperature, preferably with an air gap. Do not rely on a universal thickness rule, use a cast-iron sheet as a diffuser, or put hot cookware directly on the countertop.
When is heat damage not a DIY repair?
Call a professional for delamination, loose material, an unidentified coating, a moving, recurring, full-depth, widening, or long crack, cracks near sinks or supports, broad heat damage, or a repair that repeatedly peels or fails after documented preparation.