

Introduction
A salt-and-pepper polished-concrete floor has a fine, scattered aggregate reveal rather than an unbroken cream surface or a deeply exposed aggregate look. It is not a universal exposure class or a fixed grinding depth: the result depends on aggregate distribution, paste thickness, hardness, flatness, finishing, and the slab’s prior condition. The most reliable practical way to choose the cut is to make a representative test area, clean it, and approve the appearance before grinding the room.
The main risk is irreversible removal at the perimeter. Establish the exposure with the field grinder first, then bring the edge toward that approved sample with a separate, conservative operation. Do not try to make an edge “catch up” by dwelling with a hand grinder.
Key takeaways
- Define the target by the visible amount of mortar and aggregate, not by an informal exposure label.
- Test first-cut tooling on the actual slab before committing to a full-floor sequence.
- Use a repeatable zone-and-pass pattern; judge progress only after vacuuming or safely removing slurry and inspecting the surface.
- Treat perimeter grinding as a separate operation and keep the tool fully supported on the slab.
- Repairs can restore a defect but may not reproduce the surrounding aggregate pattern or color.
- Grinding concrete creates respirable silica; do not start without compatible dust control or wet-grinding control.
Table of Contents
- Introduction
- Key takeaways
- What Is a Salt-and-Pepper Polished Concrete Finish?
- Pre-Project Planning: Slab, Mix, and Mock-Ups
- Controlled Grinding Strategy to Reach Consistent Exposure
- Edge Finishing Techniques That Avoid over-Grinding
- Grouting and Surface Repairs to Ensure Uniform Appearance
- Densification and Final Polishing: Durability and Clarity Controls
- Common Problems, Diagnostics, and Corrective Actions
- Tools, Safety, Cost Drivers, and DIY Vs Professional Decision Guide
- Conclusion
- FAQ
What Is a Salt-and-Pepper Polished Concrete Finish?
Salt-and-pepper describes a predominantly cement-paste surface with small, dispersed aggregate visible across it. A cream finish leaves the surface paste largely intact. A deeper aggregate or “rock-cut” appearance removes more paste and makes aggregate more prominent. These are common visual descriptions, not interchangeable specifications. Specify the desired appearance and exposure on an approved sample instead. Aggregate size, hardness, gradation, placement, and degree of exposure all affect the result, as the American Cement Association’s exposed-aggregate guidance notes.
Visual characteristics and exposure level
For this finish, look for a smooth floor with a restrained, evenly scattered speckle. There should not be broad unground paste bands, isolated clusters of deeply cut stone, or a visibly lighter perimeter. Aggregate can be sparse or uneven in a particular slab; the test area may show that the desired appearance is not achievable. Decide whether you want a matte honed surface or a higher polish separately: exposure is created during grinding, while sheen is refined later with polishing tooling.
When to choose salt-and-pepper vs cream or rock-cut
Choose salt-and-pepper when the test area gives an even, forgiving visual texture with modest removal. Choose cream only when the existing or new slab has a sound, attractive surface that can remain largely intact. Choose deeper exposure only when the slab and approved sample support it. Intended traffic, slip expectations, maintenance, joint layout, and any required coating system matter more than a general indoor-or-outdoor label.
Pre-Project Planning: Slab, Mix, and Mock-Ups
First identify the scenario. A new pour can be planned around the selected mix, placement, finishing, curing, joints, and sample panel. An existing cured slab may hide coatings, adhesive, curing compound, cracks, patches, curling, contamination, or uneven aggregate. Do not assume an existing slab will reveal evenly because its unground surface looks uniform.
Aggregate selection and mix considerations
For a new slab, ask the supplier or specifier what aggregate is in the mix and make a sample using the same concrete and finishing method as the work. Aggregate selection influences the reveal, but it cannot guarantee a uniform pattern. For an existing slab, the test cut—not a guess about aggregate size—shows what is available.
Trowel finish and flatness impact
A hard, power-troweled surface may need different tooling from a softer or more porous slab. High spots reach aggregate first; low spots may retain paste. Check soundness, joints, cracks, spalls, and elevation changes before renting equipment. Stop and obtain professional assessment for widespread delamination, structural cracking, severe curling, major low spots or elevation differences, unstable edges, or unknown coatings. Follow the project specification where one exists rather than using a generic flatness tolerance.
Before grinding: readiness and test-area setup
Newly placed concrete must not be ground until the concrete supplier’s or specifier’s requirements and the current grinder, tooling, repair-product, densifier, and sealer manufacturers’ readiness requirements are met. For an existing slab, identify or remove coatings, adhesives, curing compounds, and contaminants as required by the selected equipment and product system. Do not substitute a generic elapsed time, strength value, or moisture percentage for a stated product requirement or defined test method.
Before starting the test area, confirm that the slab is suitable for grinding; dust or slurry control is working; and the grinder, edge tool, diamonds, extractor, electrical supply, and cords are a compatible manufacturer-supported system. Confirm adequate electrical capacity, correct extension-cord type and rating, GFCI protection where applicable, and cable routing that cannot create a trip, cut, or run-over hazard.
Sample panels and approval process
On a new pour, make a representative sample panel. On an existing floor, select an inconspicuous but representative test zone that includes typical field concrete and, if possible, an edge. Use the intended grinder, dust-control method, metal-bond tooling, repair approach, densifier, and polishing sequence. Clean the area and inspect it under the lighting in which the finished floor will be seen. Record the machine, tooling, tool condition, speed setting, dust-control method, and working pattern that produced the approved result.
Controlled Grinding Strategy to Reach Consistent Exposure
Grinding diamonds remove concrete and establish exposure. Resin polishing diamonds or pads refine the scratch pattern and sheen after the profile is correct. A densifier may harden or consolidate the cement paste depending on its chemistry, the slab, and the specified system; it is not a substitute for grinding. A sealer or guard is a separate protective finish when the selected system calls for one.
First-cut approach and even material removal
Select the least aggressive manufacturer-compatible metal-bond tooling that removes the actual surface defects and reaches the approved reveal. Base that choice on slab hardness, surface condition, and required removal—not on a universal grit number. Hard, uneven, weak, coated, or patched concrete may require a different bond and sequence. Follow the equipment manufacturer’s recommended hardness-assessment method. Check test-tool wear, scratch pattern, slab damage, and production rate frequently; where the equipment guidance provides an interval, use it.
Divide the floor into work zones. Make parallel passes with steady movement and the overlap specified for the machine and tooling; avoid pausing, pivoting, or repeatedly correcting one spot. Where the equipment system permits, cross-hatch on a later working stage to reveal missed bands. Vacuum the zone before judging exposure. Move on only when the intended surface layer is removed evenly, without deep scratches, gouges, or local low spots.
Honing and polishing progression
Once the approved exposure is present, advance through the compatible polishing sequence one stage at a time. Each stage must remove the scratches left by the preceding stage before the next, finer tool is used. Do not use extra polishing passes to solve a low spot or an over-exposed area; polishing does not replace removed concrete.
Grid patterns, cross-hatching, and inspection checkpoints
At the end of each test zone or working stage:
- Vacuum dust or remove slurry safely before inspecting.
- Compare the cleaned field with the approved sample under consistent lighting.
- Check for unground lanes, tool marks, deep scratches, pinholes, loose paste, and isolated aggregate clusters.
- Check the field-to-edge transition before expanding the perimeter work.
- Record a successful setup so it can be reproduced in the next zone.
- Stop and change tooling or technique if the slab response changes, tools glaze, or wear is abnormal.
Edge Finishing Techniques That Avoid over-Grinding
Perimeter concrete often cuts differently from the field because of formwork, paste thickness, chips, and limited tool access. Aim for an acceptable visual transition, not an assumption of perfect aggregate-for-aggregate matching. Use purpose-designed edge equipment or manufacturer-approved edge tooling where available.
Feathering, hand-grinder methods, and small-head tooling
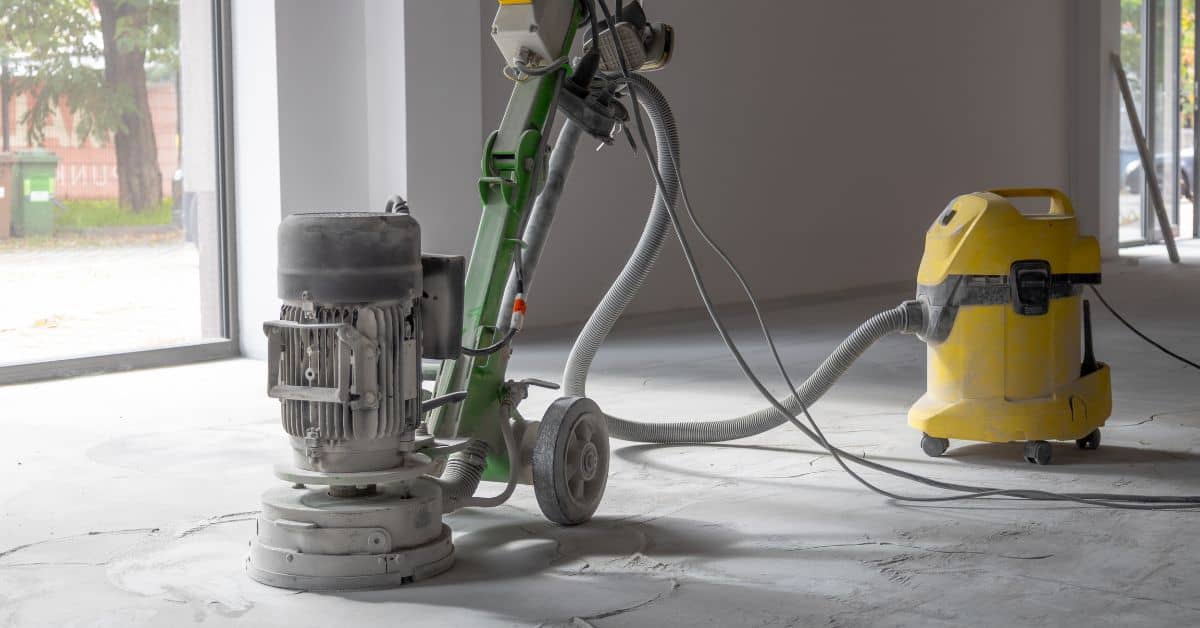
Protect walls, finished surfaces, forms, and vertical faces with rigid or sacrificial physical protection. Tape alone does not prevent a grinder from chipping a vulnerable edge. Keep stable footing, use two-handed control when the tool design requires it, and keep the head fully supported on the slab or an approved edge-grinding arrangement. Never let the wheel or tool body overhang far enough to tip, catch, or drop off the slab.
- Match the test: Use the same tooling family and work toward the approved field exposure in short, controlled sections.
- Work conservatively: Make light, moving passes and feather the transition into the field. Do not dwell at the wall line or pivot on one point.
- Inspect often: Vacuum and compare the edge to the field after each small section rather than completing the full perimeter blindly.
- Stop at unsupported geometry: If the tool cannot remain fully supported and controllable near a vertical face or slab edge, do not overhang, tip, or improvise. Use purpose-designed approved edge equipment or hire a professional; a vertical face may require a separate professional detail.
- Leave a boundary when needed: If form defects, geometry, or a prior over-cut prevent an acceptable blend, a deliberately designed border or transition detail can be more honest and durable than chasing a match.
When to use edge treatments or contrasting borders
A contrasting strip, threshold, or intentional perimeter border is a design decision, not a repair for unsafe grinding. Consider it when an edge has a persistent visual mismatch, vulnerable form damage, or a change in floor material. Confirm that any added coating or strip is compatible with intended traffic, joints, and the polishing system.
Grouting and Surface Repairs to Ensure Uniform Appearance
Map cracks, joints, pinholes, spalls, low spots, coatings, and earlier patches before grinding. Keep movement joints functional; do not rigidly fill a joint that the floor system requires to move. Select a repair or grout specifically rated for polished concrete or for the intended polishing system and identified by its manufacturer as compatible with the slab, densifier, and sealer or guard. Related guidance: Repairing Etched or Dull Polished Concrete: Densifier Reapplication vs Re-Polish.
Selecting compatible repair and grout materials
Use a compatible fine grout for pinholes and small voids, and a compatible repair mortar for larger chips or spalls. Test the repair in the sample area whenever appearance matters. Even a sound repair can remain visible because its color, porosity, hardness, paste, and aggregate do not match the original concrete.
Repair timing and inspection before final polishing
- Stop surrounding grinding and clean the defect before deciding whether it is excessive exposure, a low spot, a chipped edge, loss of profile, or a form-related defect.
- Prepare the defect and apply the compatible repair as required by the repair-product instructions.
- Allow the repair to cure, dry, or become grindable only as its manufacturer directs; do not rely on a generi