
Introduction
A bonding agent is a coating that helps new concrete grab onto old concrete, while cement slurry is a thin mix used to dampen and bridge the surface for bonding. In practice, you choose one or the other based on how you plan to join the pours and how the surface looks and feels. Think of it as two tools that achieve similar goals with different application methods.
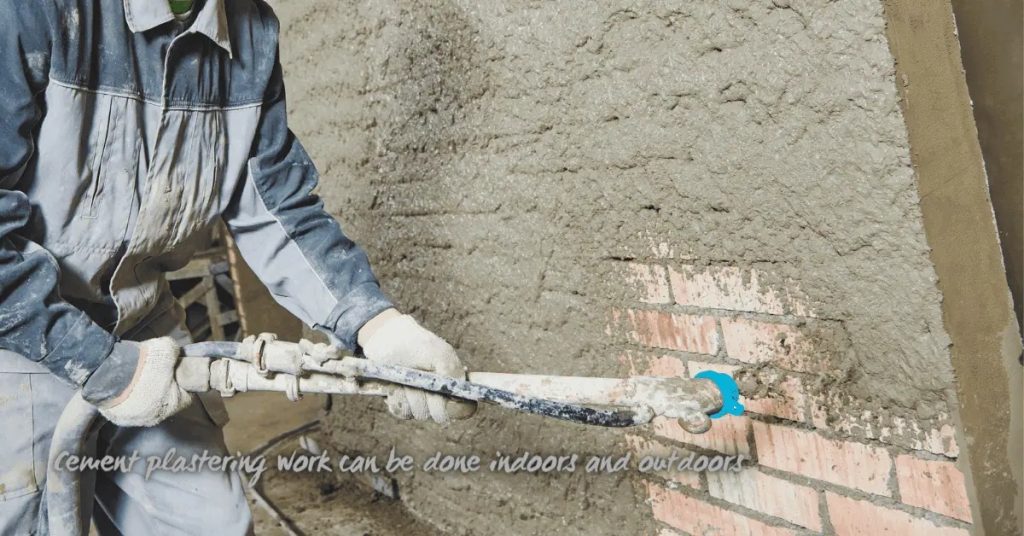
Start with solid surface prep: remove dust, oil, and loose stuff, and roughen slick surfaces if needed. Control moisture by avoiding bare water on the old surface and following product or material guidance for damp-but-not-wet conditions. Use the bonding method that matches your situation and check labels or manufacturer instructions for compatibility, recoat windows, and safe handling to keep the bond strong.
Key takeaways
- Choose bonding agent for chemical bond or cement slurry for mechanical grip.
- Clean, damp surface with no laitance; avoid contaminants and loose dust.
- Moisture management matters; control humidity and avoid drying cracks during bonding.
- Mechanical bonding relies on roughened, dust-free substrates; chemical bonding needs primers.
- Wear PPE; follow safety rules when applying coatings and handling adhesives.
- Follow manufacturer instructions and local rules; verify guidance before mixing products.
- Inspect and cure bonds; look for uniform color, no gaps, and firm tacks.
Table of Contents
- Introduction
- Key takeaways
- Quick Comparison — Bonding Agent Vs Cement Slurry
- How Bonding Actually Works: Chemical Vs Mechanical Mechanisms
- Surface Preparation — Step-by-Step Checklist
- Application Methods and Practical Best Practices
- Tools, Materials, and Safety Checklist
- Quality Checks and Visual Checkpoints After Application
- Cost, Durability, and Lifecycle Considerations
- Common Mistakes, Troubleshooting, and Repair Strategies
- Conclusion
- FAQ
Quick Comparison — Bonding Agent Vs Cement Slurry
Bonding agents rely on chemical adhesion to stick new concrete to old, while cement slurry mostly relies on creating a rough, mechanical grip and a chemical bond from the cement paste itself. Bonding agents work best on thin patches or overlays where depth is limited, and they cure with a film that bonds to aged surfaces. Slurry blends are more versatile for thicker patches or where you need to fill gaps and form a solid surface edge-to-edge.
Surface prep for bonding agents emphasizes clean, damp-but-not-wet surfaces and a compatible profile, while slurry needs a solid mechanical key and a clean substrate free of curing compounds. Bonding agents can tolerate slightly rough or aged surfaces if the product label allows it. Slurry typically requires a fresh, mechanically keyed base and careful moisture management to prevent laitance.
What a bonding agent is
A bonding agent isn’t your regular cement mix. It’s a special blend of polymer resins, epoxies, or acrylics designed to stick surfaces together better than plain old cement.
Think of it like this: cement is like a glue that sets hard and fast. But when you’re dealing with different materials or old, rough surfaces, you need something more flexible and sticky. That’s where bonding agents come in.
Bonding agents improve adhesion, meaning they help two surfaces stick together better than if you just used cement on its own. They also add some flexibility, so your repair doesn’t crack under pressure like a rigid cement patch might.
You’d typically use a bonding agent when you’re fixing old concrete, or when you want to stick different materials together – like attaching a new concrete slab to an existing one. But remember, every job’s different, so always check the manufacturer’s instructions for the best results.
What a cement slurry is
A cement slurry is like a thick soup made of cement and water. It’s the base for your scratch coats and patch bonding.
For patching, you mix cement with just enough water to make it spreadable. For scratch coats, you might use a polymer-modified slurry for better adhesion.
Check: Your mix should be thick enough to stick but not so thin it runs off. If unsure, start with a 3:1 ratio of cement to water by volume.
Choosing between them
Alright, listen up. You’ve got two options here – bonding agent or cement slurry. Both can get the job done, but it depends on what you’re dealing with.
First off, check the condition of your existing concrete. If it’s in good shape, both will work fine. But if it’s rough and porous, a bonding agent might be your best bet. It penetrates deep, creating a strong bond.
Now, how much strength do you need? If you’re just adding a thin layer, either could work. But for thicker layers or heavy traffic areas, you’ll want to check the required bond strength and go with what’s recommended.
Lastly, consider where you’re working. If it’s an area that gets wet often or sees a lot of freeze-thaw cycles, you might want to lean towards a cement slurry. It provides a better seal against moisture.
How Bonding Actually Works: Chemical Vs Mechanical Mechanisms
Chemical adhesion uses a bonding agent to form a molecular bond with the old concrete, creating a cohesive layer that resists separation. Mechanical interlock relies on a roughened surface that the new material can grip as it cures. In DIY repairs, you often see a combination of both for the strongest result.
Surface prep drives both mechanisms: cleaning removes contaminants, while creating a profile gives the new layer something to grip. Controlling moisture and porosity helps the chemical and mechanical parts work together rather than fight each other. A practical approach is to use bonding agents for chemical adhesion and ensure a micro-mechanical key for interlock.
Chemical bonding (adhesives and polymers)
Chemical bonding uses adhesives, polymers, or epoxies to create molecular adhesion between new and old concrete. This is ideal for non-porous substrates and thin overlays.
Polymers and epoxies penetrate the substrate’s surface, forming strong chemical bonds. They’re great for sealing cracks or applying thin toppings.
To apply, clean the surface, remove any contaminants, and ensure it’s dry. Apply the bonding agent according to the manufacturer’s instructions, usually with a brush or spray. Allow it to cure as directed before proceeding.
Mechanical bonding (surface profile and keys)
Mechanical bonding relies on surface roughness, keys, or physical interlock created by abrasion or profiling. It’s essential for thick overlays and high-load areas.
Surface profile increases the contact area between old and new concrete. Keys are grooves cut into the substrate to provide additional mechanical interlock.
Create a profile using a surface preparation tool or by chipping away at the concrete. For keys, use a saw or router. Ensure the surface is clean, dry, and free of contaminants before proceeding.
When to combine methods
The best results often come from combining chemical adhesion with mechanical interlock. This is especially true for vertical surfaces or high-load areas like foundations, retaining walls, or bridge decks.
First, prepare the surface mechanically as described above. Then, apply a bonding agent or primer to create chemical adhesion. This combination provides superior long-term performance by preventing delamination and increasing overall strength.
Always follow manufacturer’s instructions for specific products and application techniques. Ensure the environment is suitable for curing, with no risk of frost damage or excessive heat.
Surface Preparation — Step-by-Step Checklist
Assess the concrete for soundness and moisture risk before you start. Look for cracking, scaling, or delamination that could undermine bonding. If unsure, perform a quick moisture check per product instructions.
Clean thoroughly to remove loose material, curing compounds, and sealers. Allow the surface to dry as required by the product you plan to use, and protect the area from rain or rapid drying. A sound base is the foundation of a durable bond.
Step-by-Step Process
Before you start bonding new concrete to old, follow this step-by-step checklist for surface preparation. It ensures a solid base and maximizes bond success.
- Assess condition: Check existing concrete for cracks, scaling, delamination, and moisture issues. Perform a moisture test if unsure.
- Clean thoroughly: Remove loose material, dust, curing compounds, and sealers using a sweep and degreaser. Allow complete dry time.
- Remove unsound concrete: Chisel out damaged slabs or edges to establish solid boundaries and create a clean base.
- Create proper profile: Roughen the area by grinding, shot-blasting, or wire-brushing to achieve a mechanical key with a defined peak-to-valley depth.
- Degrease and contaminate control: Eliminate oil, grease, and contaminants using appropriate cleaners. Rinse thoroughly and avoid leaving residues.
- Final checks: Verify dryness, temperature, and ambient conditions. Set up proper safety PPE, ventilation, and dust control.
- Plan for priming/bonding agent: If required, plan for any priming or bonding agent steps before applying new concrete.
- Safety first: Always prioritize safety by wearing appropriate PPE, using proper ventilation, and controlling dust.
Quick rule: Skipping these steps can lead to bond failure and costly repairs down the line. Don’t rush; prep is key!
Cleaning and contaminant removal
Before you start bonding, clean the surface thoroughly to remove any contaminants that could hinder adhesion.
- Pressure wash: Use a pressure washer with a suitable nozzle to remove dirt, dust, and loose material. Be careful not to damage the surface.
- Degrease oil stains: Apply a degreaser specifically designed for concrete. Let it sit, then scrub and rinse thoroughly.
- Remove paint/ sealers: Use a paint stripper or suitable solvent to remove any paint, sealers, or other coatings. Follow the manufacturer’s instructions.
- Eliminate tree sap: Apply a concrete cleaner or use a mixture of water and bleach (1 part bleach to 3 parts water) to remove tree sap. Scrub and rinse well.
- Deeper removal: For stubborn contaminants, you may need to use specialty cleaners or consult a professional.
Quick rule: A clean surface is crucial for optimal adhesion. Don’t skip this step; it’s the foundation of your repair!
Removing unsound concrete and feather edges
Before you start repairing, remove any damaged or unsound concrete to ensure a durable repair.
- Locate delaminated areas: Tap the surface with a hammer. Unsounded areas will sound hollow.
- Chisel out damage: Using a chisel and hammer, carefully chip out delaminated or spalled material to create solid edges for repair.
- Avoid feathered edges: Ensure you have well-defined, square edges. Feathered edges weaken the bond and can lead to failure.
- Remove loose debris: After chiseling, remove all loose debris using a brush or vacuum to create a clean base for repair.
Quick rule: Removing unsound concrete might seem like extra work, but it’s essential for a strong, lasting repair. Don’t cut corners here!
Achieving the correct surface profile and dampness
Before applying new concrete, prepare the surface to achieve optimal adhesion through mechanical bonding.
- Mechanical abrasion: Use a grinder or shot-blasting equipment to expose the aggregate. This creates a rough texture for better adhesion.
- Dampen the surface (but don’t pond): Before applying many products, dampen the surface to improve adhesion. Avoid leaving standing water as it can weaken the bond.
- Check manufacturer guidelines: Always follow the manufacturer’s recommendations for surface preparation and profile depth.
- Industry standards: Familiarize yourself with industry-standard surface-profile requirements (e.g., 0.5mm – 1mm for most applications).
Quick rule: Achieving the correct surface profile and dampness is crucial for mechanical bonding. Don’t guess; measure and follow guidelines!
Application Methods and Practical Best Practices
Start with surface prep that cleanly exposes a sound substrate, roughened as needed for both bonding agents and slurries. Choose the method based on patch depth, exposure, and whether you need chemical adhesion or structural build.
For bonding agents, apply primer as directed and avoid puddling. For cement slurry, mix and spread to form a uniform layer without laitance or blistering, following the product instructions for thickness and curing. Monitor cure conditions and adjust as needed to prevent cracks or debonding.
Applying bonding agents (primers/adhesives)
Bonding agents, like primers and adhesives, are typically applied using a brush, roller, or spray. Follow product instructions for the best results.
Brush/roller: Apply evenly, working in small sections to prevent puddling. Use even strokes, ensuring full coverage without leaving dry spots.
Spray: Maintain a consistent distance from the surface and use steady, overlapping passes for even coverage. Be mindful of overspray and protect nearby areas.
Re-coat windows as needed, but don’t exceed the product’s pot-life to maintain effectiveness. Always follow manufacturer guidelines for coverage and tack time.
Preparing and applying cement slurry or scratch coat
Cement slurry, also known as a scratch coat, is mixed according to manufacturer proportions. Don’t guess; follow the mix ratio for best results.
Use a trowel or troweled to press the slurry into the substrate. Work in small sections, ensuring full contact and penetration. Aim for a consistent 1/8″ to 1/4″ thickness.
Apply using a trowel or brush, working quickly and evenly. Avoid laitance (surface cement paste) buildup by keeping the mix consistent and applying promptly after mixing.
Allow the slurry to cure according to manufacturer recommendations before proceeding with the next step in your project.
Surface wetting, temperature, and curing tips
Wet the surface lightly but evenly using a fine mist or damp cloth. Avoid pooling water, which can weaken the bond.
Apply bonding agents and slurries in temperatures between 50°F (10°C) and 90°F (32°C). Extreme heat or cold can affect curing and bonding.
Follow manufacturer curing recommendations to prevent rapid moisture loss or delayed strength gain. Use wet burlap, plastic sheeting, or other approved methods for proper curing.
Monitor the surface closely during curing. Look out for signs of dusting (indicating insufficient water), delamination (peeling), or color changes, which may require additional attention and remediation.
Tools, Materials, and Safety Checklist
Have the basics: brushes, stiff broom, vacuum, chisel, putty knife, trowel, float, mixing paddle, and a drill with mixer. Gather bonding agents, cementitious patch or mortar mixes, and any required primers or crack-injection products.
Pack safety gear: eye protection, gloves, a respirator or dust mask, long sleeves and pants, non-slip footwear, and ventilation guidance. Keep PPE handy and follow site rules for dust and fumes. Store and label materials properly to prevent mix-ups.
Essential Tools and Equipment
Before you start, ensure you have all the necessary tools for a smooth repair process.
- Grinders: For removing old concrete and preparing surfaces. Skip this and you’ll struggle to achieve a sound substrate.
- Pressure washers: To clean surfaces thoroughly. Neglecting this can lead to bond failure.
- Chisels & Hammers: For chipping away unsound concrete. Don’t skip, or you’ll end up with weak spots.
- Stiff-bristle brushes: To remove loose material and dust. Without this step, your bond won’t be strong.
- Mixing drills & paddles: For mixing bonding agents and mortars. Skipping this can result in improperly mixed materials.
- Trowels & Floats: To apply and smooth out patches. Don’t skip, or you’ll end up with an uneven surface.
- Testing tools (moisture meters, pH testers): To ensure a sound substrate for bonding. Without testing, you risk bond failure.
- Vacuum: For cleaning up dust and debris. Ignore this, and your bond will be weak.
Quick rule: Always have the right tool for the job to ensure a strong, lasting repair.
Typical Materials and Product Selection Tips
Choose the right products to ensure compatibility and longevity of your repair.
- Bonding agents: Epoxy or acrylic? Check datasheets for compatibility with old concrete. Wrong choice can lead to bond failure.
- Cementitious patch/mortar mixes: Latex-modified cement, polymer-modified blends? Check warranties and longevity claims. Incompatibility can cause early deterioration.
- Crack/injection products: Choose based on crack width and depth. Wrong product can result in ineffective repairs.
- Primers: Ensure they’re compatible with your bonding agent. Wrong primer can hinder adhesion.
Quick rule: Always check datasheets, warranties, and compatibility to ensure a lasting repair.
PPE and Jobsite Safety
Safety first! Protect yourself and your workspace before starting any repair work.
- Gloves: Protect hands from chemicals and sharp edges. No gloves mean risking injuries.
- Eye protection (safety glasses): Shield eyes from debris and splashes. Without it, you’re at risk of eye injuries.
- Respirator/dust mask: Protect lungs from dust and solvents. Skip this, and you could inhale harmful particles.
- Long sleeves/pants & non-slip footwear: Protect skin from chemicals and prevent falls. Inadequate protection can lead to injuries.
- Ventilation: Ensure proper airflow to reduce dust and solvent exposure. Poor ventilation can cause health issues.
- Hearing protection (for grinders): Protect ears from loud noises. Without it, you risk hearing damage.
- Safe handling/storage of adhesives & cementitious materials: Follow manufacturer guidelines to prevent accidents and ensure product effectiveness.
Quick rule: Always prioritize safety to protect yourself and your workspace.
Quality Checks and Visual Checkpoints After Application
Look for initial bond success by checking for tackiness and a cohesive bond when you touch the surface lightly. A soft surface or visible bubbling is a warning sign to recheck the preparation and product compatibility.
During cure, monitor color uniformity and edge integrity, and watch for delamination or voids. Document progress with notes and photos, and plan follow-up tests if the project is high-stakes or shows signs of trouble.
Quick on-site checks (tap test, visual inspection)
After applying the new concrete, use this checklist to quickly check if it’s bonding well with the old surface.
- Tap test: Gently tap the surface with a trowel or hammer. A solid, clear sound indicates good bonding.
- Visual inspection: Look for any gaps between the old and new surfaces. Uniform contact means good bonding.
- Blistering: Check for any blisters or bubbles on the surface. These indicate poor bonding.
- Edge check: Inspect edges for any separation from the old surface.
- Color uniformity: Ensure the new concrete matches the color of the old one, indicating even curing.
- Air voids: Look for air pockets or voids on the surface. These can weaken the bond.
- Moisture content: Check if the surface feels damp but not wet. Too much moisture can cause poor bonding.
- Temperature check: Ensure the surface temperature is within the recommended range for curing.
Quick rule: If anything seems off, stop and investigate further to prevent bigger issues later on.
Formal adhesion/adhesive tests
For critical or warranty work, use these tests to confirm the bond’s strength and durability.
- Pull-off test: Use a pull-off testing machine to measure the bond’s strength in pounds per square inch (psi). Follow manufacturer guidelines for proper application and interpretation of results.
- Shear bond tests: Apply force parallel to the bond line using a shear testing machine. This measures the bond’s resistance to shearing forces.
- Adhesion test standards: Follow ASTM D4541 or other relevant standards for pull-off and shear bond tests.
- Product guidance: Always follow the manufacturer’s recommendations for testing their specific bonding agents or cement slurries.
- Documentation: Keep detailed records of test results, including dates, locations, and test methods used.
Quick rule: Don’t rely solely on visual checks. Formal tests provide objective data for critical bonds.
What failure looks like and early warning signs
Regularly inspect the bond for these signs of inadequate bonding to prevent major failures.
- Delamination: Look for any peeling or flaking of the new concrete from the old surface. This indicates a weak bond.
- Hollow sounds: Tap the surface with a hammer. A hollow sound indicates a lack of adhesion and potential delamination underneath.
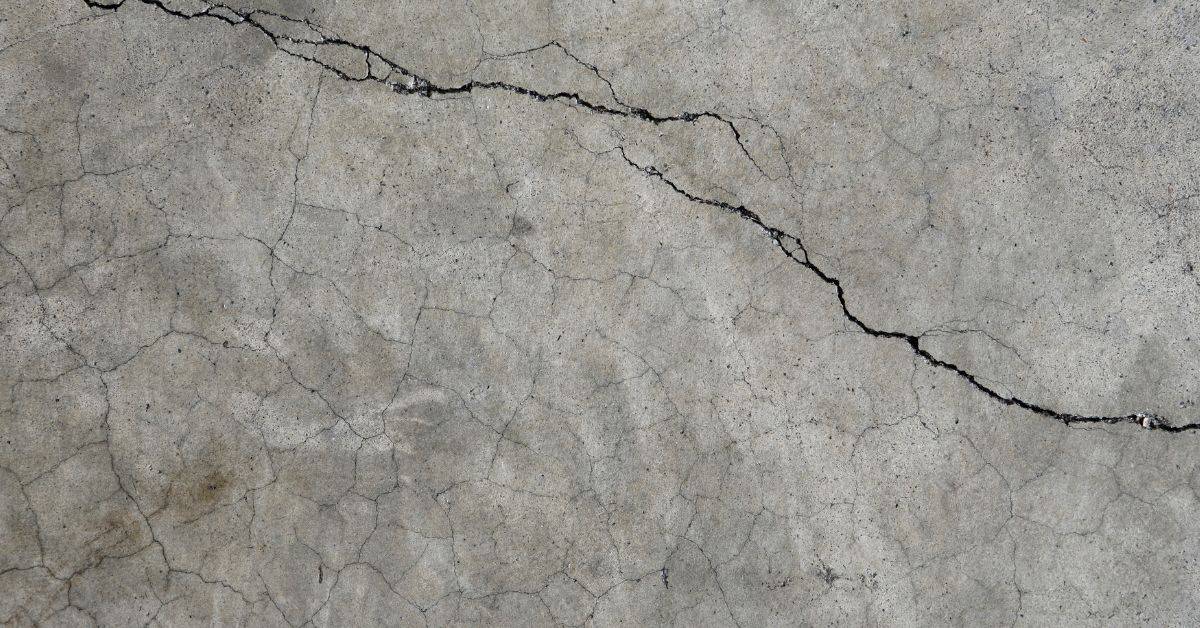
- Early cracking: Check for any cracks, especially at the bond line. These can indicate stress from poor bonding.
- Edge separation: Inspect edges for any signs of lifting or separation from the old surface.
- Blistering: Look for any blisters or bubbles on the surface, indicating trapped air or moisture that could weaken the bond.
- Air voids: Check for any air pockets or voids in the new concrete. These can reduce its strength and durability.
Quick rule: If you spot any of these signs, stop and investigate further to prevent major failures that could compromise the structure’s integrity.
Cost, Durability, and Lifecycle Considerations
Weigh material costs against labor time and required tools. Bonding agents may offer faster turns on small jobs, while slurry builds can handle larger fills more quickly in some cases. Look for value in long-term performance and maintenance needs rather than just upfront price.
Consider expected service life, exposure, and potential for future movement. Factor in rework ease and the availability of compatible primers or injections when planning the project scope. Use these inputs to pick the option that balances cost with durability.
Factors that drive cost
When comparing bonding agent vs cement slurry, several factors influence the upfront costs. First off, consider the material prices per square foot. Bonding agents are typically more expensive than cement slurry due to their specialized formulations.
Labor intensity also plays a significant role. Applying a bonding agent often requires less labor and time compared to mixing and applying cement slurry. However, skilled labor may be needed for both methods to ensure proper application.
Site access is another cost driver. If the area is hard to reach or requires special equipment like scaffolding, expect higher costs. Prep time also matters – bonding agents usually require less surface preparation than cement slurry.
Durability in real-world conditions
The longevity of your bond depends on how well it holds up under real-world conditions. Freeze-thaw cycles, moisture, and load can all impact durability. Bonding agents often perform better in harsh conditions due to their superior adhesion and flexibility.
Moisture exposure is a significant concern. Cement slurry can degrade over time when exposed to water, leading to reduced bond strength. High-performance adhesives are less affected by moisture but come at a higher cost.
Chemical exposure also influences longevity. If your substrate is likely to be exposed to chemicals (like in a garage or workshop), consider using a bonding agent designed for chemical resistance.
When replacement is more economical
While patching with either bonding agent or cement slurry can extend the life of your concrete, it’s not always the most cost-effective solution. Extensive movement, multiple full-depth cracks, and widespread deterioration are signs that replacement might be a better option.
Extensive movement indicates that the substrate is no longer stable. Patching won’t fix this issue at its root, and the new bond will likely fail over time. The same goes for multiple full-depth cracks. These suggest that the concrete has lost its integrity and can’t support a strong bond.
Widespread deterioration also points to replacement being more economical. If large areas of your concrete are crumbling or delaminating, it’s better to start fresh rather than trying to patch and bond over failing substrate.
Common Mistakes, Troubleshooting, and Repair Strategies
Skipping thorough surface prep is a primary cause of failures; laitance, oil, or dust can sabotage adhesion. If you spot this early, re-clean and re-prepare the surface to restore bonding potential.
Watch for moisture and porosity issues, which can derail bonding; use moisture-tolerant systems or primers as directed. When problems arise, adjust the approach rather than forcing a poor patch, and plan for future maintenance moves like joints or re-bonding strategies.
Frequent mistakes to avoid
Here are common pitfalls to steer clear of when bonding new concrete to old.
- Inadequate surface prep: Skipping proper cleaning, removing laitance, and ensuring a sound key before applying the bonding agent can lead to poor adhesion. Always perform a scratch-trough test to verify a good key.
- Wrong product choice: Using the wrong bonding agent or cement slurry for your substrate condition can result in failed bonds. Match the product to the surface type and condition.
- Improper mixing: Not following the manufacturer’s guidelines for mixing and application can lead to weak bonds. Always mix and apply as directed.
- Over- or under-wetting: Too much or too little water can affect the bond’s strength. Be mindful of the water-cement ratio and avoid adding extra water at the job site.
- Poor curing practices: Exposing the newly bonded surface to rapid drying, freezing, or extreme temperatures can cause delamination. Protect the area with curing blankets, misting, or shade as needed.
Remember, prevention is cheaper than cure. Take your time and do it right the first time.
Environmental and timing issues
Temperature, humidity, and seasonal timing can impact bond success. Here’s how to navigate these challenges:
Temperature: Ideal bonding temperatures range between 50°F (10°C) and 90°F (32°C). In hot conditions, use cool water for mixing and protect the surface from rapid drying. In cold conditions, use warm water and consider using accelerators or heat blankets.
Humidity: High humidity can cause excessive moisture in the substrate, leading to poor adhesion. Use moisture meters to assess the substrate’s readiness and allow adequate cure time before bonding. Consider using moisture-tolerant bonding systems if high humidity is an issue.
Timing: Plan your bonding work during mild weather conditions whenever possible. Avoid bonding during extreme heat or cold, and ensure the surface has adequate time to cure before exposing it to harsh conditions.
How to fix a failed bond
If you find yourself with a failed bond, follow these steps for remediation:
Remove failed material: Carefully remove any loose or delaminated concrete using a chisel and hammer. Be sure to wear appropriate PPE during this process.
Assess the cause: Determine why the bond failed. Was it inadequate surface prep, wrong product choice, improper mixing, over- or under-wetting, or poor curing practices? Understanding the cause will help you choose the right course of action for reworking.
Re-profile and clean the surface: Re-profile the surface to ensure a sound key. Thoroughly clean the area using appropriate cleaning methods based on the substrate type. Allow the surface to dry before proceeding with bonding.
Choose an appropriate bonding method: Based on your assessment, select the right bonding agent or cement slurry for the rework. Follow the manufacturer’s guidelines for mixing and application, ensuring you avoid the mistakes that led to the initial failure.
Conclusion
Bonding new concrete to old is about getting the surface ready, choosing the right method, and following the steps without rushing. Do it right and you’ll avoid repairs, keep appearances clean, and protect against bond failure that shows up as cracks or hollow spots.
First, inspect and prepare the area thoroughly: clean all dust and debris, roughen slick edges, dampen the surface without leaving puddles, and then apply the chosen method exactly as the product guide instructs. Work in small sections, embed or press the new concrete into place as you go, and then cure according to the guidelines so the bond builds without cracks. Verify the bond with a simple test after initial set and before full backfilling or finishing, and avoid letting any step drag or be skipped.
Common mistakes to avoid include skipping surface preparation, using the wrong mixture or wrong ratio, and letting primers or slurry dry too long before applying the next layer. Safety rules are simple: wear eye protection and gloves, keep the area well ventilated, keep pets and kids away, and don’t mix or apply materials near heat or direct sun if the product guidance warns against it. Always test a small area first to confirm the bond and don’t proceed if anything looks off.
If you’re dealing with large structural cracks, extensive damage, or hard-to-reach areas, it makes sense to call a professional rather than push on alone. Stay methodical, pace yourself, and keep the work area clean and dry. With careful prep, the right method, and disciplined application, you’ll see a solid bond and a durable finish that stands up to use.
FAQ
1. How do bonding agent and cement slurry compare when attaching new concrete to old?
Bonding agent gives a chemical grip on the old surface, while slurry provides a mechanical bond as the new concrete wraps around it. Use a bonding agent for low- to mid-rough surfaces and when moisture control is good. Slurry is a straightforward option for rough or slightly damaged surfaces where a stronger mechanical bond is needed.
2. What surface prep steps improve bonding effectiveness?
Clean the old concrete thoroughly. Remove loose material, dust, oil, and paint. For best results, dampen the surface without standing water just before applying the bonding product or slurry.
3. Why is moisture control important during bonding, and how do I manage it?
Too much moisture can weaken the bond; drying the area can improve adhesion. If the surface is damp, use a compatible moisture-mighting method per the product you choose. Avoid applying bonding products to standing water or frozen surfaces.
4. What are practical post-bonding quality checks and how soon should I inspect?
Look for a uniform surface with no obvious gaps or delamination. Tap gently in several spots and listen for a solid sound. Recheck after curing time, and fix any obvious voids or loose patches before proceeding with further concrete work.