
Introduction
Debonding in concrete toppings happens when the new layer separates from the existing slab. This article explains why that happens and how to prevent it, with practical steps you can check on a home job. In plain talk, it often comes from not prepping the surface or skipping the right profile.
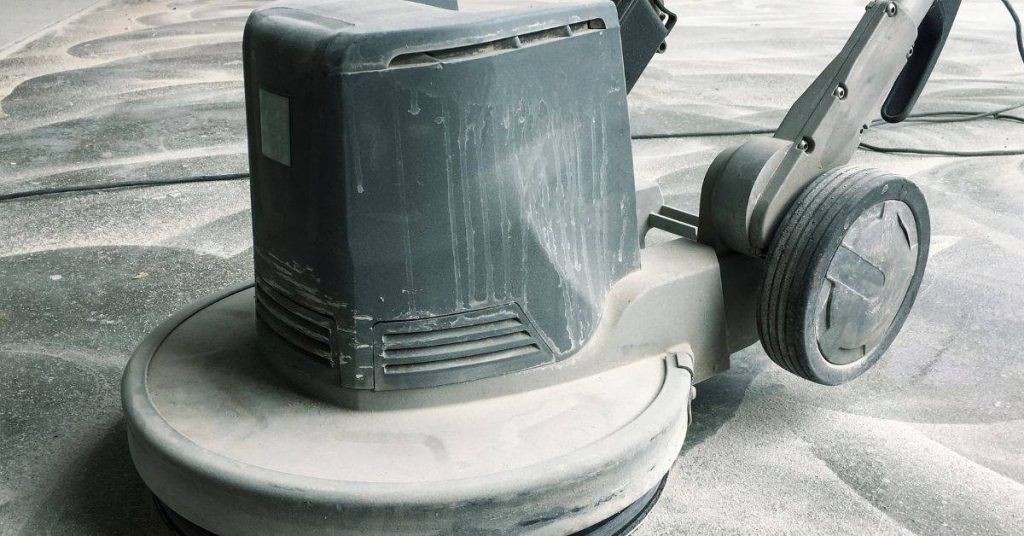
Surface preparation is the key step that gives the topping something to grab onto. Know the terms and aim for a rough, clean, and dry surface; check CSP guidance on the product label and follow manufacturer instructions. Tools and methods range from hand tools for small jobs to grinders or scarifiers on larger areas, and you should remove dust, oils, and laitance before applying.
Key takeaways
- Define surface preparation for toppings as exposing a clean, rough, bond-ready CSP.
- Choose appropriate CSP level to maximize mechanical interlock and adhesive grip.
- Wire brushing, grinding, or shot blasting are common surface preparation methods.
- Remove sealers and contaminants before overlay to prevent weak bonding.
- Verify surface readiness with CSP guidance, pull-off tests, and manufacturer instructions.
- Wear PPE and follow dust-control, vibration, and noise safety during prep.
Table of Contents
- Introduction
- Key takeaways
- What Is Surface Preparation for Concrete Overlays?
- Concrete Surface Profile (CSP) and Bond Mechanisms
- Common Surface Preparation Methods
- Removing Existing Sealers, Coatings, and Contaminants
- Tools and Materials Checklist
- Standards, Testing, and Verification
- Common Mistakes That Lead to Overlay Debonding
- Preventing Debonding: Best Practices Before, During, and After Installation
- Conclusion
- FAQ
What Is Surface Preparation for Concrete Overlays?
Surface preparation for overlays means getting the substrate ready to receive toppings with a bond-focused approach. It differs from prep for new concrete because you must address existing remnants that prevent adhesion. The goal is a clean, profile-ready surface that the topping can grip.
Assess substrate conditions that drive prep steps: laitance and dust, curing residues, coatings or sealers, and any cracks or rough patches. Critical readiness tests include moisture checks, pH checks, surface profiling, and adhesion cues from test patches. Documenting the prep steps helps prevent future delamination and failures at the interface.
Definition and scope
Surface preparation for concrete overlays is about creating a bondable substrate. It’s different from preparing new concrete or applying coatings or stains.
The goal? To make the existing slab compatible with your overlay, so it sticks like glue. This involves cleaning, profiling, removing contaminants, and managing moisture.
Remember, preparation is key. Skimp on this step, and you’re asking for trouble later.
How poor preparation leads to debonding
Inadequate surface prep sets the stage for overlay failure. Here’s how:
First, contaminants like dirt, grease, or curing residues act like a barrier. They stop your overlay from bonding.
Next, an inadequate surface profile means there’s not enough ‘tooth’ for the overlay to grip onto. It’s like trying to stick something smooth on another smooth surface – it won’t work.
Lastly, trapped moisture can cause your overlay to lift or peel. This is why moisture management is crucial.
Concrete Surface Profile (CSP) and Bond Mechanisms
Concrete Surface Profile (CSP) describes the roughness that creates mechanical keying for toppings. Roughness and porosity influence how well adhesive contact forms and how the topping locks in. A proper CSP supports long-term bond durability.
Understand how surface roughness and substrate porosity interact with capillary action and mechanical interlock. Check ICRI guidance and manufacturers for the required CSP when using common toppings. On site, look for laitance, dust, oils, efflorescence, and any residual adhesives that could weaken bonding.
What CSP Means for Overlays
The Concrete Surface Profile (CSP) is like the texture of your concrete. It’s crucial for mechanical keying, which helps toppings stick.
Different overlay products need different profiles. Polymer-modified overlays, for instance, need a rougher profile than epoxy toppings.
To verify, check manufacturer specs and use ICRI guidance. Visual checks or their tests can help confirm the right profile.
Mechanical vs. Chemical Bonding
Overlays stick to concrete through two ways: mechanical interlock and chemical adhesion.
Mechanical interlock is like how a puzzle piece fits into another. It’s influenced by the CSP.
Chemical adhesion is when the overlay’s molecules bond with the concrete’s. Contaminants or sealers can disrupt both mechanisms, leading to debonding.
Common Surface Preparation Methods
Set the core goals for overlays: achieve the correct mechanical profile, remove laitance and contaminants, and verify moisture so you don’t trap it under the overlay. Avoid damaging the slab during prep. Choose methods that suit the substrate and the target CSP.
Mechanical methods include grinding, scarifying, and light shot blasting, each with different substrate impacts and dust controls. Chemical options like cleaners or etching have limits with sealed or dense concrete. After cleaning, manage moisture with proper testing to ensure a dry, bond-ready surface.
Mechanical methods (grinding, shot-blasting, scarifying)
Mechanical methods are the backbone of concrete surface preparation. They create a proper profile for overlays to bond with.
Grinding is ideal for small areas and tight spaces. It creates a smooth, consistent profile but can be slow and generate heat.
Shot-blasting is fast and effective on large surfaces. It produces a uniform profile but generates dust and requires proper containment.
Scarifying is aggressive, removing laitance and contaminants. It’s great for damaged or contaminated slabs but can be harsh, damaging the substrate if not done carefully.
Abrasive and water blasting, and high-pressure washing
Blasting and high-pressure washing remove contaminants and laitance. They’re quick but can damage the substrate if not done right.
Abrasive blasting uses grit to clean the surface. It’s effective but generates dust and requires proper safety measures.
Water blasting is gentler, using high-pressure water with or without added abrasives. It’s safer but may not remove all contaminants.
High-pressure washing is ideal for light cleaning. It’s fast and safe but may not be enough on its own.
Chemical etching and specialty treatments
Chemical methods can enhance bonding, but they’re no replacement for mechanical prep. They work best when used in combination with other methods.
Acid etching is effective on dense concrete. It requires proper safety measures, ventilation, and neutralization of the acid afterward.
Strippers remove sealers and contaminants but don’t create a profile. They’re useful for preparing sealed surfaces for mechanical prep.
Primers enhance bonding and can be used to stabilize dusty surfaces. They won’t replace proper surface preparation, though.
Removing Existing Sealers, Coatings, and Contaminants
Develop a quick protocol to spot sealers, curing compounds, coatings, and surface contaminants. Look for greases, efflorescence, and dusty residues as clues. Symptom cues help decide the removal path before overlay work begins.
Use testing methods to confirm the type and presence of contaminants, such as solvent compatibility tests or spot chemical tests. Create a decision framework for chemical stripping, abrasive removal, or mechanical methods based on substrate condition and topping compatibility. After removal, verify surface profile and cleanliness to ensure a solid bond.
Identifying sealers and contaminants
Start by checking for obvious signs like shiny surfaces, discoloration, or a film. For sealers:
- Water droplet test: Apply a drop of water. If it beads up, there’s likely a sealer.
- Etch test: Apply a weak acid (like lemon juice). If it fizzes, there’s a chance of a sealer or salt contamination.
For oils and grease:
- Look for dark spots or streaks. Wipe with a paper towel dampened with solvent (like acetone) to confirm.
If unsure, take samples for lab testing using methods like Fourier Transform Infrared Spectroscopy (FTIR).
Removal techniques and when to use them
Chemical strippers are good for thin, water-based sealers. Apply, agitate, and rinse off. Use safety gear and follow manufacturer’s instructions.
Solvent strippers work on oil-based coatings but can damage concrete if left too long. Spot test first.
Mechanical removal, like grinding or scarifying, is harsh but effective for thick coatings or contaminants. It requires heavy equipment and creates dust.
Abrasive blasting (shot-blasting) is aggressive and messy but can remove multiple layers at once. Use proper PPE and ventilation. Multiple steps may be needed to fully remove residues.

Tools and Materials Checklist
Organize tool categories by the overlay method and target CSP, accounting for substrate condition. Prepare a plan that matches the job size and complexity. Have a quick reference for what goes with which prep path.
Detail phase-by-phase gear: demolition tools, grinding or scarifying equipment, cleaning supplies, moisture and adhesion tests, and priming materials. Include safety gear, dust controls, and maintenance schedules to keep tools ready and compliant onsite.
Equipment by preparation method
Use this checklist to select the right equipment for your concrete overlay project, based on the chosen preparation method and desired Surface Profile (CSP).
- Grinders/Scarifiers: Choose between walk-behind or handheld models. Consider power requirements and access needs.
- Shot Blasters: Select a machine that suits your substrate condition, from light to heavy duty.
- Pressure Washers: Opt for high-pressure units with suitable PSI and GPM ratings for your surface profile target.
- Dust Containment Systems: Use vacuum attachments or wet collection methods to control dust and ensure a clean working environment.
- Demolition Hammers/Jackhammers: Select the right tool for removing old coatings or damaged concrete, based on substrate condition.
- Surface Profiling Tools (e.g., Needle Guns): Choose tools that create the desired CSP, from light to aggressive profiling.
- Moisture/Vapor Barriers: Use appropriate barriers to manage moisture levels and prevent debonding.
- Safety Equipment (PPE): Ensure you have proper safety gear, including ear protection, eye/face shields, gloves, and work boots.
Quick rule: Always consider the substrate condition, desired CSP, and potential hazards when selecting equipment.
Consumables, primers, and test kits
Use this checklist to select essential consumables, primers, and test kits for your concrete overlay project.
- Grinding/Scarifying Discs: Choose discs with the appropriate grit size (e.g., 16-30) based on your desired CSP.
- Blasting Media: Select a suitable media type (e.g., steel shot, glass beads) for your chosen preparation method.
- Cleaners/De-greasers: Use cleaners that effectively remove contaminants without affecting the concrete’s surface profile.
- Bonding Agents/Penetrants: Choose a primer or penetrant suitable for your substrate condition and overlay system.
- Moisture Meters: Select meters with accurate readings (e.g., RH, pH/alkalinity) to ensure proper surface preparation.
- Surface Profile Gauges: Use gauges that measure CSP accurately, helping you achieve your desired profile.
- Concrete Patch Compounds: Choose patch materials that match the substrate’s strength and provide a suitable base for overlay application.
- Safety Supplies (e.g., Respirators): Ensure you have proper safety gear to protect against harmful dust, fumes, or chemicals.
Quick rule: Always choose consumables and test kits that are compatible with your chosen overlay system and preparation method.
Visual checkpoints and test patches
Before applying the concrete overlay, create small test patches to confirm profile, adhesion, and compatibility. This checklist helps you ensure a successful installation.
- Surface Profile Verification: Use a surface profile gauge to measure the CSP of your test patch, ensuring it matches your desired target.
- Moisture/Vapor Pressure Checks: Test moisture levels in the test patch using appropriate meters (e.g., RH, pH/alkalinity) to ensure proper adhesion.
- Adhesion Testing: Perform pull-off or push-off tests on the test patch to confirm adequate bond strength with the overlay system.
- Compatibility Testing: Observe the test patch for any signs of incompatibility, such as discoloration, blistering, or delamination.
- pH/Alkalinity Tests: Measure the pH level of the substrate to ensure it’s within acceptable ranges for proper overlay adhesion.
- Edge Preparation Checks: Inspect the edges of the test patch to confirm they are properly prepared and will not cause delamination or other issues.
- Cleanliness Verification: Ensure the test patch is clean, dry, and free from contaminants before applying the overlay system.
Quick rule: Always perform visual checkpoints and create test patches to confirm your preparation methods and materials are suitable for your specific project.
Standards, Testing, and Verification
Outline the standards that govern overlays, such as ICRI guidance and relevant ASTM tests for surface prep, bonding, moisture, and curing. Translate those into practical checks you can perform in the field. When in doubt, use product datasheets as the reference point.
List common verification tests and what they show, including surface profile checks, moisture tests, and adhesion pull-offs. Use a decision framework to decide when to involve a third party or a licensed professional, especially for ambiguous conditions or code requirements.
Standards and specifications to consult
Before you start, familiarize yourself with these industry standards:
ICRI 03732.1-2018: Guide for the Inspection of Concrete Surfaces Prior to Application of Coatings.
ASTM D6428/D6428M-15: Standard Test Method for Bond Strength of Mastic Asphalt and Other Materials Used in Highway Construction.
Check with your overlay manufacturer too. They’ll have specific requirements.
On-site tests: adhesion, moisture, and pH
These on-site tests help ensure a strong bond:
Adhesion Test (Pull-off): Measures the force needed to pull off a small disc glued onto the surface. It tells you if your substrate’s ready for bonding.
Moisture Test: Checks relative humidity or moisture content with meters. Too much moisture can ruin your overlay.
Surface pH Test: Measures alkalinity. Concrete should be between 6-9.5. If it’s too high, etching might be needed.
Follow manufacturer criteria for pass/fail numbers.
Common Mistakes That Lead to Overlay Debonding
Identify frequent prep mistakes: missing profile, surface contamination, moisture issues, incompatible primers, or poor patching. On site, use simple checks such as visual cues, roughness tests, and quick moisture observations to catch problems early.
Note installation errors like improper bonding agents, inappropriate topping thickness, or inadequate cure protection. Use pull-off tests, profile gauges, and moisture readings to guide corrective actions, including reprofile, re-etch, or full removal when needed.
Preparation errors (insufficient profile, residual contaminants)
Proper surface preparation is crucial to prevent debonding. Avoid these common mistakes:
- Insufficient Profile: Inadequate profiling leaves a smooth surface with no mechanical bond for the overlay. Solution: Use abrasive blasting or scarifying to create a rough profile.
- Residual Sealers: Old sealers prevent new materials from bonding. Solution: Remove existing sealers using appropriate strippers and mechanical means if necessary.
- Oil, Grease, or Salt Residue: Contaminants weaken the bond. Solution: Clean surfaces with degreasers or other suitable cleaners before overlay application.
- Incompatible Primers: Using the wrong primer can lead to debonding. Solution: Always use primers designed for your specific overlay system.
Remember, proper preparation is key to a strong bond. Don’t skip these steps!
Environmental and timing mistakes (moisture, temperature, curing)
Ambient conditions play a significant role in overlay success. Avoid these environmental pitfalls:
- High Moisture: Excess moisture weakens the bond and can cause delamination. Solution: Test for moisture using a calcium chloride test or a hygrometer. Postpone application if moisture levels are high.
- Low Temperatures: Cold temperatures slow curing and weaken the bond. Solution: Keep temperatures above 50°F (10°C) during application and curing.
- Inadequate Curing: Insufficient cure time weakens the overlay. Solution: Follow manufacturer’s guidelines for proper curing times and conditions.
Monitor environmental conditions closely to ensure optimal overlay performance.
Installation and product compatibility errors
Proper installation techniques and compatible products are vital for a strong bond. Avoid these common mistakes:
- Under or Over-Torqued Trowel: Incorrect trowel pressure affects the bond. Solution: Maintain consistent, recommended trowel pressure throughout application.
- Excessive Thickness: Applying too much material weakens the overlay and increases the risk of debonding. Solution: Follow manufacturer’s guidelines for appropriate thickness.
- Improper Bonding Agents: Using the wrong bonding agent can lead to failure. Solution: Always use bonding agents designed for your specific overlay system.
- Fast-Setting Toppings: Quick-setting toppings don’t allow enough time for proper bonding. Solution: Use toppings with appropriate setting times and extend cure protection if necessary.
Attention to detail during installation is crucial for a successful overlay.
Preventing Debonding: Best Practices Before, During, and After Installation
Start with pre-install inspections of substrate readiness, cracks, moisture, and joint conditions. Confirm compatibility of the chosen coating system with the substrate. Ensure flatness and joint details are within acceptable ranges before proceeding.
Collect manufacturer guidance and compatibility checks by compiling product data sheets and cure requirements. Align priming, bonding agents, and toppings under a single system to minimize surprises during install. Maintain moisture control, environmental windows, and post-install care to protect the bond over time.
Pre-installation checklist and contractor responsibilities
Before any overlay installation, it’s crucial to ensure the substrate is ready. Use this checklist to assess the condition and sign off on the surface.
- Inspect existing substrate: Check for cracks, delamination, or other defects that could compromise adhesion.
- Moisture test: Conduct a calcium chloride test (or relative humidity/CM test) to ensure moisture levels are within acceptable limits. Excessive moisture can lead to debonding.
- Check alkalinity: Test the pH level of the substrate. High alkalinity can affect primer adhesion and cause debonding.
- Verify floor flatness: Ensure the floor meets the required F-numbers (F30, F60, etc.) to prevent issues with overlay application and performance.
- Check joint conditions: Inspect expansion joints for proper spacing, width, and depth. Damaged or improperly spaced joints can cause stress on the overlay.
- Compatibility check: Ensure the chosen coating system is compatible with the substrate material (concrete, plywood, etc.).
- Gather product data: Collect and document data sheets for all products to be used, including primers/tillers, recommended surface prep methods, cure times, and moisture/vapor barrier requirements.
- Perform test patch: Apply a small test patch of the overlay system to confirm adhesion and performance on the specific substrate. Skipping this step can lead to costly mistakes.
- Sign off: Once all checks are complete, sign off on the substrate’s readiness for installation.
Quick rule: Always document each step of the pre-installation checklist and keep records on file. This protects both you and the homeowner in case of disputes or warranty claims.
Installation techniques and quality control
Proper installation is key to preventing debonding. Follow these tips for a successful overlay application.
Start by applying the recommended primer evenly across the surface. This creates a better bond between the substrate and the overlay. Use a notched trowel or roller, depending on the product’s specifications.
Working time is critical. Follow the manufacturer’s guidelines for mixed ratios and pot life to ensure the overlay remains workable during application. Rushing the process can lead to poor adhesion and debonding.
Apply the overlay in thin, even layers according to the manufacturer’s recommended thickness. Thicker layers can trap moisture and cause delamination over time. Use a straight edge or level to ensure proper application and prevent uneven surfaces.
Quality control checks are essential during installation. Inspect the overlay for any signs of debonding, such as bubbling, blistering, or peeling. Address these issues immediately to prevent them from spreading.
Post-install maintenance and inspection schedule
Regular maintenance and inspections are crucial for detecting early signs of delamination and extending the life of your concrete overlay. Follow this checklist to keep your overlay in top condition.
- Initial cure: Maintain recommended curing conditions (temperature, humidity) until the overlay is fully cured. Skipping this step can lead to weak adhesion and debonding.
- Protect from traffic: Keep foot traffic and heavy loads off the overlay during the initial cure period to prevent damage.
- Regular inspections: Conduct visual inspections every 3-6 months for signs of delamination, such as cracking, peeling, or bubbling. Early detection allows for quick repairs before issues worsen.
- Clean regularly: Remove dirt, debris, and stains promptly to prevent buildup that can compromise adhesion over time.
- Seal annually: Apply a recommended sealer to protect the overlay from moisture intrusion and other environmental factors. This helps maintain adhesion and prevents debonding.
- Monitor joint movement: Inspect expansion joints for proper functioning. If they become clogged or damaged, they can cause stress on the overlay and lead to delamination.
- Address issues promptly: If you notice any signs of debonding, address them immediately. Small problems can quickly become large, costly ones if left untreated.
- Document maintenance: Keep records of all maintenance activities and inspections. This helps track the overlay’s performance over time and aids in future troubleshooting.
Quick rule: Always follow manufacturer-recommended maintenance guidelines to ensure your warranty remains valid and your overlay performs as expected.
Conclusion
The key to a durable concrete overlay is solid surface prep and careful execution. Get the bond right, and the result will look good, wear well, and stay intact with normal use and simple maintenance.
Before you pour, check the surface profile and cleanliness, remove or neutralize coatings and contaminants, verify the area is dry and properly cured, and verify you have the right tools, materials, and a safe working plan. Inspect a small test spot first, follow the standards you’re using, document results, and then proceed in stages with adequate ventilation and PPE. Confirm adhesion with a simple pull test or per your project standards, and keep your work area organized so you don’t miss a critical step.
Common mistakes to avoid are skipping proper surface preparation, using the wrong CSP, and rushing the install or skipping testing. Don’t overspread or overwork the surface, and respect primer and cure times. Always wear eye and respirator protection, and don’t work in temperatures outside the recommended range or when rain is in the forecast.
If you’re near the edge of these guidelines or your surface is particularly poor, consider bringing in a qualified pro rather than guessing. A professional can spot trouble early and prevent costly fixes later. Stay steady, follow the checks you’ve learned, and you’ll finish with a solid, lasting overlay. You’ve got this.
FAQ
What is surface preparation in concrete toppings?
Surface preparation means making the concrete ready to receive a topping. It includes cleaning, roughening, and removing anything that can keep the overlay from sticking. If the surface isn’t prepared, the topping can fail early.
Why does proper surface preparation matter for bond?
A good bond depends on a clean, rough, and accepting surface. Poor prep leaves dust, oils, or laitance that act like a barrier. Skimp on prep and you’ll see debonding, flaking, or hollow spots down the line.
What are the key CSP terms I should know?
Concrete Surface Profile (CSP) is how rough the surface is. Higher roughness lets get a better bite for the topping. Don’t confuse CSP with cleanliness—both matter for a solid bond.
What tools and methods should I use for surface preparation?
Use the right tool for the job: grinders for light prep, scarifiers or planers for bigger areas, or shot blasting for heavy profiles. Follow the manufacturer’s instructions for the topping and the prep equipment. Clean the surface thoroughly after mechanical work before applying the overlay.