
Introduction
Blocking water stains on ceilings means stopping moisture and stains from showing through the paint by drying and prepping the surface before priming. You’ll want the area to feel dry, flat, and clean before you apply any primer. This is a hands-on, practical step you can handle with common tools and a bit of patience.
First, dry the stained area and investigate for any active leaks or damp spots. Clean the area gently, repair any damaged drywall if needed, and then test for dryness before you proceed with primer and paint. If in doubt, check the product label or manufacturer instructions for drying hints and surface prep guidelines specific to the materials you’re using.
Key takeaways
- Confirm moisture source first and fix leaks before any drying or priming steps.
- Verify ceiling is dry enough to prime by visual and tactile checks, not guessing.
- Use environmental controls like airflow and humidity management to promote even drying.
- Prepare the surface after drying with cleaning, chalk removal, and sanding as needed.
- Choose a stain-blocking primer or sealer compatible with your paint system.
- Apply primer evenly and follow manufacturer guidance for coats and drying cues.
- Safety: wear respirator, protect occupants, and ventilate during priming and painting.
Table of Contents
- Introduction
- Key takeaways
- Confirm and Fix the Source of Moisture First
- Verify the Ceiling Is Dry Enough to Prime
- Environmental Controls to Promote Safe Drying
- Prepare the Surface After Drying Is Confirmed
- Choose the Correct Stain-Blocking Primer or Sealer
- Application Best Practices for Priming and Painting over Stains
- Special Scenarios and Troubleshooting
- Tools, Materials Checklist and Visual Checkpoints Before You Paint
- Conclusion
- FAQ
Confirm and Fix the Source of Moisture First
Stopping the moisture source is non-negotiable before anything else. If the ceiling will keep leaking or sweating, primer and paint won’t fix the problem. Begin by identifying where the water is coming from—roof, plumbing, or condensation from humid spaces—and plan repairs accordingly.
Verify repairs with careful checks before touching visible stains. Look for ongoing drips, damp spots after rain, or unexpected new staining. When in doubt, consult manufacturer instructions, local building rules, or a licensed professional to confirm the fix is complete and persistent.
Common sources and how to inspect them
Before you start any repairs, find the source of your ceiling water stains. Here are some common culprits:
Plumbing: Check for leaks around pipes, vents, and drains. Look for water damage on ceilings directly below bathrooms, kitchens, or laundry rooms.
Roof: Inspect your roof for missing, damaged, or improperly installed shingles, tiles, or flashing. Water stains often appear around chimneys and vents.
HVAC: Inspect your HVAC system for condensation issues. Check for water damage around ducts and vents. If you’re unsure, consult a professional.
Condensation: Look for signs of excess moisture in attics or crawlspaces. Improper ventilation can cause condensation, leading to water stains on ceilings below.
Temporary containment and safety measures
While you’re scheduling repairs, take these temporary steps to prevent further damage:
Containment: Place a large bucket or pan under the leak to catch dripping water. This can help prevent further damage to your ceiling and floors.
Drying: Use fans to dry out affected areas. This can help prevent mold growth and reduce damage.
Safety checks: Turn off any affected systems, like HVAC or water supply, if necessary. Always prioritize safety before making repairs.
Verify the Ceiling Is Dry Enough to Prime
Dryness matters, so establish practical checks you can trust. Visual cues help, but also use a moisture meter or moisture indicator at representative locations. Confirm there are no active damp areas and that surfaces feel solid and dry to the touch.
Follow product labels and manufacturer guidance for when a surface is considered ready. Compare your observations with the tool results and any notes from the ceiling or substrate supplier. If you see lingering dampness, pause and recheck the repairs and ventilation before priming.
Using a moisture meter correctly
A moisture meter is your best friend here. It takes the guesswork out of drying.
First, take readings across the stained area. Then, check adjacent sound areas for comparison. Most meters read in percentage or relative humidity (RH).
Check your primer/paint’s manufacturer recommendations. They’ll tell you what moisture level is safe for priming and painting. Aim to be below that.
Visual and tactile checks
Your eyes and hands can spot trouble too. Look for dark spots, shiny areas (efflorescence), or salt deposits. These are signs of lingering moisture.
Feel the ceiling. If it’s cooler than surrounding areas or feels soft, there might be hidden moisture.
If you’re unsure, do a simple test. Wet a paper towel and place it on the suspect area. If it stays wet after a few hours, you’ve got moisture.
Test patch and adhesion checks
Before you prime the whole ceiling, do a test patch. Pick an inconspicuous spot. Apply your primer and let it dry according to the manufacturer’s instructions.
Now, lightly scratch at the primer with a nail or coin. If it flakes off easily, that’s bleed-through. You need more drying time.
If it sticks well, you’re good to go. But remember, this is just a test. Always check your whole ceiling before full application.
Environmental Controls to Promote Safe Drying
Ventilate the space to move moisture out and avoid trapping humidity. Use fans to circulate air and a dehumidifier if you have one, staying mindful of safe operation around the work area. Keep doors open to aid airflow where possible.
Work within the limits of your tools, materials, and building insulation. Check label directions for temperature and humidity ranges, and adjust within those guidelines. Plan drying with the space’s normal use in mind to prevent rewetting.
Ventilation and airflow strategies
Cross-ventilation is key to drying your ceiling quickly. Open windows or doors on opposite sides of the room to create a breeze.
Place fans at the edge of the room, blowing across the ceiling, not directly onto it. This moves air without spreading contaminants.
Use oscillating fans if available. They cover more area and help distribute heat evenly.
Dehumidifiers, heaters, and equipment use
Drying a ceiling is like Goldilocks – you want it just right. Too hot or cold, too humid or dry, can slow drying or cause more damage.
- Dehumidifier: Reduces moisture in the air. Ideal for damp climates or after water damage. Keep relative humidity below 50%.
- Heater: Speeds up drying by warming the area. Use when temps drop at night. Keep it below 80°F (27°C).
- Infrared heaters: Rentable, energy-efficient. Direct heat onto the ceiling for faster drying.
- Air movers (fans): Circulate air to speed up evaporation. Use with dehumidifiers or heaters.
- Thermohygrometer: Measures temp and humidity. Essential for monitoring conditions.
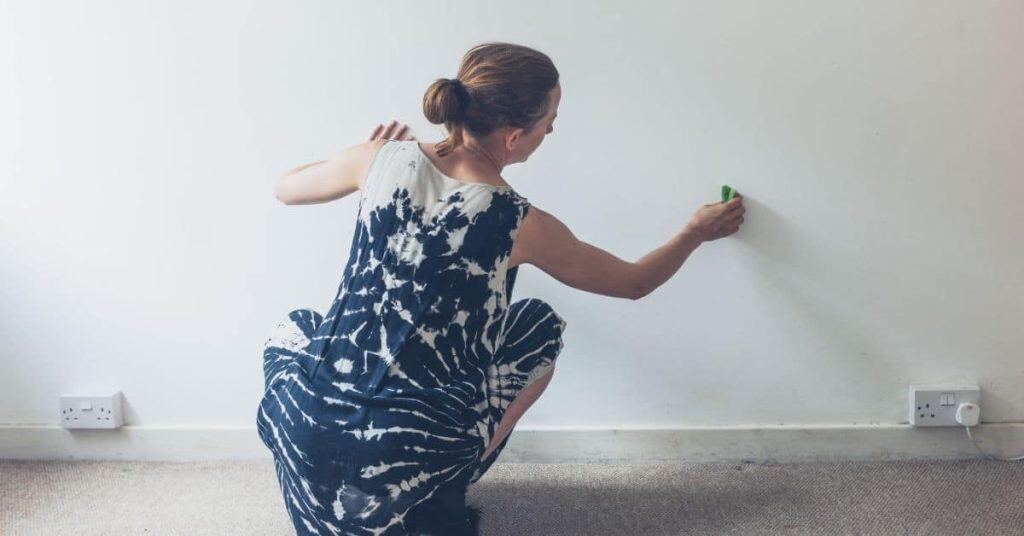
Prepare the Surface After Drying Is Confirmed
Clean the ceiling to remove dust, deposits, and any newly formed mildew. Lightly scuff or abrade the surface to improve primer adhesion once it’s dry. Remove any compromised paint or texture that may peel later.
Address residual stains or mildew with appropriate cleaners or compatible treatments per label instructions. Ensure the area is dry and free of cleaning residues before moving to priming. Keep the preparation focused on creating a sound, clean base for coating.
Cleaning and Mildew Remediation
Before you start, put on gloves, goggles, and a mask. Safety first.
For organic stains: Use a solution of 1 part bleach to 3 parts water. Apply with a spray bottle or brush, let it sit for 15 minutes, then scrub gently. Rinse thoroughly with clean water.
For mildew: If you see black or green spots, that’s mold. Use a solution of 1 cup bleach, 1 quart water, and 3 tablespoons detergent. Apply, let it sit, scrub, then rinse. If the area is large (more than 10 sq ft), consider hiring a professional for mold remediation.
Repairing Damaged Drywall or Texture
First, remove any loose material with a putty knife. Be careful not to damage the surrounding area.
For holes, use joint compound and a putty knife to fill them in. Let it dry according to the package instructions, then sand smooth using a fine-grit sandpaper.
To match texture, you might need to use a spray can texture applicator or hire a professional. The goal is to have an even surface for your primer and paint to adhere to.

Choose the Correct Stain-Blocking Primer or Sealer
Understand the main primer types and what they target for blocking water stains. Compare substrate compatibility, stain chemistry, and any VOC considerations that matter for your space. Choose a product that suits ceilings and texture that you have.
Rely on manufacturer recommendations and local rules to match the right primer to your ceiling; avoid guessing. If you’re unsure, check the product data sheet or label and confirm with the supplier or a pro. Select a sealer that can handle the expected stain depth and weathering conditions in your room.
Primer type pros and cons (shellac, oil-based, water-based stain-blockers)
Choosing the right primer is crucial for effective stain blocking. Here’s a quick rundown of different types:
Pros
- Shellac: Fast drying, seals tannin stains, non-toxic.
- Oil-based: Excellent adhesion, blocks most stains, good for porous surfaces.
- Water-based: Low VOCs, easy cleanup, dries quickly, suitable for most stains.
Cons
- Shellac: Limited stain blocking, not ideal for water stains or mold.
- Oil-based: Slow drying, strong odor, not eco-friendly.
- Water-based: May not block heavy stains, may require multiple coats.
Shellac is great for tannin and light stains. Oil-based works well on porous surfaces and heavy stains. Water-based is versatile and eco-friendly, but may need extra coats.
Specialty sealers for tough stains (smoke, tannin, rust)
Some stains are tougher than others. For these, you might need specialty products.
Smoke stains require smoke-sealing primers. They’re designed to encapsulate soot and prevent it from bleeding through paint.
Tannin stains from wood can be tough. Consider using a tannin-blocking primer, often based on shellac or other natural resins.
Rust stains need rust-inhibiting primers. These contain chemicals that stop rust from spreading and prevent it from bleeding through paint. However, always check product compatibility with your final paint to avoid issues later.
Application Best Practices for Priming and Painting over Stains
Adopt a stepwise approach that follows label instructions from start to finish. Apply primers evenly with proper coverage and allow adequate cure time as indicated by the manufacturer. Use proper technique to prevent lap lines or thin spots.
Incorporate quality control checks as you go—inspect for uniform color, edge cleanliness, and complete coverage over stain-prone areas. Adhere to safety guidelines for ventilation, lighting, and tool use. Stop if the surface looks compromised and re-evaluate before proceeding.
Tools, technique, and surface conditions for priming
The right tools and techniques ensure an even, effective primer application.
- Brushes/Rollers: Use 1.5-2″ nap rollers or angled brushes (2-3″ wide) for smooth surfaces. For textured ceilings, opt for 9″ rollers with 3/8″ or 1/2″ naps.
- Sprayers: Optional, but great for large areas. Rentable, around $50-$75/day. Use low-pressure (10-15 psi) and wide-fan tips (e.g., 411 or 412).
- Wet-film check: Apply primer to a small area, let it dry, then check for even coverage. Adjust application technique if necessary.
- Surface conditions: Prime when surfaces are clean, dry (moisture content <16%), and at optimal temperature (50-90°F).
- Avoid over-applying: Too much primer can cause drips or mildew growth. Apply thin, even coats.
Timing, curing, and test areas before full paint
Proper timing ensures the primer cures and blocks stains effectively.
Curing time: Follow manufacturer’s instructions. Most primers need 1-4 hours to cure at optimal temperature (50-90°F).
Perform a test repaint patch on an inconspicuous area. Apply paint, let it dry, then check for stain bleed-through.
If no stains appear after 24 hours, proceed with full painting. If stains reappear, apply another coat of primer and retest.
Special Scenarios and Troubleshooting
For recurring stains or unknowns, identify any underlying issues such as leaks, condensation, or insulation problems. Plan fixes before repainting and document what you have checked. Treat persistent mildew with the appropriate product per label directions.
Ceilings with texture, unusual insulation, or prior coatings may require adjusted prep or primer choices. Consider testing a small area first and consulting instructions or a pro if you’re unsure how textures interact with primer. Tackle complex cases methodically and avoid overcoating a suspect surface.
Textured and Popcorn Ceilings
Priming and painting textured surfaces like popcorn ceilings can be tricky. Here’s what you need to know:
First, ensure the texture is stable. If it’s crumbling or flaking, remove it safely before proceeding.
Use a stiff-bristled brush for cutting in edges and apply primer with a roller designed for textured surfaces. Work from one side of the room to the other, maintaining a ‘wet edge’.
If the texture is too delicate or you’re unsure about safety (asbestos, for instance), consider removing it professionally. It’s worth the extra cost for peace of mind.
Recurrent Stains and When to Escalate to a Pro
If you’re seeing new discoloration or moisture after painting, it might be a sign of recurring stains. Here’s how to tell:
Check for moisture. Use a moisture meter if necessary. Recurring stains often indicate an ongoing water issue.
Look at the edges of the stain. If they’re blurry or spreading, it’s likely recurring.
If you suspect recurring stains or see signs of structural damage (like warping drywall), don’t wait. Call a professional. They can inspect and remediate issues you might miss.
Tools, Materials Checklist and Visual Checkpoints Before You Paint
Create a short, DIY-friendly checklist of tools, primers, sealers, and safety gear. Include items for moisture assessment, cleaning, and surface preparation. Review this list before you start the priming step.
Use visual checkpoints to confirm readiness: dry surface, clean and blemish-free area, and clean edges around the work zone. Make sure safety gear is in place and that you have clear access to the area. Double-check labels and instructions for all products you intend to use.
Essential tools and safety items
Before you start, ensure you have all the necessary tools and safety gear to protect yourself and get the job done right.
- Moisture meter: To confirm your ceiling is dry before priming and painting. Skipping this can lead to recurring stains or mold growth.
- Appropriate primer: Choose a stain-blocking primer suitable for your specific stain type (shellac, oil-based, water-based).
- Cleaning supplies: Dish soap, bleach, and clean cloths to remove dirt, grease, and mildew.
- Safety glasses: Protect your eyes from debris and splashes.
- Dust mask: Shield yourself from airborne particles during cleaning and sanding.
- Drop cloths: Cover the floor to protect it from spills and drips.
- Ladder or scaffolding: Safe access to your ceiling is crucial for thorough work.
- Painter’s tape: To mask off areas you don’t want to paint.
Quick rule: Always prioritize safety when working on ceilings. Wear appropriate PPE and use stable, secure ladders or scaffolding.
Visual checkpoints and a pre-paint checklist
Before you apply your primer, perform these final checks to ensure your ceiling is ready for painting.
- Dryness confirmation: Use your moisture meter to confirm the ceiling is dry (below 15% moisture content).
- Repaired substrate: Inspect all repaired areas, like cracks or holes, to ensure they’re properly patched and sanded smooth.
- Clean surface: Check for any remaining dirt, grease, or mildew. A clean surface ensures better primer adhesion.
- Successful test patch: Apply a small test patch of primer in an inconspicuous area to check for any adverse reactions with your paint or stain.
Quick rule: If any checks fail, address the issue before proceeding. A thorough pre-paint checklist saves time and ensures a successful outcome.
Conclusion
Keep the ceiling safe and looking right by tackling moisture first, confirming real dryness, and controlling the environment before you prime. When you take those steps in the right order, you prevent future stains, peeling paint, and costly fixes.
Start by confirming and fixing the moisture source, verify the ceiling is dry enough to prime, set the room to favor drying, and only then prepare the surface. Next, choose the correct stain-blocking primer or sealer, follow application best practices, and use the tools and materials you already have on hand. Finally, run through the visual checkpoints and address any special scenarios or troubleshooting noted earlier before you paint.
Common mistakes to avoid: skipping moisture repair or rushing dry-time, using the wrong primer for the stain, and skipping surface preparation or test patches. Safety rules: wear appropriate protection, ventilate well, and never push through suspected active leaks or mold without addressing the root cause. If you’re unsure about the extent of damage, a professional can quickly assess hidden moisture or structural issues and save you costly rework. Stay steady, follow the steps, and you’ll finish with a durable, clean ceiling you can be proud of.
FAQ
What tells me a ceiling is dry enough to prime after staining?
Look for no damp feel when you touch the surface and no obvious fresh moisture on the coating. If the ceiling still feels cool or damp, don’t prime yet. Check the stain area with a quick visual test after a few hours of drying in the right conditions.
How do I confirm I’ve stopped the moisture source before priming?
Fix the moisture first, then recheck the area once it’s dry. If you’re unsure the source is fixed, don’t proceed with primer. Label the product you used and follow the manufacturer’s recheck steps.
What environmental steps help the ceiling dry faster and safely?
Move air across the room and away from vents or windows. Keep the space reasonably warm and avoid sudden temperature changes. If humidity sticks around, add longer drying cycles or temporary dehumidification as recommended by product instructions.
What should I do to the surface after drying is confirmed?
Clean the surface to remove dust and any loose material. Patch any tiny cracks or chipping before you prime. Tape and protect edges and nearby surfaces to keep the stain-blocking primer from spreading.