
Introduction
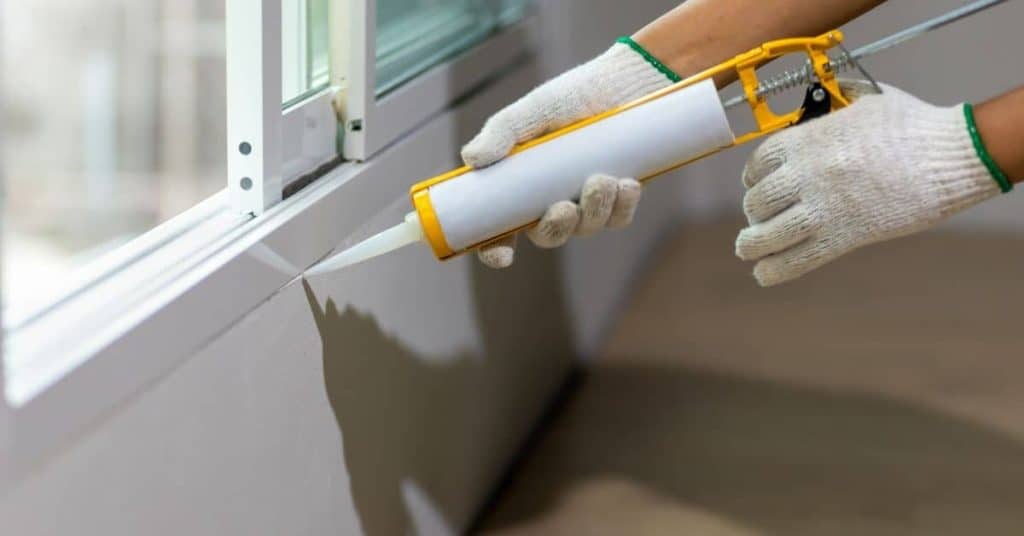
Painting over silicone caulk is not reliably paintable, and it often peels later. Silicone tends to resist most paints, so prep and choices matter. If the goal is a solid paint job, plan for alternative routes like replacing or masking.
To prep, clean the joint and dry it thoroughly before any paint effort. Lightly roughen the surface or use a primer that the label says is compatible with silicone. Always check the product instructions and local rules for suitability and curing times.
Key takeaways
- Silicone resists paint due to its surface oils and flexible polymers.
- Test a small area before full commitment to confirm adhesion.
- Use a primer compatible with silicone or a bonding primer for best grip.
- Roughen the caulk surface with mild abrasion for better adhesion.
- Wipe with isopropyl-based cleaners and dry completely before painting.
- Allow proper cure time per product instructions and avoid moisture.
- Wear gloves and ensure ventilation; caulk dust and fumes can irritate.
Table of Contents
- Introduction
- Key takeaways
- Why Silicone Is Difficult to Paint
- When Painting over Silicone Can Work
- Common Reasons Paint Peels from Silicone
- How to Test If Your Caulk Can Be Painted
- Surface Preparation Steps for Best Results
- Primers and Paints That Improve Adhesion
- Application Best Practices and Curing
- Troubleshooting Failures and Repair Options
- Conclusion
- FAQ
Why Silicone Is Difficult to Paint
Silicone surfaces have a unique chemistry that makes paint reluctant to stick. The material’s low surface energy repels most coatings and creates a slick, non-porous feel that paints struggle to grip.
Additionally, cured silicone is elastic and can flex with movement. That elasticity can cause coatings to crack or delaminate over time if they don’t tolerate the surface flex. Look to the product label or manufacturer data for guidance on suitability and prep needs.
Surface chemistry and low surface energy
Silicone’s molecular structure is designed to repel water, making it hydrophobic. This means paint, which is water-based or has a water component, won’t stick well.
The surface energy of silicone is low, meaning it doesn’t ‘like’ other substances like paint. It’s like trying to mix oil and water – they just don’t combine.
Think of it like this: imagine you’re trying to glue two pieces of wax paper together. The wax makes it hard for the glue to stick, right? That’s similar to what happens with silicone and paint.
Elasticity and differential movement
Silicone is flexible and stretches. This is great for caulking because it can move with the surface it’s on, like when walls expand and contract due to temperature changes.
The problem is, paint doesn’t stretch like silicone. So, when the silicone moves, it puts stress on the paint, causing it to crack or peel.
It’s like painting a rubber band – no matter how well you paint it, when you stretch the rubber band, your paint will crack.
When Painting over Silicone Can Work
Painting can work if you are working with a coating system labeled for silicone compatibility. Choose products designed for non-porous, flexible surfaces and follow their exact prep steps.
Work in controlled conditions and apply per the product instructions. Do not assume any generic paint will behave the same way on silicone as it does on typical caulk substrates.
Appropriate situations and use-cases
Painting over silicone caulk can work best in low-movement interior joints, like those found between walls and baseboards or around bathtubs. These areas are less prone to expansion and contraction.
The caulk’s stability is key. If the bead is already firm and hasn’t moved since application, it’s a good candidate for painting. Cosmetic paint-overs on stable beads can often succeed.
Remember, never attempt this on exterior joints or high-movement areas like door frames or windows. The caulk will likely crack or peel under stress.
Types of caulk more likely to accept paint
Not all silicone caulks are created equal. Some are more paintable than others. True silicones, for instance, are usually the most resistant due to their low surface energy.
Neutral-cure silicones and siliconized acrylics, however, can be more receptive to paint. These often have higher surface energies, allowing better adhesion of paint.
Always check the product label before assuming a caulk is paintable. Some manufacturers may state that their products are ‘paintable’ or ‘prime-ready’.
Common Reasons Paint Peels from Silicone
Peeling usually starts when adhesion is poor from the start. A slick surface or residue keeps paint from grabbing properly.
Other culprits are contamination, insufficient surface roughening, or moving the caulk after painting. Read the product guidance to spot noncompliant surfaces before you begin.
Contamination and uncured residues
Before you grab your paintbrush, check for any contaminants on the caulk. These can stop paint from sticking.
Uncured silicone is a common culprit. It’s tacky to touch and hasn’t fully hardened yet. You might see it as a white residue or powdery substance.
Other contaminants like oils, dust, or release agents can also cause issues. Wipe the area clean with a damp cloth before painting.
Silicone bleed-through and migrating siloxanes
Sometimes, silicone compounds can migrate to the surface of the caulk over time. This is called bleed-through. It makes it hard for paint to stick.
You might notice this as a shiny or sticky residue on the surface. Or you could see it when your paint starts peeling, revealing the silicone underneath.
Migrating siloxanes can also weaken the bond between your caulk and paint. To prevent this, make sure your caulk is fully cured before painting. Follow the manufacturer’s instructions for curing time.
How to Test If Your Caulk Can Be Painted
Do a simple surface test before committing to a full job. Clean a small area and dry it thoroughly.
Apply a small amount of your chosen paint on a concealed spot and let it cure as directed by the label, then check for adhesion and any soft or creeping movement.
Step-by-Step Process
Before you start painting over your silicone caulk, follow these steps to test its paintability and ensure a successful outcome.
- Preparation: Gather materials – painter’s tape, primer suitable for silicone, paint, scissors, utility knife, and sandpaper (fine grit).
- Safety first: Put on gloves and eye protection. Ensure the area is well-ventilated.
- Main test: Apply a small amount of primer to an inconspicuous part of the caulk using a paintbrush or roller. Let it dry according to the manufacturer’s instructions.
- Paint application: Once the primer is dry, apply a thin layer of your chosen paint over the primed area. Allow it to cure as per the paint’s guidelines.
- Inspection and cleanup: After curing, check for any signs of peeling or poor adhesion. If satisfied, proceed with painting the rest of the caulk. If not, consider calling a professional.
Small patch adhesion test
To assess your silicone caulk’s paintability without committing to a full job, perform this simple test:
Apply a small, discreet patch of primer and paint on an inconspicuous part of the caulk. Ensure it’s big enough for proper evaluation but small enough to remain unnoticed if the test fails.
Allow the test patch to cure completely as per the manufacturer’s instructions before proceeding with any checks.
Inspect the test patch for signs of peeling, bubbling, or poor adhesion. If it looks good, proceed with painting the rest of the caulk. If not, consider alternative solutions or consult a professional.
Tape pull and cross-hatch checks
Once your test patch is fully cured, perform these simple adhesion tests to ensure the paint will stick:
Tape pull: Apply painter’s tape over the test patch and press firmly. After a few minutes, pull off the tape quickly at a 90-degree angle. If the paint peels off with the tape, it’s not adhering properly.
Cross-hatch check: Using a utility knife or cutters, make small cuts through the paint and caulk in a crosshatch pattern. Then, apply painter’s tape over the cuts and pull it off quickly. If any paint comes off with the tape, the adhesion is poor.
Surface Preparation Steps for Best Results
Start with a good cleaning to remove oils, grease, and dust. Rinse and let the area dry completely before proceeding.
Lightly scuff the caulk surface with a non-metallic pad or fine grit to create a rougher profile. Follow up with the recommended cleaner or degreaser per manufacturer guidance and dry again before priming or painting.
Cleaning and degreasing the bead
Start by removing any dust, dirt, or debris from the caulk bead with a soft brush or cloth. Then, it’s time to clean and degrease the surface.
Use a mild detergent or an approved solvent by the manufacturer. Avoid harsh chemicals like bleach or strong acids that can damage your surfaces.
Apply the cleaner with a sponge or soft cloth, let it sit for a few minutes, then scrub gently and rinse thoroughly with clean water.
Let the surface dry completely before moving on to the next step. This could take anywhere from 30 minutes to an hour, depending on humidity levels.
Abrading and scuffing the silicone
To improve paint adhesion, you need to increase the surface profile of the caulk. This means making the surface slightly rough.
For most cases, a gentle abrasion is enough. You can use a fine-grit sandpaper (around 220-grit) or a scuff pad designed for this purpose. Lightly sand or scuff the caulk bead, moving in one direction to avoid creating swirl marks.
Be careful not to sand too aggressively or you might damage the caulk or create deep grooves that will show through your paint.
After abrading, wipe off any dust with a damp cloth and let it dry. If you’re unsure about the surface profile, you can feel it with your fingers – it should feel slightly rough but not sharp.
Masking and protecting adjacent surfaces
Before applying primer or paint, mask off the areas around the caulk bead to protect them from overspray or drips. This will also help you achieve clean paint lines.
Use painter’s tape and a putty knife to press it firmly against the surface. This helps create a tight seal that won’t let paint seep underneath. Remember, cheap tape can cause more harm than good, so invest in a quality tape.
For larger areas or complex shapes, you might need to use drop cloths or plastic sheeting. Make sure they’re securely held down to prevent them from moving around while you work.
Once masked off, you can proceed with priming and painting, knowing that your adjacent surfaces are protected.
Primers and Paints That Improve Adhesion
Select primers labeled for silicone or nonporous surfaces and pair them with paints that declare compatibility. Always verify with the product data sheet or label before use.
Recognize that some systems rely on specific primer–topcoat combinations to achieve acceptable adhesion. If in doubt, ask the retailer or consult the manufacturer for compatibility notes.
Adhesion promoters and specialty primers
When painting over silicone caulk, using the right primer can make all the difference. You’ll want to look for adhesion promoters or specialty primers designed for silicone surfaces.
Silane/silane-modified primers are popular choices. They contain silane molecules that bond with the silicone in your caulk, creating a strong chemical link between the primer and the surface.
Check the technical data sheet to ensure the primer is compatible with your specific caulk type. Some primers may not play nice with certain silicone blends or additives.
Paint types and flexibility trade-offs
Not all paints are created equal when it comes to sticking to silicone caulk. You’ll want a flexible coating that can move with the surface without cracking or peeling.
High-quality acrylic latex paints are usually a safe bet. They’re designed to stretch and flex, making them ideal for surfaces like caulk that expand and contract with temperature changes.
Elastomeric paints are another option. These are super flexible and can bridge hairline cracks, but they might not be necessary for most caulk jobs. Standard latex paint could work too, as long as it’s of good quality and you’ve properly prepared the surface.
Application Best Practices and Curing
Apply in thin, even coats and avoid extended open times that allow dust to settle. Do not overwork the coating, which can create dragging or uneven texture.
Control the environment according to product guidelines and allow full curing as recommended by the manufacturer. Protect the area from moisture, dirt, and rapid temperature changes during drying.
Tooling and application techniques
When applying concrete, it’s crucial to use the right tools and techniques to avoid common pitfalls like trapping solvents or creating pinholes.
Caulk beads: Before you start, ensure caulk beads are well-sealed. Use a utility knife to score them lightly, then apply a thin layer of concrete primer to seal the surface. This prevents solvents from being trapped and causing issues later on.
Application methods:
–
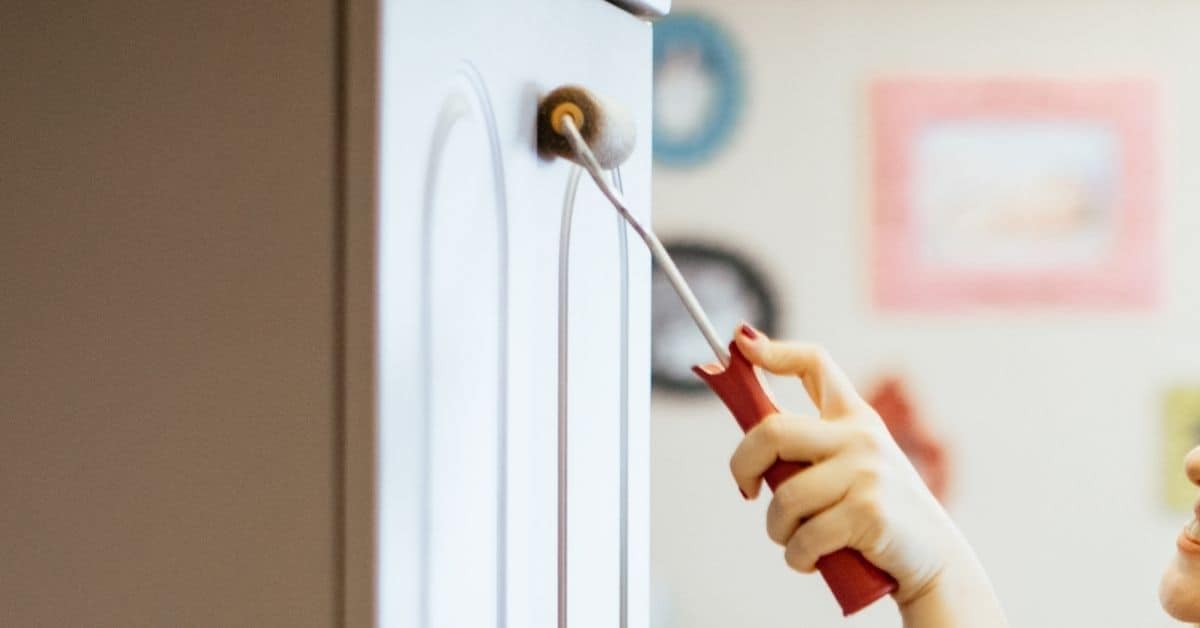
- Brushing: For small areas or repairs, use a stiff-bristled brush to work the concrete into place. Ensure you’re not leaving any dry spots or trapping air bubbles.
- Rolling: For larger surfaces, use a nap roller suitable for your mix’s consistency. Work in manageable sections, ensuring even coverage and no air pockets.
- Spraying: For high-volume applications, consider renting a concrete sprayer. Ensure the nozzle is clean and well-maintained to avoid clogging or creating pinholes.
Pro tip: Always check your manufacturer’s instructions for specific tool recommendations based on your chosen product. It’s also a good idea to check local rules regarding application methods, as some jobs may require certified applicators or specific techniques.
Environmental and curing considerations
Listen up, DIYer. Temp, humidity, and air flow ain’t just for talkin’. They make or break your concrete job.
Temperature matters. Too hot, too cold, both bad news. Check your product’s cure recommendations. Most concretes like it between 50°F to 90°F (10°C to 32°C). If you’re unsure, do a test patch.
Humidity’s a game-changer. Concrete needs moisture to cure right. But too much can cause issues. Keep an eye on it. If it’s dry as a desert out there, consider wetting the surface occasionally. Again, check your product’s recommendations and test if you’re unsure.
And don’t forget about ventilation. Concrete needs to breathe while curing. So, keep those fans running, or open up that space. But not too much, or you’ll dry it out too fast.
Troubleshooting Failures and Repair Options
Identify failure modes like poor initial adhesion, peeling, or cracking. Document where they occur to guide repairs.
Options range from spot fixes to full caulk replacement. Weigh pros and cons, and follow safe, manufacturer-approved repair steps for each path.
Diagnosing the cause of peeling
The first step to fixing a peeling paint job over silicone caulk is figuring out why it happened. Here’s a quick checklist:
Contamination: Check if the surface was properly cleaned and degreased before painting. Dirt, grease, or other contaminants can prevent adhesion.
Movement: Look for signs of movement in the caulk or the substrate it’s attached to. This could be due to settling, expansion/contraction, or vibration.
Wrong products: Ensure you used the right primer and paint for silicone caulk. Some paints just don’t stick well to silicone.
Incomplete cure: Make sure the caulk was given enough time to fully cure before painting. This can take anywhere from a few days to a couple of weeks, depending on the product and conditions.
Repair workflows: patching vs full replacement
When your paint starts peeling over silicone caulk, you have two main repair options: patching or full replacement. Here’s when to choose each:
Patching: If the peeling is isolated and not too extensive, you can often get away with just patching the affected areas. This involves scraping off the loose paint, cleaning the surface, applying a spot primer, and repainting.
Full replacement: If the peeling is widespread or if the caulk itself has failed (e.g., cracked, shrunk, or pulled away from the substrate), you’ll need to remove all the old caulk and replace it. Start by safely removing the old caulk using a utility knife and a caulk remover solution.
Once the old caulk is gone, clean the surface, let it dry, apply new caulk, let it cure, then prime and paint as before. This ensures a durable result that should last for years to come.
Conclusion
Paint sticking to silicone hinges on careful prep, honest testing, and steady technique. Get the caulk tested, prep the surface, and choose the right primer and paint so you don’t waste time or money chasing a finish that won’t last.
Do a small test spot to confirm adhesion, clean with the right solvent, scuff the surface, let it dry, and apply a compatible primer before painting. Apply in thin, even coats and let each pass cure as recommended. If any area fails the test, don’t force it—choose a repair path that does not risk peeling or damage.
Common mistakes to avoid are skipping the test, skipping or skimping on surface prep, and using the wrong primer or paint for silicone. Safety rules are simple: wear eye protection, work in a well ventilated area, follow the product labels, and let each coat cure fully before touching. If you see peeling or unexpected failure, stop and reassess instead of forcing another coat.
If the patching or painting feels uncertain—especially on high-traffic joints or exterior seams—calling a professional is sensible. A quick consult can prevent bigger repairs later. Stay practical, stay careful, and you’ll end up with a durable, clean look that lasts. You’ve got this.
FAQ
Can you repaint over silicone in bathrooms or kitchens without removing it?
You can sometimes, but it isn’t guaranteed. If you’re unsure, check the product label or manufacturer instructions for adhesion over silicone and test a small area first. Look for a compatible primer or a paintable caulk option as alternatives.
What steps should I take if I decide to try repainting over silicone?
Clean the area well and dry completely. Lightly scuff the silicone to give the paint something to grab, then follow the primer and paint manufacturer instructions. If the seal remains flexible or old, be prepared for possible failure and have a repair plan ready.
What are the signs that paint will peel after painting over silicone?
Edges lifting or peeling away from the caulk, bubbles in the paint film, or paint peeling after a wash or a few days. If you see these, stop and reassess—often the issue is the silicone’s nonstick surface or moisture behind it. Check the label for adhesion guidelines and local rules before fixing.
If painting over silicone isn’t working, what are my safe alternatives?
Replace the silicone with a paintable caulk suited to the area, or use a non-silicone sealant compatible with the paint you chose. Follow the product instructions and, if in doubt, contact the manufacturer for guidance on surface compatibility and curing. Inspect the area for moisture and substrate condition before resealing.