
Introduction
Chalk paint is a matte, water-based finish that adheres to wood and furniture with minimal prep. In this article I’m breaking down what causes common chalk paint issues and practical DIY fixes you can do at home. You’ll learn what chalk paint is, how DIY mixes compare to store-bought options, and how to tweak it for brushes, rollers, or spray.
We’ll touch on post navigation and how to explore related topics, plus how to participate by leaving a reply or canceling a reply if you change your mind. If a technique or result isn’t working, check the product label and manufacturer instructions, and follow safe ranges or options you can verify in your area. This is a hands-on guide written for DIY homeowners and focused on practical, plain-language steps you can apply in your project.
Key takeaways
- Understand chalk paint basics: DIY vs store-bought affects finish and odor levels.
- DIY chalk paint uses simple binders and chalk ingredients; follow steps and safety.
- Modify chalk paint for brush, roller, or spray by thinning or adding extenders cautiously.
- Prep, application, and sealing choices: waxes, polyurethanes, or alternatives; safety first.
- Common problems: bleed-through, peeling, and uneven finish; fix before final seal.
- Post navigation and Leave a Reply Cancel reply prompts appear; check site sections before posting.
Table of Contents
- Introduction
- Key takeaways
- What Is Chalk Paint and Why Use It?
- Common Causes of Chalk Paint Problems
- Best Ready-Made Chalk Paints and What to Choose
- DIY Chalk Paint Recipes and Ingredient Guide
- Application Methods: Brushing, Rolling, and Spraying
- Fixing Specific Problems (Bleed-Through, Peeling, Uneven Finish)
- Sealing and Finishing: Waxes, Polyurethanes, and Alternatives
- Prep Checklist, Common Mistakes, and Safety Precautions
- Conclusion
- FAQ
What Is Chalk Paint and Why Use It?
Chalk paint is a type of decorative paint made from common binders with chalky pigments. It’s often mixed at home from simple ingredients or sold ready-made by brands. This section covers what it is and how it behaves on different surfaces.
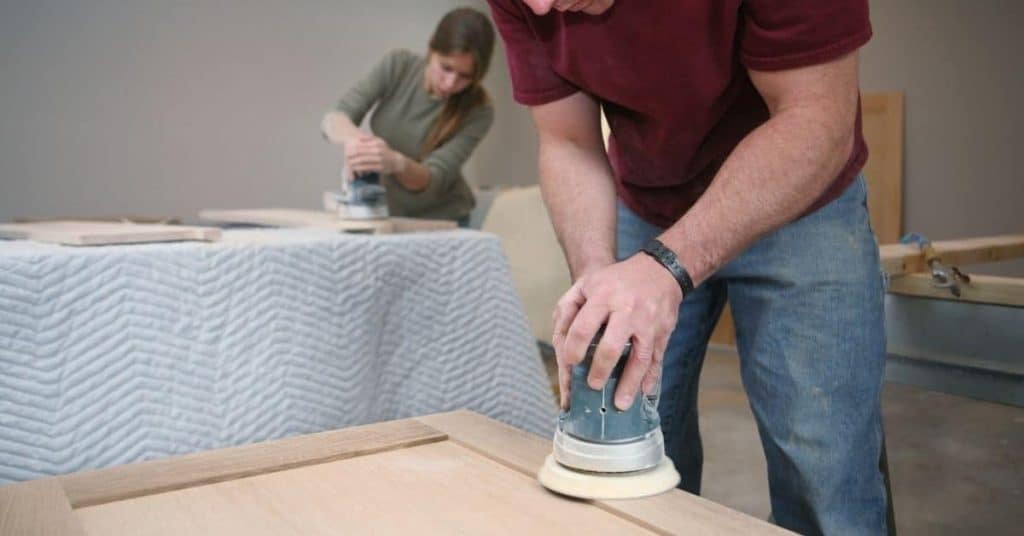
You’ll notice a matte, velvety finish with strong adhesion to many substrates and minimal surface prep compared to traditional paints. It also buffs well for distressing and layered looks, which makes it popular for furniture and decorative pieces. Compare how it differs from regular latex and milk paints in prep, coverage, finish, and sealing needs as you plan a project.
Key benefits and typical uses
Chalk paint is a versatile, durable option for your DIY projects. It’s made from a mix of pigments, chalk (which gives it that matte look), and a binder – usually a non-toxic, water-based acrylic polymer.
Durability: Chalk paint adheres strongly to many surfaces, making it great for furniture, cabinets, and walls. It’s also easy to distress, giving your projects an aged, shabby-chic look.
Aesthetic effects: The matte finish gives a soft, velvety look that hides imperfections well. It’s perfect for creating a rustic, vintage feel in your home.
Typical uses: Chalk paint is ideal for upcycling old furniture, painting walls (especially in older homes with uneven surfaces), and adding a touch of charm to new pieces. It’s often used on wood, metal, and previously painted surfaces.
Cost comparison: store-bought vs. DIY
Making your own chalk paint can save you money – up to 50% compared to store-bought brands. The cost depends on the brand of paint and plaster of Paris (or calcium carbonate) you use, as well as how much you’re making.
Factors affecting cost: Cheaper paints and plaster will lower your costs, but may affect the quality of your finish. Adding pigments or special effects can also increase expenses.
When to buy: If you need a specific brand for its unique qualities (like better adhesion or easier distressing), it might be worth buying pre-made chalk paint. For general use, DIY is usually the more affordable option.
Here’s a rough breakdown: Store-bought can range from $15 to $30 per quart, while DIY can cost as little as $7 to $15 per quart, depending on your ingredients and quantities.
Common Causes of Chalk Paint Problems
Typical chalk paint symptoms to watch for include bleed-through, peeling, uneven coverage, visible brush marks, and surface cracking. Each issue has a root cause linked to the substrate or prep work. Understanding the cause helps you decide the fix quickly.
Root causes range from porous or stained surfaces to oil or grease contamination and improper surface prep. Heat and humidity during cure, too thick or uneven applications, or incompatibility with existing finishes can all cause trouble. Use quick diagnostic checks and targeted remedies to keep projects moving forward.
Surface and Substrate Causes
Chalk paint problems often start with the surface itself. Wood types, tannins, previous finishes, and grease can all cause issues.
Tannin-rich woods, like pine or cedar, can bleed through your chalk paint, turning it pink or orange over time. This is due to the tannic acid in these woods leaching out.
Previous finishes might not play nice with chalk paint. Wax, varnish, or other sealers can prevent adhesion, leading to peeling or flaking. Grease and oil stains can also cause issues, as they repel water-based paints like chalk paint.
Ensure your surface is clean, dry, deglossed (if necessary), and free of grease spots before painting to avoid these problems.
Product and Mixing Causes
Chalk paint issues can also stem from the product itself or how it’s mixed. Let’s dive into some common culprits.
Wrong binder ratios can lead to chalk paint that’s too runny or too thick. This can result in poor coverage, visible brush marks, or cracking as it dries.
Improper thickeners can also cause problems. Grout, for instance, can clump and not mix well, while calcium carbonate might not thicken the paint enough. Using the wrong base – like latex instead of plaster – can also cause issues.
Always follow the manufacturer’s instructions when mixing your chalk paint. If you’re making your own, experiment with different ratios and thickeners to get the right consistency.
Best Ready-Made Chalk Paints and What to Choose
Ready-made chalk paints fall into premixed options and brands with additives or pre-mixed bases. Look for differences in sheen, open time, and how they behave on various substrates. The choice depends on your project goals and experience level.
When selecting, consider surface compatibility, priming needs, desired sheen, color variety, and price per project. Compare practical factors like coverage, drying time, and durability, plus how the finish feels with wax or sealers. Test on scrap pieces to confirm color and texture before committing.
How to pick the right brand for your project
The first step in choosing a chalk paint is understanding your project’s needs. Here are some factors to consider:
Surface Porosity: Different surfaces absorb paint at varying rates. Chalk paints work best on porous surfaces like wood and masonry, but may require extra coats or additives for non-porous surfaces like metal or laminate.
Preparation Needs: Some chalk paints require sanding or priming before application. Consider the prep work involved in your project when choosing a brand.
Durability: If your project is high-traffic, you’ll want a chalk paint with good durability and resistance to scraping or chipping. Check the manufacturer’s specifications for this information.
Budget: Chalk paints vary in price per quart. Consider how many quarts you’ll need for your project and factor that into your budget.
When to choose a premixed over DIY
While making your own chalk paint can be rewarding, there are times when choosing a premixed option is the better choice. Here’s when:
Time Constraints: Premixed chalk paints save time as they’re ready to use right out of the can. If you’re on a tight deadline, this could be a deciding factor.
Spray Application: Some DIY chalk paint recipes may not spray well due to their consistency. If you plan to use a sprayer, consider a premixed option designed for this application.
Color Matching: Premixed chalk paints often have wider color ranges and better color consistency than homemade versions. If you need a specific color, a premixed paint might be your best bet.
Warranty: Many commercial chalk paints come with warranties that cover defects or fading. This can provide peace of mind for larger projects.
DIY Chalk Paint Recipes and Ingredient Guide
Four base options are commonly discussed: calcium carbonate, plaster of Paris, talc, and spray-friendly modified recipes. Each has its own strengths for texture, coverage, and drying behavior. This guide helps you pick based on your project needs.
Assess the adhesion, chalkiness, density, working time, and sanding requirements for each base. Note moisture sensitivity and potential for cracking with certain ingredients. Include practical tips for stirring, preventing clumps, and adding binders or additives for a smoother finish.
Step-by-step basic DIY chalk paint recipe
This simple recipe will give you a classic chalk paint finish. It’s perfect for testing before committing to larger projects.
- Mix 1 cup of calcium carbonate with 2 cups of water until smooth.
Reason: Calcium carbonate provides the chalky texture and coverage.
Check: Mixture should be lump-free and slightly thicker than milk. - Add 3 tablespoons of plaster of Paris to the mixture.
Reason: Plaster of Paris helps with adhesion and durability.
Check: Stir well, ensuring no clumps remain. - Let the mixture sit for 5 minutes.
Reason: This allows the plaster of Paris to absorb water.
Check: The mixture should thicken slightly. - Stir in 1 tablespoon of unsanded grout or talc.
Reason: Grout or talc helps with coverage and texture.
Check: Stir well, ensuring no clumps remain. - Add 2-3 tablespoons of water to reach desired consistency.
Reason: Adjusting the water content allows you to achieve your preferred paint thickness.
Check: The final mixture should have a similar consistency to yogurt.
Recipe modifications: for spraying and for extra durability
For spray application, thin your chalk paint with water until it reaches a consistency similar to heavy cream. This will help prevent clogging the nozzle.
Tip: Start with small amounts of water and gradually add more as needed. Always test on scrap material first.
To enhance durability, consider adding a polymer or sanding sealer to your chalk paint mixture. Start with 1/4 cup per quart of paint and adjust based on your desired level of hardness. Keep in mind that adding too much can affect the chalky finish.
Caution: Always test modified recipes on scrap material before applying them to your project. Some modifications may not be compatible with certain surfaces or finishes.
Application Methods: Brushing, Rolling, and Spraying
Brushing, rolling, and spraying each have their ideal use cases on concrete and similar surfaces. Choose based on detail work, coverage area, and equipment you already own. Prep and sealing considerations should align with the method you pick.
Prepare the surface properly, seal porosity, and match primer and sealer to the paint type for best results. Learn the practical tool choices and technique patterns to minimize brush marks, roller fuzz, or spray halos. Follow a consistent workflow from start to finish for a smooth result.
Best practices for brush and roller application
For brushing, use a flagged brush with stiff bristles. Nylon works well on concrete. Work the paint into the surface in long, even strokes. Avoid circular motions to prevent swirl marks.
Rollers are great for large areas. Use a 9-inch roller cover with a 3/8-inch nap length. Apply paint in ‘W’ or ‘M’ patterns to avoid lap lines. Let the first coat dry, then lightly sand and apply a second coat at a 45-degree angle.
To avoid brush marks, work quickly but carefully. Don’t overwork the paint. For rollers, maintain even pressure and overlap each pass by about half the roller width.
Spraying chalk paint: prep and adjustments
Before spraying, thin your chalk paint with water at a 1:1 ratio. Start with less, add more as needed. Test on a scrap piece of concrete first.
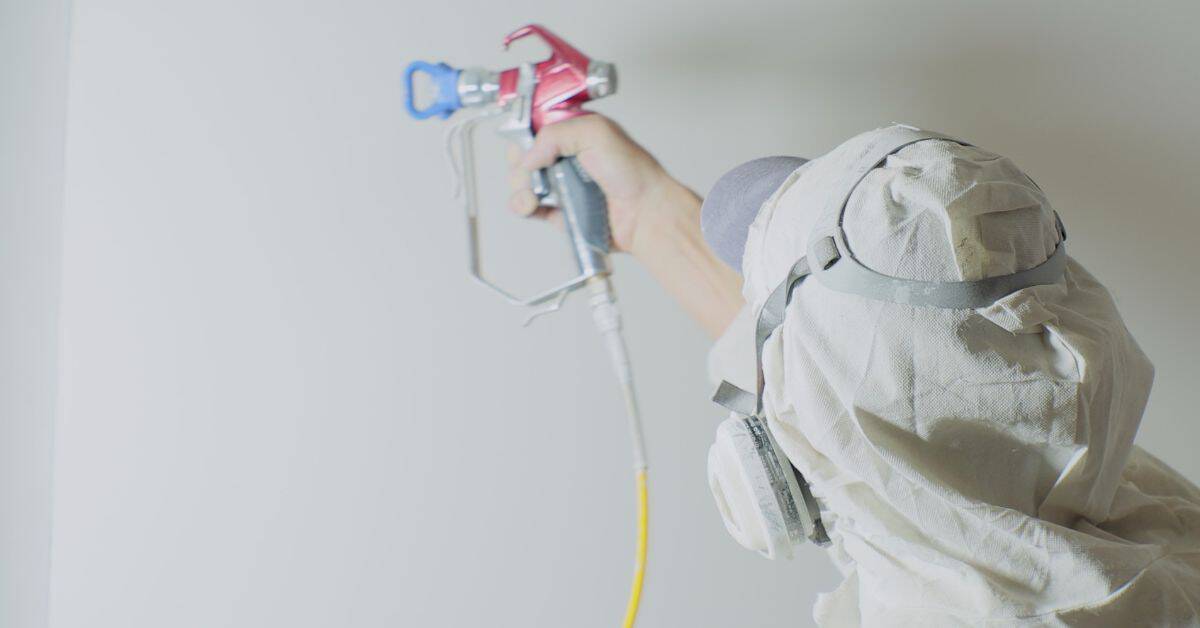
HVLP sprayers work best for chalk paint. They atomize the paint well and provide good coverage. Check your filter regularly to prevent clogging. Adjust the nozzle to create a fine mist.
Do test passes to get a feel for the spray pattern and adjust as needed. Work in even, overlapping passes, keeping the nozzle about 10-12 inches from the surface. Let each coat dry before sanding lightly and applying the next.
Fixing Specific Problems (Bleed-Through, Peeling, Uneven Finish)
Treat issues in order of severity to keep the project moving. Start with bleed-through diagnostics and remedies before addressing peeling or an uneven finish. This approach saves you time and material.
Bleed-through fixes involve identifying the stain source and using stain-blocking primers and even sealing. For peeling, remove loose paint and reprime with a bonding primer before recoat. An uneven finish benefits from light sanding between ultra-thin coats and maintaining consistent drying times.
How to stop and fix bleed-through
Bleed-through is when stains from the wood or previous finishes seep through your chalk paint. It’s a common issue, but don’t worry – we can fix it.
First things first: Identify the source of the stain. Let it dry completely so you know what you’re dealing with. Once dry, lightly sand any raised grain.
Now, prime that sucker! Use a stain-blocking primer like shellac-based BIN or an oil-based primer. These work best for stopping bleed-through. Apply evenly in thin layers, letting each one dry before adding the next. Sand lightly between coats with fine-grit sandpaper.
After priming, you can now apply your chalk paint as usual. Remember to keep those layers thin and even. If bleed-through persists, consider sanding back to bare wood and starting over.
Repairing peeling, cracking, and uneven texture
Peeling chalk paint is a sign of poor adhesion. Before you start fixing, figure out why it’s happening. Is the surface not prepped properly? Was the paint applied too thickly?
If the paint is just peeling: Strip or spot-sand off the loose paint. Clean the surface thoroughly with a degreaser to remove any dirt or residue. Apply a bonding primer or primer-sealer to help the new paint stick.
For cracking and uneven texture: Lightly sand the affected areas, then clean as before. This time, apply a thin layer of chalk paint, let it dry, then lightly sand again. Wipe off any dust and apply another thin coat. Keep coats thin to avoid cracking or an uneven finish.
After repainting, seal with a compatible topcoat for extra protection. Remember, preparation is key to preventing these issues in the future.
Sealing and Finishing: Waxes, Polyurethanes, and Alternatives
Sealing options include paste wax, water-based polyurethane, oil-based polyurethane, and newer topcoats. Each has its own typical applications and compatibility with chalk paint. Understanding the tradeoffs helps you pick the right finish for your project.
Sheen, durability, and maintenance vary with the sealant you choose. Consider how the finish will be used, and plan cleaning and re-coating intervals accordingly. Guidance on prep, application cues, and common mistakes helps you avoid typical sealing missteps.
Waxing: when and how to do it right
Wax is a popular choice for sealing chalk paint, especially on furniture. It enhances the natural texture of chalk paint while providing protection.
When to wax: Wax is ideal for pieces that need a soft sheen or matte finish. It’s great for dining tables and chairs, dressers, and decorative items.
How to apply: Use a soft cloth or brush to apply a thin, even layer of wax. Let it sit for 15-30 minutes, then buff off the excess with a clean cloth. Waxing provides moisture resistance but isn’t stain-proof. Re-wax every 2-3 years.
Durable topcoats for high-use pieces
For tabletops, floors, and other high-traffic areas, opt for durable clear coats like polycrylic or acrylic-polyurethane blends.
Polycrylic: This water-based topcoat is great for kitchen tables and cabinets. It dries quickly (1-2 hours) to a hard, durable finish with minimal odor.
Avoiding tacky finishes: Apply thin coats, letting each dry fully before recoating. Don’t rush the process or you’ll end up with a sticky surface. Lightly sand between coats with fine grit sandpaper for better adhesion.
Prep Checklist, Common Mistakes, and Safety Precautions
Assemble essential tools and materials tailored for chalk paint on concrete, including degreaser, deglosser, and the right primer. Have your sealer, brushes, rollers, and PPE ready before you start. A solid setup prevents interruptions later.
Follow a clear prep sequence and avoid common missteps like skipping deglossing or porosity checks. Prioritize ventilation, eye and skin protection, and proper cleanup to maintain a safe workspace. A quick-reference prep checklist helps you stay on track.
Safety and ventilation while mixing and applying
Before you start, ensure your workspace is safe and well-ventilated.
- Wear gloves: Protect your hands from chemicals and paint.
- Eye protection: Wear safety glasses to prevent debris or splashes from harming your eyes.
- Respirator/mask: Use when sanding, deglossing, or applying paint. Solvent fumes can be harmful.
- Ventilation: Open windows and doors, use fans to circulate air, or work outdoors if possible.
- Dispose of rags/waxes properly: Rags soaked in solvents can spontaneously combust. Wax-soaked rags should be disposed of in sealed plastic bags.
- Avoid smoking: Open flames near solvent-based products pose a fire risk.
- Keep workspace clean: Remove clutter to prevent trip hazards and ensure easy access to safety equipment.
- Store materials safely: Keep chemicals, paint, and tools out of reach of children and pets.
Quick rule: Always prioritize safety over speed. A few extra minutes spent on precautions can prevent accidents.
Visual checkpoints before moving to the next step
Before proceeding with the next stage, inspect your work for any issues that need addressing.
- Check coverage: Ensure primer or paint covers the entire surface. Missed spots can lead to uneven finish and poor adhesion.
- Inspect for bleed spots: Check for any bleeding through from previous layers, especially with dark colors on light surfaces.
- Feel for tackiness: Lightly touch the surface to ensure it’s no longer sticky. Tacky surfaces can pick up dust and debris, ruining your finish.
- Check adhesion: Gently scratch or tap the surface to ensure the primer or paint isn’t peeling off. Poor adhesion can lead to flaking and chipping.
- Look for efflorescence: White salt deposits on concrete surfaces can cause paint to peel if not addressed.
- Inspect for stains: Ensure any stains or discolorations have been treated before painting. Otherwise, they may bleed through.
- Check for dust: Wipe the surface with a damp cloth to ensure no dust remains. Dust can cause an uneven finish and poor adhesion.
Quick rule: A thorough visual inspection before each step ensures you catch any issues early, saving time and materials in the long run.
Conclusion
Chalk paint can deliver a durable, good-looking finish when you plan ahead, test materials, and follow a steady process. The key is safety, proper prep, and choosing the right mix of paint and sealer for the job.
First, verify your surface, pick a compatible paint and DIY recipe or a ready-made option, and then run a small test patch. Clean connections, sand where needed, apply in thin coats, let each coat dry fully, and seal with a compatible finish. Keep a clean work area, wear a mask when spraying or sanding, and stay within the manufacturer guidelines for you selected products.
Avoid these common traps: rushing the prep or skipping adhesion checks, applying thick coats that trap moisture or peel later, and ignoring safety gear or ventilation. Always work in a well-ventilated space, test first, and don’t force a finish that looks or feels wrong. If the project spans high humidity, large surfaces, or unfamiliar materials, consider a professional to prevent costly mistakes.
When in doubt about stubborn bleed-through, peeling, or uneven results, step back and ask for expert help before you lock in a finish. Stay practical, work methodically, and you’ll keep surfaces sturdy and looking solid for years to come.
FAQ
What is chalk paint and why would I use it?
Chalk paint is a matte, chalky finish that sticks to many surfaces with little prep. It’s popular for its vintage look and low preparation work, but it may require sealing for durability.
Advantages of DIY chalk paint vs store-bought
DIY lets you control color, texture, and cost. It can be faster to touch up small projects, and you can tailor ingredients to your needs. Check the label and follow safe mixing practices on every batch.
Homemade chalk paint recipe ingredients and steps
Most homemade recipes blend a paint base with a binder and a filler or additive. Mix until you reach a smooth, brushable consistency, then let it rest if the mixture thickens. Always check the product label or manufacturer instructions for recommended ratios and safety tips.
Modifying chalk paint for painting techniques (brush, roller, spray)
Brushes leave texture; rollers can smooth larger areas; sprays need a well-ventilated area and thin passes. Adjust viscosity with water or a ready-made additive per instructions, and test on scrap before tackling furniture.
Applying wax to finished furniture
Wax provides a soft sheen and added protection. Apply thin, even coats with a lint-free cloth, then buff after it sets. Follow the wax product’s curing times and avoid heat or direct sun during cure.