
Introduction
Painting your walls white means applying a white paint finish to interior walls after proper surface prep. This introduction frames a practical, hands-on approach with clear stop points to check as you go. It helps you spot issues early so you can keep things bright and even.
Before you start, check the paint label and local rules for any space-specific requirements. Do a small test swatch on a discreet area and observe how it dries and how the light changes the shade. Follow the prep steps, use the right tools, and defer to manufacturer instructions if you’re unsure.
Key takeaways
- Choose white tones based on room lighting and existing fixtures before painting.
- Prepare surfaces thoroughly: clean, repair cracks, and sand glossy areas for adhesion.
- Prime where needed to seal stains and improve topcoat coverage.
- Use quality brushes and rollers, and follow manufacturer directions for drying.
- Stop points: inspect edges, corners, and transitions before moving to next stage.
- Safety: ventilate or wear a mask in dusty or solvent-prone tasks.
Table of Contents
- Introduction
- Key takeaways
- Choose the Right White for Your Room
- Assess and Prepare Surfaces Before Painting
- Primer and Paint Selection Guidelines
- Tools and Materials Checklist
- Step-by-Step Painting Workflow with Clear Stop Points
- Lighting, Undertones, and Room Function Considerations
- Common Mistakes, Troubleshooting, and Fixes
- Cleanup, Maintenance, and Final Quality Checklist
- Conclusion
- FAQ
Choose the Right White for Your Room
Whites aren’t all the same. They carry undertones that can shift with lighting and adjacent colors. Look at labels or manufacturer notes to understand undertone and reflectivity before choosing.
Consider the room’s function and existing furnishings when you pick a shade. Compare chips in the space under the light you’ll use most. If in doubt, check the product data sheet or label for guidance on finish and coverage.
Understanding undertones and finishes
White paints aren’t all created equal. They’ve got undertones – cool, warm, or neutral. These affect how the color looks in your room’s light.
Cool whites have blue, purple, or green undertones. They reflect light and make rooms feel bigger, but can look cold under certain lights.
Warm whites have yellow, pink, or orange undertones. They create a cozy atmosphere, but can appear dull in bright sunlight.
Sheen matters too. Higher sheens reflect more light and are easier to clean, but show imperfections. Lower sheens hide flaws better but aren’t as durable.
How to test paint samples correctly
Before you commit, test your top picks. Buy small sample pots and apply them to large pieces of paper or directly onto the wall.
Place these in different areas of the room – near windows, on north-facing walls, etc. This way, you see how they look in various lights throughout the day.
Live with your samples for at least a few days. Look at them at different times of day and night. See how they pair with your furniture and flooring.
Stop when you’ve found the one that works best in all conditions. It’s worth taking the time to get it right.
Assess and Prepare Surfaces Before Painting
Start with a quick survey of walls for cracks, dents, and moisture signs. Push on surfaces to find loose paint or chalky patches that need attention. Make a plan based on what you find before you dip a roller.
Plan the prep steps you will actually do, like cleaning, sanding, patching, and priming. Keep a list handy so you don’t miss a task that can affect adhesion and finish. When in doubt, reference manufacturer prep guidelines or local rules for the substrate you’re painting.
Inspecting, patching, and repairing drywall or plaster
Before you start painting, give your walls a thorough once-over. Look for any cracks, holes, or other defects.
Common defects include: nail pops, hairline cracks, and larger gaps from previous repairs gone wrong.
For small holes and cracks, use a drywall repair kit. For larger issues, you might need to cut out damaged sections and replace them with new drywall. Always let your patching compound fully cure before sanding and priming.
Cleaning, sanding, and priming prep steps
Start by cleaning your walls. Use a mild detergent or a solution of water and vinegar to remove dirt and grime.
Do not use abrasive cleaners as they can damage the surface. Let the walls dry completely before moving on.
Next, sand your walls lightly with 120-grit sandpaper. This helps paint adhere better. Wipe off any dust with a damp cloth and let it dry. Your walls are now ready for priming if they’re smooth, clean, and free of dust. Priming seals the surface and improves paint adhesion.
Primer and Paint Selection Guidelines
Know when primer is needed and when you can skip it. Primers help with stains, bond to slick surfaces, and even out porosity for white finishes. Check the label to see if a stain-blocking or bonding primer is recommended for your wall.
Choose your primer and paint based on the surface and existing conditions. If you’re uncertain, consult the manufacturer instructions or product data sheet for the best pairing. Remember that primer can affect final coverage and color depth of white.
Choosing the right type of primer
A good primer is your first line of defense for a smooth, long-lasting white paint job. Here’s how to pick the right one:
Sealed walls: If your walls are already painted and in good condition, a stain-blocking primer will do the trick. It seals in any minor imperfections and prevents tannins from bleeding through.
Porous surfaces (new drywall, unprimed paint): Opt for a high-adhesion primer. It creates a better bond with porous surfaces, preventing peeling and ensuring even coverage. Some high-adhesion primers are also stain-blocking.
For heavily stained or challenging surfaces, consider a tinted primer. It provides extra coverage and helps you achieve a more uniform finish with your white paint.
Selecting paint type and sheen for longevity
The type of paint and its sheen level can significantly impact the lifespan and appearance of your white walls. Here’s what you need to know:
Paint type: Waterborne (latex) paints are generally easier to clean up, dry faster, and have less odor than oil-based paints. They’re suitable for most interior walls. However, if you’re dealing with a high-moisture area or want better adhesion, consider an oil-based paint.
Sheen level: The sheen level affects both the appearance and durability of your paint job. For white walls, I recommend a satin or semi-gloss sheen. These provide good hide, are easy to clean, and reflect light well. They’re also durable enough for high-traffic areas.
Here’s a quick rundown of sheen levels from highest to lowest gloss:
- High Gloss: Very durable, reflects a lot of light
- Semi-Gloss: Good durability, easy to clean, reflects some light
- Satin: Moderate durability, reflects a little light
- Eggshell: Least durable, doesn’t reflect much light
Tools and Materials Checklist
Gather the basics first: brushes, rollers, trays, and a compatible pan liner. Include a utility knife, sanding block, and a bucket for cleanup. Have drop cloths or plastic on hand to protect floors and fixtures.
Think about optional gear that speeds the job, like a paint edger or extension poles. Verify tool compatibility with your chosen paint, and check manufacturer guidance if you’re using specialty primers or finishes. Do not improvise beyond your comfort level; use what the label recommends.
Essential hand tools and consumables
Before you start, make sure you’ve got these basics on hand. They’ll save you time and ensure a smooth finish.
- Paint brushes: Natural bristles for oil-based paints, synthetic for latex. Check they’re not too stiff or soft.
- Rollers: Choose the right size and nap (thickness) for your surface. Too thin or thick can cause issues.
- Painter’s tape: Blue tape is best for delicate surfaces. Check it’s not too old, as it may lose its stickiness.
- Drop cloths: Heavy-duty plastic sheets to protect floors and furniture from drips.
- Putty knife: For filling holes and smoothing joint compound. Check the size fits your needs.
- Sandpaper: Medium-grit (120-150) for most surfaces. Too coarse or fine can cause problems.
- Safety gear: Gloves, goggles, and a respirator to protect from fumes and splashes.
- Paint tray liners: Reusable and eco-friendly. Check they fit your tray properly.
Quick rule: Don’t skimp on quality here. Cheap tools can lead to poor results and injuries.
Optional tools and when to use them
These tools aren’t essential but can make your life easier in certain situations. Know when to invest or hire a pro.
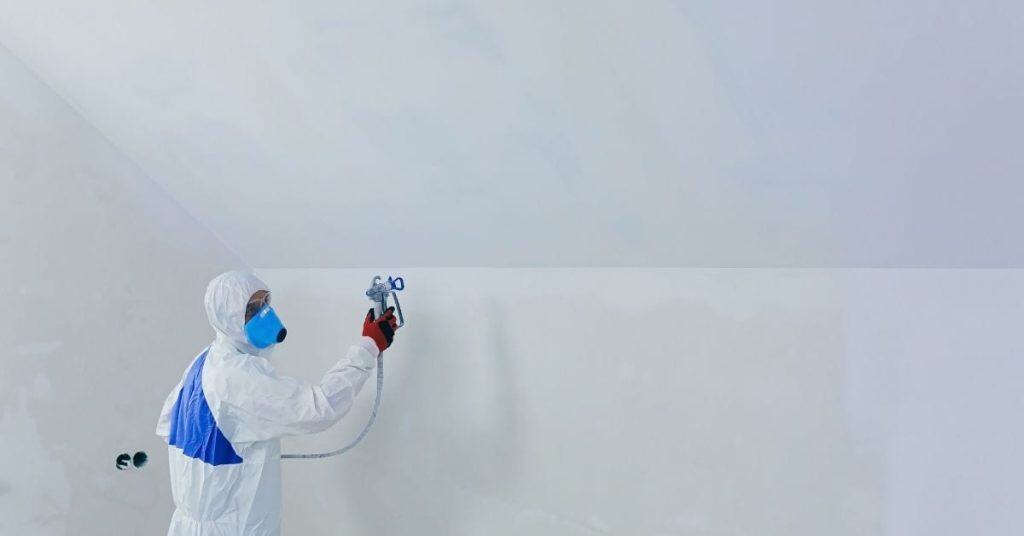
- Paint sprayer: Great for large areas like walls and ceilings. But it requires practice to avoid overspray.
- Pole sander: Ideal for high ceilings or hard-to-reach spots. But it can be unwieldy for precise work.
- Scaffolding: Necessary for high walls and ceilings. Always ensure it’s stable and secure.
- Heat gun: Useful for stripping old paint or removing wallpaper. But be careful not to overheat surfaces.
- Paint edger: Helps create straight lines along edges. But it requires practice to use effectively.
Quick rule: Consider hiring a pro if you’re unsure about using these tools safely and effectively.
Step-by-Step Painting Workflow with Clear Stop Points
Start with prep work and masking, then cut in around edges. Move to rolling in sections, keeping a wet edge to avoid lap marks. Stop to inspect adhesion and uniformity after each major step.
Implement explicit pause points where you can evaluate finish, repair any nibs or specks, and decide if an additional coat is needed. Use the inspection criteria on the label or in manufacturer instructions as your stop-point guide. Do not rush final coats if the surface isn’t settling evenly.
Step-by-Step Process
This section guides you through a practical, numbered sequence of steps to achieve a professional-looking paint job. It starts with preparation and safety checks, then moves on to the main work, and finally includes cleanup or final checks.
- Preparation: Gather your tools and materials as listed in our previous section. Ensure you have drop cloths, painter’s tape, sandpaper, primer, paint, and any necessary safety gear like gloves and goggles.
- Safety Checks: Open windows for ventilation, remove or cover furniture, and secure loose electrical switch covers with tape to prevent paint from getting inside.
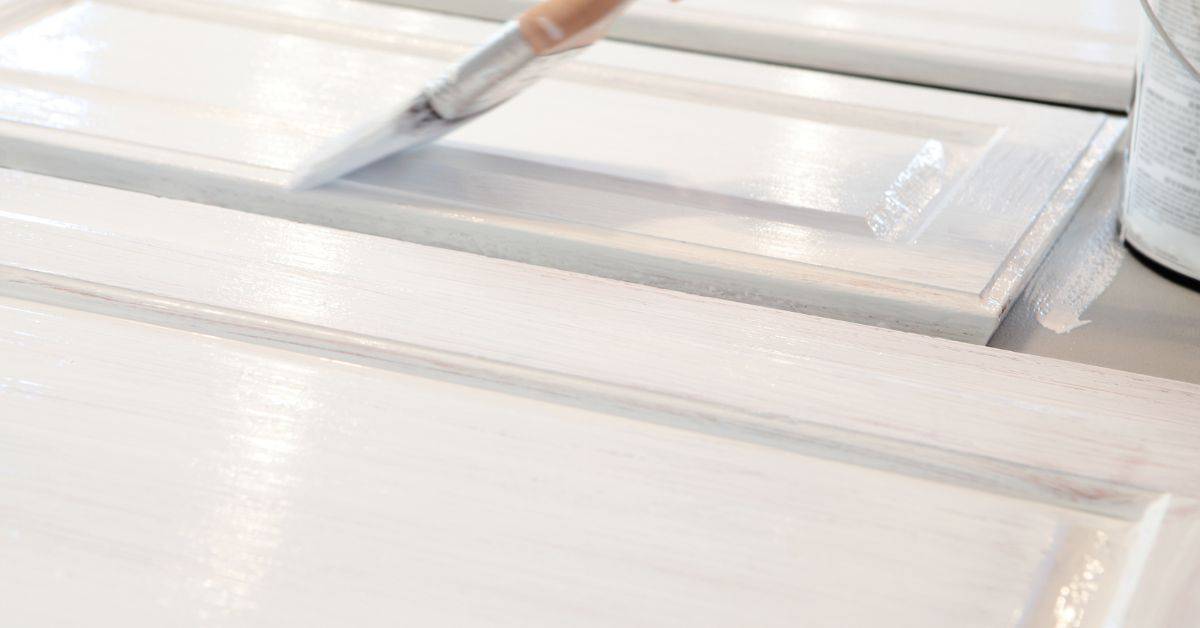
- Main Work – Cutting In: Using a 2-inch angled brush, apply paint along edges where the wall meets the ceiling and baseboards. Work in small sections, about 3 feet at a time, to maintain a ‘wet edge’ and avoid lap marks.
- Rolling: Fill your roller tray with paint and use it to apply paint to the walls in a ‘W’ or ‘M’ pattern, working from top to bottom. Keep your roller cover well-loaded but not dripping. Quickly check for any missed spots or drips as you go.
- Final Checks: After completing each section, step back and inspect your work. Look for any missed spots, drips, or areas that need touch-ups. If satisfied, move on to the next section. If not, correct any issues before they dry.
- Cleanup: Once you’ve finished painting, clean your tools immediately to prevent paint from drying and making them unusable. Rinse brushes and rollers under water, then store them properly for future use.
Cutting in, rolling, and maintaining wet edges
The key to a smooth paint job is maintaining a ‘wet edge’ – keeping the paint you’re applying slightly damp so it blends seamlessly with what’s already on the wall. Here’s how:
Cutting In: Using an angled brush, apply paint along edges in 2-3 foot sections at a time. Work quickly and confidently, using long, smooth strokes to create a straight line.
Rolling: Fill your roller tray with paint and use it to apply paint to the walls in a ‘W’ or ‘M’ pattern, working from top to bottom. Keep your roller cover well-loaded but not dripping. Overlap each stroke by about half to ensure even coverage and avoid lap marks.
Maintaining Wet Edges: After cutting in an edge, immediately start rolling the adjacent wall section before the paint on the edge dries. This helps blend the two areas together seamlessly. If you can’t reach the next section right away, lightly touch up the edge with your brush to keep it wet.
Drying, recoat timing, and inspection stop points
Before you progress to the next coat or declare the job done, use this checklist to ensure your paint has dried properly and there are no issues that need addressing.
- Check for Drips: Inspect walls for any drips or runs. If found, lightly sand them smooth once dry, then touch up with a small brush.
- Feel the Surface: Gently touch the painted surface to ensure it’s completely dry. It should feel cool and smooth, not tacky or warm.
- Look for Missed Spots: Check for any areas you may have missed during painting. Inspect corners, edges, and hard-to-reach spots.
- Inspect Color Uniformity: Ensure the paint color is even across the entire wall. If there are lighter or darker patches, you may need to sand lightly and repaint those areas.
- Check for Cissing: Look for any areas where the paint has beaded up instead of spreading out evenly. This could indicate a problem with the surface preparation or the paint itself.
- Feel for Texture: Run your hand over the painted surface to feel for any raised grain, bumps, or other texture issues. If found, lightly sand and repaint those areas.
- Check Recoat Timing: Before applying a second coat, wait until the first coat is completely dry (usually 24-48 hours). Check your paint can for specific recoat times.
- Inspect Edges: Ensure all edges are smooth and even. If not, lightly sand and touch up as needed.
- Final Inspection: Once you’re satisfied with the drying process and have made any necessary touch-ups, perform a final walkthrough to ensure everything looks perfect.
Quick rule: Always follow the manufacturer’s recommended drying and recoat times for best results. Rushing this process can lead to poor adhesion, peeling, or other issues down the line.
Lighting, Undertones, and Room Function Considerations
Natural and artificial light reveal undertones differently, so test samples in the room’s typical lighting. Move a sample around the room to see how it looks at different times of day. Use this to decide which white best fits the space and furnishings.
Match white to room use and function by considering glare, mood, and wear. Check label or data sheet for guidance on sheen and durability in high-traffic rooms. If you’re unsure, compare options in the room with actual lighting on during a typical evening or day.
How different light sources affect white paint
White paint can look drastically different under various lighting conditions. Understanding how light affects your chosen shade is crucial.
Warm lighting, like incandescent bulbs or sunset, casts a yellowish glow. It makes whites appear creamier or even yellow-tinged. Cool lighting, such as fluorescent lights or north-facing windows, has a blue undertone that can make whites look brighter and cooler.
Preview your paint under the same conditions you’ll have in the room. Tape up samples, turn on your lights, and observe at different times of day to see how the light changes the appearance of the white.
Matching white to furniture, floors, and trim
White is versatile but can still clash if not chosen wisely. Consider your existing elements when selecting a white.
For instance, cool-toned woods or dark floors might look best with a warm white that complements them. Conversely, light-colored woodwork could pair well with a bright, cool white.
Test adjacent samples together before committing. Tape swatches of your chosen white next to your furniture, flooring, and trim. Observe how they interact in different lighting conditions to ensure a cohesive look.
Common Mistakes, Troubleshooting, and Fixes
Avoid skipping prep or using too thin a coat, which can make whites look uneven. Don’t rush the dry times and skip the recommended cure period between coats. Keep a note of any issues you see and plan fixes before the next coat.
For troubleshooting, rely on product instructions or data sheets for fixes like blotching, peeling, or color drift. If you encounter a problem, verify the cause with the label or manufacturer guidance before applying a remedy. Prevention beats fixes when painting white.
Tackling streaks, lap marks, and uneven sheen
Streaks and lap marks happen when paint dries too quickly or you’re not maintaining a ‘wet edge’. Uneven sheen can be due to poor surface preparation. Here’s how to fix:
Streaks/Lap Marks: Sand lightly with fine-grit sandpaper, wipe off dust, then apply another coat. Keep your roller or brush well-loaded and work quickly.
Uneven Sheen: Lightly sand the area, wipe clean, then spot prime before painting again. Ensure your paint is mixed well and use even strokes.
Handling stains, bleed-through, and color shifts
Stains can bleed through if not properly sealed. Color shifts might occur due to undertones or lighting changes. Here’s how to manage:
Stains/Bleed-Through: Use a stain-blocking primer before painting. Let it dry, sand lightly, then clean off dust before painting.
Color Shifts: Check your paint undertones under different lights. If needed, adjust your paint choice or consider using a color-matching app for better accuracy.
Cleanup, Maintenance, and Final Quality Checklist
Finish with proper cleanup of brushes, rollers, and trays per the product label. Wipe splatters while still fresh to prevent buildup. Store leftover paint as directed and label the container for future touch-ups.
Use a concise final checklist to confirm the job looks professional: even color, clean edges, and no drips or missed spots. Compare against manufacturer guidance for cure times and recoat windows before concluding the project.
Proper cleaning and storing of tools and leftovers
Once you’ve finished painting, it’s time to clean up. Here’s a checklist to ensure your tools are ready for the next job.
- Clean brushes: Rinse with water (alkyd-based paint) or solvent (oil-based paint), shape bristles, and let dry.
- Clean rollers: Remove excess paint, rinse thoroughly, and allow to air dry.
- Store leftover paint: Seal tightly, label with date and color, and store in a cool, dry place.
- Dispose of waste: Follow local regulations. Don’t pour down drains or into the trash.
- Clean trays: Scrape excess paint, rinse, and allow to air dry.
- Inspect drop cloths: Launder if possible, dispose of responsibly if not.
- Check on tape: Remove carefully, inspect for any residue or damage.
- Wipe down handles: Clean any paint off tool handles to prevent rusting.
Quick rule: Regular cleaning and proper storage extend the life of your tools.
Long-term maintenance and touch-up strategy
After painting, it’s important to maintain your walls for longevity. Here’s a checklist to help you keep your paint looking fresh.
- Touch up nicks: Paint over small scratches or chips as soon as they appear.
- Wash walls periodically: Clean with mild soap and water, rinse, and let dry. Avoid harsh chemicals.
- Store test samples: Keep leftover paint and formulas for touch-ups and future reference.
- Monitor light exposure: Direct sunlight can fade paint over time. Consider window treatments if necessary.
- Check for moisture: Excessive humidity or water damage can cause peeling or bubbling.
- Inspect for pests: Insects and rodents can cause damage to walls, leading to paint issues.
- Observe changes in color: If your white paint starts to look yellowed or discolored, it might be time for a repaint.
- Check for cracks or holes: Fill and sand any new damage before touching up.
Quick rule: Regular maintenance and timely touch-ups can extend the life of your paint job by years.
Conclusion
Choosing the right white and preparing the room properly matters more than you think. A solid plan keeps surfaces durable, colors true, and your finish clean and even, with safety built in from the start.
Make your next move with this quick, practical checklist: confirm the room’s lighting and finish needs, test the chosen white in a small patch, repair and sand any flaws, clean and protect floors and trim, mask off surfaces, prime where needed, choose the correct paint and sheen, mix thoroughly, gather the right tools, follow the step-by-step workflow with the clear stop points, ensure adequate ventilation and steady safety practices, and do a final run-through before cleanup and put-away.
Common mistakes to avoid are skipping surface prep, painting over damp or flaky areas, using the wrong primer or finish for the space, and piling on coats too thick. Safety rules are simple: work with good ventilation, wear a mask when sanding or spraying or if at all dusty, test colors in a small area first, and never rush through drying times or ladder work. These habits prevent costly touch-ups and irreversible damage.
If you’re facing high ceilings, wide wall areas, moisture concerns, or significant repairs, consider bringing in a professional instead of pushing ahead alone. When you do it right, you’ll end up with a crisp, lasting white that enhances the room and stays looking fresh. Stay practical, stay steady, and finish with confidence.
FAQ
How can I avoid a chalky or uneven look when painting walls white?
Pick a finish that suits the room and test patches on actual walls. Check for uniform coverage in the test area and follow the manufacturer’s instructions for the product. If it looks off, don’t guess—compare swatches and adjust before the whole wall is done.
How do I prevent roller marks and lap lines with white paint?
Keep a wet edge and work in small sections with steady, overlapping strokes. Don’t overwork a patch once it starts to dry. If you see lap marks, feather them out with light, even passes while the paint is still fresh.
What’s the best way to protect trim and ceilings while painting walls white?
Tape carefully along trim and use drop cloths to cover floors. Cut in with a steady hand using a small brush, then roll the walls. Remove tape while the edge is still slightly tacky to avoid peeling paint.
How should I handle touch-ups after the paint dries?
Use a small brush for precise touch-ups and match the finish as closely as possible. Feather the edges to blend with the surrounding paint. If color or sheen looks off, it’s safer to repaint the affected area rather than patching repeatedly.