
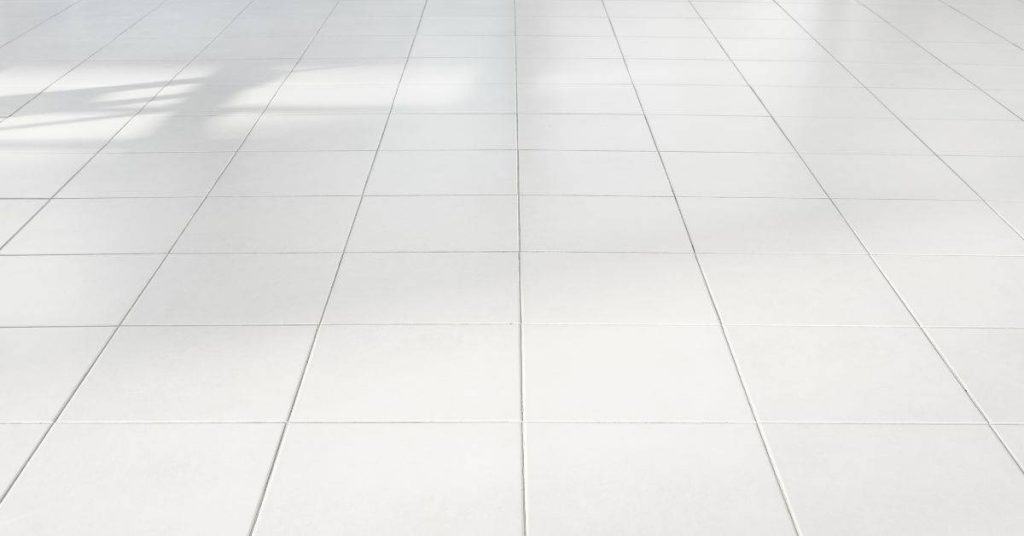
Introduction
Sealing grout on new tile is a responsibility that should be agreed upon between homeowner and contractor. If grout is not sealed, it can stain or absorb moisture, which is why the topic matters. Check who agreed on sealing and what the manufacturer or installer recommends for your job.
How to test if sealing is needed involves simple checks like whether water beads on the grout or how the grout feels after cleaning. If you need to seal, follow a practical, hands-on process: clean, apply sealant with proper applicator, and wipe off excess, then cure as directed. Always verify with product labels and local rules before proceeding.
Key takeaways
- Responsibility for sealing grout on new tile depends on contract terms.
- Unsealed grout can absorb moisture, stain easily, and harbor mold growth.
- Test grout sealing by water droplet retention and color change checks.
- Steps to seal properly: clean grout, choose compatible sealer, apply evenly.
- Safety: follow manufacturer instructions, wear gloves, ventilation, and eye protection.
- Long-term maintenance includes periodic resealing per product guidance and use precautions.
Table of Contents
- Introduction
- Key takeaways
- Who Is Typically Responsible for Sealing Grout: Homeowner Vs Contractor
- Common Problems from Unsealed or Poorly Sealed Grout
- Causes of Grout Failure in New Tile Installations
- How to Test Whether Grout Is Properly Sealed
- Fixes for Improperly Sealed or Failing Grout
- Tools, Materials, and Product Recommendations (Specs and Safety)
- Legal, Warranty, and Cost Considerations
- Long-Term Maintenance to Prevent Future Problems
- Conclusion
- FAQ
Who Is Typically Responsible for Sealing Grout: Homeowner Vs Contractor
In most projects, sealing grout is treated as part of installation or as a follow-up service, depending on local norms and the contract. Regional practices and trade standards influence whether sealing is bundled or listed as an optional add-on. Expect the base scope to vary by who is involved in the installation and what is written in the agreement.
Review contracts for clear language such as “seal grout,” “protect grout during installation,” or “creeping maintenance obligations.” Look for who is responsible if sealing is not completed, and how warranties respond to sealing decisions. Note situations that shift responsibility, like DIY tiling or use of self-sealing products, and how to document these in the project paperwork.
Contract Language and Job Scope
When hiring a contractor, always review the contract to understand who’s responsible for sealing grout. Here’s what to look for:
Included in Contract: If ‘seal grout’ or ‘protect grout during installation’ is mentioned, the contractor will likely handle it.
Not Included: If there’s no mention of sealing, it might be the homeowner’s responsibility. Look for phrases like ‘creeping maintenance obligations.’
If missing, add a clause: ‘Contractor shall seal all grout joints within 72 hours after installation‘ to ensure clarity.
When Tile Setters or General Contractors Must Seal Grout
Tile setters and GCs usually include grout sealing as part of their workmanship:
Tile Setters: They typically seal grout during installation, especially in wet areas like bathrooms. It’s part of their trade standard.
General Contractors: If they manage the tiling project, they should ensure grout sealing is done by a qualified tradesperson. Check if it’s included in their scope of work.
For separate sealing services, expect additional costs and possibly delayed warranties.
Homeowner Responsibilities and Timelines
After installation, homeowners play a crucial role in grout maintenance:
Timing Matters: Seal grout within 7-14 days after installation. Earlier sealing can prevent stains; later may require additional cleaning.
Maintenance Intervals: Re-seal every 2-3 years, or as needed based on wear and tear. Regularly inspect for signs of deterioration.
DIY sealing is possible but ensure you use the right sealant and follow manufacturer’s instructions to avoid voiding warranties.
Common Problems from Unsealed or Poorly Sealed Grout
Visual signs include color changes from staining, white mineral blooms, mold or mildew growth, cracking, or gaps that suggest water intrusion. These cues help identify where sealing may be insufficient or failing. Each issue has its own telltale appearance you can spot during routine checks.
Causes tie to porous grout, uneven sealer coverage, and frequent moisture exposure or harsh cleaners. Diagnostic checks include simple water tests and a damp shadow test, plus moisture readings where appropriate. These problems affect grout strength, porosity, and cleanliness over time, leading to higher maintenance needs.
Cosmetic vs Structural Problems
The first signs of unsealed grout often show up on the surface. But don’t mistake these for minor issues.
Color changes, efflorescence, and mold are cosmetic problems. They’re unsightly but don’t necessarily mean deep damage.
Structural risks hide behind the scenes. Cracking grout or gaps signal water intrusion. Soft spots underfoot hint at subfloor issues. These need immediate attention to prevent costly repairs.
Early Warning Signs to Watch For
Regular checks can catch sealing failures early. Here’s what to look out for:
Discoloration: Grout should be uniform in color. Dark patches or halos around tiles signal staining.
Softness: Press gently on grout lines. Soft spots indicate water intrusion and potential damage behind the tile.
Cracking or puddling: Hairline cracks or standing water after rain hint at sealant failure, inviting more moisture in.
Long-Term Effects on Tile and Substrate
Prolonged water exposure from poor sealing can wreak havoc:
Subfloor damage: Water seeps into subfloors, causing rot, warping, or weakening structural integrity.
Grout deterioration: Unsealed grout absorbs moisture, leading to crumbling and reduced bond strength with tiles. This can cause tiles to pop off.
Microbial growth: Moisture breeds mold and mildew, which can spread behind tiles, causing further damage and health risks.
Causes of Grout Failure in New Tile Installations
Root failures start with mixing, water ratio, and curing conditions that affect strength and adhesion. Improper grout choice for tile size and substrate can also create weak joints or mismatches. Premature sealing traps moisture and can lead to failures if curing isn’t complete.
Surface preparation matters too: dirty or oily substrates, improper priming, and flatness issues contribute to poor bonding. Environmental and installation factors such as temperature, humidity, and airflow influence cure and performance. Movement or deflection in the substrate can crack grout over time.
Material and application errors
Choosing the right grout and applying it correctly is crucial for a successful tile installation. Here are some common material and application mistakes to avoid:
- Wrong Grout Type: Using sanded grout with small tiles or narrow joints can cause cracking. Unsanded grout might not be strong enough for large tiles or wide joints.
- Improper Mixing Ratios: Too much water weakens the grout, making it susceptible to cracking and staining. Not enough water makes it hard to spread and causes voids.
- Tool Misuse: Over-wiping with a sponge can remove too much grout from joints, leading to weak spots. Insufficient back-buttering leaves gaps that won’t hold grout.
- Ignoring Dry/Cure Times: Rushing the drying and curing process weakens the grout’s bond and makes it prone to failure.
- Incorrect Grout Color: Dark grout colors can stain and show every imperfection. Lighter colors may require more coats or sealant for protection.
Environmental and substrate factors
Grout needs the right conditions to cure properly. Here’s how environmental factors and substrate issues can cause grout failure:
High Humidity: Excess moisture during curing prevents grout from hardening, leading to weak bonds and cracking.
Extreme Temperatures: Grout should not be applied in temperatures below 50°F (10°C) or above 90°F (32°C). Extreme temperatures can cause grout to cure too fast or too slow, leading to weak spots.
Substrate Flexing/Deflection: Movement in the substrate can cause grout to crack. Ensure your substrate is flat and stable before tiling.
Water Exposure During Curing: Grout needs time to dry and cure without water exposure. Washing or exposing tiles to water too soon can weaken the grout’s bond.
Product compatibility and contamination
Compatibility between sealant, grout, and other products is crucial for a successful installation. Contamination or incompatibility can prevent proper sealing:
Sealant/Grout Incompatibility: Using incompatible sealants and grouts can cause discoloration, staining, or weak bonds. Always check product compatibility before use.
Residues from thinset mortar, cleaners, or other substances on the tile surface can prevent grout from bonding properly. Ensure your tiles are clean and free of residues before grouting.
Improper priming can also cause grout failure. Priming helps grout adhere better and prevents it from soaking into porous surfaces. Always prime as recommended by the manufacturer.
How to Test Whether Grout Is Properly Sealed
Testing goals are to confirm the seal prevents water intrusion, staining, and mold growth, and to distinguish surface moisture from actual penetration. Use practical tests after cure and after any resealing to verify performance. Document conditions and results for reference.
Low-cost steps include a controlled water drop test and a color test using safe amounts of dye or food coloring. Record outcomes and interpret minimal color changes as surface resistance and deeper penetration as failure. Consider advanced methods if interior moisture is suspected or if results are inconclusive.
Step-by-Step Process
The following steps guide you through testing your grout seal to ensure it’s protecting your tile installation as intended.
- Preparation: Ensure the grout has cured for at least 72 hours and the area is clean, dry, and free of any debris. Protect adjacent surfaces with painter’s tape and plastic sheeting.
- Water Drop Test: Apply a few drops of water to the grout lines using an eyedropper or pipette. Observe how the water interacts with the grout.
- Food Coloring Test: Mix 1 tablespoon of food coloring with 2 cups of water. Apply this mixture to the grout lines, allowing it to sit for 30 minutes before blotting dry with a paper towel.
- Inspect Results: Check if water beads up and stays on the surface (good seal) or penetrates into the grout (poor seal). For food coloring, look for any color transfer onto the tile or substrate, indicating poor sealing.
- Clean Up & Document: Remove protective materials, clean up any test residue, and document your findings with photos and notes. Retest every 6 months to a year, or as recommended by your sealer product’s warranty.
Simple DIY tests
The water drop test and food coloring test are easy, low-cost methods to check if your grout seal is intact. Here’s how to perform them:
Water Drop Test: Apply a few drops of water to the grout lines. If the water beads up and stays on the surface for at least 10 minutes, your grout is likely properly sealed. If it absorbs or darkens the grout, resealing may be necessary.
Food Coloring Test: Mix food coloring with water (as mentioned earlier) and apply to the grout lines. After 30 minutes, blot dry with a paper towel. Any color transfer indicates that moisture can penetrate the grout, signaling a need for resealing.
Repeat these tests in multiple spots along the grout lines to ensure consistency and check for any weak points.
Tools for more definitive testing
When simple DIY tests aren’t conclusive or you suspect hidden moisture issues, consider using these tools for more accurate readings.
- Moisture Meter: Rental options are available at hardware stores. Set it to the appropriate scale (e.g., 0-20% for wood flooring) and press the probes into the grout lines. Readings above 15% may indicate moisture penetration.
- Infrared Imaging: This tool detects heat patterns, which can reveal hidden moisture. Rentals are available, or hire a professional with specialized equipment. Suspicious patterns warrant further investigation.
- Probe Test: For dense substrates like concrete, use a probe test to measure moisture content deep within the material. This may require hiring a professional for accurate results.
When to call a professional inspector
While DIY tests are helpful, there are situations where professional assessment is recommended:
Visible Substrate Damage: If you notice cracks, warping, or other signs of damage to the substrate beneath your tile, contact a professional immediately. This could indicate structural issues that require expert intervention.
Persistent Leaks: If you’ve identified leaks but can’t pinpoint their source, hire a professional leak detection service. They have specialized equipment and expertise to locate hidden moisture problems.
Ambiguous Test Results: If your DIY tests yield inconsistent or unclear results, consider hiring a professional inspector. They can provide more accurate assessments using advanced tools and techniques.

Fixes for Improperly Sealed or Failing Grout
Symptoms like staining, efflorescence, cracking, mold, and visible water penetration guide the remediation path. Understanding these signs helps choose the right level of intervention. Each scenario has a practical progression from least to most invasive.
Remediation tiers start with surface resealing, then deep cleaning and resealing, followed by grout repair or replacement, and finally tile removal in extreme cases. Use clear criteria like damage extent, moisture levels, and accessibility to decide the approach and expected time/effort involved.
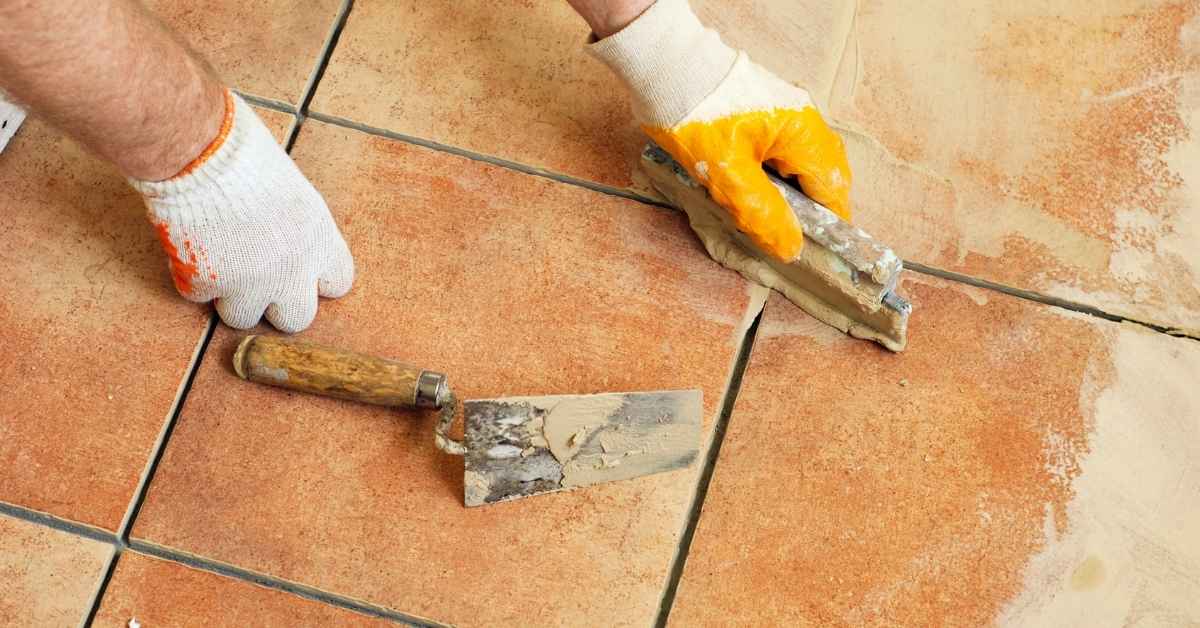
Resealing steps for the homeowner
First, clean your grout using a solution of water and mild detergent. Let it dry completely.
If grout is old or damaged, you might need to etch it with a grout etcher to prepare it for resealing. Follow manufacturer’s instructions.
Choose the right sealer type – penetrating sealers for moisture resistance, topical sealers for stain protection. Apply according to package instructions, using a paintbrush or sprayer. Coverage is typically 100-250 sq ft per gallon.
Safety first: Wear gloves and eye protection. Ventilate the area during application and curing.
Professional remediation options
Pros can steam clean grout to remove deep-seated dirt and stains, then apply sealers.
For severe cases, they may use grout injection to fill cracks or replace damaged grout entirely. They can also repair substrates if necessary.
If your tile is under warranty, pros might offer warranty-backed fixes. Always check with the manufacturer first.
Tip: Get multiple quotes and ask about their process and expected results.
When to replace grout or tile
If more than 10% of your grout is damaged, it’s often cheaper and easier to regrout the entire area.
However, if there are structural concerns, like crumbling underlayment or water damage, you might need to remove and replace tiles. This can be costly but necessary for preventing further issues.
Consider the extent of damage, your budget, and whether it’s a DIY job or needs professional help. Remember, prevention is key – regular maintenance can extend the life of your tile installation.
Tools, Materials, and Product Recommendations (Specs and Safety)
Build a compact toolbox with essential hand tools, mixing containers, and brushes suitable for grout work and testing. Keep supplies organized to prevent cross-contamination and to simplify clean-up. Note durability and cleanup considerations for a DIY setup.
Break down materials by category: penetrating vs topical sealers, epoxy versus cementitious grout compatibility, and surface prep products. Include PPE, ventilation needs, and SDS references. Include basic test methods for penetration and shade change, plus patch testing steps for compatibility.
Sealer types and how to choose
When it comes to sealing grout, you’ve got three main sealer types: penetrating, topical, and hybrid.
Penetrating sealers soak into the grout, protecting from within. They’re great for shower floors and walls where moisture is a constant. But they won’t hide stains or change the grout’s color.
Topical sealers sit on top of the grout, forming a barrier. They’re ideal for high-traffic areas like kitchen floors as they resist scuffs and stains. However, they can darken the grout slightly.
For exterior or heavy-duty use, consider hybrid sealers. They combine penetrating and topical properties but are pricier. Always check if your chosen sealer is compatible with your grout type – epoxy for epoxy grouts, cementitious for cement-based ones.
Safety and application precautions
Safety first, folks. Always read the manufacturer’s safety data sheet (SDS) before starting.
Ventilation is crucial when applying sealers. Open windows, use fans, or work outdoors if possible. Some sealers require a respirator – follow SDS guidelines.
Wear gloves, goggles, and a long-sleeved shirt. Solvent-based sealers can cause skin irritation, so keep ’em off your skin. Dispose of solvents responsibly – don’t pour them down the drain.
Professional application might be safer if you’re dealing with large areas or complex layouts. They’ve got the gear and know-how to get it done right and safe.
Visual checkpoints and quality control
After application, it’s time for a quick inspection. Here’s what to look out for:
- Beading test: Lightly mist water onto the grout. If it beads up, the sealer’s working.
- Touch and cure inspection: Wait 24 hours, then gently touch the grout. It should feel dry and not sticky.
- Color check: Ensure the grout hasn’t darkened too much with the sealer.
- Warranty doc: Note down the sealer type, application date, and any issues you faced for future reference.
- Missing spots: Check for any unsealed areas that need reapplying.
- Surface damage: Look for any damaged grout or tiles that might need repair.
- Cleanliness: Ensure no sealer residue is left on the tile surface.
- Curing time: Make sure you’ve allowed enough time before using the area heavily.
Quick rule: If something doesn’t look or feel right, double-check your application and wait a bit longer for curing. Better safe than sorry!
Legal, Warranty, and Cost Considerations
Clarify who is responsible for grout sealing in the contract, specs, and any applicable guidelines. This includes how sealing is defined within warranties and what maintenance milestones apply. Understand local code or manufacturer expectations that affect responsibilities.
Warranty obligations cover whether sealing is a workmanship issue or material defect, and what voids the warranty. Document damage with photos and timestamps, and know when to pursue mediation or small claims. Provide safe cost ranges and note that variables like area size and tile type influence final numbers.
Warranties and manufacturer requirements
Manufacturer guidelines play a big role in grout sealing warranties. Contractors must follow these to keep their warranty valid.
Sealers specified by the tile or grout manufacturer should be used. Using others may void the warranty. Follow their application procedures too.
Why does this matter? If your contractor doesn’t follow these, they could dodge responsibility for sealing issues later on.
Typical cost factors and ranges
Costs vary by region and project specifics. Here’s what to expect:
Sealing a typical bath/kitchen area (100 sq ft) might range from $250-$450. This includes materials and labor.
Regrouting can be around $3-$7 per square foot, plus materials. Replacing tile is pricier, around $8-$15 per square foot.
Documenting and pursuing claims
If you find defective sealing, document it. Take photos, note timestamps, and check for moisture intrusion.
Notify your contractor in writing. Give them a chance to fix the issue within their warranty period (usually 1-2 years).
If they don’t respond or can’t fix it, consider mediation or small claims court. When to involve a lawyer? If damages are significant or the dispute is complex.
Long-Term Maintenance to Prevent Future Problems
Establish a proactive maintenance cadence with regular cleaning, joint checks, and moisture assessments for early signs of wear. Outline clear actions and timelines when indicators appear. A routine helps catch issues before they escalate.
Include sealant lifecycle planning, typical re-seal intervals by grout type and exposure, and approved cleaners and care routines. Maintain a simple log with product details, dates, and inspection notes to guide future DIYers or pros.
Establishing a Routine Inspection and Cleaning Schedule
Regularly inspecting your tiled surfaces helps catch issues early. Here’s a simple checklist to follow.
- Monthly: Visually check grout lines for cracks or wear. Use a magnifying glass if needed.
- Quarterly: Measure grout depth with a ruler. Depth should be consistent; any variation may indicate damage.
- Spring and Fall: Clean tiles and grout using a mild, pH-neutral cleaner to remove dirt and grime.
- Annually (or as needed): Reseal grout based on tile type, porosity, exposure, and manufacturer’s recommendations.
- Before resealing: Test for sealant failure using water bead tests or dye penetration. If water is absorbed, it’s time to reseal.
- After cleaning: Rinse thoroughly with clean water and allow to dry completely before resealing.
- Before winter: Ensure proper ventilation in bathrooms and kitchens to prevent moisture buildup.
- Before using harsh chemicals: Test a small, hidden area first. Some cleaners can damage grout or tile.
Quick rule: Consistency is key. Stick to your schedule to keep your tiles and grout in top shape.
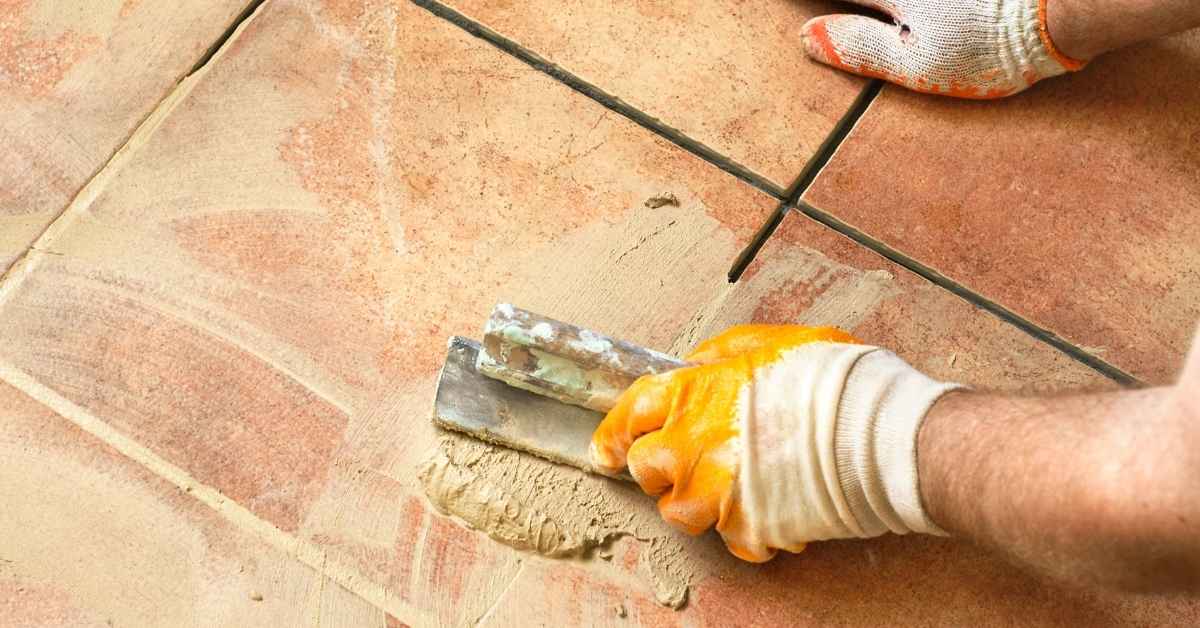
Re-sealing Grout and Tiles: Products, Tools, and a Step-by-Step Refresh Plan
Resealing your grout is crucial to maintain its longevity. Here’s how:
- Choose the right sealer: Use a penetrating sealer for natural stones or topical sealers for ceramic/porcelain tiles.
- Gather tools: You’ll need a grout brush, squeegee, rubber gloves, safety glasses, and painter’s tape. Rentable tools include sprayers and heat guns.
- Prepare the area: Clean, dry, and tape off the work area. Ensure proper ventilation.
- Apply sealer: Using a grout brush or sprayer, apply sealer to grout lines, working in small sections. Allow it to penetrate for the recommended time (usually 10-30 minutes).
- Remove excess: Wipe off any excess sealer with a damp cloth or squeegee after penetration time.
- Let it cure: Allow the sealed area to dry and cure according to manufacturer’s instructions (usually 24-72 hours).
- Clean up: Rinse tools thoroughly with water. Remove tape carefully to avoid damaging paint or wallpaper.
- Optional: heat treatment: For high-traffic areas, use a heat gun to accelerate curing and improve sealer penetration (around $50/day to rent).
Conclusion
Sealing grout correctly protects the look of your tile, keeps it clean, and stops water and mold from sneakily causing damage. Do it right and you reduce costly repairs and down-time, and you keep the job durable for years.
Apply this as a practical check: identify who is responsible, verify grout type and sealer compatibility, test a small area with proper prep and cure times, evaluate the test results, decide whether you fix or replace, assemble the needed tools and safety gear, follow manufacturer specs for application and ventilation, and schedule long-term maintenance so the grout stays sealed.
Common mistakes to avoid are using the wrong sealer for the grout or tile, skipping the test area or rushing the cure, and applying sealer over dirty, damp, or heavily stained grout. Safety first means gloves, eye protection, good ventilation, and reading product labels; work in a small area at a time, and never seal over wet grout or untreated joints.
If the project involves hidden areas, widespread failure, or uncertain test results, call a pro rather than guessing. When in doubt, take a measured approach, fix what you can safely, and stay focused on a durable seal. Stay practical, stay careful, and you’ll finish with a grout seal that lasts.
FAQ
Who is typically responsible for sealing grout on a new tile installation?
Look at the contract and local practices. If it’s not spelled out, ask the installer to confirm who handles sealers and when it should be done. Check the product label and manufacturer guidance to see who should apply and when to reseal.
What are common issues with grout that isn’t sealed or is poorly sealed?
Stains and discoloration can appear quickly. Grout may crumble or attract mold in damp areas. A dull look or faster wear on high-traffic spots is another sign to recheck sealing status.
How can I test if grout needs sealing?
Clean the grout and let it dry, then apply a small amount of sealer to a hidden patch. Wipe clean and see if the surface beads up or darkens unevenly. If it soaks in or changes color, it likely needs sealing or re-sealing.
What’s the basic steps to seal grout properly?
Read the sealer instructions and prep the area. Apply evenly with a brush, sponge, or applicator, away from grout lines too thick or puddled. Wipe off excess and let it cure per the product label before exposing to traffic or water.