
Introduction
Backdrop paint is a durable, washable coating that provides a uniform wall finish.
This guide explains how to choose the right product, prep surfaces, and apply it with practical techniques.
You’ll learn tips for smooth coverage, color control, and avoiding common mistakes so you can achieve professional-looking results.
Key takeaways
- Backdrop paint provides flat or subtle texture for photography or video sets.
- Best applied on smooth, sound surfaces with proper priming and sealing.
- Choose matte finishes to avoid glare and ensure even lighting coverage.
- Maintain consistent paint depth with two coats and controlled drying times.
- Store rolled or flat panels horizontally; avoid extreme heat or cold.
- Test color under expected lighting to prevent color shifts during shoot.
Table of Contents
- Introduction
- Key takeaways
- What is backdrop paint?
- Where backdrop paint works best
- Tools and materials checklist
- Surface preparation and priming
- How to paint a backdrop — step-by-step
- Color selection, lighting, and visual considerations
- Troubleshooting and common problems
- Maintenance, storage, and longevity
- Conclusion
- FAQ
What is backdrop paint?
Backdrop paint is a specialized coating designed for use on set or stage walls to read consistently on camera, under bright lights, and across different lenses. It’s formulated to stay uniform in color and finish, often with a flatter look than typical wall paints. It differs from regular wall paint and prop paints in its intended use, finish, and how it responds to lighting and camera sensors.
For DIY work, this matters because lighting, white balance, and color accuracy can make or break a shot. Using the right backdrop paint helps you avoid color shifts, blotchiness, or unwanted reflections that cheap paints can cause. Check the label or datasheet for specifics, and follow local disposal rules for household hazardous waste when you’re done; never dump paint into drains or soil, and expect to replace it if you see signs it’s going bad.
Key characteristics and finishes
Backdrop paint comes in different finishes, each with unique properties that affect how light interacts with the surface. A matte finish is great for reducing glare but can show imperfections easily. Satin provides a slight sheen, making it easier to hide minor flaws while still controlling reflections.
The opacity of backdrop paint is crucial; you want something that covers completely in one or two coats without showing through. This ensures the background remains consistent and professional-looking. Tinting capabilities also vary by brand—some allow for more color customization than others, which can be handy if you need specific shades for your shoot.
Light-reflective properties are another key aspect. Backdrops often require even lighting to avoid harsh shadows or hot spots. A paint that reflects light evenly will help maintain a smooth gradient across the entire surface, making it easier to achieve professional results in any setting.
Types of backdrop paint (fabric, paper, vinyl, walls)
The type of backdrop material you use will dictate the kind of paint you need. For fabric, like muslin or canvas, look for paints that are specifically designed to adhere well and remain flexible over time without cracking or peeling.
Seamless paper backdrops require a different approach. These often call for water-based acrylics with additives that enhance adhesion and durability on the smooth surface of the paper. Vinyl backdrops need paint formulations that can handle the rigidity and texture of vinyl, providing a long-lasting finish without compromising flexibility.
When painting walls as backdrops, you’ll want to use high-quality wall paints designed for large surfaces. These typically offer better coverage and durability compared to standard interior paints. Ensure your chosen paint is suitable for the substrate material—whether it’s drywall, plaster, or concrete—and consider any additional treatments like primers that might be necessary.
Where backdrop paint works best
Backdrop paint shines in controlled spaces like photo studios, home studios, stage sets, and green screen areas. It generally performs best indoors where you can manage humidity and temperature.
If you use it outdoors or in damp rooms, you may see issues with reflections, staining, or uneven tones. Choose a paint formulated for backdrops and follow the product label for guidance. Disposal rules vary—check local household hazardous waste rules; never dump into drains or soil.
Indoor studio vs location shoots
When setting up a backdrop for an indoor photo studio, you want something that’s permanent and durable. A painted wall or large vinyl sheet works great here because it can withstand frequent use without fading or tearing.
For location shoots, portability is key. You’ll need backdrops that are easy to transport and set up quickly. Fabric backdrops are ideal for this since they’re lightweight and roll up neatly into a compact package.
The durability needs also differ. An indoor studio backdrop should be tough enough to handle daily wear and tear, while location shoots require materials that can withstand outdoor elements like wind and rain but still look good after each use.
Surface compatibility matrix
Fabric backdrops work well with fabric paint or spray paints designed for textiles. These paints adhere to the material without cracking or peeling, even when folded and stored.
Wood and drywall surfaces require a primer before painting. Use an oil-based primer on wood for better adhesion and durability. For drywall, choose a water-based primer that seals the surface and prevents paint from soaking in too much.
Paper rolls are great for temporary setups but need special care. Acrylic paints work best here because they dry quickly and don’t damage the paper. Avoid oil-based paints as they can warp or tear the paper.
For vinyl backdrops, opt for specialized vinyl paint that’s designed to stick without cracking when rolled up. This type of paint also resists fading from UV light exposure, making it perfect for both indoor and outdoor use.
Tools and materials checklist
This H2 covers the tools, paints, primers, solvents, and safety gear you’ll need for typical backdrop projects. You’ll want a basic kit with hand tools, brushes or rollers, painter’s tape, drop cloths, and the right paints, primers, and compatible solvents plus eye and respiratory protection. Check product labels or datasheets for the exact requirements.
Having the right kit saves time and helps you finish cleanly and safely. It also reduces trips to the store and avoids bad fits between products. If you’re unsure about a item, read the label and choose substitutes that fit your project; follow local rules for disposal and check household hazardous waste guidelines—never dump anything down drains or into the soil.
Paint types and recommended brands
Before you start your backdrop painting project, use this checklist to ensure you have the right tools and materials.
- Oil-based paint: Use for durability; check if it’s low-VOC. If skipped, indoor air quality may suffer.
- Water-based paint: Quick-drying option; confirm high-coverage formula. Skipping can lead to multiple coats needed.
- Low VOC: Environmentally friendly; verify safety data sheets (SDS). Not checking could harm health.
- High coverage: Saves time and paint; check manufacturer specs. Avoids extra work and wasted materials.
- Epoxy primer: For smooth application; ensure it’s compatible with backdrop surface. Skipping can cause poor adhesion.
- Vinyl fabric: Durable option for large backdrops; confirm thickness and durability ratings. Not checking may result in wear issues.
- Paper backdrop: Easy to set up but less durable; verify weight and tear resistance. Skipping can lead to frequent replacements.
- Vinyl paint: Water-resistant option for outdoor use; check if it’s UV resistant. Not using UV protection leads to fading.
Quick rule: Always choose paints with low VOC and high coverage for better results and less hassle.
Brushes, rollers, sprayers and accessories
Before you start your backdrop painting project, use this checklist to ensure you have the right tools and materials.
- Paint brushes: For detailed work; check bristle quality. Skipping can result in poor edges.
- Roller covers: For large areas; confirm nap length matches surface texture. Not checking leads to uneven coverage.
- HVLP sprayer: For smooth finish on small backdrops; ensure it’s set up correctly. Skipping can cause overspray issues.
- Airless sprayer: For large, flat surfaces; verify pressure settings. Not checking leads to paint waste and poor coverage.
- Drop cloths: Protect floor from spills; check for durability. Skipping can damage flooring or other surfaces.
- C-clamps: Hold backdrop in place during painting; confirm they’re strong enough. Not using clamps may cause backdrops to shift.
- Masking tape: For clean edges around fixtures; verify quality and adhesion. Skipping can lead to messy lines.
- Squeegee: Remove excess paint from vinyl surfaces; check for flexibility. Not checking leads to uneven finish.
Quick rule: Always choose the right tool for the job size and surface type.
Surface preparation and priming
This section walks you through cleaning, repairing, sizing, and priming different backdrop surfaces so paint sticks and covers evenly. You’ll learn practical steps to prep concrete, plaster, drywall, or wood without leaving hidden failures. No guessing—prep right and you’ll save trips back to fix problems.
Good prep makes adhesion consistent and prevents peeling or blotching later. It matters because DIY results depend on the surface you start with, not just the paint you pick. Follow the product label for timing and compatibility, and check local guidelines for disposal—don’t dump anything down the drain or into soil.
Preparing fabric and canvas backdrops
Start by washing your fabric backdrop to remove any dust, dirt, or sizing from the manufacturing process. Use a mild detergent and cold water for delicate fabrics like silk or cotton. Rinse thoroughly until the water runs clear.
Next, stretch out the fabric on a frame or tarp to ensure it’s taut before applying starch or sizing. This prevents any sagging during painting and keeps your backdrop flat and wrinkle-free. Apply the sizing evenly with a brush or spray bottle, making sure not to leave any streaks.
Once dry, prime the fabric using an acrylic primer designed for porous surfaces. This step is crucial as it seals the surface and provides a better base for paint adhesion. Avoid oil-based primers, which can yellow over time or damage delicate fabrics.
Preparing paper, vinyl, and wall surfaces
For paper backdrops, start by patching any tears with a lightweight spackle. Smooth it out with a putty knife to create a seamless surface. Once dry, lightly sand the area to remove any rough spots.
Vinyl backdrops require special attention due to their nonporous nature. Use a primer specifically designed for vinyl surfaces like Zinsser Bulls Eye 1-2-3. This type of primer bonds well and helps paint adhere better without peeling or cracking over time.
Wall-mounted backdrops should be scuffed lightly with sandpaper to create some tooth for the paint to grab onto. For new walls, a coat of primer is essential before painting. If you’re repainting an existing wall backdrop, clean it thoroughly first and patch any holes or cracks.
How to paint a backdrop — step-by-step
Begin with layout and masking to define the scene. Apply an undercoat, then build layers and blend as you go. Let each layer dry before moving on.
Sticking to the order keeps hard edges clean and colors even, giving a professional look. It helps you spot issues early and makes the finish easier to fix later. Always check the product label or datasheet for guidance and follow local disposal rules for paint waste.
Step-by-Step Process
This sequence guides you through painting a backdrop from start to finish, ensuring everything is done safely and correctly.
- Check your tools and materials are ready. Lay out drop cloths and tape off areas not being painted.
- Apply the first coat of primer evenly with a roller or brush. Let it dry completely before moving on.
- Paint the base color using long, smooth strokes to avoid streaks. Overlap slightly for coverage but don’t overwork.
- Add any details or patterns next. Use small brushes and work in sections to keep things neat.
- Allow each layer to dry fully before adding another coat if needed. Check by touching the paint lightly; it should be firm.
Small DIY backdrop (home or tabletop)
For a small backdrop, prep your surface first with primer and let dry overnight. Use a roller for large areas and brushes for edges.
Roll on the base coat evenly, making sure to cover all spots. Let it sit for at least 4 hours before adding any details or patterns.
Finish by checking for missed spots or uneven patches. If everything looks good, let it dry completely overnight before setting up your shoot.
Large seamless or studio backdrop
To paint a large backdrop, start with thorough surface prep and priming. Use a sprayer for even coverage across the entire area.
Roll on your base color in long strokes to avoid lap marks. Work in sections if needed but ensure each overlaps slightly for smooth transitions.
For consistency, mix paint batches ahead of time so colors match perfectly. Let layers dry fully before adding more coats or details.
Color selection, lighting, and visual considerations
Paint color, finish, and texture change how a scene reads under studio lighting. The same shade can look warm, cool, or flat depending on the light and camera white balance. These choices also affect how much the subject stands off from the background.
Test swatches under your actual lights and camera setup so you see the real result before you commit. Finish and texture affect glare and diffusion and help or hurt subject separation. Check the product label or datasheet for guidance on finish and color notes, and follow local rules for disposal.
Choosing colors for different shoots (portraits, product, video)
When it comes to portraits, you want a backdrop that complements skin tones without overpowering them. Soft pastels or neutral shades like light gray work well here.
For products, the color of your backdrop should highlight rather than compete with the item. A neutral white can make colors pop, while darker grays help to isolate and focus on the product details.
In video shoots, consistency is key. Choose a solid color that doesn’t distract from the content or cause unwanted reflections. Opt for matte finishes over glossy ones to avoid glare issues.
Neutral grays, chroma keying, and avoiding reflections
Avoid common pitfalls like hotspots and color casts by choosing the right backdrop colors. Neutral grays are great for clean lines and minimal distractions.
- Use neutral gray: Provides a balanced look without overpowering subjects or products.
- Opt for chroma key green/blue: Ideal for video editing where you need to remove the background easily.
- Avoid glossy surfaces: They can cause unwanted reflections and glare, making your setup look unprofessional.
- Minimize direct light sources: Position lights strategically to prevent harsh shadows or hotspots on the backdrop.
Maintaining a professional appearance means paying attention to these details. A well-chosen backdrop can make all the difference in your final output.
Troubleshooting and common problems
Troubleshooting this coating means spotting common issues like streaks, bubbles, cracking, color shifts, and adhesion failures and fixing them before they ruin the job. Start with a clean surface, correct mixing and application, and work in the right conditions to prevent these problems. If you see any of these signs, address prep and technique fast to keep the finish looking even and lasting.
These problems aren’t just cosmetic—they can turn into costly rework. Knowing what causes them helps you avoid mistakes, save time, and get a durable result. Use product labels and datasheets for limits and steps, and test a small area if you’re unsure.
Fixes for visible seams, lap marks, and overlap lines
To hide seams and lap marks on your backdrop, start by sanding the edges where the paint meets. Use fine-grit sandpaper to feather out the sharp line so it blends better with the surrounding area.
Once you’ve sanded down the rough spots, clean off any dust or debris before applying a thin coat of primer over the seam. This helps ensure good adhesion and a smooth finish when you apply your final paint layer.
If lap marks are still visible after priming, use a small brush to carefully blend in the edges where the paint overlaps. Work quickly but methodically to avoid creating new lines or streaks. Let everything dry thoroughly before moving on to the next step.
Dealing with peeling, mold, and stains
If you notice paint peeling off your backdrop, start by scraping away any loose pieces. Use a putty knife or scraper to remove the damaged area completely.
Mildew on fabric backdrops can be treated with a mixture of water and bleach. Apply it evenly using a spray bottle, then rinse thoroughly and let dry before repainting if necessary. For paper surfaces, use a mild detergent solution instead of bleach to avoid damaging the material.
For stubborn stains, try applying rubbing alcohol or acetone on a soft cloth to gently remove them without leaving marks behind. Always test these solutions in an inconspicuous area first to ensure they won’t damage your backdrop’s surface.
Maintenance, storage, and longevity
Keep painted backdrops clean and stored properly. Clean gently. Roll instead of folding for long-term shape, and touch up small nicks. Avoid harsh cleaners.
This matters because proper handling slows wear and keeps the backdrop looking even in studio use. Store them flat or rolled as recommended, and touch up nicks before they spread, so you get more use between cleanings.
Cleaning painted fabric and canvas
To clean your backdrop, start with a soft cloth dampened with water. Avoid harsh solvents like acetone or ammonia as they can strip the paint off the surface. Use mild soap if needed.
If you spot a stain, dab it gently with a solution of warm water and dish soap. Rinse thoroughly to remove any residue that could attract dirt over time. Make sure the backdrop dries completely before rolling or folding it up for storage.
Avoid scrubbing too hard as this can damage the paint layer. If you need to tackle tougher stains, consider using a mixture of baking soda and water to create a paste. Apply it gently with a soft brush and rinse thoroughly afterward.
Storing and transporting painted backdrops
When rolling up your backdrop, aim for a diameter of at least 4 inches to prevent creasing. Use a protective sleeve made from thick plastic or canvas to shield the paint from dust and moisture. Keep it in a cool, dry place.
Avoid storing backdrops near heat sources like direct sunlight or heaters as this can cause warping or fading of the paint over time. High humidity can also lead to mold growth on fabric backdrops, so keep them in an area with good air circulation.
When transporting your backdrop, roll it tightly but not too tight to avoid creases and folds that could damage the painted surface. Use a sturdy case or bag to protect it during transit. Handle carefully to prevent any accidental tearing or snagging.

Conclusion
Backdrops are a solid upgrade when you treat the prep, paint, and finish as a process, not a guess. Do it right and you’ll get a durable, clean look that withstands use and looks intentional.
First, wipe the surface clean and remove dust; rough up any slick areas; prime when needed; mix batches for color consistency; test a small area first; apply a first coat evenly and let it dry, then assess and apply a second coat if required; clean brushes and tools after, and store leftovers sealed. In short, check the surface, prep it properly, keep paint lines clean, and finish with two even coats plus solid protection.
Common mistakes to avoid are skipping primer on slick surfaces, over-thinning paint which creates runs, and rushing through coats without proper drying time. Stay mindful of safety: ventilate the space, wear a mask and eye protection, protect floors and adjacent surfaces, and never mix unknown chemicals. If you see peeling, bubbling, or large irregular patches, don’t press on—pause and assess or call a pro if needed.
If the job grows beyond a manageable project—very large walls, exposed framing, or questionable substrate—consider bringing in a professional rather than forcing a DIY fix. Stay patient, follow the steps above, and you’ll finish with a pro-grade look you can be proud of.
FAQ
What is backdrop paint?
Backdrop paint is a thick, even-colored coating meant to create a solid backdrop on walls or large surfaces. It hides textures and imperfections so the behind-the-scenes area looks clean in photos or on stage. It’s not a decorative glaze; it’s a flat, uniform finish.
Where can you use it?
You can use it on interior walls that need a clean, neutral backdrop for photos, video, or stage sets. Don’t use it outdoors unless the product specifically says indoor/outdoor rated. If the surface is rough, you’ll need extra prep or a primer first.
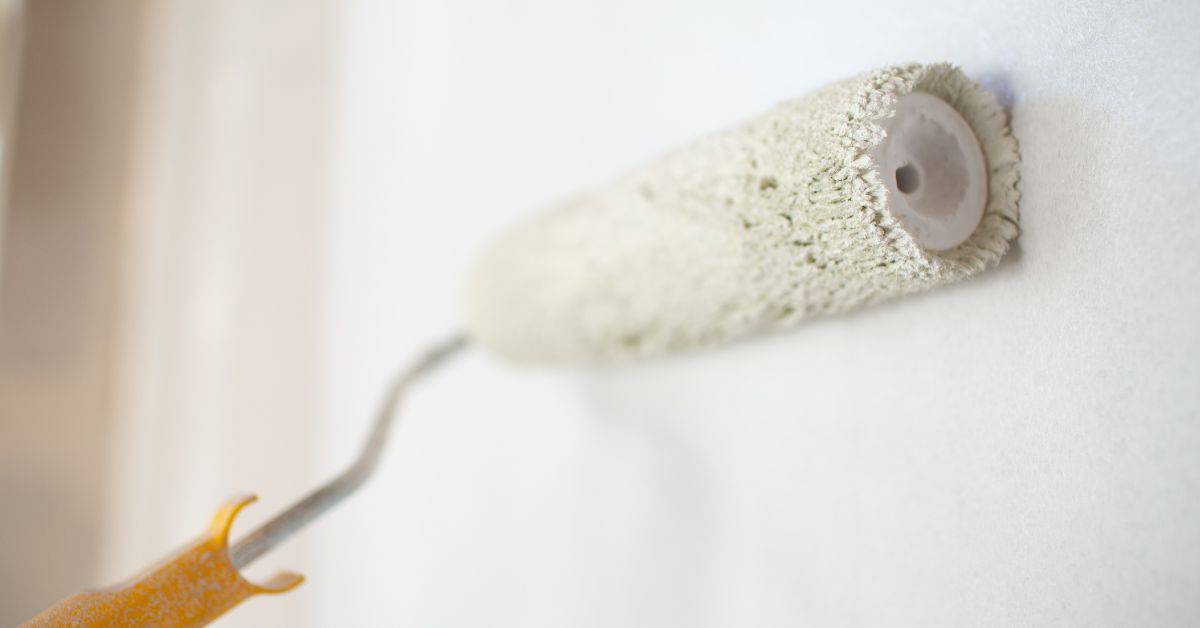
How do you apply it?
Prep the surface by cleaning and sanding rough spots. Prime if the wall is porous or stained. Apply with a roller in even, thin coats and let each coat dry before adding the next.
What common mistakes should you avoid?
Don’t skip prep or primer. Don’t overload the roller or brush—drips show up in photos. Avoid applying in hot, humid, or dusty conditions; it wrecks the finish and takes forever to dry.