
Introduction
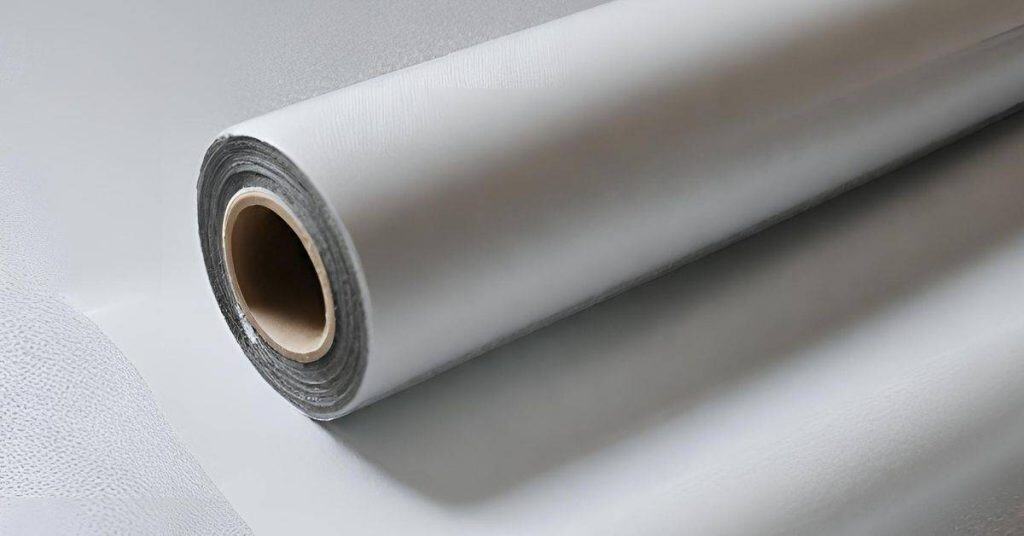
A double vapor barrier on a PWF is usually unnecessary and can trap moisture between layers. In plain terms, two barriers give moisture nowhere to go and can lead to damp spots and mold. Check the wall assemblies and follow manufacturer guidance when in doubt.
What to test: look for damp spots, water staining, and use simple moisture checks in suspected areas. Fixes: remove one redundant layer if allowed, reseal edges, and make sure drainage and ventilation are working; always verify with product labels and local rules before altering any barrier setup.
Key takeaways
- Verify if two vapor barriers exist by tracing seams and inspecting labeling.
- Avoid sealing multiple barriers without addressing the underlying moisture source first.
- Follow manufacturer instructions and local code when removing or replacing barriers.
- Test for unexpected moisture flow and condensation before choosing remediation steps.
- Document conditions with photos and notes to guide effective remediation decisions.
- Safety warning: avoid exposing electrical or plumbing when removing suspected barriers.
Table of Contents
- Introduction
- Key takeaways
- How Double Vapor Barriers Get Created — Common Causes
- Why a Double Vapor Barrier Can Be Harmful
- Diagnose: Inspections and Tests to Confirm a Double Vapor Barrier
- Material Specs and Standards to Consult Before Intervening
- Remediation Options — Step-by-Step Fixes and Pros/Cons
- DIY Vs Professional Remediation — a Decision Guide
- Tools, Materials Checklist and Visual Checkpoints for Fieldwork
- Common Myths, Case Notes and Preventative Best Practices
- Conclusion
- FAQ
How Double Vapor Barriers Get Created — Common Causes
Double vapor barriers often show up in projects where multiple layers were added to chase a moisture problem. The typical design and installation scenarios involve older builds, retrofits, or misunderstandings about which layer should be permeable. Look for notes on venting, sheathing, and climate considerations in the project records.
Check the product labels and installation guides for each layer involved. If the instruction sheets mention layering or sequencing, treat that as a clue to possible double barriers. When in doubt, verify with the manufacturer instructions and local rules before making changes.
Design and specification mistakes
Mistakes in design and specification can lead to double vapor barriers. Here are some common pitfalls to avoid:
- Incompatible materials: Using waterproofing membranes that aren’t designed to work together.
- Lack of vapor strategy: Specifying systems without considering the moisture movement in your specific climate.
- Misunderstanding product labels: Not reading and understanding manufacturer’s guidelines on product use and compatibility.
- Outdated standards: Using old building codes that don’t reflect current best practices for waterproofing.
Always double-check drawings, specs, and product data before starting any work to avoid these mistakes.
Field and installation errors
Even with the best plans, things can go wrong on site. Here are some common field and installation errors to watch out for:
- Over-layering membranes: Applying one membrane over another without checking compatibility.
- Redundant products: Using multiple waterproofing products in the same area, leading to excess layers.
- Ignoring manufacturer guidance: Not following product-specific installation instructions.
- Improper seaming: Incorrectly joining membranes, leaving gaps or overlaps that can trap moisture.
Regular site inspections and clear communication with your team can help prevent these errors.
Renovations and layering over time
Over time, renovations and repairs can unintentionally add extra layers. Here’s how:
Retrofits: Adding new waterproofing systems over old ones without removing the original membrane.
Finishes: Applying multiple coats of paint or other finishes that trap moisture in walls and ceilings.
Patch repairs: Using incorrect materials for repairs, which can create additional barriers to moisture movement.
Before starting any renovation work, inspect the existing waterproofing system. If in doubt, consult a professional to avoid adding extra layers.
Why a Double Vapor Barrier Can Be Harmful
Two impermeable layers can trap moisture inside the wall or floor system, slowing drying and promoting rot or mold. Moisture movement may shift from condensation or bulk water intrusion to areas behind the barriers. This can lead to hidden damage over time if unchecked.
Material compatibility matters too. Some barrier materials resist drying, while others trap humidity and shed moisture differently. Always confirm the intended behavior from the product data and the project specifications before assuming risk.
Trapped moisture and condensation dynamics
A double vapor barrier traps moisture within your walls. Here’s how:
Moisture from inside your home (like cooking, showering) meets the inner barrier. It can’t escape. So, it condenses on the cold surface of the inner barrier.
Now, this moisture is trapped between two barriers. It can’t dry to either side. This leads to a buildup of moisture over time.
Think of it like a greenhouse effect in reverse. Instead of heat, we’re trapping moisture.
Effects on insulation, framing, and sheathing
A double vapor barrier can ruin your wall’s performance and durability. Here’s why:
Moisture-soaked insulation loses its R-value. It can’t keep heat in or out like it should.
Wet wood framing and sheathing can rot. This weakens your walls, making them less durable over time.
And remember, once these materials start to degrade, it’s hard to stop. The damage can spread quickly.
Mold, indoor-air impacts, and durability consequences
A double vapor barrier can lead to serious problems:
Moisture buildup promotes mold growth. Mold can cause health issues, like allergies and respiratory problems.
You might notice a musty odor. This is a sign of moisture and potential mold.
Long-term, the trapped moisture weakens your walls. This can lead to structural issues, like warping or cracking.
Diagnose: Inspections and Tests to Confirm a Double Vapor Barrier
Start with a visual survey of all barrier layers and fasteners, noting any signs of blistering, staining, or peeling. Photograph the joints and overlaps to compare with the as-built drawings. Identify areas where two layers could be present due to retrofit work.
Proceed with non-destructive tests and checks guided by the product labels and local codes. Look for moisture readings at accessible points and correlation with prior water intrusion events. If you’re unsure about test methods, consult vendor instructions or your local building authority for approved procedures.
Visual Inspection Checklist and Photographic Documentation
Use this checklist when you first suspect a double vapor barrier. It helps identify visible signs of the problem.
- Exterior walls: Look for any overlapping seams, multiple layers of sheets, or paint/seal coatings that might indicate a second barrier.
- Interior walls: Check for similar signs. Also, look for any discoloration, warping, or musty odors suggesting moisture damage.
- Attic and crawlspace: Inspect for improperly installed or additional vapor barriers.
- Windows and doors: Ensure they’re properly sealed and not allowing extra moisture in.
- Plumbing: Check for leaks that could contribute to excess moisture.
- HVAC: Make sure it’s functioning correctly and not causing condensation issues.
- Ventilation: Ensure all vents are open and unobstructed.
- Photographic documentation: Take pictures of any suspicious areas from multiple angles. Note what you’re seeing in the captions.
Quick rule: If you find signs of a double vapor barrier, don’t stop at visuals – proceed with moisture measurements and tests to confirm.
Moisture Measurement Methods and Interpretation
Use these methods after your initial visual inspection to quantify moisture levels.
- Pin meters: They’re cheap but can be inaccurate. Use them to get a general idea of moisture content.
- Pinless meters: More accurate, they measure capacitance instead of resistance. Great for scanning large areas.
- Cavity relative-humidity probes: These measure humidity inside walls. They’re invasive but provide valuable data.
- Interpretation: Look for trends and spot-to-spot differences. Consult manufacturers’ guidelines and local codes for numeric thresholds.
Quick rule: Don’t rely on a single measurement. Take multiple readings over time to confirm trends.
Airflow, Infrared, and Smoke Tests
Use these tests to understand airflow patterns and hidden moisture paths that could exacerbate vapor trapping.
- Infrared thermography: It reveals temperature differences, helping spot areas with poor insulation or air leaks.
- Smoke tests: Use a smoke pen to visualize airflow. Blow smoke around suspected problem areas.
- Fan depressurization tests: Run a fan in a door or window to see if it causes moisture to enter or leave the wall, indicating air leaks.
Quick rule: These tests can’t diagnose a double vapor barrier alone but they help understand airflow dynamics and confirm suspicions raised by other tests.
Material Specs and Standards to Consult Before Intervening
Before any remediation, locate the current material specs for each barrier layer involved. Confirm the intended permeability, installation order, and bonding details per the datasheets. Compare against project drawings and any applicable code references.
Document where to look for standards—manufacturer data sheets, installation manuals, and local building codes. If a specification is unclear, call out the exact document to verify with the manufacturer or code official and plan a compliant path forward.
Reading permeance, vapor diffusion and product datasheets
When you’re dealing with a double vapor barrier issue, the first step is to understand your materials. Grab those product datasheets and look for these key terms:
Permeance or permeability: These tell you how much water vapor can pass through the material. Lower numbers mean less permeable.
Check installation notes too. Some materials need specific conditions to work right, like a dry surface before applying.
If it’s not clear, don’t hesitate to call the manufacturer. They’re there to help you get it right.
Local building code and climate guidance
Before making changes, check your local building codes. They’ll tell you what’s allowed in your area.
Climate matters too. What works in dry Arizona might not cut it in humid Florida. Look for climate-specific guidance from trusted sources like the Department of Energy or local experts.
Accepted standards, like those set by ASTM International, can also influence your choices. Make sure you’re up to date with the latest ones.
Your local building department should have this info. Give them a call if you’re unsure.
Choosing smarter materials — categories and tradeoffs
Material choices make all the difference in preventing double vapor barriers. Here are some categories to consider:
- Permanent impermeable sheets: These stop water vapor completely but can trap moisture if not installed right. Look for high permeance ratings and avoid them where you have high humidity.
- Semi-permeable ‘smart’ retarders: These let water vapor out but not in. They’re great for controlling moisture but can be pricey. Check their adhesion properties to ensure they stick well.
- Liquid-applied membranes: These are flexible and easy to apply, but they need a dry surface to work properly. Look for good elongation ratings to avoid cracking.
The wrong material can cause problems like cracking, staining, or weak bonds. So, choose wisely based on your specific needs.
Remediation Options — Step-by-Step Fixes and Pros/Cons
Adopt a least-invasive approach first, identifying which barriers can be modified or resealed without full removal. Outline practical steps to address trapped moisture, such as targeted drying or resealing joints. Weigh the potential disruption against the moisture risk when choosing a path.
When considering more extensive fixes, lay out a clear sequence for partial or full replacement, including surface prep, compatibility checks, and inspection after completion. List the pros and cons of each option and verify compatibility with the existing materials and local requirements.
Step-by-Step Repair Process
The following is a clear, numbered sequence of practical steps for remediating a double vapor barrier issue. It starts with preparation and safety checks, then moves on to the main work, and finishes with cleanup or final checks.
- Preparation: Gather tools (utility knife, caulk gun, etc.), materials (vapor barrier membrane, tape, etc.), and PPE (gloves, goggles).
- Safety Checks: Ensure no live electrical wires are near work area. Turn off power if unsure.
- Main Work: Carefully cut away the offending vapor barrier layer using a utility knife, starting from one corner and working your way across.
- Sealing Seams: Apply caulk or tape to seal any exposed seams to prevent air leakage.
- Final Checks: Inspect work area for any missed spots. Ensure all seams are properly sealed.
Fix-first, monitor-next: non-destructive mitigations
Before resorting to destructive measures, consider these non-destructive options to mitigate the double vapor barrier issue.
Selective Removal: If possible, carefully remove only the offending layer without damaging underlying materials. This can be done using a utility knife or similar tool.
Improving Ventilation: Ensure there’s adequate ventilation in your home by opening windows, using exhaust fans, or installing mechanical ventilation systems if necessary.
Containment and Monitoring: Temporarily contain the issue while monitoring for signs of improvement. This could involve sealing off affected areas and regularly checking for moisture or condensation.
Partial removal and repair best practices
When dealing with a double vapor barrier issue, it’s often necessary to partially remove and repair the affected area. Here are some best practices:
Safety First: Always ensure no live electrical wires or other hazards are present before starting work.
Exposing Problem Areas: Carefully cut away the offending vapor barrier layer using a utility knife, being mindful not to damage underlying materials. Seal any exposed seams with caulk or tape to prevent air leakage.
Patching: Use compatible materials to patch any holes or gaps left behind after removal. Ensure these patches are securely attached and properly sealed.
Full removal and rebuild scenarios
In some cases, a double vapor barrier issue may be so extensive that full removal and rebuild of the affected assembly is necessary. Here are some guidelines:
Extensive Rot or Damage: If the underlying materials have suffered extensive rot or damage due to moisture buildup, they should be completely removed and replaced.
Inaccessible Drying Paths: If there’s no accessible drying path for trapped moisture to escape, a full rebuild may be necessary to create one.
Scope of Work: A full removal and rebuild typically includes removing all affected materials, addressing any underlying issues (like poor ventilation), and reinstalling new materials with proper vapor barrier and air sealing techniques. It’s important to consult with a professional for an accurate assessment and scope of work.
DIY Vs Professional Remediation — a Decision Guide
Assess which tasks you can safely handle, such as simple resealing or inspection, based on your comfort and the project scope. Be honest about access, risk to structure, and potential exposure to mold or moisture damage. Use vendor guidelines and local rules to frame safe boundaries for DIY work.
Identify tasks that should stay with a qualified contractor, like structural remediation, complex barrier removal, or testing that requires specialized equipment. When in doubt, consult the manufacturer instructions and a licensed professional before proceeding.
Homeowner-safe tasks and precautions
As a DIY homeowner, you can perform several tasks to diagnose and temporarily fix moisture issues before hiring professionals. Remember, safety first!
Visual inspection: Check for visible signs of water damage, mold, or rot. Take photos for documentation.
Moisture measurement: Use tools like hygrometers or moisture meters to measure moisture levels in walls and floors. Refer back to the moisture measurement methods section for guidance on interpretation.
Temporary fixes: If you find minor issues, you can perform temporary fixes like sealing leaks or improving ventilation. But be cautious: don’t cause more damage by attempting major repairs without proper knowledge.
When to call a building scientist or contractor
Knowing when to seek professional help is crucial. Here are some red flags:
Structural rot: If you find extensive wood rot, it’s time to call in the pros. They can assess the structural integrity and recommend repairs.
Repeated high moisture readings: Consistently high moisture levels could indicate a serious underlying issue that requires professional diagnosis and remediation.
Widespread mold: If you find extensive mold growth, it’s best to hire professionals. They can perform proper testing, containment, and removal to prevent further spread and health risks.
What to prepare when hiring help
Before you invite contractors for estimates, gather all relevant information to ensure they can provide accurate recommendations:
Documentation: Keep records of moisture readings, test results, and any other relevant data. This helps contractors understand the extent of the issue.
Photos: Take clear, detailed photos of affected areas. These help contractors visualize the problem and plan their approach.
Questions: Prepare a list of questions to ask contractors. Inquire about their experience, methods, timeline, and cost. Don’t hesitate to ask for references or examples of past work.
Tools, Materials Checklist and Visual Checkpoints for Fieldwork
Prepare a practical kit with basic PPE, measurement tools, moisture meters, and inspection aids. Include items for documenting progress and keeping notes aligned with the project specs. Use a simple checklist to avoid missing critical steps during the visit.
Establish visual checkpoints to record moisture signs, barrier overlaps, and any damage behind the layers. Cross-check each item against the product labels and installation guides to ensure you’re following the intended method and not missing a requirement.
Essential tools and testing equipment
Before you start, make sure you have the right gear. This checklist helps you stay prepared.
- Moisture Meters: Check for moisture content in materials. Rental or professional-grade meters may be needed.
- RH Probes: Measure relative humidity in air and assemblies to ensure they’re within acceptable ranges.
- Thermal Camera: Detect temperature differences that could indicate moisture intrusion or poor insulation.
- Tape Measure: Accurate measurements are crucial for proper installation of materials.
- Level: Ensure surfaces are flat and walls are plumb to prevent water from pooling.
- Carpentry Tools: Basic tools like hammers, screwdrivers, and saws are essential for repairs and installations.
- Sealing Materials: Have appropriate sealants, caulks, and adhesives on hand to prevent water intrusion.
- Safety Gear: Include safety glasses, work gloves, and ear protection.
Quick rule: Always check your tools before starting. Faulty gear can lead to inaccurate readings or improper repairs.
Visual checkpoints and photo log protocol
Documenting your findings helps track progress and troubleshoot issues. Use this checklist for consistent recording.
- Before/After: Take photos before starting work and after completing repairs to document changes.
- Wide-Angle Views: Capture wide shots to show the entire area and its context.
- Close-Up Details: Get close-ups of specific issues or areas of concern.
- Labeling: Include a label with date, time, location, and issue description in each photo.
- Metadata: Add relevant metadata to photos, such as moisture readings or RH levels.
- Sequence Numbers: Number your photos for easy tracking of before/after pairs.
- Consistent Lighting: Keep lighting consistent for accurate comparisons between photos.
- Regular Updates: Update your photo log regularly to track progress and identify new issues.
Quick rule: Consistent, detailed documentation helps you understand the problem, track repairs, and prevent future issues.
Safety and material compatibility reminders
Prioritize safety when working with materials and tools. This checklist helps you stay safe and effective.
- Moisture-Safe Materials: Use materials specifically designed for moisture-prone areas to prevent mold growth and structural damage.
- Fire Safety: Follow fire safety guidelines when using sealants, caulks, and adhesives. Keep them away from heat sources and open flames.
- Ventilation: Ensure proper ventilation when working with hazardous materials to prevent fume inhalation.
- MSDS/Manufacturer Guidance: Consult Material Safety Data Sheets (MSDS) or manufacturer guidelines for safe handling of hazardous products.
- Personal Protective Equipment (PPE): Wear appropriate PPE, such as gloves, goggles, and respirators, when working with hazardous materials.
- Storage Safety: Store materials properly to prevent accidents or contamination.
- Disposal Guidelines: Follow local guidelines for disposing of hazardous waste materials.
- Emergency Plan: Have an emergency plan in place in case of accidents or spills.
Quick rule: Safety should always be your top priority. Always follow safety guidelines and use appropriate PPE when working with hazardous materials.
Common Myths, Case Notes and Preventative Best Practices
Separate myths from reality by contrasting what a double barrier implies with what the field evidence shows. Include short notes on what happened in real-world projects and what was learned. Use the lessons to guide future design decisions.
Wrap up with preventative tips that align with the materials and local rules. Emphasize proper sequencing, ventilation, and moisture control practices to reduce the chance of a double barrier forming again.
Myth-busting: “More barriers = better protection”
The idea that adding more vapor barriers always improves waterproofing is a common misconception. In reality, it can cause more harm than good.
Vapor barriers work by preventing moisture from moving through them. However, if not installed correctly or used in the wrong situation, they can trap moisture instead of allowing it to escape. This trapped moisture can lead to mold growth and structural damage.
It’s crucial to understand that vapor barriers should only be used where necessary and in the correct sequence. More is not always better when it comes to vapor barriers.
Short case notes and lessons learned
Let’s look at a few real-life examples to illustrate this:
Case 1: A homeowner added an extra layer of polyethylene sheeting to their basement walls, thinking it would provide better protection. However, the lack of proper ventilation led to moisture buildup, resulting in mold growth.
Case 2: In a renovation project, the builder used two layers of vapor barrier instead of one. This trapped moisture between the layers, leading to significant water damage and increased repair costs.
Preventive checklist for future projects
To prevent double-barrier issues in new builds or renovations, use this checklist:
- Document vapor strategy: Clearly outline the intended vapor control strategy before starting any work.
- Coordinate trades: Ensure all contractors understand and follow the agreed-upon vapor strategy.
- Record materials: Keep detailed records of all materials used, especially those related to vapor control.
- Check material compatibility: Ensure that all materials are compatible with each other and the intended use.
- Verify installation methods: Confirm that all vapor barriers are installed correctly and in the right sequence.
- Plan for ventilation: Include proper ventilation to allow moisture to escape when necessary.
- Inspect during construction: Regularly inspect the work to ensure it aligns with the planned vapor strategy.
- Educate homeowner: Inform the homeowner about the importance of maintaining the vapor control system and any specific care instructions for the materials used.
Quick rule: Always remember, more barriers do not always mean better protection. It’s about using the right barriers in the right way.
Conclusion
Dealing with a double vapor barrier right means protecting the structure from hidden moisture and keeping the finish looking right. Do not rush. Verify what’s there, test as you go, and fix only what you can prove is necessary to avoid costly mistakes or damage.
Walk this out in a practical flow: confirm the signs of a double barrier with the right inspections and simple tests, review material specs before you intervene, pick the least invasive remediation that handles the problem, and document every step as you go. Start small in a controlled spot, gather data, then scale up if needed. Safety first and steady checks keep you from chasing phantom issues or making things worse.
Common mistakes to avoid are pushing repairs without confirming causes, guessing material compatibility, and skipping moisture testing before seals go back in. Always seal and test in a protected area, use the recommended materials, and follow the simple order: identify, test, plan, fix, retest. If the tests show you’re out of your depth or the system is complex, call a professional rather than risking bigger damage. Stay practical, stay cautious, and you’ll finish with a durable, dry, and good-looking result.
FAQ
How can I spot a second vapor barrier causing trouble during a rebuild?
Look for layers that feel unusually stiff or glossy and note if you see two distinct sheets in the same cavity. If a second barrier is present, you may notice reduced drying potential and damp spots near seams or penetrations. Confirm by checking product labels or drawings from the manufacturer or installer.
What quick checks should I run before tearing into a wall or floor assembly?
Inspect visible edges for extra plastic or foil layers and document any unusual thickness. Check for signs of trapped moisture like staining, musty smells, or blistering paint. If you’re unsure, pause and consult the product instructions or a local professional for guidance.
How do I approach remediation safely without creating new moisture traps?
Follow the existing system’s intended sequence and avoid over-sealing with impermeable layers. Ventilation and controlled drying paths matter; ensure there’s a way for air and moisture to move where it should. When in doubt, rely on manufacturer instructions or guidance from a local pro before changing the setup.
What should I document or confirm with materials and manufacturer guidance before making changes?
Check labels, datasheets, and installation notes for each layer involved. Verify any proposed changes align with the original design intent and local practices. If specifics aren’t clear, note them and seek clarification from the material maker or a qualified tradesperson.