
Introduction
Water on a vapor barrier is moisture that collects on or under the plastic barrier in a building assembly. It happens when warm, moist air reaches cold surfaces, or when the barrier is damaged or improperly sealed. Understanding why it shows up helps you decide what to fix and how to keep insulation dry.
Start by looking for visible damp spots, squishy insulation, and any ripped or loose edges around the barrier. If you find moisture, check the barrier installation and seals, then follow the manufacturer’s instructions and local rules for repair. If you’re unsure, consider a simple test or seek guidance to choose safe, practical fixes.
Key takeaways
- Inspect vapor barrier seals and seams for gaps or punctures during inspections.
- Identify water entry points behind walls by tracking damp patches and odors.
- Contain active leaks immediately and isolate affected areas to prevent spread.
- Use proper PPE and ventilation when inspecting moldy or damp zones.
- Dry-out with dehumidifiers and airflow while delaying finishes until moisture stabilizes.
- Plan permanent fixes with suited repairs and verify with follow-up moisture tests.
Table of Contents
- Introduction
- Key takeaways
- What Is a Vapor Barrier and Why It Matters
- How Water Appears on a Vapor Barrier — Typical Causes
- Visual Checkpoints and How to Inspect Safely
- Tests to Identify Moisture Source and Severity
- Immediate Dry-Out and Containment Steps
- Permanent Fixes — Repair and Replacement Options
- Preventive Measures and Best Practices to Avoid Recurrence
- Mold, Health Risks, and Cleanup Guidance
- Conclusion
- FAQ
What Is a Vapor Barrier and Why It Matters
A vapor barrier is a material designed to slow the movement of moisture through building assemblies. It is not the same as a vapor retarder, which may allow some moisture transfer depending on its rating. Common materials include plastic sheets, foil-faced products, and specialized coatings used in walls, ceilings, floors, and around plumbing penetrations.
Moisture control affects both the durability of the structure and indoor air quality. Proper placement helps prevent issues like condensation, mold, and wood rot, while failure to install or protect the barrier can lead to hidden moisture problems that show up later in repairs or occupant complaints.
Vapor Barrier vs. Vapor Retarder — Key Differences
The main difference between a vapor barrier and a vapor retarder lies in their permeability ratings.
A vapor barrier is designed to be completely impermeable to moisture, allowing no water vapor to pass through. These are typically used in cold climates where the risk of condensation is high.
A vapor retarder, on the other hand, has a permeability rating between 0.1 and 1 perm (a perm is a unit of measurement for water vapor transmission). They’re used in warmer climates to control moisture migration but still allow some vapor diffusion to prevent trapped moisture.
Common Vapor Barrier Materials and Installation Basics
The right material choice is crucial for effective moisture control. Here are the most common types:
- Polyethylene (PE) Sheeting: 0.5-1 mil thickness, cheap, easy to install. Look for 6 mil for better durability. Avoid thin sheets that can tear easily.
- Foil-Faced Membranes: Aluminum or plastic foil with a poly film backing, 0.5-1 perm. Good for walls and ceilings. Seal seams carefully to prevent moisture intrusion.
- Self-Adhered Membranes: Bituminous or polymer-modified asphalt, 0.5-1 perm. Easy to apply, sticks well. Avoid applying in cold temperatures as it affects adhesion.
- Extruded Polystyrene (XPS) Foam: Closed-cell foam, 0.3-0.6 perm. Good for below-grade applications. Ensure proper overlap and sealing at joints.
How Water Appears on a Vapor Barrier — Typical Causes
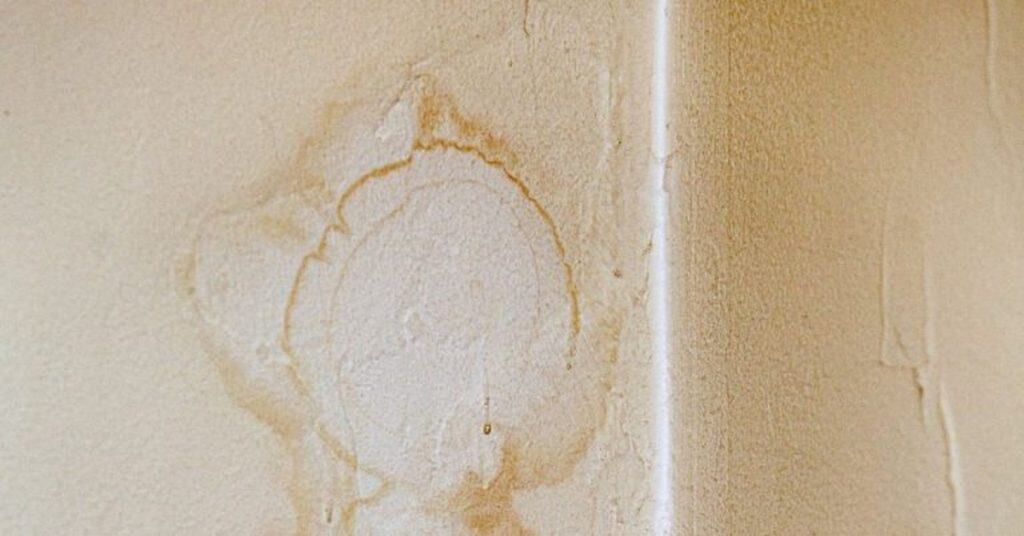
Condensation happens when warm, moist air contacts a cold surface, which can collect on or behind the barrier. Liquid water intrusion occurs from leaks, breaches, or bulk water running into the assembly. Look for staining, puddles, or damp insulation behind the barrier as obvious signs.
Construction or installation defects include gaps, improper sealing, or misaligned barriers. HVAC or plumbing issues such as leaks, condensate drainage problems, or overspeed air movement can overwhelm the barrier and drive moisture into the wall or floor assemblies. Each scenario requires a different corrective path, so verify the root cause before planning repairs.
Condensation and moisture migration mechanisms
When warm, humid air inside your home comes into contact with a cool vapor barrier, it can’t hold all that moisture. It’s like when you see water droplets form on a cold glass of lemonade on a hot day – that’s condensation.
The dew point is the temperature at which this happens. If the air cools down to its dew point, the excess moisture turns into tiny water droplets. This can happen on your vapor barrier if it’s cooler than the dew point of the air next to it.
Temperature differentials play a big role here too. The bigger the difference between the two surfaces, the more likely condensation is to occur. So, keeping your home’s temperature consistent and well-insulated can help prevent this.
Liquid leaks and capillary movement
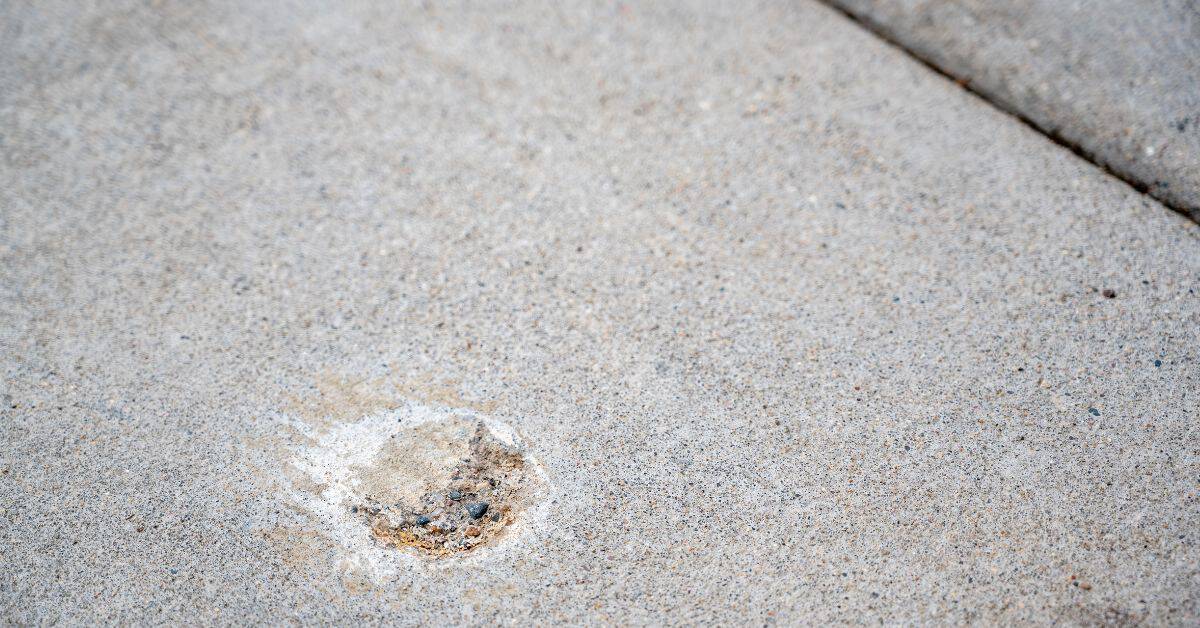
Water from roof leaks, plumbing issues, or foundation cracks can find its way to your vapor barrier. Once there, it can wick through insulation or seep into seams, causing problems.
Capillary action is like how a paper towel soaks up water – it moves liquid upwards against gravity. This can happen in the tiny spaces between fibers in your insulation, drawing water up towards the vapor barrier.
Even small leaks can cause big issues over time. That’s why it’s important to address any water problems promptly and ensure your home is properly sealed and insulated.
Installation and material failures
The right materials and proper installation are crucial for a vapor barrier to work effectively. The wrong choices can lead to water accumulation and damage.
- Poor laps: Gaps between sheets allow moisture to pass through. Use overlapping laps, following the manufacturer’s instructions.
- Unsealed penetrations: Unfilled gaps around pipes, wires, or ducts let water in. Seal all penetrations with caulk, foam, or other suitable sealants.
- Punctures: Holes from nails, screws, or other objects can compromise the barrier. Be careful when installing and use appropriate fasteners.
- Incompatible materials: Using the wrong type of vapor barrier for your climate can lead to condensation and damage. In cold climates, use a permeable barrier; in hot climates, use an impermeable one.
- Wrong material thickness: Too thin, and it won’t provide adequate protection; too thick, and it could trap moisture. Use the recommended thickness for your specific application.
Visual Checkpoints and How to Inspect Safely
Start with attics: look for staining, efflorescence, or damp insulation near penetrations. In crawlspaces and basements, check for standing moisture, musty odors, and rust on metal components. In wall cavities, search for soft spots, peeling paint, or warped paneling that indicates moisture behind the barrier.
Safety comes first: wear gloves, a dust mask or respirator, and eye protection. Avoid disturbing wet insulation or moldy material, and shut off power when working near water or insulation debris to prevent shocks or trips.
Exterior and Interior Signs to Look For
Before you start your inspection, use this checklist to spot obvious signs of moisture issues both inside and outside your home.
- Pooling water: Check for standing water around the foundation. This could indicate drainage problems or a high water table.
- Staining: Look for discoloration on walls, ceilings, and floors. It may suggest water intrusion or condensation.
- Mold: Check for visible mold growth, which indicates moisture and potential health risks.
- Insulation compression: Compressed insulation in walls or ceilings might signal water damage.
- Rusted fasteners: Rust on nails, screws, or other fasteners can indicate prolonged exposure to moisture.
- Warping or buckling: Check for warped walls, floors, or ceilings, which could be due to water damage.
- Musty odors: A musty smell often indicates the presence of mold or mildew.
- Wet insulation: Insulation that feels damp or squishy has likely absorbed moisture.
Quick rule: Don’t ignore any signs you find. They all warrant further investigation.
When to Call a Pro vs. DIY Inspection Limits
While many moisture issues can be inspected and addressed by homeowners, some require professional help.
- Active leaks: If you see water dripping or streaming from any part of your home’s structure, call a pro immediately to prevent further damage.
- Structural rot: If you suspect structural components are rotting due to moisture, have them inspected by a professional.
- Mold spread: Extensive mold growth should be assessed and remediated by a certified mold removal specialist.
- HVAC faults: If your heating or cooling system is the source of moisture, it’s best to have it inspected by an HVAC professional.
- Complex systems: If your home has complex plumbing, electrical, or mechanical systems, some inspections may be better left to professionals.
- Safety concerns: If you’re uncomfortable with any part of the inspection process, it’s wise to call a pro to avoid potential injuries or further damage.
Quick rule: When in doubt, err on the side of caution and consult a licensed professional.
Tests to Identify Moisture Source and Severity
Use a moisture meter to get a relative indication of moisture in materials at suspect spots. Take note of readings across several points to see if a pattern exists. Record the locations and conditions for later comparison during remediation.
Measure ambient relative humidity and temperature to assess dew point risk, and consider simple dye or paper towel leak checks to confirm active intrusion. For complex cases, infrared imaging or lab testing can help, but rely on manufacturer instructions or local rules to determine when those tests are appropriate.
Using moisture meters correctly
A moisture meter is your first line of defense. Here’s how to use it right:
Pin vs. Pinless: Pin meters measure resistance between two pins. Pinless meters send a signal through the material. Both work, but pinless are easier to use.
Place probes on flat surfaces. Expect reference values around 12-15% for dry materials. Readings over 17% indicate moisture. Compare readings across areas to spot differences.
Relative humidity, dew point and surface temperature checks
Condensation happens when RH meets or exceeds dew point. Here’s how to check:
Use a hygrometer to measure relative humidity (RH). Normal indoor range is 30-50%. Measure surface temp with an infrared thermometer.
Calculate dew point using online calculators. If RH ≥ Dew Point, condensation is likely. Keep surfaces above 50°F (10°C) to prevent condensation.
Targeted leak tests and tracing methods
Once you’ve found moisture, trace it back to the source:
Roof leaks: Use a water hose to simulate rain. Check for leaks around vents, skylights, and flashing.
Plumbing leaks: Isolate suspect lines, turn off main water supply, and check pressure gauges for drops (leaks). For wet pathways, use smoke pencils, tracer dye, or sequential drying inspections to trace moisture back to its source.
Immediate Dry-Out and Containment Steps
First, isolate the moisture source to prevent further transfer. If safe, improve ventilation and bring a dehumidifier into the space to stabilize humidity levels. Prioritize drying out any wet materials that are safe to handle and remove items that are saturated or compromised.
Document conditions as you go, including visible damage and any changes in moisture readings. This will help guide the remediation plan and protect you if contractors are needed for follow-up work.
Safe removal and drying of wet materials
The material you use to dry out the area matters. Some materials can cause damage if not used correctly.
- Insulation: Use rigid foam or mineral wool for best results. Avoid fiberglass as it can release fibers into the air and cause irritation.
- Carpeting: Remove soaked carpeting immediately to prevent mold growth. Look for moisture-resistant padding.
- Fans: Use axial fans with a minimum of 20″ diameter. They should have a rating of at least 50 CFM per foot of ductwork.
- Dehumidifiers: Choose one with a capacity of at least 1 pint per hour for every 500 sq ft of affected area.
- Moisture readings: Use a pinless moisture meter to monitor progress. Keep readings below 12% for best results.
Temporary sealing and leak-stopping measures
Prevent further water damage with these temporary fixes until permanent repairs can be made.
Seams: Use a vapor barrier tape specifically designed for your material. Apply it according to the manufacturer’s instructions to prevent leaks.
Taped repairs: For small holes or cracks, use duct tape as a temporary fix. Ensure the area is dry before applying.
Plumbing shutoffs: If water is coming from plumbing, locate and shut off the main valve to stop the flow immediately.
Permanent Fixes — Repair and Replacement Options
Repair strategies should target the root cause: reseal or re-seat vapor barriers where needed and replace damaged sections with compatible materials. Address any insulation or structural rot that moisture has compromised, since lingering moisture can undermine a fix.
When applicable, correct exterior drainage and roofing issues that allow bulk water to approach the barrier. Coordinate with local building codes or manufacturer instructions to ensure the patch meets requirements and remains durable over time.
Proper repair of punctures, seams, and penetrations
First, identify all holes, tears, or gaps in your vapor barrier. Use a flashlight to inspect edges, seams, and around any openings like pipes or wires.
Seal small punctures with compatible tape or sealant. For larger holes, use a patch made from the same material as your vapor barrier. Ensure you restore continuity by overlapping patches properly.
Around penetrations, install flashing. This metal strip directs water away from the penetration and prevents it from getting behind the vapor barrier again.
When to replace a vapor barrier versus patching
If damage is minor and localized, like a small tear or hole, patching is usually sufficient. Use the repair methods mentioned earlier.
However, if there are multiple punctures, widespread damage, or signs of mold, consider replacement. Mold can compromise your vapor barrier’s performance and pose health risks.
Also, check your insulation. If it’s damp or damaged, you might need to replace that too. A new vapor barrier won’t be effective with compromised insulation.
Long-term performance is another factor. If your vapor barrier is old or degraded, replacement might be the better option despite minor damage.
Fixing underlying causes (roofing, grading, plumbing, HVAC)
Water intrusion often comes from external sources. Inspect your roof for leaks or damaged shingles. Ensure your gutters and downspouts are directing water away from your home’s foundation.
Check your grading. The ground around your home should slope away to prevent water from pooling and seeping in. If it doesn’t, you might need to regrade or install a French drain.
Inspect your plumbing for leaks. Even small leaks can cause significant damage over time. Check under sinks, around toilets, and on exterior walls.
Lastly, ensure your HVAC system is functioning properly. Leaky ducts or condensate pans can lead to moisture problems. Regular maintenance can prevent these issues.
Preventive Measures and Best Practices to Avoid Recurrence
Choose a vapor-control strategy that matches your climate and building use, and strive for a continuous air barrier with controlled ventilation. Implement proper dehumidification schedules and ensure exhausts and intakes are balanced to avoid pushing moisture into walls.
Maintain grading, gutter systems, and downspouts to minimize water near foundations. Schedule routine inspections of known moisture-prone areas and document any changes to catch problems early before they become costly repairs.
Climate-based placement and material selection
The climate where you live plays a big role in choosing the right vapor barrier. The wrong one can cause more harm than good.
- Cold climates: Use an interior vapor barrier. Look for low permeability ratings (less than 1 perm). Avoid high perm materials that let moisture in.
- Mixed/humid climates: Exterior vapor barriers work best here. Choose materials with medium perm ratings (5-10). Don’t use impermeable barriers as they trap moisture.
- Warm-humid climates: Omit vapor barriers if possible. If needed, use exterior barriers with high perm ratings (10+). Avoid low perm materials that trap heat and humidity.
- Check local codes: Always follow your area’s building codes for vapor barrier placement and material selection.
- Avoid common mistakes: Don’t use plastic sheets as vapor barriers in cold climates. They can trap moisture, leading to condensation and mold growth.
Installation checklist and tools/materials needed
Use this checklist before you start installing your vapor barrier. It’ll help ensure a long-lasting, effective job.
- Tools: Tape measure, utility knife, scissors, chalk line, stapler or adhesive applicator, ladder (if needed).
- Tapes and sealants: Compatible vapor barrier tape, seam sealer, and edge sealant.
- Fasteners: Staples, nails, or adhesive for securing the barrier in place.
- Materials: Vapor barrier sheets (correct type for your climate).
- Check before installation: Ensure surfaces are clean, dry, and free of debris. Any imperfections can cause leaks.
- Check during installation: Inspect seams and edges for proper sealing. Use a moisture meter to check for any hidden moisture.
- Check after installation: Perform a blower door test to ensure airtightness.
- Quick rule: Always overlap joints by at least 2 inches and seal them properly. This is crucial for preventing leaks.
Mold, Health Risks, and Cleanup Guidance
Prolonged moisture and mold growth can affect indoor air quality and occupant health. If mold is visible or suspected due to moisture, plan remediation with safety in mind and follow local guidelines or manufacturer instructions for containment and cleanup.
Homeowners may handle minor, non-porous cleaning, but large or contaminated mold setups typically require professionals. Determine who should handle testing or remediation by referencing applicable rules and product data sheets to define scope and limits.
Identifying mold vs. staining and when to test
Mold can be tricky to spot, especially for DIY homeowners. It’s not always about seeing green or black spots. Sometimes it’s a musty smell or discoloration that hints at trouble.
Visual signs: Look for stains, usually green, black, or white, often with a fuzzy texture. Mold can also appear as small, dark specks or threads.
Olfactory signs: If you smell a musty odor, even if you don’t see any visible mold, it’s time to investigate further.
For small areas (less than 10 sq. ft.), simple on-site screening methods like using a moisture meter or infrared camera can help. But for larger areas or hidden growths, lab testing is crucial. It confirms the presence of mold and identifies species.
Safe cleanup protocols and when to hire remediation experts
If you find mold, act fast but safely. Here’s how:
Containment: Seal off the affected area using plastic sheets and tape to prevent spores from spreading.
PPE: Wear gloves, goggles, and a respirator designed for mold (N95 or P100). Clothing should cover skin and be disposable.
Drying & Disposal: Dry out the area thoroughly. Remove and dispose of porous materials like drywall if they’re contaminated. Non-porous items can often be cleaned and reused.
But remember, professional remediation is recommended for infestations larger than 10 sq. ft., structural involvement (like joists or beams), or HVAC contamination. They have specialized equipment and training to handle these situations safely and effectively.
Conclusion
Water on a vapor barrier signals active moisture that can hurt health and structure if you don’t handle it now. The safer and drier you keep the area, the longer the barrier lasts and the less mold you’ll have to clean up later.
Check in a simple, real-world order: first ensure electricals and power are safe, then locate obvious leaks or standing water, dry the spot with appropriate methods, test moisture levels across the affected area, inspect the vapor barrier for tears or gaps, and finally repair or replace as needed before you seal up and reassemble. Keep ventilation improved after you start drying, and recheck in a day or two to confirm the area stays dry.
Common mistakes to avoid include rushing a fix without drying the space, cutting into studs or wall assemblies without confirming structure, using the wrong sealants or fasteners, and ignoring signs of mold or lingering odor. Safety rules are simple: wear protection, shut off water and power as needed, test small areas first, and never mix unknown cleaners with existing materials. If you see active mold growth, a large leak, or potential electrical risk, pause and reassess before continuing.
When in doubt, call a professional—especially for hidden leaks, roof or exterior moisture, or widespread mold. A measured, careful approach protects your investment and your family. Stay systematic, document what you find, and you’ll finish with a solid, durable repair you can trust.
FAQ
How can I test moisture on a vapor barrier safely?
Do a careful surface check for damp spots, staining, or discoloration. Use a moisture meter if you have one and follow the device’s instructions for your material. If you’re not sure what the readings mean, check the meter’s label or manufacturer guidance for what’s considered normal.
What bad practices can make water on a vapor barrier worse?
Avoid puddling or leaving water on the barrier. Don’t use aggressive power tools or high-pressure water near the barrier, and don’t rely on dehumidifiers alone without addressing the source. Keep the area ventilated and fix any leaks or intrusion before you dry things out.
What are practical steps to dry out and contain water before a permanent fix?
First, stop the water source. Remove standing water and increase airflow with fans, aiming to dry the barrier surface and surrounding materials. Use a dehumidifier if you have one and keep it running until the area feels dry to the touch and looks dry.
How do I decide between repair and replacement of the vapor barrier?
If the barrier is punctured, torn, or saturated across a wide area, replacement is usually the safer route. If there’s extensive mold or persistent moisture after drying, plan for replacement and follow the manufacturer’s instructions, plus any local guidance. When in doubt, check the product label or datasheet and consider professional advice.