

Introduction
Spotting a roof leak early allows you to fix it right before it causes major damage. You’ll learn how to identify signs of a leak, trace the source safely, and decide when to seal, repair, or replace. The guide walks through simple steps, practical tips, and common-sense rules you can apply in most homes.
Key takeaways
- Inspect attic for water stains, drips, and mold near penetrations after rainfall.
- Check flashing, roof valleys, and joints as common leak entry points.
- Use flashlight, non-contact moisture meter, and ladder safety during inspections.
- For pitched roofs, seal flashing with appropriate materials; for shingles, replace damaged sections.
- Schedule annual roof inspection and interior checks after storms to catch hidden leaks.
Table of Contents
- Introduction
- Key takeaways
- Common causes of roof leaks
- Visual inspection: where to look first
- Tools and techniques to find the leak source
- Step-by-step repairs for common leak types
- Safety precautions for inspections and repairs
- Preventative maintenance and annual inspection plan
- Cost estimates and budgeting for repairs
- Signs you need urgent repair vs. can-wait maintenance
- Conclusion
- FAQ
Common causes of roof leaks
Leaks usually come from six root causes: aging or deteriorating roofing materials (shingles or membranes), weather and climate damage (wind uplift, hail, sun exposure), improper installation or flashing, roof penetrations and their sealing (vents, skylights, chimneys), drainage and gutter issues that let water pool near the roof edge, and interior-driven moisture problems like condensation and poor attic ventilation that sneak moisture to the ceiling. You’ll see them as worn or curled shingles, lifted edges, rusty vents, loose flashing, damp or compressed insulation, or damp spots in the attic. Each cause has a telltale on the roof and a corresponding spot in the attic to check from ground level or the hatch.
Why it matters: spotting the right root cause lets you plan fixes that actually stop the leak and prevent recurrence. Start with a quick, safe ground check (shingle condition, flashing at edges, gutter condition) and a careful attic inspection (underlayment, insulation dryness, vent seals). If you find structural damage, extensive flashing repairs, or compromised sheathing, call a pro. Finish with a simple prevention routine—seasonal checks, gutter upkeep, and better attic ventilation—to reduce future leaks without turning a DIY into a bigger job.
Exterior causes (shingles, flashing, gutters)
The first thing to look for when you suspect a roof leak is damage on the exterior. Shingles that are cracked, curled, or missing can let water seep through and cause leaks inside your home. Inspect around roof penetrations, such as chimneys, skylights, and vents, where flashing should be tight and secure to prevent water from getting in.
Clogged gutters and downspouts are another common culprit. When rainwater can’t flow freely off the roof, it pools up and finds its way under shingles or through small cracks. Make sure your gutters are clear of debris and properly angled to direct water away from your home’s foundation.
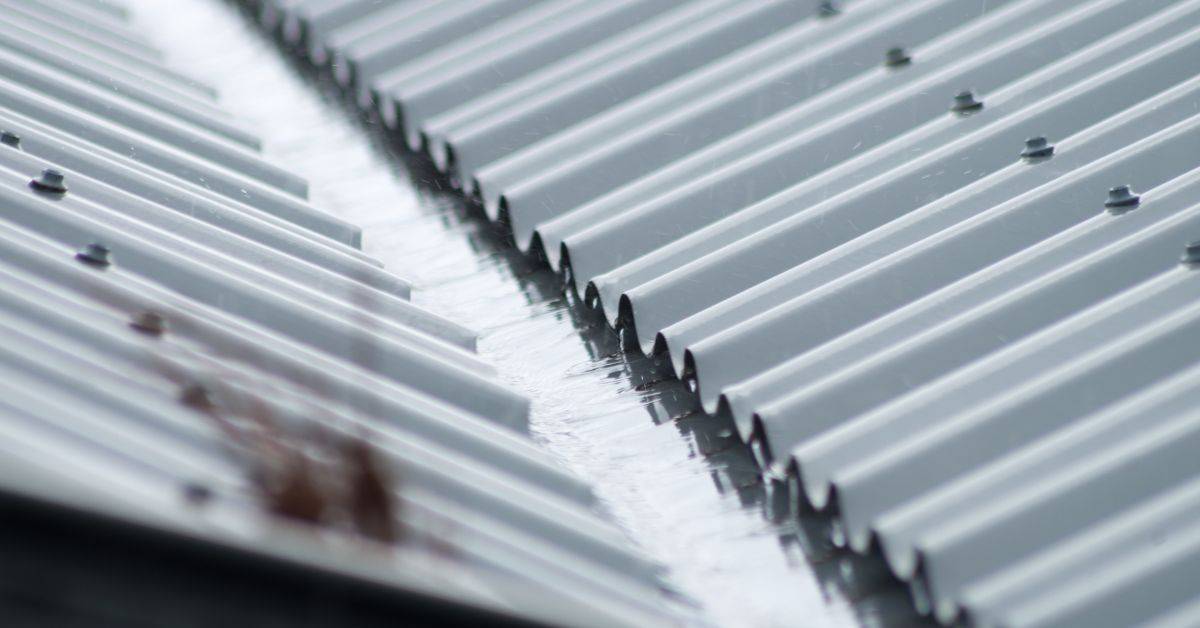
Flashing around valleys and edges is crucial for preventing leaks. Bent, rusted, or missing flashing can let moisture in, especially during heavy rain or snowfall. Check these areas closely; they’re often the weak spots where water tends to accumulate.
Interior and attic-related causes
Leaks aren’t always caused by exterior damage alone. Issues inside your home can also contribute to roof leaks. For example, condensation from poor ventilation in the attic can lead to water dripping through ceiling cracks or causing mold growth.
Plumbing vents and exhaust fans that vent into the attic without proper sealing can introduce moisture directly into the space above your home. This can cause condensation buildup on cold surfaces, leading to leaks over time.
Clogged attic vents are another problem area. When warm air gets trapped in the attic during summer months, it creates a perfect environment for ice dams to form in winter. Ice dams block water from draining off the roof properly and can lead to significant damage if not addressed.
Human and maintenance-related causes
Poor installation is a major factor that leads to roof leaks. If flashing isn’t installed correctly or shingles aren’t laid properly, water can easily find its way into your home. Mistakes made during DIY repairs, like using the wrong type of sealant or not sealing around penetrations tightly enough, can also cause issues.
Lack of regular maintenance is another common issue. Over time, materials wear down and need replacement. If you don’t keep up with inspections and necessary repairs, small problems turn into big ones. For instance, failing to clean gutters regularly means water won’t drain properly off your roof.
Ignoring signs of damage or delaying needed maintenance can lead to more extensive—and expensive—repairs down the road. It’s important to stay on top of regular checks and address any issues as soon as they arise to prevent leaks from developing.

Visual inspection: where to look first
Early visual cues matter because small signs of moisture can sneak into ceilings, walls, and roofs long before a leak becomes a flood, and a methodical room-by-room check helps you spot them before they hide. Start with a practical plan you can follow room by room, then step outside to scan the roof area and exterior features where leaks often start. This introduction lays out a simple checklist you can adapt for every room, plus exterior observations for gutters, flashing, and roof lines that deserve a closer look after storms and seasonal shifts.
Inside the home, focus on attic and ceilings for staining, sag, mold, or water trails; and on ceilings and walls for linear staining or paint peeling that hints at ongoing moisture. Check under sinks and around fixtures in kitchens and baths, and peek at basements or crawl spaces for dampness, wood decay, or a musty odor that signals trouble you can address early. Doing the exterior check with the same cadence—watch for damaged shingles, loose flashing, damaged fascia, and clogged gutters—helps you catch problems before they worsen, and makes seasonal timing practical rather than reactive.
Interior signs in ceilings, walls, and attic
Use this checklist when you notice any discoloration or dampness inside your home.
- Check for stains: Look for dark spots on ceilings and walls. Stains often indicate water has been dripping through the roof for some time.
- Mold and mildew: Mold typically grows in areas with high humidity or moisture, signaling a potential leak.
- Sagging drywall: If sections of your ceiling are drooping, it’s likely holding water from above. This can lead to structural damage if ignored.
- Peeling paint: Paint that is lifting off the walls or ceilings may indicate moisture seeping through.
- Musty odors: A musty smell often accompanies damp areas, signaling mold growth and potential leaks.
- Warped wood: Look for warped floorboards or ceiling panels. Warping is a sign of excess moisture.
- Drywall joints: Check around the edges where drywall meets walls and ceilings. Water can seep through these areas easily.
- Sinks and plumbing fixtures: Inspect under sinks for water marks or leaks. Plumbing issues often go unnoticed until they cause significant damage.
Quick rule: Any sign of moisture indoors is a red flag that needs immediate attention to prevent further damage.
Exterior checkpoints on the roof deck
Inspect your roof after heavy storms or before winter sets in to catch potential leaks early.
- Shingle damage: Look for missing, cracked, or curled shingles. Damaged shingles allow water to seep through easily.
- Ridge vents: Ensure ridge vents are clear and not blocked by debris. Blocked vents can cause moisture buildup under the roof deck.
- Valley flashings: Check valleys for any gaps or missing metal pieces. Valleys often collect water, so proper flashing is crucial.
- Fascia boards: Inspect fascia boards for cracks and splits. Water can enter through these openings and cause significant damage over time.
- Gutters and downspouts: Make sure gutters are clean and free of debris, and that downspouts direct water away from the foundation.
- Chimney cap: Ensure the chimney cap is secure and not damaged. A loose or missing cap can allow rain to enter your home through the chimney.
- Skylights and roof vents: Check around skylights and roof vents for any gaps or cracks where water could seep in.
Quick rule: Regularly inspecting these areas can help you catch issues before they turn into major leaks.
Using photos and markers to map leak sources
Taking photos and marking suspected spots helps correlate interior damage with exterior weaknesses.
- Photograph stains: Take clear pictures of any ceiling or wall stains. This will help identify the source of leaks.
- Mark suspect areas: Use chalk to mark potential leak points on your roof. Chalk marks are easy to spot and won’t damage shingles.
- Note water trails: Follow water trails from inside out to pinpoint where they originate. This helps trace the path of leaks accurately.
- Document roof issues: Take photos of damaged or missing shingles, cracks in flashing, or other weak spots on your roof.
Quick rule: Mapping leak sources visually aids in identifying and addressing problems more effectively.
Tools and techniques to find the leak source
Finding the leak source means tracing interior damp spots back to the roof or exterior penetrations and confirming you’ve located the actual entry point before you plan repairs. Use a practical toolkit to test and observe—garden hose for simulated rain, clamps if you have them to seal joints, an attic flashlight for dark spaces, a moisture meter to spot elevated readings, a spray bottle with soap and water to reveal leaks, sturdy ladder safety gear, and a drone or high-zoom binoculars to view suspect areas from a safe distance. Each tool has a job: hoses test water entry, clamps control joints, light and moisture readings highlight trouble spots, and the drone or binoculars let you inspect hard-to-reach seams without climbing constantly.
This approach matters because it helps you locate the leak without tearing the whole roof apart, reduces guesswork, and builds a clear record of findings you can use to guide repairs or talks with pros. Expect to document what you see, when you saw it, and how the interior symptoms relate to exterior observations, so you have a solid plan for temporary mitigation or permanent fixes. Use the results to decide whether a DIY fix is reasonable now or if you should bring in a pro—and let the data guide the next steps rather than chasing symptoms blindly.
DIY testing methods (garden hose, tracer lines)
To find a roof leak, start by identifying the most likely areas where water might be entering. Use a garden hose to simulate rain and pinpoint the source. Begin at the highest point of your roof or any area showing signs of damage.
Attach the hose securely with inlet/outlet clamps if needed, ensuring no leaks from the hose itself. Start by gently spraying water in one spot for about 10 minutes before moving to another location. Watch carefully inside for new damp spots near ceilings, walls, or around penetrations like chimneys and vents.
For tracer lines, use a soap solution sprayed along suspected seams and joints. This will help you see where water is seeping through. Remember to seal any gaps in the hose setup to avoid false positives from your testing equipment.
Useful tools and when to use them
A well-equipped toolkit can make finding a roof leak much easier. Here’s what you need:
- Ladder safety gear: Ensure safe access with sturdy ladders, non-slip shoes, and fall protection harnesses.
- Attic flashlight: Use a bright light to inspect dark corners of your attic for signs of water damage or stains.
- Moisture meter: Test near penetration points, around flashing, and along rafters. Look for readings above 15% moisture content as an indicator of potential leaks.
- Caulk gun: Essential for sealing small gaps and cracks found during your inspection.
- Drone or high-zoom binoculars: Survey roof slope, flashing seams, chimney/vent joints, and upper gutters from a safe distance. Drones can be rented for around $100 per day if you don’t own one.
When a professional leak trace is worth it
If your roof has intermittent leaks or complex multi-story issues, consider hiring a professional. They have specialized equipment like thermal cameras and moisture meters that can detect hidden problems.
For instance, if you notice water stains but cannot replicate them with DIY methods, or if the leak seems to move around unpredictably, it’s time to call in experts who can trace the exact path of water entry.
Professionals also offer peace of mind and warranty coverage for repairs. They know how to handle tricky situations like ice dams or wind-driven rain that might be causing your leaks.
Step-by-step repairs for common leak types
We’ll walk you through the common roof leaks you’re likely to see and pair each type with a clear, repeatable repair sequence. Expect steps for replacing damaged shingles, resealing step-flashed valleys, and patching around vent pipes, plus important prep, materials, and finish checks to close the leak firmly. Each repair emphasizes dry surface prep, proper nailing or fastening, and confirming flashing foundations are clean and aligned before sealing.
This matters because a solid plan saves time, reduces call-backs, and protects your attic and interior from water damage. You’ll learn to assess weather windows, gather the right gear, and methodically lift shingles to inspect underlayment, repair or replace damaged layers, and re-seal penetrations with compatible materials. Finish checks, re-nailing where needed, and a light test help catch lingering leaks and set you up for longer-lasting results—without guessing or rushing through corners.
Step-by-Step Repair Process
This sequence guides you through repairing common roof leaks, from prep to finish.
- Assess weather window and set safety protocols. Gather materials: shingles, roofing cement, sealant, flashing, nails, and protective gear.
- Dry the surface thoroughly before starting work. Lift damaged shingles carefully to inspect underlayment; replace or repair as needed.
- Clean and align flashing foundations properly before sealing. Apply compatible sealant over penetrations like vents and chimneys.
- Replace damaged shingles with proper nailing pattern, ensuring a tight fit against neighboring shingles. Verify deck integrity if necessary.
- Perform a light water test or rain simulation to check for leaks. Inspect interior ceiling for signs of moisture intrusion.
Short-term Patch vs. Permanent Repair
A temporary fix like tarps or roof cement can buy time, but it’s crucial to plan a proper repair within 2 weeks.
Permanent solutions involve replacing damaged shingles and resealing flashing properly. This ensures long-lasting protection against leaks.
If the leak is minor and weather conditions are favorable, consider doing a permanent fix right away to avoid future issues.
Repair Walkthroughs: Shingle, Flashing, and Penetration Fixes
To repair damaged shingles, lift the affected area carefully. Replace with matching shingles using a proper nailing pattern.
For flashing repairs, clean around the area thoroughly. Use roofing cement to reseal valleys or chimneys. Ensure all components are aligned correctly before sealing.
Patch penetrations like vent pipes and plumbing stacks by applying appropriate sealant and installing new flashing boots if necessary. Check for leaks after rain or a water test.
When Replacement Is the Right Choice
If you notice widespread damage, multiple leaks, or significant wear on your roof’s shingles and flashing, consider partial or full replacement.
A new roof can be more cost-effective than repeated repairs. Look for signs like curled, cracked, or missing shingles, rusted nails, or deteriorated underlayment.
Consult a professional to assess the condition of your roof. They can provide an estimate and help you decide if replacement is necessary.

Safety precautions for inspections and repairs
Safety for inspections and repairs starts with solid ladder setup—keep a stable base, extend the ladder several rungs above the edge, secure the top, and have a spotter nearby while you climb. Check the rails, feet, and hardware for damage before you even start, and wear a proper harness or non-slip footwear if the job calls for fall protection. Keep your hands as free as possible, use tool belts, and plan for good weather and daylight so you don’t scramble in a rush.
Weather and surface conditions decide when you work: postpone for rain, ice, high winds, or damp, crumbly roofs, and always wait for dry, clear conditions. Treat electrical hazards seriously—de-energize nearby circuits if possible, organize cords out of the way, use insulated tools, and stay clear of power lines, metal flashing, and soaked areas. Plan access and communication: designate a clear entry, set a small, stable work zone with toe boards, and work with a buddy who can call for help or lower you if conditions worsen or you need to quit.
Personal protective equipment and ladder best practices
Use this checklist before you start your roof inspection to ensure safety.
- Wear a helmet: Protects against falling objects; skip at risk of head injuries.
- Secure the ladder: Extend 3 feet above edge, place on stable ground; skipping can lead to falls.
- Check for cracks: Inspect ladder rails and rungs before climbing; damaged ladders are dangerous.
- Use non-slip shoes: Prevents slipping on wet or icy surfaces; bare feet increase risk of injury.
- Buddy system: Have a spotter to help stabilize the ladder and catch you if needed.
- Ladder angle: Set ladder at 75-degree angle for stability; too steep can cause falls.
- Harness and anchor: Use fall protection gear when required by height or conditions.
- Tool belt: Keep hands free to hold onto the ladder securely; loose tools increase risk of accidents.
Quick rule: Always double-check your equipment before climbing up.
Working in wet, icy, or windy conditions
This checklist helps you decide if it’s safe to proceed with roof work.
- Avoid wet roofs: Postpone inspections until surfaces are dry; water can cause slips and falls.
- No ice climbing: Wait for ice to melt or use professionals trained in icy conditions.
- Check wind speed: Avoid high winds that could blow you off the roof; gusts over 20 mph are risky.
- Inspect surface grip: Ensure your footing is secure on wet, slippery surfaces; poor traction increases fall risk.
- Use caution tape: Mark dangerous areas to warn others of potential hazards.
- Plan for emergencies: Have a backup plan in place if conditions worsen unexpectedly.
- Weather forecast: Check weather updates before starting work; sudden changes can be dangerous.
- Professional help: Call experts when conditions are too risky to handle yourself.
Quick rule: Safety first—postpone inspections if conditions aren’t ideal for working on the roof.
Preventative maintenance and annual inspection plan
This plan gives you a seasonal maintenance calendar you can actually follow, with homeowner‑friendly tasks for spring, summer, fall, and winter to help head off leaks. You’ll find simple checks like keeping gutters and downspouts clear, inspecting visible flashing, roof penetrations, and shingles or tiles for damage, plus looking at attic insulation and ventilation. The goal is to build a routine that pairs DIY checks with an annual professional inspection to catch issues before they become big leaks.
Why it matters: a straightforward DIY check helps you spot trouble early, and a yearly professional inspection covers the full scope—roof surface, flashing, valleys, vents, chimneys, and skylights—plus interior indicators such as ceiling stains, mold, or attic condensation. If you have access to moisture readings or infrared, use them as tools to identify hidden moisture, but rely on the pro for interpretation and any required repairs. Keep a simple maintenance log and a budget plan to prioritize repairs, and know when to escalate to a contractor or roofer so small issues don’t turn into major leaks.
Quarterly and seasonal maintenance tasks
Use this checklist every season to keep your roof in tip-top shape.
- Gutter cleaning: Clear out leaves and debris. Check for leaks or cracks.
- Shingle checks: Look for missing, cracked, or curled shingles. Replace as needed.
- Attic ventilation inspection: Ensure proper airflow to prevent moisture buildup. Look for signs of mold.
- Trim around roof penetrations: Inspect flashing and seals around chimneys, vents, and skylights. Tighten or replace if loose.
- Roof surface debris removal: Clear away any branches or other objects that could damage your shingles.
- Flashing condition review: Check for rust, gaps, or missing pieces around roof edges and valleys.
- Valley inspection: Look for water pooling. Ensure proper drainage to prevent leaks.
- Vent caps check: Inspect vent caps for damage or missing screws. Replace if necessary.
- Skylight seals: Check around skylights for cracks, gaps, or signs of wear. Seal as needed.
- Chimney cap inspection: Ensure the chimney cap is secure and free from debris.
Quick rule: Regular checks prevent big problems down the road.
Annual professional inspection checklist
Schedule this with a pro to catch issues before they become leaks.
- Roof surface condition: Inspect for missing, cracked, or damaged shingles. Note any repairs needed.
- Flashing and valleys check: Look for gaps, rust, or damage around roof edges and valleys.
- Vents and skylights inspection: Ensure proper sealing and no signs of water intrusion.
- Chimney condition review: Check for cracks, missing mortar, or other structural issues.
- Moss and algae removal: Clean off any growth that could damage your roof over time.
- Moisture readings: Use a moisture meter to detect hidden wet spots in the attic.
- Infrared scan (if available): Detect heat loss or water intrusion not visible with the naked eye.
- Ceiling stains and mold signs: Look for any discoloration or growth inside your home.
- Attic ventilation check: Ensure proper airflow to prevent moisture buildup. Check insulation condition.
Quick rule: Professional inspections catch issues you might miss on your own.
Cost estimates and budgeting for repairs
This section helps you map a budget to concrete repair steps by breaking down costs by fix type—from temporary tarps to full roof replacement. Define scope, list the factors that drive price, and plan for insurance steps and staged work so you know what to spend at each stage. Expect to get multiple quotes and set aside a contingency for surprises.
Prices hinge on roof type, materials, extent of damage, accessibility, permit fees, and any hidden moisture or behind-wall work. Insurance matters include what’s typically covered, how deductibles work, and the documents and timelines you’ll need; temporary fixes can affect claims. Use a practical budgeting approach: triage leaks, phase the work, and consider bundled services or off-season scheduling to save time and minimize weather delays.
Typical repair price ranges
Patching a small leak can cost around $200 to $500, depending on the size and location. For flashing replacement or repairs, you’re looking at an average of $400 to $1,000 per section.
Replacing shingles is more expensive; expect costs between $600 and $2,000 for a single damaged area. If it’s time for partial roof replacement due to extensive damage or aging materials, the price can range from $5,000 to $15,000.
A full roof replacement is the most significant expense, typically ranging from $10,000 to $30,000. This includes labor and materials for a complete new setup. The exact cost will depend on your roof’s size, material type, and local labor rates.
Working with insurance and warranties
To file an insurance claim, document everything: take photos of the damage, get estimates from contractors, and keep detailed notes. Insurance companies usually cover repairs but not upgrades or cosmetic changes.
Check your policy for deductibles and coverage limits. A high deductible might mean you pay more out-of-pocket before insurance kicks in. Also, temporary fixes can affect claims if they prevent a full assessment of damage.
Roofing warranties are another factor. They often cover defects in materials or workmanship but not wear and tear over time. Make sure to read the fine print on your warranty documents before making any repair decisions.
Signs you need urgent repair vs. can-wait maintenance
This section helps you triage leaks: know what needs urgent, same-day action and what can wait for a scheduled repair. Active dripping, ceiling bulges, or exposed electrical hazards require immediate attention. Less urgent issues—like a small drip after rain or damp spots without active flow—can be planned for a later repair.
In a hurry, protect people and valuables, shut off power if water is near outlets or fixtures, and capture leaks with buckets or tarps. Document what you see with photos and notes, and contact the right helper for emergency versus scheduled repair. Understanding the signs helps you limit damage, plan quicker assessments, and prevent bad outcomes while you wait for a pro.
Red-flag symptoms (structural, electrical, rapid water ingress)
If you spot active dripping from your ceiling, especially if it’s accompanied by bulging or sagging in the drywall, that’s a red flag. It means there’s significant water pressure and potential for structural damage. Move people away from affected areas immediately.
Exposed wiring or electrical hazards are another critical sign needing urgent attention. Water near outlets or fixtures can create an electric shock risk. Turn off power to those circuits if you can do so safely, then call in a professional right away.
To minimize damage until help arrives, cover the leak with buckets, tarps, or plastic sheeting. Protect your floors and valuables from water intrusion. Quick action here can save thousands in repair costs later on.
Manageable issues to schedule for repair
Minor dripping after rainfall or damp spots without active flow are typically less urgent but still need attention. These signs often indicate a small leak that can be fixed with some patching.
Keep an eye on these areas and document any changes over time. Take photos and notes to track the issue’s progression, which will help when scheduling repairs or dealing with insurance claims.
Seasonal checks are key for preventing recurrence of minor roof issues. Inspect your roof after heavy storms and during annual maintenance windows. Addressing small problems early can prevent them from becoming major headaches down the road.
Conclusion
Spotting and fixing roof leaks early protects your home’s structure, keeps water where it should be, and saves you from bigger, more expensive damage. Stay methodical, pace yourself, and prioritize safety above all as you work from the top down.
Start by confirming the leak source with a clear visual check, then gather the right tools, and tackle the repair in small, controlled steps. Check the common causes first, inspect ceilings and attic spaces for signs of water intrusion, identify the exact leak path, apply the appropriate repair for the type of leak, and test the area in a dry condition before calling it done. Do not rush, and test each fix on a small, discreet patch before moving on to the next area. Keep yearly maintenance on your calendar and budget for upfront costs to prevent bigger problems later.
Two common mistakes to avoid are rushing through the repair without confirming the source and using the wrong repair method for the roof type. Always prioritize safety: wear a harness or secure ladder, work with a partner when possible, and never seal a leak from the inside without ventilating and drying the area first. If you’re unsure about the roof’s condition, or if the leak is near skylights, chimneys, or damaged decking, call a pro rather than pushing on alone.
When in doubt, schedule a professional assessment sooner rather than later, and keep up a simple maintenance routine: inspect after heavy rain, re-secure loose shingles, clean gutters, and address damage quickly. Stay disciplined, fix smart, and your roof will stay dry and durable season after season.
FAQ
How can I tell if a roof leak is from rain or plumbing upstairs?
Look for when the leak shows up. If it comes with rain, it’s likely the roof. If it leaks after running water or flushing, it’s probably plumbing from above.
What’s the fastest way to locate a roof leak inside the house?
Start at the ceiling stain and trace upward along attic rafters. Look for wet insulation, dark stains, or a source like a missing shingle edge. Don’t chase shadows—water travels; find the highest point above the stain.
What should I do first to fix a small roof leak myself?
Contain the leak with a bucket and protect nearby areas. Patch temporary damage with a roofing tape or tarp until you can do a proper repair. A permanent fix means replacing damaged shingles and sealing flashing.
What should I not do when fixing a roof leak?
Don’t poke at the roof with metal or forceful tools. Don’t skip safety or crawl on a wet roof. Don’t ignore active leaks—water follows gravity and will ruin insulation and ceilings fast.