
Introduction
Epoxy resin is a two-part system that you mix and pour to create a hard, glossy surface. This guide walks you through mixing, pouring, and finishing like a pro, with practical, DIY-friendly steps. Keep it simple, check the product label and follow manufacturer instructions for safe use.
Air bubbles come from rushing mixing, too-fast pouring, or temperature changes, and can mar the finish. Slow, steady mixing, avoiding whipping the resin, and pouring in thin streams helps reduce bubbles, then use proper methods to remove any remaining ones. If bubbles persist after pour, look for manufacturer guidance on heat, leveling, and curing, and plan for a careful final pass with a heat source as advised.
Key takeaways
- Inspect manufacturer instructions and labels; choose compatible resin, hardener, and tools.
- Clear, level work surface; protect surroundings; cover nearby items against drips.
- Mix epoxy slowly in stages; scrape sides and bottom for uniformity.
- Pour with a steady, slow flow; use a heat source to release bubbles.
- Work in short pours and pinch bubbles by torching or degassing carefully.
- Allow curing in a well-ventilated area; monitor fumes and temperature changes.
- Wear PPE; avoid skin contact; stop work if irritation occurs.
Table of Contents
- Introduction
- Key takeaways
- Quick Overview and Project Planning
- Tools and Materials Checklist
- Preparing the Surface, Forms, and Environment
- Mixing Epoxy Correctly (Avoid Common Mixing Mistakes)
- Pouring Techniques and Layering Strategy
- Understanding, Preventing, and Removing Bubbles
- Curing, Sanding, Polishing, and Sealing Final Surfaces
- Safety, Common Mistakes, Troubleshooting, and Cost Considerations
- Conclusion
- FAQ
Quick Overview and Project Planning
This section gives a quick map of the epoxy projects we cover, from tables and river pours to coatings. You’ll see how each type changes surface prep, tooling needs, and curing expectations.
Next, we lay out a simple planning checklist. Define the scope, sketch a rough timeline, and note workspace conditions like temperature and ventilation. Always verify product datasheets for key details before you start, such as pot life, cure windows, and compatibility with substrates.
Choosing the right epoxy for your project
The first step in any epoxy project is choosing the right resin. Epoxies come in various types, each suited to different applications.
Tabletop Resins: These are thin, self-leveling resins designed for shallow pours and coatings. They’re great for countertops, tabletops, and floor coatings where a smooth, even surface is desired.
Deep-Pour Resins: These have a higher viscosity and are designed to be poured thick without sagging. They’re ideal for river pours, thick coatings, and encapsulating objects in epoxy.
Clear Casting Resins: These are used for casting clear objects like jewelry, decorative items, or table legs. They require careful mixing and pouring to avoid bubbles.
Estimating materials and budget
The material you choose will greatly impact your project’s outcome and cost. Here’s how to estimate what you’ll need:
- Resin Volume: Calculate the volume of resin needed based on surface area and desired depth. Most resins cover about 10-20 square feet per gallon at a typical depth.
- Hardener: Epoxy kits come with a hardener that’s usually mixed in a 1:1 or 5:1 ratio with the resin. Make sure to account for both in your calculations and purchases.
- Supplier Coverage Rates: Check the supplier’s coverage rates to ensure you’re ordering enough material. Some suppliers may overestimate, so it’s wise to round up.
- Container Sizes: Consider the container sizes available. Buying in bulk can save money but may lead to waste if you don’t use all the resin before it expires.
- Waste Factor: Expect some waste due to spills, overmixing, and learning curves. A 10-20% waste factor is reasonable for DIY projects.
Tools and Materials Checklist
Start with the essentials: measuring vessels, a mixing implement, protective gloves, safety glasses, and a clean area for mixing. Emphasize accurate volume measurement and proper mixing technique to stay consistent.
Include the required consumables: epoxy resin and hardener per product spec, disposable cups, spatulas, and cleaners. Optional items like a heat source or a thermometer can help fine tune results; note safety considerations and read labels for any additives.
Essential tools and consumables
Before you start mixing, ensure you have all the necessary tools and consumables to make your epoxy resin project a success.
- Measuring vessels: Accurate volume measurement is crucial. Use measuring cups or jugs for small batches, and 5-gallon buckets with dividers for larger projects.
- Mixing tools: Mini motors or stir sticks are essential for proper mixing technique. A drill-compatible mixing attachment can speed up the process.
- Protective gear: Wear gloves to protect your hands, safety glasses to safeguard your eyes, and a respirator if fumes are significant.
- Clean stir area: Ensure you have a clean, dedicated workspace for mixing to prevent contamination.
- Epoxy resin and hardener: Always follow the product’s specific ratio instructions. Mixing incorrectly can lead to improper curing or even damage.
- Disposable cups: Use these for measuring small amounts of epoxy and hardener, then discard them to prevent contamination.
- Wooden or silicone spatulas: These are useful for scraping out every last bit of epoxy from your mixing containers.
- Isopropyl or denatured alcohol: Have plenty on hand for cleaning tools and surfaces. Epoxy is tough to remove once cured.
- Release agents: If you’re shaping your epoxy, use release agents to prevent it from sticking to molds.
Quick rule: Always confirm chemical compatibility of tools with epoxy to avoid damage or contamination.
Pro tools and finishing supplies
As your skills and project complexity grow, consider investing in these optional but helpful tools for a professional finish.
- Heat gun or torch: These help remove small bubbles by heating the epoxy’s surface. Be careful not to overheat and damage the resin.
- Thermometer or digital temp gun: Monitoring temperature helps ensure optimal curing conditions, preventing issues like slow cure times or yellowing.
- Pressure pot or vacuum chamber: These tools can significantly reduce bubbles in your epoxy by either applying pressure or creating a vacuum. They’re worth the investment for large projects or critical surfaces.
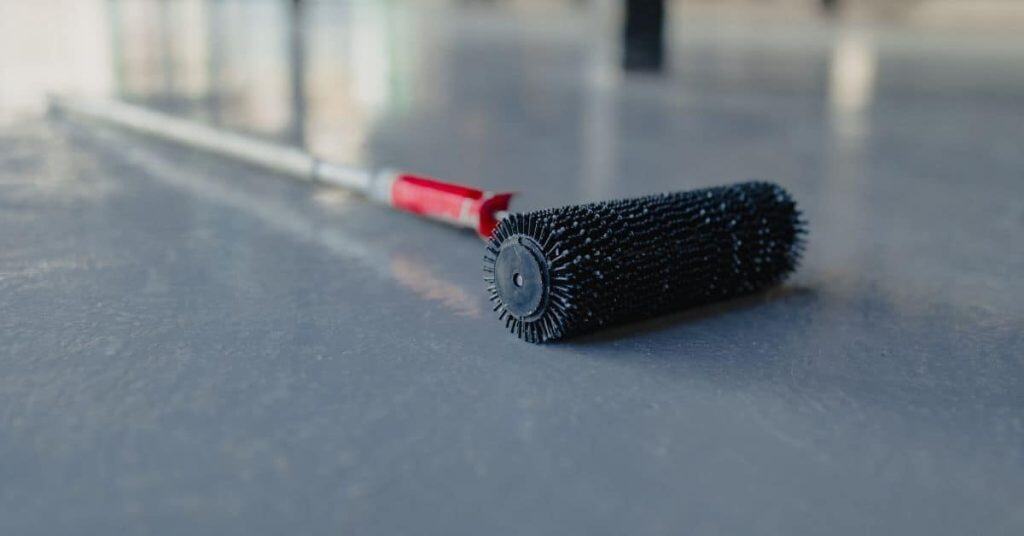
- Leveling tools: For large, flat epoxy surfaces, use leveling tools to ensure a smooth, even finish.
- Squeeze bottles: These allow precise placement of resin in hard-to-reach areas or for creating intricate patterns.
- Polishing kits: Once cured, use these kits to achieve a high-gloss, professional-looking finish. They’re especially useful for table tops and other visible surfaces.
Quick rule: Invest in these tools as your skills grow and project demands increase. They can significantly improve the quality of your finished epoxy projects.
Preparing the Surface, Forms, and Environment
Prepare the substrate by cleaning, degreasing, and addressing cracks or damage so the epoxy adheres well. Ensure the surface is uniform and dust-free before pouring.
Plan your forms, leveling, and release methods to prevent sticking. Control the environment by aiming for steady conditions and minimizing wind or dust during the job.
Surface prep and seal coats for porous materials
The material you choose for your epoxy project can greatly impact its final appearance and durability. Porous surfaces like concrete or old epoxy require special attention to prevent trapped air and moisture from causing issues.
- Cleaning: Use a degreaser to remove any dirt, grease, or contaminants that could hinder adhesion.
- Filling cracks: Apply an epoxy crack filler to seal gaps and prevent further damage. Look for one with good flexibility to accommodate substrate movement.
- Seal coat: Apply a thin epoxy seal coat before the final pour. This helps push trapped air out of porous substrates, reducing bubbles in your finished surface.
- Avoid: Don’t skip this step on porous surfaces; it can lead to cracking, staining, and weak bonds.
- Tip: Use a seal coat with good penetration and low viscosity for best results.
Building forms and ensuring level support
Proper formwork is crucial for achieving a smooth, level epoxy surface. Choose forms made from sturdy materials like plywood or steel to prevent warping.
Seal: Apply a release agent to the forms to prevent the epoxy from sticking. This makes removing the forms easier after curing.
Use supports and shims to keep the forms level and prevent sagging. Check for levelness at multiple points along the form’s length. Adjust as needed with additional support or by adding shims under the low spots.
Controlling temperature and humidity
Ambient temperature and humidity play a significant role in epoxy curing. They affect viscosity, curing time, and bubble formation.
Temperature: Follow the manufacturer’s recommendations for application temperatures. Typically, this is between 70-85°F (21-29°C).
Keep the substrate and epoxy at consistent temperatures before, during, and after pouring to prevent temperature shock, which can cause bubbles or weak curing.
Humidity: Maintain a humidity level between 40-70% to ensure proper curing. Too much humidity can lead to excessive moisture in the epoxy, causing it to cure slowly or not at all. Too little humidity can result in rapid curing and increased shrinkage.
Mixing Epoxy Correctly (Avoid Common Mixing Mistakes)
Focus on accurate measuring and correct resin-to-hardener ratios. Use proper devices and tare scales to confirm quantities before mixing.
Mix with a calm, steady motion to avoid introducing air. Keep the workspace clean and at a consistent temperature, and follow a repeatable sequence for reliable results.
Reading labels and following mix ratios
First, check the manufacturer’s datasheet for the correct resin-to-hardener ratio. This is crucial as it determines pot life and full cure.
Accurate measurement is key. Use a scale to tare (zero) your mixing container before adding components. For larger quantities, use a graduated cylinder or measuring jug.
Some epoxies come with disposable mixers or dispensers. Follow their instructions for precise volume control.
Mixing technique and avoiding trapped air
Mistakes to avoid: whipping, vigorous stirring, and not allowing bubbles to escape.
- Don’t whip: Whipping incorporates too much air. Use a slow, steady folding or stirring motion instead.
- Scrape sides and bottom: Ensure all resin and hardener are incorporated by scraping the sides and bottom of your container.
- Pause to release bubbles: After mixing for about 2 minutes, pause to allow any air bubbles to rise and escape.
- Avoid cold components: Cold resin thickens quickly, trapping air. Warm components as per product guidance.
Use a clean, smooth-sided container for easy scraping and minimal residue.
Temperature of components and work area
Temperature affects epoxy mixing and curing. Warmer resin mixes more easily and releases bubbles faster, while cold resin thickens quickly, trapping air.
Follow the manufacturer’s guidance for warming components. Generally, aim for 70-85°F (21-29°C) for both resin and hardener.
Prepare your workspace to maintain this temperature. Avoid extreme heat or cold shock that can affect curing.

Pouring Techniques and Layering Strategy
Select a pouring method that fits the project, whether flood coat, layered pours, or river accents. Each approach has a different impact on flow control and edge definition.
Outline a practical workflow from substrate prep to mixed resin handling and timely pours. Consider edge control, gradual spreading, and how to sequence layers for best bonding and appearance.
Flood coats vs deep pours and layer timing
When pouring epoxy, you’ve got two main approaches: flood coating with multiple thin layers or going for a single deep pour. Which one to choose depends on your surface size and desired finish.
Flood Coating: Ideal for large surfaces like floors or countertops. It’s easier to control and reduces the risk of runs or puddling. Check your product datasheet for max pour depth, usually 1/8″ to 1/4″.
Deep Pours: Suitable for smaller areas or design accents. They create a thicker, more textured look. But beware: deep pours can hide imperfections and are harder to control. Recoat windows vary by product, typically 24-72 hours.
Pouring methods, angles, and spreading tools
Controlling flow during pouring is key to a professional finish. Here’s how:
- Pour Speed: Slow and steady wins the race. Too fast, you’ll trap air; too slow, it won’t spread right.
- Angle of Pour: Aim for 45 degrees. Too steep, it splashes; too flat, it runs.
- Spreaders (Squeegees): Use a notched trowel or squeegee to spread epoxy evenly. Rentable: $20-$30/day.
- Rollers: For large surfaces, use 1/4″ or 3/8″ nap roller. Avoid air bubbles; use a ridge-backed roller for better control ($5-$10).
- Bridges (Leveling Tools): For deep pours, use bridges to maintain level and prevent sagging. Rentable: $10-$20/day.
Visual checkpoints during the pour
While pouring, keep an eye on these key areas to catch issues early:
- Level Lines: Check they’re consistent. If not, adjust your pour angle or spread.
- Edge Creep: Ensure edges stay crisp. Use dam forms or tape ($5-$10 roll).
- Trapped Debris: Spot-check for dust, dirt, or hair. Remove immediately with a damp cloth.
- Air Bubbles: Look for tiny bubbles. Pop them with a pin or needle scribe.
- Runs/Puddles: Watch for epoxy collecting in low spots. Spread it out before it hardens.
Quick rule: If you spot an issue, fix it right away. Once hardened, it’s too late.
Understanding, Preventing, and Removing Bubbles
Identify common bubble sources such as pouring dynamics, mixing speed, and temperature shifts. Understand how ratios and additives can influence bubble formation in practical terms.
Establish rules to prevent bubbles before pouring and know when to degas or surface prep to minimize trapped air. Learn steps for both uncured and cured epoxy remediation as needed.
Why air bubbles form (substrate, mixing, environment)
Air bubbles in epoxy can be a real pain. Let’s figure out why they happen so you can prevent them.
First off, porous substrates like concrete or wood can suck up air as you pour. Seal coats (read more) help here. Improper mixing – whipping the epoxy too fast – incorporates air. Slower, steady mixing with a scraper rewards prevents this.
Dissolved gases in your materials can escape during temperature swings. Keep your resin and hardener at recommended temps (learn more). Viscosity factors also play a role. Pre-warming resin lowers viscosity, reducing bubble retention.
Resin-to-hardener ratios, mixing speed, and additives all influence bubble nucleation and retention. Stick to consistent ratios (read labels) and control your environment for best results.
Prevention rules and best practices
Now you know why bubbles happen, let’s prevent them. Here are some actionable tips:
Seal coats (see here) block air from getting into your epoxy. Slow, steady mixing with a scraper rewards keeps air out. Degassing waits – letting mixed epoxy sit before pouring – help too. Control ambient conditions (learn more), and use proper pouring technique.
Pre-warm resin to lower viscosity, reducing bubble retention. Cover containers to reduce dust, and avoid whipping air into your mix. Maintain consistent resin-to-hardener ratios for a smooth pour.
Removing bubbles before and after cure
Sometimes bubbles happen despite our best efforts. Here’s how to remove them:
For uncured resin, use a heat gun or torch (be careful here) to reseat bubbles carefully. Re-pour if needed, and level gently. Monitor temperature to avoid rapid curing that traps air.
For cured epoxy, sand out surface bubbles and fill with epoxy paste or microballoons. Test your repair method on scrap first (important step). Match sheen and color for a seamless finish. Safety considerations include proper ventilation and protective gear.
Remember, once epoxy cures, it’s tough to remove bubbles. Prevention is key! But if they do happen, don’t despair – you can fix them.
Curing, Sanding, Polishing, and Sealing Final Surfaces
Outline the post-pour timeline and key cues for moving between cure stages. Use objective indicators to judge when the surface is ready for the next step.
Describe the finishing workflow from sanding to sealing, including how to choose between matte or gloss and how to handle pigments or aggregates. Include safety checks and common cure-related issues to watch for.
Cure stages and how to read them
The cure process is crucial for your epoxy resin’s strength and durability. Here’s how to track it:
Initial Cure (24-72 hours): The surface feels tacky, like a post-it note. Don’t walk on it yet.
Gel Stage (3-7 days): The surface is no longer tacky but still soft. You can lightly walk on it. Avoid heavy traffic.
Final Cure (7-28 days): The epoxy hardens fully. Wait for the manufacturer’s recommended time before sanding or loading the piece. Always confirm cure times based on your specific product and conditions.
Sanding and polishing workflow
Sanding restores a smooth surface, while polishing brings back gloss:
Start with 80-grit sandpaper: Sand lightly in circular motions. Clean off dust between steps.
Progress to 120 and then 220 grit: Each time, clean thoroughly before moving up a grit size.
Polish with a suitable compound: Apply a small amount on a soft cloth or pad. Buff in circular motions until gloss is restored. Clean off residue.
Final sealing and maintenance
A topcoat or sealer protects your epoxy floor from UV damage, scratches, and stains:
UV-Protective Sealer (optional): Apply after final cure. It blocks UV rays that can yellow the epoxy over time.
Cleaning: Regularly clean with a mild detergent and warm water. Avoid harsh chemicals or abrasives.
Long-term care: Reapply sealer every 2-3 years, depending on traffic and wear. Inspect for damage regularly.
Safety, Common Mistakes, Troubleshooting, and Cost Considerations
Cover safety essentials such as PPE, ventilation, and spill containment. Keep SDS on hand and plan for safe exits in case of emergency.
Offer a practical troubleshooting path for common issues and a high-level view of costs, including potential waste, tool needs, and budgeting considerations. Provide guidance on how to evaluate options without committing to specific prices.
Safety and PPE best practices
Working with epoxy resin requires proper safety measures. Start by wearing the right Personal Protective Equipment (PPE). That’s gloves to protect your hands, goggles for eye protection, and a respirator to safeguard against harmful fumes.
Ventilation is crucial. Work in a well-ventilated area or use a ventilation system designed for epoxy work. Always have safety datasheets (SDS) on hand to understand specific hazards and disposal procedures.
Never pour near open flames or heat sources due to the fire risk. Keep clear escape routes in case of spills or accidents.
Common mistakes and quick troubleshooting
Here are some common pitfalls to avoid when working with epoxy resin:
- Incorrect mix ratio: Always follow the manufacturer’s guidelines. Too much or too little hardener can ruin your pour.
- Insufficient degassing: Air bubbles can form if you don’t remove them before pouring. Use a heat gun or vacuum to degas your resin.
- Ignoring pot life: Work quickly once you’ve mixed your epoxy. The ‘pot life’ is the time it takes for the mixture to become too thick to pour.
- Improper mold release: Using the wrong release agent or not applying it evenly can lead to stuck molds and ruined projects.
- Under- or overheating: Both extremes can cause problems. Pre-warm your epoxy and work area to around 75°F (24°C).
If you notice clouding or cracking, it’s likely due to rushing the curing process. Be patient, follow the manufacturer’s cure times, and don’t rush.
Cost drivers and project scaling tips
The cost of your epoxy project depends on several factors. Resin type is key – two-part epoxies are typically cheaper than one-part or UV-cured resins. Surface area, depth, and tool requirements also play a role.
To keep costs down, plan ahead. Measure accurately to reduce waste. Consider using tools you already have instead of buying new ones. And remember, proper surface preparation can save you from having to redo work later on.
Don’t forget about long-term storage. Epoxy resin has a shelf life and should be stored properly to avoid waste. Always check the manufacturer’s guidelines for disposal procedures as well.
Conclusion
Get the job done right by respecting the prep, the mix, and the cure. Proper procedure protects you, the surface, and the finish so you don’t waste material or risk a failure that’s hard to fix.
Before you start, verify the surface and environment, mask and protect surrounding areas, mix only in the correct ratio and pot life, keep temperatures in the recommended range, apply in thin, controlled pours, watch for bubbles and address them as you go, allow full cure time without disturbance, and finally sand, polish, and seal per plan. Work in clean, enclosed space with good ventilation, and don’t rush steps or shortcuts.
Common pitfalls are rushing mixing or pouring, skipping surface preparation, ignoring temperature and humidity, and neglecting ventilation or PPE. Safety first means gloves, eye protection, and a respirator when needed, plus a dedicated workspace away from heat sources and children. If you’re unsure about the surface, epoxy type, or cure conditions, test a small area first and step back when results aren’t predictable.
If the job feels beyond your comfort zone—especially large pieces, complex forms, or high-load surfaces—calling in a pro is smart. When you know the plan, stay with it, and push forward with deliberate, safe steps, you’ll finish with results you can be proud of and that last. You’ve got this—plan, protect, and proceed with confidence.
FAQ
What causes air bubbles in epoxy resin?
Bubbles come from trapped air and moisture in the mix. They also form if the epoxy is too aggressive or you pour too quickly. Hot or cold conditions can make bubbles stick around longer.
How can I prevent air bubbles during mixing?
” Stir slowly and scrape the sides and bottom as you fold. Avoid vigorous whisking or shaking that whip air into the mix. Follow the manufacturer’s instructions for mixing order and any degassing steps they recommend.
What are the best methods to remove air bubbles after pouring?
” Use a heat source like a torch or heat gun at a safe distance to pop surface bubbles. You can also lightly touch the surface with a just-warm tool or squeegee, but don’t disturb the cure. If bubbles reappear, rework the surface calmly and evenly.
What safety steps should I follow during epoxy work?
” Work in a well-ventilated area and wear gloves, eye protection, and a mask if needed. Keep kids and pets away during mixing and curing. Always check the product label for ventilation, handling precautions, and disposal guidance.