
Introduction
Peel-and-stick tile is self-adhesive tile that you press onto a prepared surface. This intro covers how to choose, prep, cut, and install it without surprises. Always check the product label and manufacturer instructions for any surface prep or adhesion requirements.
Surface preparation, material selection, cutting technique, and careful installation all impact how long it lasts. Plan to clean, dry, and flatten the area, then follow practical steps and check the label before you peel. If in doubt about tools or techniques, verify with the product instructions or local rules and adjust accordingly.
Key takeaways
- Consider site conditions and surface prep before choosing peel-and-stick tiles to avoid failures.
- Check tile materials and backing for moisture resistance and installation compatibility.
- Plan layout with grid or staggered pattern; mark center and chalk lines.
- Only cut with proper tools and support; avoid cutting offboard edges.
- Prepare for adhesion failures: clean, dry, and dust-free surface before pressing.
- Have safety gear and follow manufacturer instructions; peeling tiles can cause waste.
Table of Contents
- Introduction
- Key takeaways
- Quick Overview: Is Peel-and-Stick Tile Right for Your Project?
- Types, Materials, and Quality Indicators
- Cost, Budgeting, and Value Compared with Traditional Flooring
- Surface Preparation and Removing Old Floor Coverings
- Tools, Materials Checklist, and Step-by-Step Installation Essentials
- Adhesion, Longevity, and Why Tiles Peel
- Design, Layout Planning, and Finishing Touches
- Maintenance, Repairs, Removal, and Environmental Considerations
- Conclusion
- FAQ
Quick Overview: Is Peel-and-Stick Tile Right for Your Project?
Peel-and-stick tile is a self‑adhesive covering that sticks to prepared floors or walls without mortar. It fits simple renovations and temporary updates, especially on flat substrates with minimal prep. It is not a full replacement for traditional flooring in every scenario, so knowing where it shines helps you plan ahead.
The main tradeoffs include cost and ease of installation versus durability and moisture sensitivity. Consider whether you expect light traffic, occasional spills, or long-term use before committing. Use this quick check to decide if it’s a good fit or if another option would be better for your space.
What peel-and-stick tile actually is
Peel-and-stick tile is a type of flooring that combines the look of traditional tile with the ease of installation of stick-on products. It’s typically made from self-adhesive vinyl, solid polymer core (SPC), or luxury vinyl tile (LVT) styles.
Unlike traditional tiles that require thinset and grout, peel-and-stick tiles have a pressure-sensitive adhesive backing. They also differ from glued-down flooring as they can be removed without damaging the surface below.
Key difference: Peel-and-stick is designed for quick, easy installation with minimal mess compared to traditional tile or glued-down options.
Best use cases and limitations
Peel-and-stick tiles are ideal for low-traffic areas, rentals, or temporary updates. They work great in rooms like laundry or mudrooms where durability isn’t a major concern.
However, they’re not suitable for wet areas due to their moisture sensitivity. Avoid using them in bathrooms, kitchens with frequent spills, or on concrete slabs with major moisture issues.
Heavy wear: Peel-and-stick tiles aren’t designed for heavy-use floors. They can dent under high heels, furniture, or heavy equipment.
Heat zones: High-heat areas like fireplaces or radiators should be avoided as the heat can damage the adhesive and cause tiles to lift.
Quick decision checklist
Before you buy, use this checklist to ensure peel-and-stick is right for your project:
- Subfloor type: Check if it’s flat, clean, and dry. Concrete needs a moisture barrier if there are issues.
- Traffic: Consider the room’s usage. High-traffic areas need more durable options.
- Moisture: Avoid wet areas or concrete with major moisture problems.
- Heat: Steer clear of high-heat zones.
- Long-term expectations: Peel-and-stick is best for temporary or low-use situations.
- Budget: Compare costs with alternative options like glue-down vinyl, ceramic tile, or porcelain.
- Design: Ensure the style matches your decor.
- Installation: Consider if you can handle precise alignment and potential surface dents.
Quick rule: If you’re unsure about any factor, it’s better to choose a more robust option or consult with a professional.
Types, Materials, and Quality Indicators
Material families fall into traditional vinyl peel‑and‑stick, SPC rigid cores, and other rigid‑core LVT options. Each has its own pros and cons for DIY use, with differences largely in durability, feel, and installation needs. Understanding these helps you pick with confidence.
Key quality signals to compare include wear layer thickness, core stability, finish embossing, edge systems, and backing support for adhesion. Look for moisture tolerance, substrate requirements, and whether a vapor barrier or leveling underlayment is advised by the manufacturer. Certifications and warranties can reveal reliability and testing backing, so note where to find that information.
Material differences and pros/cons
The material you choose for your peel-and-stick tile significantly impacts its performance, durability, and feel. Here are the main types:
- Traditional Vinyl: Inexpensive, flexible, and easy to install. Pros: Budget-friendly, comfortable underfoot. Cons: Less durable, can stain or crack with heavy traffic.
- SPC (Stone Plastic Composite): Rigid core made from stone plastic composite, offering durability and stability. Pros: Highly durable, water-resistant, suitable for high-traffic areas. Cons: Less flexible, can feel harder underfoot.
- Rigid-Core LVT: Similar to SPC but with a different core material, offering similar benefits and drawbacks.
Thickness, wear layer, and backing indicators of quality
The thickness of the tile indicates its overall durability. Thicker tiles are more stable and less prone to damage.
The wear layer is crucial for high-traffic areas. A thicker wear layer (6-20mil) provides better protection against scratches and scuffs.
Check the backing support as well. A good adhesive backing ensures a strong bond with your subfloor. Some manufacturers offer pre-applied adhesives, while others require you to apply it yourself.
Warranties, certifications, and manufacturer claims
Check the warranty terms. A longer warranty indicates better product quality and manufacturer confidence.
Look for industry certifications like FloorScore or ANSI/NSF 141 to ensure the product meets indoor air quality standards.
Verify slip ratings, especially if installing in areas prone to moisture. Some manufacturers claim their products are suitable for kitchens and bathrooms, but it’s best to check with the manufacturer first.
Cost, Budgeting, and Value Compared with Traditional Flooring
Major cost drivers are the tiles themselves, any required primer or adhesive, and surface prep materials. Tools and safety gear, plus potential labor for larger rooms, also add to the budget. Plan for a realistic amount of waste and future repairs when estimating total cost.
Think in tiers of product quality and expected lifespan. Higher wear layers and thicker tiles usually cost more but may reduce replacement frequency. Use a simple planning approach to compare upfront spend versus long‑term value, and consider regional price differences and your own DIY comfort level.
DIY vs. Professional Installation Cost Considerations
Installing peel-and-stick tiles yourself can save you labor costs, but it’s not always the cheapest option. Pros bring experience and tools that can speed up the job and prevent costly mistakes.
DIY: You’ll need to buy your own tools and may spend more time learning how to use them. But if you’re handy and have some spare time, DIY can save you 30-50% on labor.
Pros: They bring their own tools, know the tricks of the trade, and can usually finish the job faster. However, they’ll charge for their time and expertise, typically around $2-$5 per square foot installed.
Long-term Value and Replacement Timeline
The lifespan of your peel-and-stick tiles depends on the quality, wear layer, and how well you maintain them. Better tiles can last 10-20 years or more, while cheaper ones may only last 5.
Quality: Thicker tiles with a better wear layer will last longer but cost more upfront. They’re worth the investment if you plan to stay in your home long-term.
Maintenance: Regular cleaning and prompt repairs can extend the life of your tiles. Check for signs of wear, like scratches or chips, and address them quickly to prevent further damage.
Replacement: Even with proper care, you’ll eventually need to replace your tiles. Better-quality tiles may last longer but will also be harder to remove when the time comes. Keep this in mind if you think you might sell your home before they wear out.
Cost-Saving Tips and Budgeting Checklist
Use this checklist to help plan your project and save money where you can. It’s best to go through it before you start shopping or prepping.
- Measure twice: Accurate measurements prevent overbuying and waste.
- Check for sales: Look for end-of-season sales, closeouts, or manufacturer rebates.
- Buy overage: Always buy extra tiles (around 10-15%) to account for cuts, breaks, and mistakes. It’s cheaper than buying more later.
- Prep correctly: Proper surface prep prevents rework and ensures your tiles stick well. Skip this step at your peril.
- Check moisture levels: Excess moisture can ruin your subfloor and cause your tiles to fail. Use a moisture meter to check before you start.
- Consider leveling compound: If your floor isn’t perfectly flat, you may need to use a leveling compound. It’s an extra cost but ensures a smooth finish.
- Plan your layout: Measure and plan your tile layout before you start installing. This helps minimize cuts and waste.
- Check warranties: Make sure the tiles and adhesive are covered by warranties in case something goes wrong.
- Factor in regional price variations: Prices can vary depending on where you live. Research local prices to avoid sticker shock.
Quick rule: Always prioritize quality over cost. Cheaper tiles may seem like a bargain, but they’ll likely need replacing sooner and could end up costing you more in the long run.
Surface Preparation and Removing Old Floor Coverings
Surface prep is the most crucial factor for successful adhesion, as poor prep is a common cause of debonding and failures. A clean, dry, flat, and properly primed surface gives the tile its best grip and look. Address any cracks or gouges before laying the first tile.
Identify the existing floor type and apply the appropriate steps: clean thoroughly, level high spots, and remove residues from previous coverings. Plan a moisture check where relevant and choose primers or adhesion promoters as noted by the tile manufacturer. Maintain a safe, dust‑free workspace throughout the process.
Assessing subfloor and surface cleaning
The first step is to assess your subfloor. It’s the foundation of your peel-and-stick tile installation, so it needs to be in good shape.
Check for flatness using a straightedge or level. If you find low spots, they’ll need to be filled. High spots should be sanded down.
Moisture is another enemy here. Concrete and basement floors are especially susceptible. Use a moisture test kit to check for excess moisture before proceeding.
Cleanliness is crucial too. Sweep, vacuum, or wash the floor depending on its type. Ensure there’s no dirt, dust, grease, or other contaminants that could hinder adhesion.
Safe methods for removing old floor coverings
Removing old flooring can be a dirty job. Safety’s key here. Wear gloves, long sleeves, and eye protection.
For vinyl or linoleum, you might need to use a chemical stripper if the adhesive is tough. Always follow manufacturer instructions. For mechanical removal, use a scraper or floor scraper tool.
With carpet, start by removing tack strips with a pry bar. Then, pull up the carpet and any padding. If there’s old adhesive, use a chemical stripper to remove it.
Always ensure proper ventilation when using chemicals. And remember, safety doesn’t stop at you – keep pets and kids away from treated areas.
Leveling, patching, and moisture mitigation
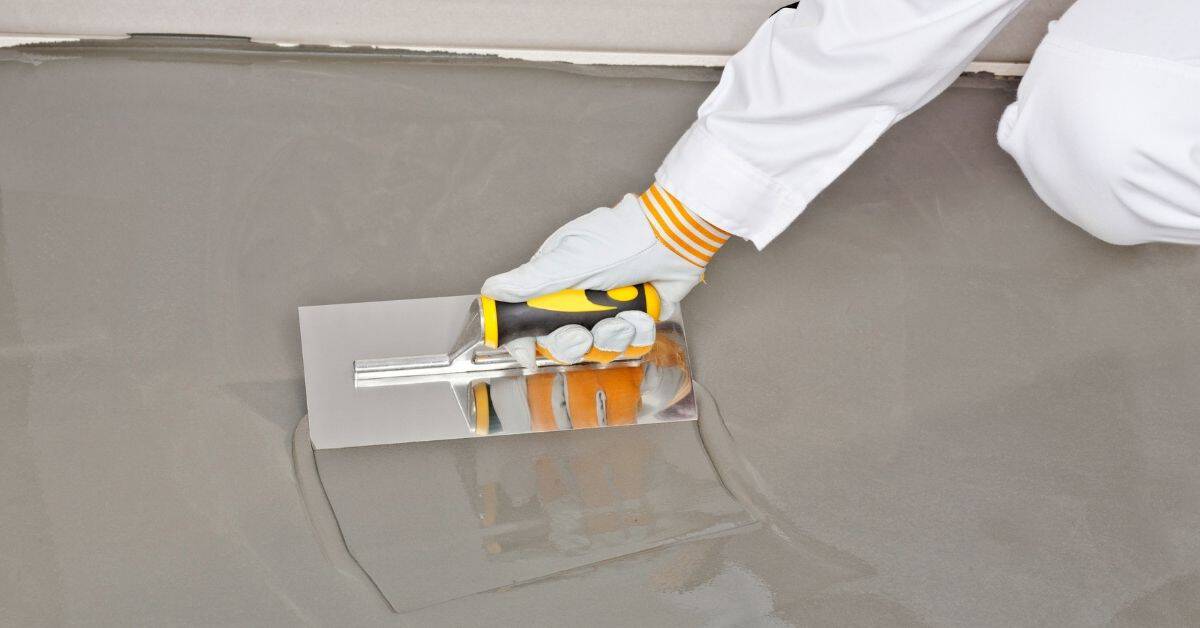
Once old flooring’s gone, it’s time to level your subfloor. Use a self-leveling compound for low spots. Sand down high spots until they’re even with the rest of the floor.
If you find cracks or gouges, repair them with a patching compound. Let it dry completely before proceeding.
Moisture mitigation is crucial, especially on concrete floors. If your moisture test kit shows high readings, consider using a moisture barrier membrane before installing your tiles.
Always follow manufacturer guidelines for their products. And remember, patience is key here – let each layer dry completely before moving on to the next step.
Tools, Materials Checklist, and Step-by-Step Installation Essentials
Assemble a compact toolkit and a readiness checklist to prevent common mistakes. Ensure the surface is clean, dry, and primed if required, and plan a centerline layout to guide placement. A dry run helps you catch alignment issues before committing to adhesive.
Core items include a sharp utility knife, straightedge, measuring tools, spacers, level, cloth, cleaner, and a roller for air removal. Follow the sequence: center, align, cut edges precisely, peel backing gradually, press firmly, and work from center outward to smooth out bubbles. Reseat tiles promptly if misaligned within the permitted window.
Step-by-Step Installation Process
Before you start laying your peel-and-stick tiles, make sure to follow this step-by-step checklist to ensure a successful installation.
- Preparation and Safety: Inspect the substrate for cleanliness, dryness, smoothness, and prime if needed. Wear safety glasses when cutting tiles.
- Measure and Plan: Measure your space to determine tile layout, starting from the center. Snap a grid using chalk lines to guide installation.
- Dry-Fit Tiles: Perform a dry run by placing tiles along the snapped lines without adhesive to ensure proper alignment and spacing.
- Gather Tools: Have your utility knife, straightedge, tape measure, pencil, spacer, level, clean cloth, disinfectant cleaner, and roller ready.
- Start in the Center: Begin installing tiles at the center of the room to ensure a balanced layout. Peel backing gradually while pressing tiles firmly into place.
- Align Tiles Accurately: Use spacers or alignment guides to maintain consistent grout lines and prevent misalignment.
- Cut Edge Tiles Precisely: Measure and mark edge tiles accurately using a straightedge and pencil. Cut tiles carefully with a utility knife, following the scored line.
- Remove Air Pockets: Roll or press tiles from the center to edges with a soft roller or hand roller to remove air pockets and ensure proper adhesion.
- Clean Up: Wipe away any excess adhesive or debris with a clean, damp cloth. Allow tiles to cure according to manufacturer’s instructions before walking on them.
Quick rule: Always start in the center and work your way outwards to maintain a balanced layout and prevent misalignment.
Tools and materials checklist
Before you begin installing peel-and-stick tiles, make sure you have all the necessary tools and materials to ensure a successful outcome.
- Cutting Tools: A sharp utility knife with extra blades for cutting tiles and trimming edges. A straightedge or steel ruler is essential for accurate measurements and scoring.
- Measuring Tools: Tape measure to accurately determine tile layout and spacing. Pencil for marking cut lines and layout.
- Spacers/Alignment Guides: Use spacers or alignment guides to maintain consistent grout lines between tiles.
- Level: A level is crucial for ensuring tiles are installed evenly and do not slope, which can lead to water pooling and damage.
- Cleaning Supplies: A clean cloth and disinfectant cleaner to prepare the substrate and clean up any adhesive residue.
- Roller/Hand Roller: A soft roller or hand roller is necessary for squeegeeing air bubbles out of tiles after installation.
- Primer (optional): If your substrate requires priming, use a primer suitable for the surface and tile type to ensure proper adhesion.
- Additional Adhesive (optional): Having extra adhesive on hand can be helpful if you need to make adjustments or touch up any areas.
Quick rule: Always double-check your tools and materials before starting the installation process to avoid delays and ensure success.
Installation workflow and timing
Follow this installation workflow and timing guide to maintain adhesion and achieve a professional-looking result with your peel-and-stick tiles.
- Layout (15-30 minutes): Measure, snap chalk lines, and perform a dry run to plan your tile layout. Start in the center of the room.
- Dry-Lay Tiles (10-20 minutes): Place tiles along the snapped lines without adhesive to ensure proper alignment and spacing. Make any necessary adjustments before applying adhesive.
- Cut Tiles (15-30 minutes per tile): Measure, mark, and cut edge tiles using a utility knife and straightedge. Take your time to ensure accurate cuts.
- Apply Adhesive (5-10 minutes per tile): Peel the backing gradually while pressing tiles firmly into place. Work from the center outwards to maintain a balanced layout.
- Roll and Press Tiles (2-5 minutes per tile): Use a soft roller or hand roller to squeegee air bubbles out of tiles, starting at the center and working towards the edges.
- Allow Adhesion Time (10-30 minutes): Give the adhesive time to set before walking on the tiles or installing trim pieces. Follow manufacturer’s instructions for specific adhesion times.
- Clean Up (5-10 minutes): Wipe away any excess adhesive or debris with a clean, damp cloth. Allow tiles to cure according to manufacturer’s instructions before using the space.
- Inspect and Make Final Adjustments (5-10 minutes): Inspect your work for any misaligned tiles or air pockets. Reseat misaligned tiles within the allowed repositioning window if necessary.
Quick rule: Always allow sufficient time for each step in the installation process to ensure proper adhesion and a successful outcome.
Cutting techniques for straight lines and custom shapes
Master these cutting techniques to achieve clean, professional-looking edges with your peel-and-stick tiles.
- Straight Line Cuts (5-10 minutes per tile): Measure and mark the cut line using a straightedge and pencil. Score the tile along the marked line using a utility knife. Snap the tile along the scored line, then use the utility knife to trim any rough edges.
- Curved Cuts (10-20 minutes per tile): For curved cuts around fixtures or obstacles, trace the curve onto the tile using a pencil. Use a jigsaw with a fine-tooth blade to cut along the traced line. Sand any rough edges with fine-grit sandpaper.
- Diagonal Cuts (5-10 minutes per tile): For diagonal cuts, measure and mark the cut line using a straightedge and pencil. Score the tile along the marked line using a utility knife. Snap the tile along the scored line, then use the utility knife to trim any rough edges.
- Custom Shapes (10-30 minutes per tile): For custom shapes like circles or complex patterns, use a jigsaw with a fine-tooth blade to cut along traced lines. Sand any rough edges with fine-grit sandpaper.
- Scoring Technique: When scoring tiles, apply steady pressure and follow the marked line carefully. Do not press too hard, as this can cause the tile to crack or break.
- Snapping Technique: When snapping tiles along scored lines, use a firm, even pressure. Hold the tile securely with one hand while applying pressure with your other hand.
Quick rule: Always measure twice and cut once to ensure accurate cuts and minimize waste.
Adhesion, Longevity, and Why Tiles Peel
Peeling generally stems from poor surface prep, moisture intrusion, temperature changes, UV exposure, or incompatible adhesives. Identifying these causes helps you prevent failures before they start. Start with a small test area to gauge adhesion and moisture response.
Prep steps should be thorough: clean, degrease, repair, and ensure levelness, applying primers or promoters only when the manufacturer approves. Choose compatible products and follow prescribed bonding methods to maximize lifespan. Implement preventive measures like controlling moisture, stabilizing temperature, and sealing expansion gaps in busy zones.
Common adhesion failure causes
Tiles peeling off can be frustrating. Let’s first understand why it happens.
Improper surface prep is a common culprit. If the surface isn’t clean, dry, and free of coatings, tiles won’t stick.
Moisture intrusion weakens adhesion. Check for leaks or high humidity areas before installing.
Temperature fluctuations and UV exposure can also cause tiles to lift. Ensure your space has stable temperatures and is protected from direct sunlight.
Improving adhesion: primers and extra adhesives
Sometimes, you need extra help for a strong bond. That’s where primers and supplemental adhesives come in.
Primers create a better surface for tiles to stick to. Use them if your surface is porous or the manufacturer recommends it.
Extra adhesives or double-sided tapes can boost adhesion power. But always check with the tile manufacturer first. Using incompatible products can void warranties.
Remember, more isn’t always better. Follow manufacturer guidelines for best results.
Warranty, returns, and documenting problems
Peeling tiles can lead to costly replacements. That’s why it’s crucial to understand your warranty coverage.
Document installation conditions and take photos. This helps if you need to make a claim later.
Check your warranty for peeling or delamination coverage. Some warranties require professional installation, so read the fine print.
If tiles start peeling, address it promptly. The longer you wait, the more damage can occur and the harder it is to make a claim.
Design, Layout Planning, and Finishing Touches
Plan around the room’s function, lighting, and style to guide pattern choices. Decide between grid, offset, or more decorative layouts and lay out a mock grid before committing to cuts. This helps you predict waste and achieve a balanced look.
Prepare for transitions, borders, and edge details that frame the installation. Map starting points, determine where trims belong, and think about maintenance access. Keep batch consistency in mind and choose finishes that hide minor wear for long‑lasting appeal.
Layout strategies and pattern planning
Start by finding your room’s centerline. This helps avoid tiny slivers at walls and ensures a balanced look.
For symmetrical layouts: Snap chalk lines from the center outwards to create even rows and columns. Dry-lay tiles along these lines to preview the final look before peeling and sticking.
For intentional off-center patterns: Plan your layout around a focal point, like a fireplace or kitchen island. Again, dry-lay first to ensure you’re happy with the result.
Transitions, thresholds, and baseboard details
Plan your transitions carefully. Use matching or complementary tiles for a seamless look when moving from one floor type to another.
At thresholds: Consider using a bullnose tile or metal threshold strip for safety and durability. Ensure it’s securely attached before installing the first row of tiles.
Baseboards: Before installing, caulk any gaps between the baseboard and wall to prevent moisture from getting behind your tiles. After tiling, apply a bead of paintable caulk along the edge for a finished look.
Visual checkpoints and quality control
Perform these checks during and after installation to catch any issues early. It’s easier (and cheaper) to fix problems now than later.
- Check for alignment: Ensure each tile is straight and level with its neighbors. Use a torpedo level or long straightedge as you go.
- Look for gaps: Make sure there’s consistent spacing between tiles. Use spacers to maintain even grout lines.
- Feel for adhesion: Gently press on each tile after installation. If it feels loose, reapply the adhesive and let it cure properly.
- Check for bubbles or voids: These can indicate air pockets under the tile. Press down firmly to release any trapped air.
- Inspect corners: Ensure tiles are square with each other at corners and edges. Use a 3-4-5 triangle tool if needed.
- Verify transitions: Make sure all transitions between different floor types are level and secure.
- Check for lippage: This is when one tile is higher than its neighbor. Tap down any tiles that stick up with a rubber mallet.
- Inspect grout lines: After grouting, wipe away excess and check for consistent grout lines. Fill in any voids if necessary.
Quick rule: If it looks or feels wrong, double-check your work. Better safe than sorry!
Maintenance, Repairs, Removal, and Environmental Considerations
Establish a routine cleaning routine and avoid harsh chemicals that can damage adhesion or finish. Regular checks help you spot issues before they escalate. Address mold or staining promptly in damp areas.
When tiles fail, know whether to replace individual pieces or reseal and patch. End‑of‑life removal should minimize substrate damage and consider disposal or recycling options. Be mindful of VOCs, indoor air quality, and choosing low‑emission materials for a healthier space.
Cleaning and long-term maintenance
Keep your peel-and-stick tiles looking fresh with the right cleaning routine. Use mild, pH-neutral cleaners to avoid damaging the wear layer or adhesion.
Daily: Sweep or vacuum to remove dirt. Mop with a damp mop and cleaner once a week in low-traffic areas, more frequently in high-traffic zones.
Avoid: Abrasive cleaners, scrubbing pads, or excessive water as they can compromise the grout and adhesive bond.
Prevent staining and mold by addressing spills promptly and ensuring proper ventilation in wet areas. Seal grout lines to enhance protection.
Spot repairs and full removal methods
Identify damaged tiles by checking for curls, cracks, or loose edges. For spot repairs: carefully lift the tile using a flathead screwdriver, clean the surface, apply construction adhesive, reattach, and seal.
If a tile is beyond repair, replace it following these steps: remove damaged tile, clean the area, apply new adhesive, attach the replacement tile, and seal.
For full removal: use a heat gun to soften the adhesive, then scrape off tiles with a flathead screwdriver. Work in small sections to minimize substrate damage. Use safety glasses and gloves during this process.
Before removing, consider if you can reuse or repurpose the tiles to reduce waste.
Sustainability and disposal options
Choose peel-and-stick tiles with low VOC adhesives for better indoor air quality. Look for products with recycled content or that are recyclable at the end of their life.
When disposing, check local recycling centers as some accept construction waste like peel-and-stick tiles. If not, consider landfilling responsibly by wrapping tiles in plastic to contain any remaining adhesive.
To minimize environmental impact, extend the lifespan of your tiles with proper maintenance and repairs. Consider donating or selling unwanted tiles instead of disposing of them.
Always follow local waste management guidelines for safe disposal practices.
Conclusion
Peel-and-stick tiling can deliver a fast, durable floor if you start with the right material, prepare properly, and respect the limits of the product. The key is to protect the surface, follow the correct sequence, and verify adhesion before you trust the whole room to it.
First, assess the room: ensure the old floor is removed or sealed according to the surface prep section, dry and clean the substrate, and test a small patch to confirm the adhesive sticks and stays locked in place. Then plan the layout, select a tile and adhesive that match your traffic and environment, gather the listed tools and materials, and follow the installation steps in order. Finally, inspect edges, seams, and trim with the proper finishing touches, and set aside time for a final clean and long-term maintenance checks.
Common mistakes to avoid include skipping surface prep or letting the substrate stay dusty or wet, overhandling or stretching the tiles during laydown, and rushing corners or transitions. Safety rules are simple: wear eye protection and a dust mask when removing old coverings, work in a well ventilated area, tape off the space to avoid trips, and never force tiles when they don’t seat flat. If you’re in doubt about adhesion, or the substrate shows structural issues, stop and test more areas or call for help before committing future sections to the floor.
If the job involves a fragile substrate, questionable moisture, or large rooms with heavy foot traffic, consider bringing in a professional to confirm subfloor readiness and to ensure long-term performance. Stay practical, stay patient, and you’ll get a finish that looks good, lasts, and stays on the floor where it belongs.
FAQ
How do I choose the right peel-and-stick tile for a room?
Look for tiles that match the room’s moisture level and traffic. Check the product label for suitability on concrete, wood, or existing vinyl. If unsure, read the manufacturer’s instructions and choose a tile with a forgiving wear layer for DIY use.
What surface prep steps matter most before you lay tile?
Clean and dry the floor thoroughly. Fix obvious high spots or dips and make sure the surface is smooth. If the substrate has moisture or deflection concerns, resolve those first or pick a substrate-approved product.
Any tips on cutting tiles to fit around edges and obstacles?
Score lines with a sharp utility knife for straight cuts and use a tile cutter or snips for tight bends. Work slowly and test-fit pieces before committing glue or backing. If you’re unsure about a cut, adjust with seamless edge pieces rather than forcing a tight fit.
How do room size and layout affect cost and installation planning?
Long runs reduce waste and seams; plan layout to minimize awkward cuts. Keep a small waste buffer in the budget for miscuts or damaged sheets. Always check the product’s guidelines on expansion gaps and installation spacing with the specific tile you’re using.