
Introduction
Torch-down roofing problems stem from improper installation and material failures that can lead to leaks and water damage.
The article explains how to spot common signs, what basic testing decisions to make, and practical fixes you can consider to decide between repair and replacement.
Key takeaways
- Torch-down is modified bitumen roofing using torched-in seams for watertight seal.
- Most problems stem from poor surface prep, improper torching, or substrate movement.
- Inspect flashings, edges, and seams for blisters, lifting, and pooled moisture signs.
- Safe on-roof testing requires fall protection, spotters, and controlled heat management.
- Repair options range from localized heat repairs to full membrane replacement.
- Regular maintenance includes cleaning debris, inspecting edges, and resealing suspect seams.
Table of Contents
- Introduction
- Key takeaways
- What is torch-down (modified bitumen) roofing?
- Common problems and their root causes
- How to inspect and test a torch-down roof
- Safe on-roof testing and safety precautions
- Repair options and step-by-step fixes
- Cost, lifespan, and how torch-down compares to alternatives
- Preventive maintenance and best practices
- Conclusion
- FAQ
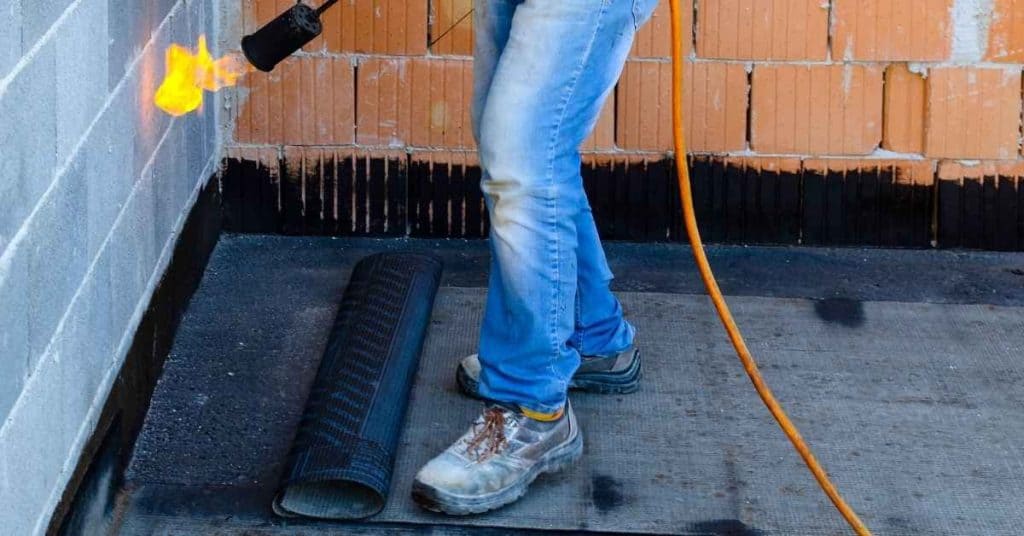
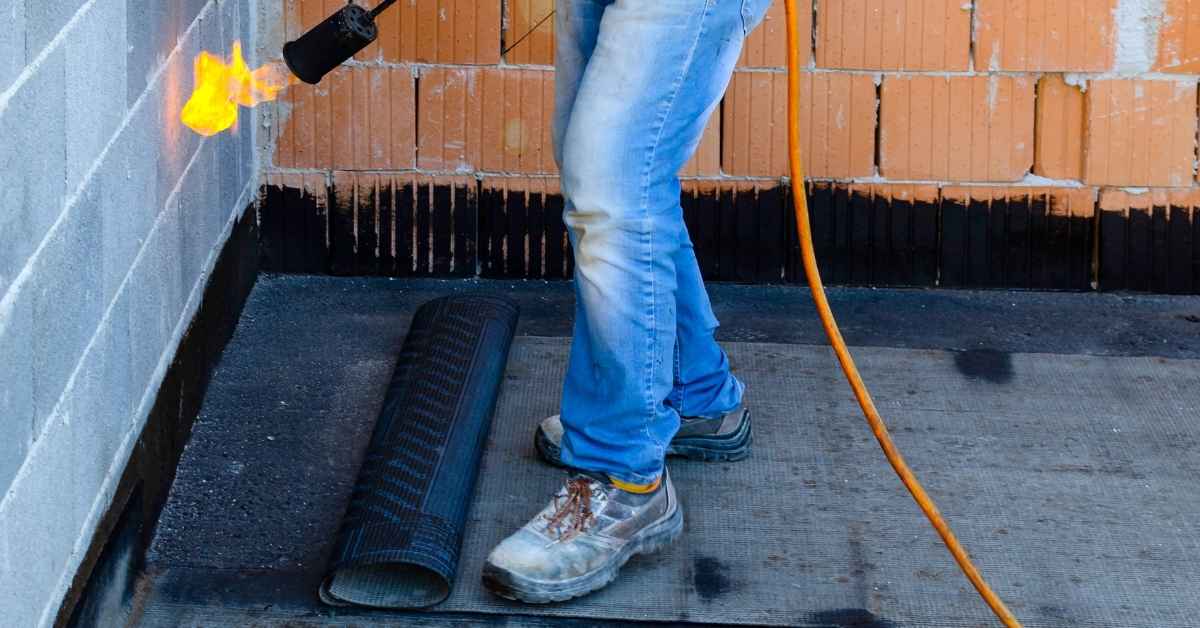
What is torch-down (modified bitumen) roofing?
Torch-down roofing is a built-up membrane system using modified bitumen sheets that are heat-applied to create a continuous, water-resistant surface. It is typically used on flat or low-slope roofs and often features granule or reflective top surfaces for added protection and longevity. The process relies on a propane flame to fuse layers together, forming a seamless barrier against moisture and weather.
The base materials include bitumen modified with polymers such as APP or SBS, carrier sheets (asphalt or fiberglass/asphalt-saturated felts), reinforcing facers, and protective top coatings or granules. These components influence how flexible the membrane remains, how it resists UV exposure, and how long it lasts under varying temperatures and stresses. Common names and misconceptions persist, including calls that it’s “rubberoid” or “rubber roofing,” or that it is simply “torch-on,” but installation methods and material behavior differ from single-ply TPO/EPDM or hot-mopped asphalt. When considering it for a roof, verify substrate readiness, slope tolerance, climate considerations, ventilation needs, and proper pre-install preparation before committing to torch-down as the solution.
Materials and manufacturing
The materials used in torch-down roofing significantly impact its performance. Let’s break down the key components:
- Bitumen: The base material, bitumen provides water resistance. Look for ratings like ASTM D312 or EN 1852.
- Modifiers (APP/SBS): Polymers added to bitumen for flexibility and longevity. APP (Atactic Polypropylene) is more common, while SBS (Styrene-Butadiene-Styrene) offers better low-temperature performance.
- Carrier sheets: Asphalt or fiberglass/asphalt-saturated felt backing provides strength and support. Avoid thin felts that can tear easily.
- Reinforcing facers: Fiberglass or polyester scrims enhance membrane durability. Check for ASTM D4869/D7725 ratings.
- Top coatings/granules: Protective layer against UV rays and physical damage. Choose reflective granules for energy efficiency.
Types of torch-down systems
Torch-down roofing comes in various types to suit different needs:
Single-ply vs Multi-ply: Single-ply membranes are thinner and lighter, while multi-ply offers better durability and insulation.
APP vs SBS modified bitumen: APP is more affordable but less flexible at low temperatures. SBS offers superior cold-weather performance but costs more.
Self-adhesive vs Torch-applied: Self-adhesive membranes use a sticky backing, while torch-applied membranes require heat for adhesion. Both have their pros and cons depending on the job.
Components of a complete system
A proper torch-down roofing assembly includes several components:
Membrane: The waterproofing layer, typically 2-4 plies thick.
Flashings: Custom-fabricated metal pieces that seal around penetrations and edges to prevent leaks.
Primer & Adhesives: Specialized products that prepare the surface and bond materials together.
Insulation: Rigid foam or loose-fill insulation improves energy efficiency and structural integrity.
Substrate preparation: Clean, dry, and primed roof deck ensures a solid base for your torch-down system.
Common problems and their root causes
Blistering and wrinkling usually point to moisture under the membrane or heat being applied with improper control, while delamination and seam failure stem from poor adhesion, inadequate substrate prep, or overlapping mistakes. Punctures and torch damage come from foot traffic or contact with sharp objects, and ponding accelerates deterioration due to extended water exposure and UV loading. Each issue has a likely primary cause plus contributing factors to inspect during a diagnostic check.
When you’re evaluating installation or material compatibility pitfalls, look for inadequate substrate prep, wrong torch settings, improper seam overlaps, and incompatible underlayments or vent details. Aging or damaged rolls can also compromise performance. Environmental and maintenance factors like poor slope, extreme temperatures, UV aging, and pedestrian traffic further influence outcomes and should be part of your ongoing assessment and planning for repairs or replacements.
Failures from installation errors
Proper installation is key to a long-lasting torch-down roof. Here are common mistakes to avoid:
- Inadequate heat application: Insufficient heat weakens the adhesive, leading to poor bonding and seam failure.
- Improper torch technique: Uneven or rushed heating can cause wrinkling, blistering, and delamination.
- Insufficient overlap: Too little overlap at seams results in weak points that leak and fail under stress.
- Bad seam welding: Incomplete melting and bonding at seams leads to leaks and eventual seam failure.
Attention to detail during installation prevents these issues.
Material and environmental causes
The right materials and understanding their limits are crucial for a durable roof. Consider:
- Aging rolls: Old or improperly stored rolls may have lost their adhesive properties, leading to weak bonds.
- UV degradation: Prolonged sun exposure breaks down the membrane’s surface, causing cracking and staining.
- Thermal cycling: Extreme temperature changes cause expansion and contraction, stressing seams over time.
- Substrate movement: Settling or shifting substrate can lead to delamination and seam failure.
- Trapped moisture: Moisture under the membrane causes blistering, wrinkling, and delamination.
- Incompatible materials: Using incompatible leak barriers or vent accessories can cause weak bonds and premature failures.
Design and drainage issues
Proper design and drainage planning prevent ponding and accelerated wear. Here’s what to look out for:
Low slope: A slope of less than 2 inches per foot can lead to ponding, trapping water on the roof.
Improper drainage: Inadequate or blocked drainage points cause water to accumulate, accelerating membrane deterioration and stressing seams.
Insulation layout: Poorly laid insulation can create low spots that trap water, leading to accelerated wear and membrane stress.
How to inspect and test a torch-down roof
Start with a visual and hands-on inspection to identify blisters, cracks, wrinkles, edge separations, exposed seams, lifted laps, flashing wear, punctures, and debris. Check membrane adhesion at edges, around penetrations, and along roof transitions. Document any signs that could indicate underlying problems needing attention.
Use a safe, repeatable workflow for testing and verification, including moisture checks, substrate cleanliness, and seam integrity. Keep notes on weather conditions during inspections and any observed changes after storms. Recording findings helps you determine whether patches, resealing, or flashing repairs are needed and in what priority.
Step-by-Step Process
Follow these practical steps to safely and effectively inspect and test your torch-down roof.
- Preparation: Check weather, set up ladder with safety measures, gather tools (binoculars, telescoping wand, pry bar/scraper, moisture meter/infrared camera, flashlight).
- Visual Inspection: Start at the edge, walk along ridges and valleys, use binoculars for distant review. Look for blisters, cracks, wrinkles, separations, exposed seams, lifted laps, flashing wear, punctures, debris.
- Edge and Penetration Check: Assess membrane adhesion at edges and around penetrations using a gentle lift with pry bar/scraper. Ensure no movement or detachment.
- Moisture Detection: Use moisture meter or infrared camera to scan for trapped water or damp areas. Focus on seams, laps, and penetrations.
- Seam and Penetration Inspection: Use flashlight to inspect seams and penetrations closely. Check for gaps, cracks, or signs of wear. Tighten any loose screws or nails.
Visual checkpoints and documentation
Use this checklist during your visual inspection to ensure you catch all potential issues.
- Blisters: Puffy areas filled with water or air. If left untreated, they can grow and cause further damage.
- Cracks: Linear separations in the membrane. Check for width and length, as well as any signs of water intrusion.
- Wrinkles: Wavy or rippled areas that can trap water and lead to leaks. Smooth out if possible.
- Edge Separations: Membrane pulling away from edges. Check for adhesion and reattach if necessary.
- Exposed Seams: Seams without proper cap flashing or sealant. Apply sealant or replace flashing.
- Lifted Laps: Lapped areas peeling up. Press down, check adhesion, and reattach if needed.
- Flashing Wear: Damage to flashing around penetrations. Inspect for gaps, cracks, or corrosion.
- Punctures: Holes in the membrane from debris or foot traffic. Seal with appropriate patch.
- Debris: Remove any dirt, leaves, or other materials that can trap water or cause damage.
Quick rule: Photograph and map all defects for future reference and to track repairs.
Non-destructive testing methods
These techniques help identify hidden problems without causing damage to your roof.
Use an infrared camera or moisture meter to scan for trapped water. Focus on seams, laps, and penetrations where leaks are most likely to occur. If you find damp areas, investigate further with a flashlight.
Perform cap sheet tap tests by gently tapping on the membrane with a flat object. A hollow sound indicates a void or delamination beneath. Follow up with a moisture check if necessary.
Inspect seams closely for gaps, cracks, or signs of wear. Use a telescoping wand to reach hard-to-access areas. If you find issues, note them for repair.
When to use destructive or invasive testing
While these methods can provide valuable information, they should be used sparingly to minimize damage to your roof.
Consider core sampling when you suspect a serious issue but cannot locate it through non-destructive means. Remove a small, discreet sample of the membrane and insulation to check for moisture or delamination. Always repair the area afterwards.
Perform adhesive pull tests only if you suspect poor adhesion. Gently pull on the membrane with a pry bar/scraper to check for movement. Be careful not to cause damage.
Localized cutting may be necessary to inspect hidden areas, such as behind parapets or under debris. Always repair any cuts made during inspection.
Safe on-roof testing and safety precautions
On-roof testing should be clearly scoped, with non-flame inspections and only certain tasks using heat if properly controlled and permitted. Distinguish between routine visual checks and any torch-assisted work, ensuring hot work is justified, supervised, and compliant with local rules. If in doubt, defer flame-based tests to a qualified professional and rely on non-destructive methods whenever possible.
PPE and protective gear are non-negotiable: flame-resistant clothing, ANSI-rated eye protection, gloves, hard hat, non-slip boots, and fall protection if needed. Before shifts begin, inspect and dispose of PPE properly, and have a fire watch and extinguishing plan ready in case conditions change. Follow conservative guidelines for wind, rain, and temperature, and establish stop-work criteria to protect people and the roof surface.
Hot Work Safety Protocols
Torch-down roofing involves hot work, which poses fire risks. Always follow these safety protocols:
Fire Watch: Assign a dedicated person to monitor for fires and have them equipped with a suitable fire extinguisher.
Permitted Tools: Only use approved torches and equipment. Inspect tools before each use, ensuring they’re in good working order.
Documentation: Maintain records of hot work permits, torch operator certifications, and daily fire watch logs.
PPE and Fall Protection
Protect yourself with the right gear:
Flame-Resistant Clothing: Wear long-sleeved shirts, pants, and gloves made of flame-resistant material.
Eye Protection: Use ANSI-certified safety glasses or goggles to protect your eyes from debris and heat.
Fall Protection: Secure fall arrest harnesses and lanyards. Ensure ladder stability with safety feet and top stabilizers. Install edge protection where needed.
Environmental and Code Considerations
Understand local regulations and insurance implications:
Permits: Obtain necessary permits for rooftop hot work. Check with your local building department.
Insurance: Ensure your policy covers rooftop work, including potential fire damage.
Weather Thresholds: Do not perform hot work in windy conditions exceeding 15 mph or when temperatures exceed 90°F. Avoid working in rain or damp conditions.
Repair options and step-by-step fixes
Quick patch options provide a low-cost, non-invasive path for minor leaks, using surface sealants, self-adhesive patches, or lap seam sealers, chosen based on weather window and traffic load. Use patches when the damaged area is small, the substrate is sound, and there is no widespread blistering or exposed insulation. For larger failures, allocate time for a more durable solution or professional help, especially where multiple seams are involved.
The decision tree weighs leak extent, seam damage, substrate condition, and the age of the torch-down layer to decide patch versus membrane replacement. A step-by-step quick patch procedure includes safe access planning, surface cleaning, primer if required, patch placement with sufficient overlap, cautious heat activation, and final testing for leaks. When patches won’t last or damage is widespread, plan for full membrane replacement and address edge flashings and ventilation as part of the整 project.
Step-by-Step Repair Process
Follow these practical steps to fix your torch-down roof, ensuring safety and effectiveness.
- Preparation: Inspect the area, clear debris, set up safe access (ladders, harness if needed).
- Surface prep: Clean, dry, and degrease the affected area. Use a wire brush or scraper for tough spots.
- Primer application: Apply primer if required by patch kit instructions. This improves adhesion.
- Patch placement: Place self-adhesive patches with sufficient overlap (2-3 inches) on leaks, seams, and punctures. Press firmly.
- Heat activation: Use a heat gun or propane torch to activate the adhesive. Be cautious, follow safety protocols.
- Final sealing/testing: Apply lap seam sealer over patch edges for extra protection. Test with water to ensure no leaks.
Temporary and Spot Repairs
For quick fixes, use compatible materials or cold adhesives. These are acceptable when you can’t perform a full repair immediately or if the damage is minor.
Note: Temporary repairs should last until the next dry period for best results.
Use roofing cement and patches for small leaks. For seams, apply seam sealant. Avoid using these fixes in heavy traffic areas or during wet weather.
Permanent Repairs and Seam Restoration
For long-lasting results, re-weld seams, use heat welding techniques, and replace flashings as needed.
Use a torch or heat gun to re-weld damaged seams. Apply primer before welding for better adhesion.
Replace damaged flashings at edges, vents, and skylights using compatible materials. Ensure proper overlap and secure with screws or nails.
Full Re-Roof and Overlay Considerations
Decide between removing and replacing or overlaying your torch-down roof based on these factors.
Remove and replace if there’s widespread damage, water-damaged substrate, or old insulation. Prepare the substrate by cleaning, drying, and priming before installing new materials.
Overlay when the existing membrane is still intact but has minor leaks or punctures. Ensure the substrate is clean, dry, and primed for best adhesion. Replace insulation if damaged.
Cost, lifespan, and how torch-down compares to alternatives
Expect a breakdown of upfront material and installation costs, ongoing maintenance, and potential repair or renewal costs to guide budgeting. Consider how warranties, depreciation, and long-term ownership influence overall value. This section helps you compare the lifecycle costs rather than just the initial price tag.
Lifespan expectations vary with exposure, climate, maintenance, and installation quality, but it is important to evaluate factors that shorten or extend life such as sun exposure, roof slope, flashing quality, and regular upkeep. Maintenance and inspection needs should be planned to catch issues early, with defined intervals and clear criteria for action. Compare performance against puncture resistance, fire risk, and energy efficiency while considering how often each system requires attention or rework.
Typical Lifespan and Maintenance Budget Planning
Torch-down roofs typically last between 15 to 20 years, but this can vary based on factors like sun exposure, climate, and maintenance. To get a more accurate lifespan estimate for your specific location, consult local roofing experts or building codes.
Plan for annual maintenance costs around $0.30 per square foot. This includes inspections, cleaning, and minor repairs to keep your roof in top shape. Regular maintenance helps extend the life of your torch-down roof and prevents costly surprises down the line.
Here’s a rough breakdown of maintenance tasks:
- Annual inspections: Check for cracks, blisters, or missing granules.
- Cleaning: Remove debris, moss, or algae to prevent water buildup.
- Minor repairs: Fix small punctures, seams, or flashing issues promptly.
Cost Drivers and Estimating Repairs vs Replacement
The total cost of torch-down roofing includes upfront material and installation costs, ongoing maintenance, and potential repair or renewal expenses. Here’s a breakdown:
- Upfront Costs: Expect to pay around $2.50 – $4 per square foot for materials and labor.
- Maintenance Costs: Budget $30 – $60 annually for inspections, cleaning, and minor repairs.
- Repair/Replacement Costs: Repairs can range from $50 to $200 per square foot. Replacing the entire roof can cost up to $7 per square foot.
When deciding between repairs and replacement, consider:
- The age of your roof: If it’s nearing the end of its expected lifespan, replacing might be more cost-effective.
- The extent of damage: Multiple leaks or widespread damage may warrant a full replacement.
- Your budget: Weigh the immediate costs of repairs against the long-term benefits of a new roof.
Matching Solution to Building Use and Climate
Choosing the right roofing type depends on your building’s specific needs, local climate, and expected maintenance capacity. Here are some guidelines:
- Slope: Torch-down roofs work best on low-slope or flat roofs (2:12 pitch or less). They’re not ideal for steep slopes due to water pooling.
- Climate: In areas with high UV exposure, consider EPDM or TPO membranes. For cold climates, hot-mopped built-up roofs can handle freeze-thaw cycles better.
- Rooftop Traffic: If you expect heavy foot traffic on your roof (e.g., HVAC units), choose a durable material like PVC or hot-mopped built-up.
- Maintenance Capacity: Consider your ability to perform regular maintenance. Some materials, like EPDM, require less upkeep than others.
Always check local building codes and consult with a professional roofer before making a final decision.
Preventive maintenance and best practices
Develop an annual visual and tactile inspection plan that assigns responsibility, notes blisters, cracks, lifted seams, exposed edges, and flashing integrity, and captures findings with photos for traceability. This sets a proactive baseline and helps you track improvements over time.
Seasonal tasks include spring cleanup, post-storm checks, and fall resealing of high-traffic areas, with quarterly spot checks in extreme climates. Regular debris removal, gutter clearance, and management of standing water are essential preventive steps, along with prompt patching of small defects and avoiding unnecessary foot traffic on the membrane. Maintain a homeowner-friendly calendar to stay on top of future inspections.
Routine maintenance tasks
Regular upkeep is key to keeping your torch-down roof in tip-top shape. Here are some tasks you should tackle:
Debris removal: Keep your roof clear of leaves, twigs, and other debris. This helps prevent water buildup and potential leaks.
Drain maintenance: Ensure that your drains, scuppers, and gutters are clean and free-flowing to avoid standing water, which can damage the membrane.
Resealing flashings: Inspect your flashings around vents, chimneys, and skylights. Reseal any gaps or cracks with a manufacturer-approved sealant.
Checking seams: Walk your roof (safely) to check for lifted seams, exposed edges, or blisters. Tackle these issues promptly to prevent them from worsening.
Trimming rooftop vegetation: Keep tree branches and other plant growth trimmed back from your roof to prevent damage during storms or high winds.
Visual and performance monitoring
Regular checks can help you spot issues early. Here’s what you should look for:
Visually inspect your roof twice a year – once in the spring after winter’s harsh weather, and again in the fall before cold temperatures set in. Look for cracks, lifted seams, or exposed edges.
For a deeper check, consider hiring a professional for infrared or moisture scans every 3-5 years. These can detect hidden issues not visible to the naked eye.
Homeowner checks: You can do simple checks yourself. Look for any signs of damage after heavy rain, hail, or high winds.
Professional assessments: For a thorough check, hire a professional roofer every 2-3 years. They have the tools and expertise to spot issues you might miss.
Common installer mistakes to avoid
Even with the best intentions, installers can make mistakes. Here are some common ones to watch out for:
- Improper torching: Inadequate heat can lead to poor adhesion and weak seams.
- Incompatible repairs: Using materials not approved by the manufacturer can cause more harm than good.
- Insufficient overlaps: Too narrow overlaps can allow water to seep in and cause leaks.
- Skipping primer: Primer helps the membrane adhere better. Skipping it can lead to delamination.
To avoid these mistakes, always hire a certified installer who follows manufacturer guidelines. Regular inspections can also help catch any issues early.
Conclusion
Torch-down roofing is durable, but its longevity depends on regular inspection, careful testing, and proper repairs done safely. Stay focused on small, correct steps now to protect the roof, your home, and your crew.
Check what to do next in plain terms: start at the low spots and inspect seams, edges, and flashings; look for blisters, cracks, lifted edges, or pooling water; test a small area with light moisture to see if it wicks or spots; if you find a leak, plan a repair in order—from resealing thin leaks to replacing damaged sections and re-sealing edges; document what you find and only use compatible materials and methods; never rush a repair, and always use fall protection and non-slip work habits when on the roof.
Common mistakes to avoid are trying to force-peel damaged areas, using the wrong sealant or patch material, or working in rain or high wind. Don’t skip safety gear, don’t ignore small leaks, and don’t over-torque fasteners or overheat the membrane. Always limit testing to small patches first and stop if the membrane shows signs of further damage or softening.
If you’re unsure about the extent of damage, or the patch keeps failing, it makes sense to call a professional rather than push on. A pro can quote real costs, confirm the roof type and compatibility, and do safe, long-lasting fixes. With a careful plan and steady work, you’ll protect the roof, save money, and keep the project moving forward.
FAQ
What are the most common causes of torch-down roofing problems?
Bad flashing, improper seam work, and old or damaged membranes cause most issues. Poor ventilation and standing water wear the rubber and asphalt faster. Heat can also soften the material and soften the adhesive over time.
How can I test for leaks in a torch-down roof?
Look for wet spots on the ceiling after rain and run a careful water test along seams with a hose. Check skylights, vents, and edge details where water can seep in. If you hear dripping or see dark stains, mark the spot and inspect nearby seams.
What fixes are safe for a DIYer on torch-down roofing?
Seal small, dry cracks and re-stick loose seams with the manufacturer’s approved adhesive. Replace damaged patches only if you have the right materials and the surface is clean and dry. Avoid heavy lifting or stretching the membrane; it can tear easily.
When should I call a professional?
Call a pro if you see widespread bubbling, cracked seams, or water intrusion that you can’t cap with a DIY fix. If your roof is older or has multiple damaged areas, a proper re-roof or full seal job may be needed. A pro can safely handle torch-down work and ensure proper ventilation and flashing.