
Introduction
The transition from stucco to brick or stone is a critical detail in any construction project, but it doesn’t have to be time-consuming. With the right planning and execution, you can complete this task efficiently.
In this guide, we’ll break down the process into manageable steps, focusing on the timeline to help you understand how long each phase takes, so you can plan your DIY project effectively.
For the full guide, see Stucco Termination at Brick or Stone: Transition Details That Don’t Crack or Trap Water.
The Complete Timeline for Stucco Termination at Brick or Stone
Understanding the timeline is crucial for planning your DIY stucco termination project. Here’s a step-by-step breakdown of how long each phase takes:
- Preparation (1-3 days): Inspect the substrate, gather materials, and ensure you have all necessary tools.
- Flashing Installation (2-4 hours): Install the flashing according to manufacturer instructions, ensuring proper overlap and clearance.
- Control Joint/Gap Creation (1-3 hours): Create a gap or control joint for drainage and movement accommodation.
- Sealant Application (2-4 hours): Apply compatible sealants following manufacturer guidelines to prevent water intrusion.
- Termination Trim Installation (2-4 hours): Install the termination trim, ensuring it’s level and properly secured.
- Inspection and Final Touches (1-3 days): Inspect your work, make any necessary adjustments, and clean up the site.
Total estimated time: 7 to 14 days, depending on the size of the project and your familiarity with the process.
Key takeaways
Proper preparation is key to staying on schedule. Ensuring you have all necessary materials and tools ready before starting will help minimize delays in your timeline.
- Inspect substrate for brick or stone joints before selecting stucco termination method.
- Use compatible flashings and weep screeds; mismatch causes cracking and water traps.
- Follow manufacturer instructions and local codes for clearance, drainage, ventilation, and safety.
- Choose termination method that accommodates movement and avoids trap water behind stucco.
- During retrofit, avoid tearing back beyond dry-stacked sections to prevent framing damage.
- Schedule visual checks after adverse weather and after any flashing repair work.
Table of Contents
- Introduction
- Key takeaways
- Why Terminations Fail: Cracking, Staining, and Trapped Water
- Materials, Compatibility, and What to Specify
- Codes, Standards, and Performance Expectations
- Termination Methods and How to Choose Between Them
- Step-by-Step Installation: New Construction Details
- Retrofit and Repair: Converting Failing Terminations Without Redoing the Whole Wall
- Waterproofing, Drainage, and Ventilation Best Practices
- Troubleshooting, Maintenance Schedule, and Visual Checkpoints
- Conclusion
- FAQ
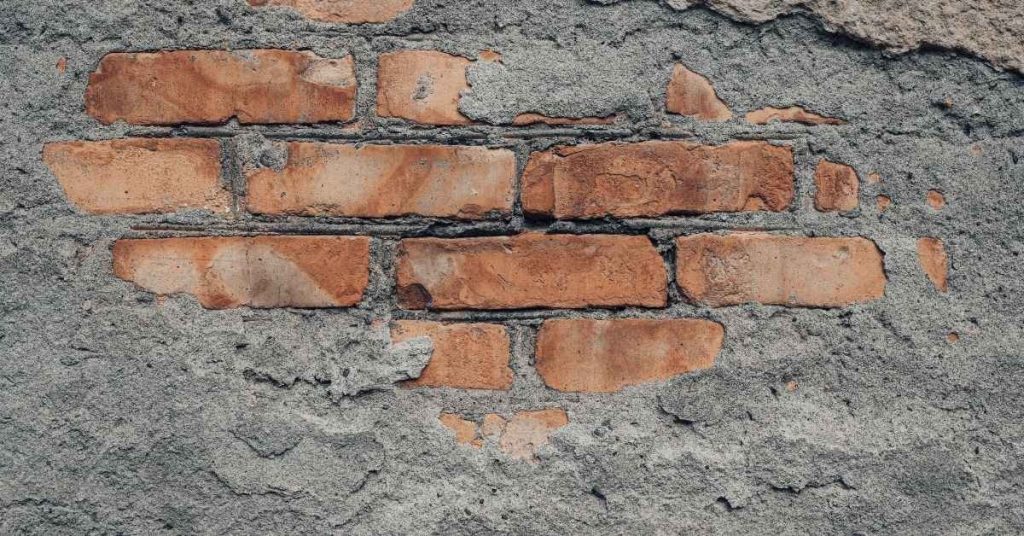
Why Terminations Fail: Cracking, Staining, and Trapped Water
Terminations between stucco and masonry commonly fail where movement, poor adhesion, or interrupted drainage concentrate stress and moisture. Cracks often start at rigid transition points or where the stucco bond is weak.
Staining and moisture intrusion follow when water is allowed to sit or track behind the finish instead of being directed out. Check product instructions and local guidance for acceptable substrates and joint details to avoid these failure modes.
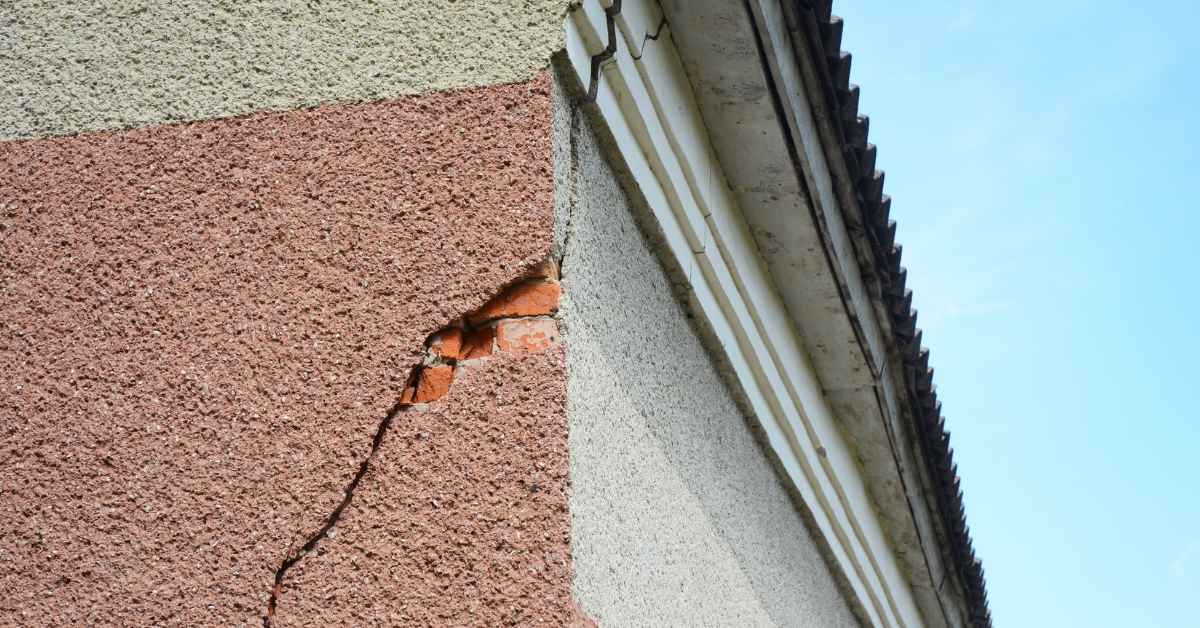
Mechanical and thermal causes of cracking
Cracks in your stucco-to-masonry transition can be caused by movement and expansion. Masonry and stucco have different expansion rates, so they move at different speeds as temperatures change. This differential movement creates stress concentrations that lead to hairline to full-depth cracks.
Improper fasteners or lack of lath support can also cause cracking. Fasteners need to be long enough to anchor securely into the masonry but not so long that they’re embedded in the stucco, which could cause it to crack as it dries and shrinks.
To prevent this: Use expansion joints to accommodate movement. Ensure fasteners are properly anchored and lath is securely attached.
How water becomes trapped behind the stucco
Water can get trapped behind your stucco if it’s not properly flashed or drained. Missing or improperly installed flashing allows water to seep in behind the stucco. Blocked weeps prevent moisture from escaping, and capillary bridging occurs when porous materials allow water to wick up into the wall.
Lack of drainage planes also contributes to trapped moisture. Without a proper slope or other means for water to drain off, it can become trapped behind the stucco.
To prevent this: Ensure flashing is installed correctly and not embedded in mortar. Keep weeps clear and provide adequate drainage planes.
Common installation mistakes to avoid
There are several common mistakes that can lead to problems with your stucco-to-masonry transition. Here are some to watch out for:
- Embedding flashing in mortar: This prevents the flashing from moving independently and can cause it to tear or pull away, allowing water intrusion.
- Continuous rigid connections: Connecting stucco directly to masonry without expansion joints causes stress concentrations that lead to cracking.
- Insufficient clearance to grade: Not providing enough space between the bottom of your stucco and the ground can trap water and prevent proper drainage.
- Not using weeps or blocking them: Without weeps, moisture has no way to escape from behind the stucco. Blocking them defeats their purpose.
Always ensure flashing is installed correctly, use expansion joints, provide adequate clearance to grade, and keep weeps clear for proper drainage.
Materials, Compatibility, and What to Specify
Select materials that are physically and chemically compatible so the stucco, mortar, lath, flashing, and sealants age together without causing corrosion or adhesion loss. Consider lath or backer types, mortar and veneer choices, and flashing metals that work with the adjacent masonry substrate.
Specify breathable water-resistive barriers, flashing sized to shed water, and sealants rated for the joint movement expected at the transition. Verify compatibility and performance ranges on product labels or the manufacturer data sheet before installation.
Stucco mixes and lath/backer compatibility
Choose between traditional three-coat cementitious stucco (scratch, brown coat, finish) or one-coat synthetic acrylic stucco. Both work well with brick or stone but have different maintenance needs.
Water-resistive barriers like housewrap or felt paper should be used behind the lath to prevent water intrusion. Ensure they’re compatible with your chosen stucco mix and allow for proper drainage.
The lath can be metal (expansion joints needed) or fiberglass, both suitable for brick or stone terminations. Attach it securely using appropriate fasteners, following manufacturer’s guidelines.
Brick and stone veneer characteristics to consider
Full-bed masonry requires a solid backing while thin veneers can be attached to framed walls. Consider this when planning your termination details.
Porous units like some types of brick or certain stones may absorb water, increasing the risk of trapped moisture behind the stucco. Dense units are less porous but can still allow water movement through capillaries.
Choose a veneer that matches your wall’s structure and expected moisture movement to avoid cracking or staining at the termination point.
Flashing, sealants, and fastener compatibility
Use corrosion-resistant flashing like galvanized steel or aluminum at the termination point. Avoid stainless steel as it can cause discoloration in some masonry.
Sealants should be compatible with both masonry and stucco, and able to accommodate expected movement without cracking. Silicone-based sealants often fit these criteria but always check compatibility before applying.
Fasteners must be suitable for the substrate (masonry or framed wall) and compatible with your chosen lath. Use appropriate anchors and follow manufacturer’s guidelines for spacing and installation.
Codes, Standards, and Performance Expectations
Building codes and industry standards set basic requirements for drainage, flashing, and weather-resistive layers at stucco terminations; these documents also establish minimum clearances and fastening practices. Know which code edition and local amendments apply to your project.
Confirm compliance by reviewing relevant code text and manufacturer installation instructions, and get clarifications from the local building department if needed. Where testing or performance criteria are referenced, follow the standard test methods and any listed acceptance criteria in the product documentation.
Building codes and local permit considerations
Before you start any work on your stucco termination at brick or stone, check your local building codes. They’ll guide you through the right way to do things in your area.
Look for sections on exterior wall assemblies, flashing requirements, clearances to grade, and inspection procedures. Your local permit office can help with this.
Why bother? Following code ensures your work is safe, durable, and up to standard. It also protects you from fines or having to redo work later.
Material and test standards to request
Choosing the right materials is crucial for a successful stucco termination. They should work well together and meet relevant standards.
- Flashing: Look for ASTM E331 or similar standards. It should be durable, flexible, and able to handle expansion and contraction. Avoid cheap, rigid flashings that can crack or peel off.
- Water-Resistive Barrier (WRB): Specify one rated for your climate and application. Check ASTM E2567 for guidance. A poor WRB lets water in, leading to trapped moisture and mold.
- Lath: Choose lath with good bond strength and corrosion resistance. ASTM C1396 is a useful standard. Incompatible lath can cause delamination or cracking.
- Sealants: Specify sealants with good adhesion, flexibility, and weathering resistance. Look for ASTM C834 ratings. Poor sealants can fail, leading to water intrusion and staining.
- Stucco mix: Ensure your mix meets ASTM C926 standards. A poorly mixed stucco can crack or fall off.
Termination Methods and How to Choose Between Them
Different termination details—weep screed, Z-flashing, metal termination beads, and back-to-back assemblies—control the finish edge, movement, and drainage in different ways. Choose a method based on wall composition, exposure, and whether a drainage cavity is present.
Match the termination to substrate backing, expected movement, and flashing needs rather than aesthetics alone. Consult product installation instructions and system details to ensure the chosen method integrates with the WRB and flashing strategy on your wall.
Weep screed and foundation terminations
The weep screed is your first line of defense against water intrusion at the base of your stucco wall. It’s a small, sloped channel that creates a drainage plane, allowing water to escape.
Proper placement is key. Install it just above the grade or foundation level, sloping downwards towards the exterior. This ensures water runs off instead of seeping in.
Leave enough clearance between the weep screed and any rigid insulation or foam board to prevent water from getting trapped. A minimum of 1/2 inch is recommended.
Metal flashing, saddle and Z-flashings
Through-wall flashings are crucial for preventing water from getting trapped behind your stucco. They create a barrier that directs water to the exterior.
Use offsets with your flashing to ensure it’s not level with the veneer courses. This prevents water from sitting on top of the flashing and finding its way back in.
Integrate your flashings with mortar joints and veneer courses for a seamless look. Make sure they’re properly secured and lapped to ensure water can’t get behind them.
Back-to-back and jamb detail alternatives
At corners, window jambs, and other abutments, you’ll need to use vertical terminations. The most common methods are back-to-back returns and independent flashing.
Back-to-back returns involve running the stucco lath up one side of a corner and down the other, creating a continuous surface. This method is simple but can be prone to cracking if not done correctly.
Independent flashings, on the other hand, are separate pieces installed at each corner or jamb. They’re more flexible and can accommodate movement better, reducing the risk of cracking. Use them where possible for a more durable finish.
Step-by-Step Installation: New Construction Details
A reliable new-construction termination starts with substrate prep, continuous WRB, proper flashing, and secure lath or backer before any stucco is applied. Each layer must be installed in a shingle fashion so water sheds to the exterior.
Install termination devices and integrate them with flashing and weep paths before applying finish coats, keeping control joints and movement gaps as specified by the material instructions. If any step is unclear, check the product data sheet or manufacturer instructions for sequencing and fastening requirements.
Step-by-Step Installation Process
This sequence will guide you through installing concrete for new construction, ensuring a strong and durable foundation.
-
Prepare the formwork: Assemble your forms using straight, secure materials. The form should be level and square to ensure a solid base.
Check: Use a laser level or bubble level to ensure the form is level and plumb.
Pro tip: Overlap joints in the formwork to prevent concrete from leaking out. -
Lay out reinforcement: Place rebar within the form, following your design plan. Ensure it’s properly spaced and secured.
Check: Verify rebar is at the correct elevation and spacing using a tape measure or string line.
Common mistake: Not using enough rebar can lead to weak concrete that cracks under stress. -
Mix and pour concrete: Follow your concrete mix’s instructions, ensuring you have the right ratio of water, cement, aggregate, and admixtures. Pour into the form, filling it completely.
Check: Use a screed to level the top surface and remove excess material. The surface should be smooth and even. -
Vibrate concrete: Use a vibrator to remove air pockets and ensure a dense, strong pour. Work from one end of the form to the other.
Check: Look for any voids or bubbles on the surface after vibrating. If present, re-vibrate those areas. -
Finish the surface: Use a bullfloat to smooth and level the concrete’s surface. Then, use a trowel to give it a final, smooth finish.
Check: The surface should be even and free of imperfections. A slight sheen indicates a well-finished surface. -
Cure the concrete: Keep the concrete moist and covered for at least 7 days to allow it to gain strength properly. Use wet burlap or plastic sheeting.
Check: Ensure the curing process is consistent, with no dry spots or gaps in coverage.
Pro tip: Don’t rush the curing process. Concrete needs time to gain strength and reach its full potential.
Preparing the substrate and installing WRB and lath
First things first, inspect your masonry substrate. Check for any cracks, loose bricks, or signs of moisture damage. If you find anything, fix it before proceeding.
Now, lay down your water-resistive barrier (WRB). Make sure it’s continuous and there are no gaps. Overlap the vertical pieces by at least 6 inches and tape the seams. Check the manufacturer’s instructions for specific overlap requirements.
Next up, install the lath. Use mechanical fasteners like staples or nails, not just adhesive. You want a secure bond between your WRB and lath. Space your fasteners about 6 inches apart along the studs. And remember, no more than 1/8 inch gap between the lath and WRB.
Flashing and drainage plane integration
Now that you’ve got your WRB (water-resistive barrier) and lath up, it’s time to integrate flashing and create a proper drainage plane. This keeps water out and lets it escape when it gets in.
Flashing: Install Z-flashings at all openings – windows, doors, and any wall intersections. Flashing should be long enough to lap over the WRB by at least 2 inches. Check manufacturer instructions for specific lapping details.
End dams and weep openings: In your masonry layer, install end dams at the top and bottom of each course. These stop water from migrating horizontally. For stucco, create weep openings at the top and bottom. This lets any trapped water escape. Check local building codes for exact spacing requirements.
Stucco application and finishing at the termination
Now that your substrate’s ready with WRB and lath, it’s time to apply stucco. Remember, we’re focusing on the terminations here – where walls meet floors or roofs.
First up: Apply a scratch coat. This is your base layer, so check base compaction. You want it solid. Use a hawk and trowel, spread evenly. Don’t forget to avoid bridging the flashing with rigid material.
Next: Level it out with a leveling coat. This is where you create that smooth surface for your finish coat. Use a darby or straight edge to screed it off. And place control joints near terminations. Every 4-6 feet, max.
Finally: Apply the finish coat. This is what everyone sees, so make it good. Use a hawk and trowel again, spread evenly. Float it out with a darby or straight edge. And remember, no bridging flashings. You want water to drain away, not get trapped.
Retrofit and Repair: Converting Failing Terminations Without Redoing the Whole Wall
Begin a retrofit by assessing the failure—location, cause, and extent of water entry—so you can target repairs rather than replacing the entire assembly. Look for stained substrate, delaminated stucco, and compromised flashing to guide your strategy.
Common retrofit approaches include adding continuous exterior flashing, cutting and reinstalling termination beads, and creating a drained cavity where practical. Follow repair product instructions and, when in doubt about concealed damage, verify allowable repair methods with the manufacturer or a building official.
Inspecting and diagnosing existing defects
The first step is to find out what’s causing your termination issues. Grab a flashlight, some gloves, and maybe a moisture meter.
Check for these:
Hidden flashing failures: Look for rust or corrosion on metal flashings. Check if they’re still securely attached at the top and bottom.
Trapped moisture: Inspect joints for efflorescence – that white, powdery stuff is a sign of trapped water. Use your moisture meter to confirm.
Adhesion problems: Tap on the stucco near the termination. If it sounds hollow or crumbles, you’ve got adhesion issues.
Retrofitting flashing and sealant solutions
Time to fix those failing flashings. You’ll need a chisel, hammer, trowel, new flashing, backer rod, and appropriate sealant.
First, trench out the joint. Be careful not to damage the masonry. Remove any old, failed sealant.
Next, install your new flashing. Make sure it’s securely attached at the top and bottom. Use screws or nails, but don’t go too deep – you don’t want to crack the masonry.
Insert a backer rod into the joint. This helps support your new sealant. Apply the sealant, following the manufacturer’s instructions. Let it cure before exposing it to water.
Repairing stucco and matching textures
Now that your flashing is fixed, let’s repair the stucco. You’ll need some new stucco mix, a trowel, and maybe some sandpaper.
First, feather or patch the damaged area. Mix up some fresh stucco and apply it to the affected area, blending it into the existing stucco as much as possible.
To match the texture, you might need to use a brush or comb while the stucco is still wet. Or, if you’ve removed large areas, consider hiring a professional to ensure a good match.
Once the repair is dry, sand it smooth. Use fine-grit sandpaper and be careful not to sand too much – you don’t want to remove too much stucco from the surrounding area.
Waterproofing, Drainage, and Ventilation Best Practices
Prevent trapped water by combining a continuous, breathable WRB with properly lapped flashing, a defined drainage plane, and an air gap or drainage cavity where possible. Ventilation at soffits and cavities helps dry any incidental moisture that reaches the cavity.
Use flashing that routes water to an exit point and choose breathable materials that allow vapor to pass without letting liquid in. Check product literature for vapor permeance and integration details so the waterproofing and drainage layers perform together.
Designing a continuous drainage plane
To keep your walls dry and healthy, you need to design a drainage plane that channels moisture out. Here’s how:
Ensure WRB continuity: Start at the base. Lay your water-resistive barrier (WRB) over the foundation wall, lapping it up and securing it with staples or nails. At corners, lap one layer over the other to maintain a continuous plane.
Check cavity depth: Your drainage cavity should be at least 1″ deep. This gives water room to flow down and out. If you’re using furring strips, make sure they’re spaced accordingly.
At impervious-to-pervious transitions (like where your wall meets the roof), ensure there’s a clear path for water to drain off. Flashing or diverters can help here. Never let water get trapped and start rotting your walls.
Weeps, vents, and keeping pathways clear
Proper placement of weep vents is crucial to let water out but keep bugs out. Check your wall system’s specs to find the right size – typically 1/4″ to 3/8″. Install them every 2-3 feet along the bottom course, just above the foundation.
For insect screening, use a fine mesh (around 16-20 gauge) to keep out critters. Fit it over your weep vents and secure with clips or screws. Regularly check for clogs – a quick poke with a wire should clear any blockages.
Never paint or seal the weep vents, and ensure they’re not blocked by insulation or other materials. Keep pathways around your home’s exterior clear to allow water to drain away from the foundation. Regular maintenance will prevent obstructions and keep your drainage system working efficiently.
Moisture Monitoring and Breathable Finishes
Keep an eye on moisture levels after waterproofing. Check your walls, floors, and ceilings regularly for any signs of dampness or mold. If you find any, address it immediately to prevent further damage.
When choosing finishes, go for breathable options like lime plasters or clay paints. They allow moisture to evaporate naturally. But remember, not all paints are created equal. Check the label and pick one with good permeability ratings.
Ensure your assemblies can dry out. This means having a proper vapor barrier on the warm side of the insulation, and keeping it intact during installation. Don’t skimp on ventilation either – keep those pathways clear as we talked about earlier.
Troubleshooting, Maintenance Schedule, and Visual Checkpoints
Establish a routine inspection schedule that looks for hairline cracks, mortar separation, staining, rust streaks, and failed sealant at terminations—address small issues before they let water in. Regular checks around windows, sills, and termination beads are high-return locations.
For repairs, prioritize reestablishing flashing continuity and maintaining movement joints; if deterioration appears extensive or hidden, consult a qualified specialist. When uncertain about a material’s condition or suitability, refer to the product label or contact the manufacturer for guidance.
Quick troubleshooting guide for leaks and cracks
Use this checklist when you spot leaks or cracks in your stucco termination at brick or stone. It’ll help you figure out if the issue is with sealant, flashing, stucco adhesion, or structural movement.
- Check sealant: Look for gaps, cracks, or peeling. If skipped, water can seep in.
- Inspect flashing: Ensure it’s intact and properly installed. Missing or damaged flashing lets water behind the stucco.
- Examine stucco adhesion: Tap on the stucco. Hollow sounds indicate delamination. Ignoring this can lead to further damage.
- Check for movement: Look for cracks at corners, windows, or doors. Movement can cause cracks and compromise the termination.
- Inspect weeps: Ensure they’re clear and functioning. Blocked weeps trap water behind the stucco.
- Check drainage plane: Make sure it’s continuous and unobstructed. A poor drainage plane can cause water to build up.
- Look for efflorescence: White powdery deposits indicate moisture issues. Ignoring this could lead to further problems.
- Check for mold or mildew: These indicate excessive moisture. If found, address the source immediately.
Quick rule: If you can’t pinpoint the issue or it’s structural in nature, consult a specialist.
Periodic maintenance tasks and inspection intervals
Use this checklist to keep your stucco termination at brick or stone in tip-top shape. Regular maintenance prevents costly repairs down the line.
- Sealant replacement: Every 5-7 years, depending on sun exposure. Skipping this can lead to water intrusion.
- Clear weeps: Once a year. Blocked weeps trap water and cause damage.
- Mortar joint check: Every spring and fall. Cracked or missing mortar allows water penetration.
- Inspect stucco finish: Annually. Look for cracks, chips, or other signs of wear.
- Check drainage plane: Once a year. Ensure it’s clear and functioning properly.
- Examine flashing: Every 2-3 years. Damaged flashing lets water behind the stucco.
- Inspect moisture barrier: Annually. Check for tears or punctures that could allow water intrusion.
- Check for plant growth: Once a year. Plants can damage weeps and drainage plane.
Quick rule: Inspect your termination annually, and address any issues promptly to prevent bigger problems.
Visual checkpoints to photograph and document
Use this checklist during inspections to record key details. Photographs and measurements help track changes over time and support contractor diagnoses.
- Stucco finish: Take close-ups of any cracks, chips, or other defects.
- Sealant joints: Photograph sealant at corners, windows, and doors. Note any gaps or cracks.
- Flashing: Inspect and photograph flashing at all transitions. Note any damage or improper installation.
- Weeps: Check and photograph weeps. Note if they’re clear or blocked.
- Drainage plane: Inspect and photograph the drainage plane. Note any obstructions or damage.
- Efflorescence: Photograph any white powdery deposits. They indicate moisture issues.
- Mold or mildew: If present, photograph and note their location. Excessive moisture is causing this.
- Measurements: Record dimensions of cracks, gaps, or other defects. This helps track changes over time.
Quick rule: Keep records of your inspections. Comparing photos from year to year helps spot trends and potential problems early.
Conclusion
Protecting the wall assembly comes down to getting the termination right: it prevents cracking, staining, and water intrusion, keeps the structure dry, and preserves curb appeal. Stay focused on safety, follow the plan, and verify every step before moving on.
Whether you’re detailing a new wall or adjusting an existing one, proceed with a simple check sequence: confirm material compatibility, choose a termination method that fits the substrate, plan proper flashing, drainage, and ventilation, implement the detail cleanly with correct engrained slope and sealants, test the system in a small area, and then extend to the full wall while keeping an eye on drainage paths and weather exposure.
Common mistakes to avoid include skipping or undersizing flashing, sealing over cracks instead of allowing movement, using incompatible materials that trap moisture, and rushing the job. Always keep safety first, don’t bridge joints without a drainage plan, and don’t apply coatings or sealants beyond their intended use. Test any new or repaired area on a mild day, and don’t tolerate visible water or staining during or after a test.
If the scope trips into structural repair, major retrofit, or you’re unsure about codes and performance expectations, call a professional. A good pro will verify flashing, drainage details, and material compatibility, and protect you from costly mistakes. With careful planning and disciplined execution, you can finish with a durable, leak-free termination that looks right and lasts.
FAQ
How do I choose a transition detail that prevents water intrusion at brick/stone end joints?
Look for details that allow drainage and venting away from the wall. Check manufacturer instructions or product labels for acceptable assemblies and use compatible materials. If in doubt, follow local rules and pick a transition designed for brick or stone exposure.
What are warning signs a current termination is failing and needs repair?
Watch for cracking, efflorescence, or layers that peel away from the brick. Certify if water appears behind the coating or there is staining near the joint. If you see movement or gaps, plan a repair before more damage happens.
Can I retrofit an existing brick veneer with a better termination without tearing the wall down?
Yes, but it depends on access and the existing assembly. Use reversible, code-approved components and follow the manufacturer directions. If you’re unsure, consult the product instructions and local requirements before starting.
What common mistakes cause cracking or water traps at stucco-to-brick transitions?
Avoid tying stucco into brick without proper flashing or drainage paths. Don’t seal joints that need movement with rigid material. Always confirm there’s a vented, breathable path and that waterproofing sits correctly under the finish coat.