

Introduction
Small-batch concrete mixing means preparing only a limited amount of concrete at a time using simple tools like buckets and a basic scale. This article walks you through keeping ratios accurate, step by step, without fancy equipment. You’ll learn practical, hands-on methods suitable for quick projects and testing mixes.
As you work, you can pair small batches with simple projects like hypertufa planters or exploring glaze ideas for surfaces. Always check the product label, follow manufacturer instructions, and respect local rules; if anything isn’t clear, verify what to check about ratios, cure times, and cleanup guidance. The aim is a calm, realistic approach that gets results without hype or guesswork.
Key Takeaways
- Keep concrete ratios honest by measuring water, cement, and aggregate consistently.
- Use a cheap scale or measured buckets to verify batch proportions.
- Document every batch: date, mix, size, slump, curing method, outcomes.
- Safety first: wear eye protection, gloves, and masks unless ventilation is adequate.
- For glaze or hypertufa projects, adjust water carefully and test small samples.
- Record costs and material waste to optimize future batches and project costs.
Table of Contents
- Introduction
- Key Takeaways
- Why Mix Concrete in Small Batches?
- Tools, Materials, and Choosing a Cheap Scale
- Measurement Methods: Buckets Versus Weight
- Keeping Ratios Honest: Reading Mix Info and Scaling Designs Down
- Water Control, Slump, and Simple Workability Checks
- Step-by-Step Small-Batch Mixing Workflow
- Casting, Finishing, Curing, and Troubleshooting
- Records, Safety, and Cost-Saving Tips
- Conclusion
- FAQ
Why Mix Concrete in Small Batches?
Small-batch mixing keeps control within arm’s reach and helps you verify each step as you go. It reduces the risk of wasted material when a mistake is caught early. The approach suits projects where space, time, or tools are limited.
By batching in modest amounts, you can tune water, cement, and aggregate to the specific conditions of the site. It also makes it easier to learn how different materials respond to environmental factors. This focus on honest ratios supports consistent results across individual pours.
Common Small-Batch Projects
Small-batch concrete mixing is ideal for various DIY projects around the home. These include:
Repair work: Fixing cracks, holes, or other damage in existing concrete structures.
Decorative elements: Creating small features like stepping stones, garden ornaments, or custom planters.
Small structures: Building low walls, raised beds, or other small-scale constructions.
Deciding Batch Size and Planning
Before you start mixing, determine the amount of concrete needed for your project. This helps you decide on the batch size:
Calculate volume: Measure the dimensions of your project area and calculate its volume.
Allow for waste: Account for approximately 10% extra to cover spills, mistakes, or settling.
Check mix ratio: Verify the required concrete mix ratio (e.g., 1:2:3 or 1:3:5) for your project type and adjust batch size accordingly.
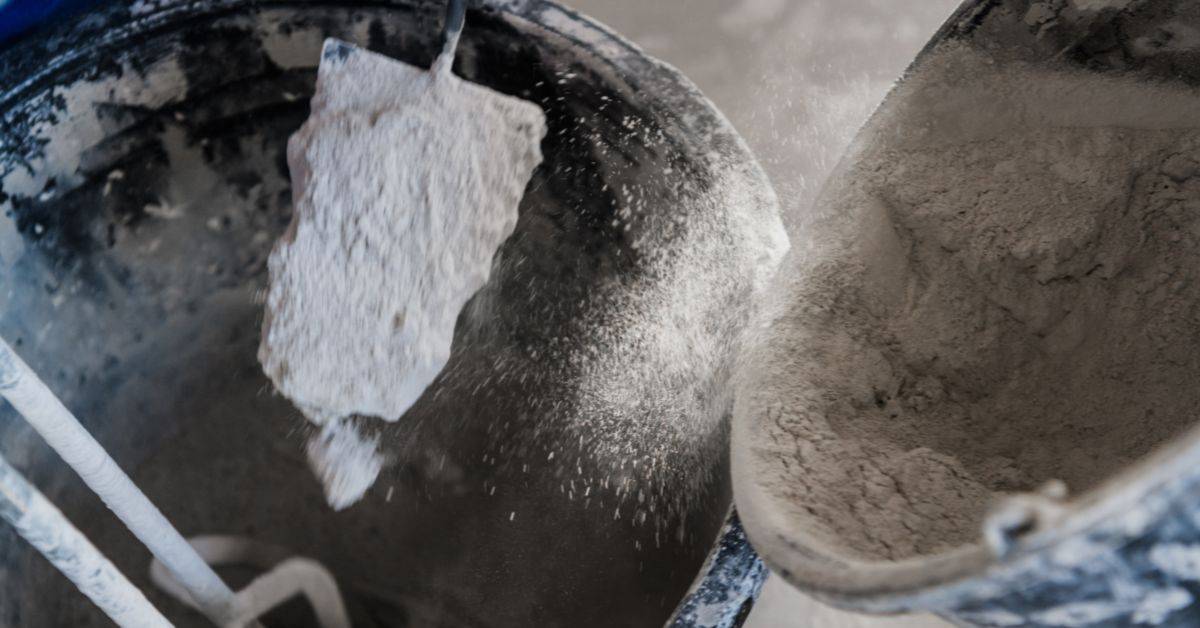
Tools, Materials, and Choosing a Cheap Scale
Core tools for small batches include durable mixing containers, a sturdy paddle or drill attachment, a trowel, measuring cups or a small scale, a clean water container, gloves, safety glasses, and a damp cloth for cleanup. Consider low-cost options like repurposed jars or lids to stretch the budget. Prioritize tools that tolerate wet use and are easy to sanitize.
Essential materials include Portland cement or a cementitious mix, suitable aggregate, clean water, and optional additives or sealants. Pre-wetting and careful batching can minimize waste and keep ratios honest. When selecting a scale, look for readability, a suitable capacity, and a simple tare feature, plus durable housing and easy cleaning surfaces.
Buckets, Scoops, and Mixing Vessels
For small-batch concrete mixing, durable containers are essential. Buckets or small tubs with consistent volume markings are ideal. Inspect your containers for cracks, leaks, or worn-out measurements before use.
Ensure your containers are non-reactive to prevent contamination of the concrete mix. If using repurposed containers, thoroughly clean and inspect them to ensure no residue affects the quality of your concrete.
Durability and consistency in small-batch concrete mixing rely on maintaining accurate batch sizes. Replace damaged containers promptly to uphold these standards.
Selecting an Affordable Scale
For accurate ingredient measurement in small-batch concrete mixing, choose a scale with clear readability, offering precision between 0.1 to 1 gram, and a capacity suitable for typical batch sizes (2 to 5 kg). A tare function to zero containers is also necessary.
Before purchasing, confirm the measurement units (grams or ounces) match your needs. Inspect the return policy and consider scales with low battery indicators to prevent mid-batch power loss. Regularly test and recalibrate using known weights to maintain accuracy.
Durability is crucial in a concrete mixing setting. Opt for scales with metal or high-grade plastic housings, non-slip feet, easy-to-clean surfaces, and displays that remain legible after liquid exposure. Review user experiences regarding durability and performance under wet conditions.
Materials Basics to Verify
The quality of your concrete depends on accurate ingredient selection. Check material labels, datasheets, or manufacturer instructions to ensure you’re using the right materials for your project.
- Cement type: Verify if it’s Portland, blended, or another type suitable for your needs. Incorrect cement types can lead to weak concrete or poor curing.
- Aggregate grading: Check if the aggregate is fine, coarse, or a mix, and that it meets your project’s requirements. Inappropriate aggregate sizes can result in weak, porous concrete.
- Admixtures: Ensure you’re using the correct admixtures for your project, as they can affect concrete properties like workability, setting time, and strength. Using the wrong admixture can cause cracking or staining.
- Freshness and dryness: Use fresh materials that are free from contaminants and have not been exposed to excessive moisture. Wet aggregates may require adjusting water content to maintain desired consistency.
- Consistent quality: If you encounter consistent quality issues with your materials, re-evaluate your sources to ensure you’re getting reliable products.
Measurement Methods: Buckets Versus Weight
Accuracy depends on bucket size, material density, and ambient conditions, while a scale offers precision with less variability. A scale can simplify ratio control and reduce misreads caused by inconsistent volumes. Consider how moisture and texture affect both methods in your setup.
Practical workflow involves taring, adding components, and verifying readings, with dedicated steps for wet versus dry components. When handling partial batches, keep notes to track how small changes affect the final product. This methodical approach helps prevent drift over time.
Reliable Bucket-Measure Techniques
For consistent volume measurements in concrete mixing, follow these steps:
- Inspect your bucket for signs of wear or damage that could affect measurement accuracy. Ensure markings are legible and relevant to your mix ratios.
- Clean, dry, and debris-free buckets ensure accurate measurements. Use a consistent scooping technique, leveling off each time. Mark the bucket at regular intervals (e.g., every 1/2 inch) for visible volume references.
Maintaining a consistent scooping technique allows bucket measurements to provide accurate volume estimates. Regularly recalibrate bucket markings using a known-volume container or water. If measurements vary consistently, consider replacing the bucket or refining your scooping technique.
Weighing Ingredients with a Scale
Material choices greatly affect the result of your concrete mix. To achieve precise ingredient ratios for optimal strength and durability, follow these steps:
- Verify that the scale displays in desired units (e.g., pounds or kilograms). Check that the scale’s capacity is sufficient for your batch size.
- Calibrate the scale before use according to manufacturer instructions. Place the scale on a stable, level surface. Tare (zero) the scale before adding each ingredient.
- Add ingredients one at a time, allowing the scale to settle briefly before recording the weight. This helps avoid errors due to material settling or air pockets.
- Avoid using a scale with a low rating for your desired precision. A scale rated for 500g may not provide accurate measurements for small batches.
- Regularly test the scale with known weights to ensure accuracy. If measurements are consistently off, recalibrate or replace the scale as needed.
Converting Between Volume and Weight
To achieve accurate ingredient ratios regardless of measurement method used, follow these steps:
Verify that density values are up-to-date and relevant to your specific ingredients and conditions. Determine the density of each ingredient (e.g., cement, sand, aggregate) using manufacturer data or online resources.
Use these densities to convert volume measurements to weight, or vice versa. If the density of each ingredient is known, then accurate conversions between volume and weight can be made.
Regularly recheck density values, as they may vary based on source or environmental conditions. If conversions consistently differ from expected results, review your calculations or reassess the ingredient densities.
Keeping Ratios Honest: Reading Mix Info and Scaling Designs Down
Read bag labels and standard mix instructions to identify cement type, aggregate size, water content, and bag yield. Note any moisture adjustments and the presence of water-reducing agents. Always verify the data with the manufacturer documentation when possible.
Understanding common mix ratios and translating them to bucket or scale readings helps you stay consistent. Use simple examples to guide how ratios convert to practical measurements in your setup. Maintain a clear method for switching between bucket and scale targets as needed.
Interpreting Product Labels and Mix Guides
To ensure accurate mixing, start by understanding the materials you’re working with. Inspect bag labels, standard mix instructions, or datasheets for authoritative information.
Key elements to note:
- Cement type (e.g., Type I, II, III)
- Recommended mix guidance (e.g., 1:2:3, 1:3:5)
- Water-to-cement ratio (w/c) recommendations
- Bag yield (how much concrete one bag of cement will produce)
- Moisture adjustments and air-entraining agents
Accurate reading ensures correct material usage and batch consistency. If mix proportions or properties do not meet expectations, recheck labels and datasheets.
Stepwise Method to Scale a Mix Down
Scaling a mix down allows you to maintain desired material ratios for small-batch consistency. Here’s a stepwise method:
- Identify the bulk proportions of your desired mix (e.g., 1:2:3, 1:3:5).
- Convert these bulk proportions into bucket-friendly measurements or scale readings.
- If using buckets for measurement, follow reliable bucket-measure techniques and weigh ingredients with a scale to maintain accuracy.
- If using a scale for measurement, ensure consistent weighing methods across batches to minimize errors.
- Perform test batches, compare actual yield and strength to label specs, and adjust based on verified data.
Understanding common mix ratios and maintaining consistency in your measuring methods will help you achieve the desired results in your small-batch concrete mixing.
Water Control, Slump, and Simple Workability Checks
Keep a focused log for water decisions, material variations, and climate effects to tailor your batches over time. Record how each adjustment changes workability and set a baseline for future mixes. Use simple comparisons to track progress and learn what works best in your environment.
Workability checks should be practical and repeatable, not ceremonial. Note how long the mix stays cohesive and how easily it pours or compacts. Use this information to refine water additions and mixing technique for subsequent batches.
Adding and Measuring Water with a Scale
Accurate water addition ensures consistent concrete strength. To achieve this, use your cheap scale to measure water precisely.
First, verify the scale’s zero point by placing an empty container on it and setting it to zero. If necessary, calibrate the scale according to its instructions.
Pour water into a clean bucket or vessel, then place it on the scale. Weigh the water after pouring to confirm the amount added. If the reading differs from expected, recalibrate or replace your scale.
If water addition is consistently off, adjust your bucket size or re-verify your scale’s accuracy.
Concrete Workability Checks
Assess concrete mix consistency to ensure effective placement. Begin by visually inspecting the mixture.
Proceed with a slump test as per ASTM C143/C143M standard. This involves filling an oiled cone with your concrete, lifting off the cone, and measuring the resulting slump.
If the slump is outside your project’s acceptable range (usually 1-2 inches for small-scale work), adjust water content and retest. If visual checks continually fail, review your mixing technique or equipment.
Adjusting for Temperature and Humidity
Climate conditions affect water demand in concrete. To account for this, make small water adjustments based on local temperature and humidity before mixing.
Monitor local conditions and adjust your mix design accordingly. In drier or warmer conditions, reduce water content slightly to maintain workability. Conversely, if conditions are cooler or wetter, increase water content slightly.
After adjusting for climate conditions, always re-test the slump to ensure your concrete’s workability is within acceptable limits. If adjustments consistently fail, consider using admixtures to control workability.
Step-by-Step Small-Batch Mixing Workflow
Prepare materials and safety setup by gathering cement, sand or aggregate, water, and any admixtures in labeled containers. Ensure the scale is zeroed and calibrated, and put on PPE. Create a dedicated, clean mixing area with a non-porous surface for easy cleanup.
Plan measurements by selecting a target ratio and pre-marking measuring containers or confirming scale readings. Keep a simple batch card for each mix to track ratios and results. Follow a steady sequence to mix dry ingredients first, then add water gradually while mixing toward a cohesive consistency.
Step-by-Step Process
Follow this clear sequence of steps for a successful small-batch mixing workflow, ensuring safety, consistency, and efficiency.
- Prepare materials and safety setup: Gather cement, sand/aggregate, water, and admixtures in clearly labeled buckets. Ensure your scale is zeroed and calibrated. Wear appropriate PPE (gloves, goggles, dust mask). Set up a dedicated mixing area with a clean, non-porous surface.
- Plan measurements and layout: Choose a target ratio for the batch (e.g., cement:sand:water in tenths or tenths-to-one-scale). Pre-mark measuring buckets or verify weights using your cheap scale. Keep a simple batch card for each mix.
- Mixing sequence and technique: Add dry ingredients first, mixing thoroughly in the bucket using a steady, circular or figure-8 motion. Gradually introduce water while continuing to mix until the mix reaches a cohesive, workable consistency. Avoid over-mixing to prevent air voids.
- Consistency checks and adjustments: Compare the initial mix to a benchmark in texture and slump. If needed, adjust with small increments of water or dry material. Document the adjustment for future repeats.
- Immediate handling, placement, and cleanup: Pour or place the concrete promptly into form or wheelbarrow. Monitor for segregation. Clean tools and bucket interiors right after use. Wipe spills and store materials properly for next batch.
- Documentation and repeatability: Keep a short checklist noting batch ratios, scale readings, and any environmental factors. Consider a quick photo log for future reference.
Dry Batching and Blending
Achieving a homogeneous dry mixture is crucial for consistent concrete results. Ensure all materials are measured accurately using your chosen method (buckets or scale).
Thoroughly mix dry ingredients in the bucket before adding water to ensure even distribution and prevent clumps.
If dry ingredients are not fully incorporated, continue mixing until a homogeneous mixture is achieved. If lumps persist, break them up and remix.
Accurate dry batching sets the stage for a successful concrete mix, ensuring consistency in your project’s results.
Wet Mixing Technique and Timing
Obtaining a cohesive, workable concrete mix with minimal air voids is essential for strong, durable results. Monitor the mix consistency to avoid over-mixing or under-mixing.
Gradually introduce water while continuously mixing to ensure even distribution and prevent dry pockets. Use your scale to maintain accurate water-to-dry-material ratios.
If the mix becomes too stiff or fluid, adjust with small increments of water or dry material as needed. Regularly check and document the mix’s consistency for future reference.
Proper wet mixing technique ensures a consistent, workable concrete mix tailored to your project’s needs.
Clean-up and Tool Care
Maintaining tools and workspace is crucial for future use and efficiency. Prompt clean-up prevents contamination, damage, and unnecessary wear on your equipment.
- Wipe spills: Clean up any concrete residue immediately to prevent it from hardening and becoming difficult to remove later.
- Store materials properly: Keep cement, sand, aggregate, and admixtures in their original containers or clearly labeled, airtight containers to maintain freshness and prevent contamination.
- Clean tools and bucket interiors: Remove any concrete residue from mixing tools (shovels, hoes) and buckets immediately after use. Use a wire brush or scraper if necessary.
- Inspect and clean/repair tools as needed: Regularly inspect your tools for signs of damage or wear. Clean and repair them promptly to maintain their functionality and extend their lifespan.
- Maintain optional/rentable tools: If using rented or borrowed tools, follow the rental company’s care instructions. Return tools in good condition to avoid additional charges.
Casting, Finishing, Curing, and Troubleshooting
For casting into forms, select appropriate small forms, apply release, and aim for consistent compaction and clean edges. Minimize segregation by monitoring the transfer from mix to form. Surface finishing should be planned with timing and appropriate tools to achieve the desired texture.
Use suitable release agents and form preparation steps to prevent sticking. Practical curing options for small pieces focus on moisture and temperature control without fixed cure times. When issues arise, apply appropriate in-situ fixes and verify progress with simple visual checks.
Finishing Methods for Small Castings
Achieving the desired surface quality on small concrete castings requires careful attention to technique and timing. Use a trowel or float to create smooth or textured surfaces, applying consistent pressure and working in manageable sections.
For smooth surfaces: Use a steel trowel with even strokes, ensuring edges are well-defined and free of ridges or marks. Inspect the surface for aggregate markers or air voids, retouching as needed.
For textured surfaces: Experiment with float techniques, varying timing and aggregate exposure to achieve different textures. Again, inspect and retouch if necessary.
Simple Curing Strategies
Proper curing is vital for small concrete pieces to achieve adequate strength and prevent cracking. Maintain consistent moisture and temperature during the initial curing phase, typically within the first 72 hours.
For small, thin pieces: Wrap them in plastic wrap or damp burlap to retain moisture. Monitor temperature and check for adequate moisture using visual cues or simple tests like placing a piece of plastic over the casting.
For larger, thicker pieces: Consider using humidity domes or curing compounds to create a controlled environment. Always consult product guidance for demolding timing.
Troubleshooting Common Issues
Inspect your small concrete castings regularly for signs of problems such as cracking, dusting, scaling, surface crazing, honeycombing, or efflorescence. Address these promptly to prevent waste and rework.
For cracking: Re-tamp affected areas using a vibrator or tamping bar, ensuring proper compaction. Monitor moisture content to prevent excessive drying.
For surface defects (scaling, crazing): Assess the damage and address with surface retouch or patching as needed. Verify progress via visual checks and simple tests like tapping or sounding before demolding.
Records, Safety, and Cost-Saving Tips
Establish a compact batch log with date, batch size, ratios, water amount, additives, outcomes, and deviations. Include a quick waste or rework note to track improvements. Keep the log accessible for ongoing reference.
PPE and dust control essentials should be clear, including eye and respiratory protection, gloves, and a well-ventilated workspace. Safety checks should cover equipment handling, secure storage, and emergency procedures relevant to concrete work.
What to Record in a Batch Log
Keeping detailed records of your concrete batches helps optimize future mixes and troubleshoot issues. Here’s what to include:
Ingredients and Quantities: Note the source, type, and amount (by weight or volume) of each ingredient – cement, aggregates, water, and additives.
Ambient Conditions: Record temperature and humidity levels during mixing. These factors can affect concrete performance.
Mix Outcome and Test Results: Document the slump test results and any visual checks performed on the fresh mix. If you cast test pieces, note their outcome after curing.
Safety Essentials for DIY Concrete
Maintaining safety while working with concrete is crucial. Here are the essentials:
Personal Protective Equipment (PPE): Wear a respirator (P100 or equivalent), eye protection, gloves, and long sleeves to protect against dust and chemicals.
Dust Suppression: Implement measures like wet mixing, dampening scoops, and using dust masks to control dust. Ensure your workspace is well-ventilated.
Equipment Safety: If using an electrical mixer, follow safety guidelines, secure lids, maintain a slip-free workspace, and adhere to lockout/tagout procedures for power tools.
Economical Sourcing and Reuse Ideas
Maintaining safety while working with concrete is crucial. Here are the essentials:
Minimize Costs: Buy ingredients in small quantities from local suppliers or share purchases with others. Reusing clean buckets and tools can significantly reduce project costs.
Batch Consistency: Track batch-to-batch consistency to minimize remixing. Measure ingredients once, pour twice for accurate mixes.
Water Reuse: If rinse water is clean, reclaim it safely for future use. Follow a rinse-and-reuse protocol for mixing water to maximize efficiency.
Conclusion
Keeping small batches of concrete precise and safe protects the surface, appearance, and long-term strength of your project, and the payoff is concrete that looks right and holds up under load without surprises. Focus on consistent measurements, clean tools, and steady curing, and you’ll reduce costly mistakes.
Check that you have a reliable scale or bucket method aligned with the mix label, confirm your water quantity is appropriate for the design, order your dry ingredients correctly, mix in the recommended sequence, document the batch for future reference, verify workability with a simple slump check, and follow through with proper curing and finish timing in that practical, repeatable order. Use the same approach for each small batch and keep a simple record so later projects stay consistent; safety remains the guiding rule as you scale down designs.
Common mistakes to avoid include rushing the mix, using weather-worn or contaminated tools, and ignoring water control or slump results. Always verify the batch is workable before casting, keep PPE and work area protections in place, and never overwater a batch or remix too aggressively, which can weaken the mix. When in doubt about a design, check the product label, manufacturer instructions, and local requirements to confirm suitability and curing needs, and apply the safe range guidelines rather than forcing a faster result.
If the project involves structural elements, unusual forms, or difficult access, consider consulting a professional to confirm load expectations and mix choices rather than pushing forward alone. Stay methodical, test a small patch first, and finish with a cautious, steady workflow—your concrete should cure evenly, resist cracking, and look clean from edge to edge.
FAQ
How Can I Adapt Small-Batch Mixing to Glaze Preparation from Scratch?
Mix glazes in small, clean containers using the same careful ratio practice as cement. Always follow the glaze label or manufacturer instructions, especially for compatibility with clay bodies and safety steps.
How Can I Recycle Clay Scraps and Throwing Water Safely?
Store scraps and water in labeled containers, letting solids settle before pouring off usable liquid. Reuse clean water where appropriate, and dry or reclaim unusable portions according to local guidance and best practices.
What Should I Know About Glaze Chemistry Basics for Small Batches?
Understand that different glaze components affect color, melt temperature, and texture. Check supplier datasheets for compatibility with your clay body and firing method, and follow their safety and storage guidance.
Can Small-Batch Mixing Be Used for Hypertufa Planters or Other Ceramic Work?
Yes, small-batch mixing can be used to prepare hypertufa mixes in measured portions. Use appropriate materials and follow project-specific instructions, then verify curing or setting times and surface treatment recommendations from the product labels.