
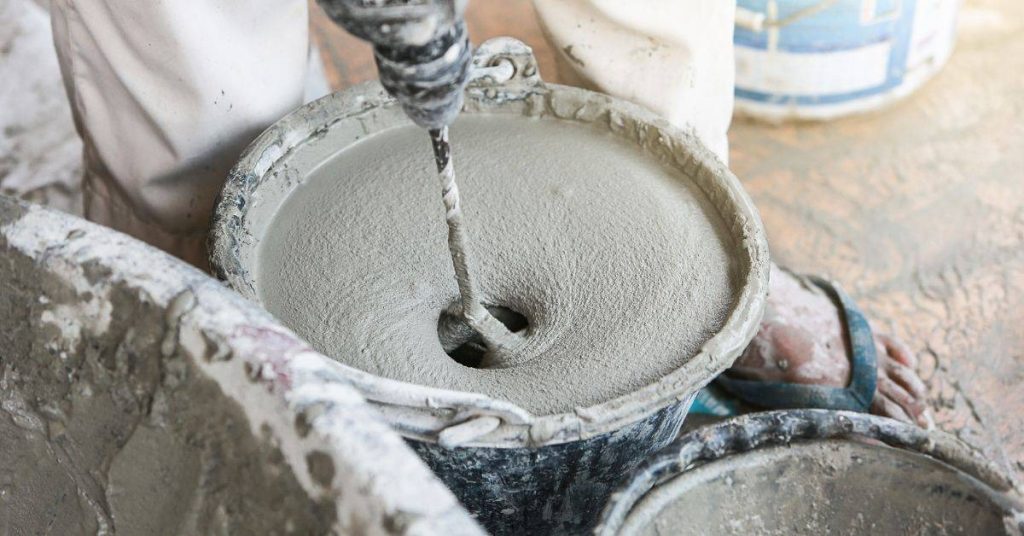
Introduction
Small-batch mixing means measuring everything in tiny, consistent portions so ratios stay true when you mix in buckets with a cheap scale. Keep it simple: use one bucket per component, tare the scale, and double-check labels before you start. Plan a batch size you can manage, and write down your target ratios in plain language so you don’t guess later.
This hands-on approach helps you test glaze ideas without wasting material, and it makes adjustments easier to track. If you’re mixing glazes from scratch, start with small test batches and note how thick or thin the mix becomes, then adjust with patience and a clear eye for consistency. Always check product labels or manufacturer instructions for mix directions and safety notes before proceeding.
Key takeaways
- Label every batch and scale, comparing target ratios to actual measurements.
- Use a cheap scale and clear buckets to maintain consistent glaze viscosity.
- Record batch weights, ingredients, and test results for future glaze testing.
- Check safety: wear gloves when handling oxides and rinse spills promptly.
- Adjust glaze consistency gradually, documenting how thins or thickens affect results.
- Test tiles after each adjustment to ensure scaling translates beyond small batches.
Table of Contents
- Introduction
- Key takeaways
- Why Small-Batch Mixing Matters for Potters
- Tools and Materials Checklist
- Measuring and Keeping Ratios Honest
- Step-by-Step Small-Batch Mixing Workflow
- Test Tiles, Sampling, and Scaling Results up
- Reducing Waste and Controlling Costs
- Common Mistakes and How to Avoid Them
- Safety, Cleanup, and Keeping Good Records
- Conclusion
- FAQ
Why Small-Batch Mixing Matters for Potters
Small batches help you spot how each component behaves without committing to a large run. You can see how glaze or body changes react to slight tweaks and keep waste to a minimum. The approach supports a steady rhythm of testing and learning within your studio workflow.
Use small batches when you’re testing new recipes, troubleshooting a formulation, or dialing in color and clarity before scaling up. Set up a simple workflow with a few sturdy buckets, a budget-friendly scale, clean stir sticks, and clear labels. Keep a consistent mixing sequence and document what you learn for repeatable results.
When to choose small-batch vs large-batch
Small-batch mixing isn’t always the right choice. It’s best when you’re experimenting or fine-tuning your glazes.
Large batches are better for consistent, high-volume production. They’re cheaper per unit but wasteful if a batch goes wrong.
Consider these factors: production volume, how much you need to experiment, glaze shelf life, and the cost trade-offs.
If you’re making small runs, testing new glazes, or tweaking recipes, go small. It’s less wasteful and lets you iterate faster.
How small batches improve glaze development
Small-batch mixing speeds up your learning curve. You can test more glazes, more often, with less waste.
Each small batch is like a quick experiment. You’re gathering data to refine your recipes. It’s like taking tiny steps forward instead of big leaps that might lead you astray.
With small batches, you can afford to make mistakes. If a glaze doesn’t work out, it’s no big loss. Just learn from it and move on to the next test.
This frequent testing lets you accelerate your learning. You’re constantly improving your glazes, making them more consistent and predictable.
Tools and Materials Checklist
Focus on core, affordable tools that stand up to repeated use: sturdy buckets, basic mixing paddles, a long-handled mixer or drill attachment, and a reliable scale with a straightforward tare function. Check each bucket for cracks and ensure the scale display is readable and easy to use.
For handling and workflow, include dry-mix tools, a dedicated mixing paddle, a fine-mesh sieve, and labels for tracking. Add PPE, a sealable container for leftovers, and a simple worktable setup that’s easy to clean. Before buying, verify quality, compatibility, and any manufacturer recommendations in your notes.
Choosing the right scale
Before you start mixing concrete, make sure your scale is up to the task. Use this checklist to choose a suitable scale for your project.
- Check capacity: Ensure it can handle your typical batch size. For example, if you’re mixing 80 lbs of cement, you’ll need a scale that can go up to at least 100 lbs (accounting for aggregates and water).
- Verify readability: The scale should allow you to measure small additions precisely. For fine-tuning your mix, you might need to read as little as 0.5 lb.
- Check display size: Ensure the display is large and easy to read, especially if you’re working in bright sunlight or wearing gloves.
- Test accuracy: Before use, place a known weight on the scale to ensure it’s accurate. Most scales should be within 2% of the actual weight.
- Check stability: The scale should have stable feet or a flat base to prevent tipping when heavy bags are placed on it.
- Verify units: Ensure the scale displays in pounds (lb) if that’s your preferred unit of measurement.
- Check portability: If you’re moving the scale around, ensure it has a handle or is lightweight enough for easy transport.
- Inspect condition: Check for any damage or wear that could affect its performance. Skip this step at your peril; a faulty scale can lead to inaccurate mixes and wasted materials.
Quick rule: Always choose a scale with a capacity at least 20% higher than your largest batch size to account for any measurement errors or overages.
Buckets, sieves, and mixing utensils
Use this checklist before starting your concrete mix to ensure you have the right tools and materials for a smooth process.
- Bucket size: Check bucket capacity. Standard sizes are 5 or 6 gallons (19 or 23 liters). Ensure it’s suitable for your mixer’s capacity.
- Lid and pour spout: Verify buckets have secure lids to prevent spills and convenient pour spouts for easy mixing.
- Sieve mesh size: Inspect sieve. Recommended mesh size is 1/4 inch (6 mm) to remove lumps and contaminants effectively.
- Mixing utensils: Check shovel, hoe, or paddle for mixing. Ensure they’re clean and in good condition to prevent contamination.
- Wet/dry vacuum: Confirm availability for cleaning mixer and tools post-mixing to maintain longevity.
- Gloves and safety glasses: Check PPE for protecting hands and eyes during mixing and handling.
- Concrete calculator: Verify you have a way (app, printout) to calculate exact material amounts based on your project’s size.
- Water source and hose: Ensure access to clean water and a suitable hose for mixing and cleanup.
Quick rule: Always check your tools and materials before starting. Missing or faulty items can lead to poor concrete quality, wasted materials, and rework.
Optional Measurement Aids
Once you’ve gathered your essential tools and materials, consider these optional measurement aids to help ensure accuracy and efficiency on your concrete project.
- Plastic Funnels: To pour aggregates into your mixing bucket accurately. Check they fit snugly in the bucket’s opening.
- Dosing Spoons: For precise measurement of small quantities like admixtures. Verify their volume markings are clear and accurate.
- Spare Tare Containers: To weigh materials without resetting your scale each time. Ensure they’re clean, dry, and the same size as your main container.
- Digital Timers: For tracking setting times of small test batches or to monitor when concrete is ready for finishing. Check battery life before starting work.
- Measuring Tapes/Sticks: To ensure consistency in mixing and pouring depths. Calibrate them against your project’s required thickness.
- Leveling Tools (e.g., 2-ft or 4-ft levels): For checking and maintaining a consistent surface level during placement. Inspect them for accuracy before use.
- Concrete Slump Test Equipment: To assess the workability of your mix. Familiarize yourself with ASTM C143/C143M standards for proper testing technique.
- Portable Concrete Vibrators (optional): For consolidating concrete in forms, ensuring a dense, void-free finish. Check they’re in good working order and have sufficient power for your needs.
Quick rule: While these aids aren’t strictly necessary, using them can help prevent common issues like inconsistent mix designs, improper curing, and rework due to poor finishing.
Measuring and Keeping Ratios Honest
Weight-based methods account for density and moisture, making small batches more predictable than volume alone. This helps you lock in proportions even when ingredients behave a bit differently batch to batch.
Translate a recipe into grams by choosing a target total weight and applying each percentage to that total. Use a scale, tare with the bucket, add components in order, and keep a running total for quick checks. Note how close you stay to the intended totals as your batch grows.
Converting Recipes to Weight
Got a recipe with percentages or volume measurements? No problem. Here’s how to convert it for your scale:
1. Choose a total weight. For concretes, 1000g is a good starting point.
2. Multiply each ingredient’s percentage by the total weight. For example, if you have 30% sand and 70% cement, calculate:
– Sand: 30% of 1000g = 300g
– Cement: 70% of 1000g = 700g
Taring, Incremental Additions, and Cumulative Weighing
Your scale’s tare function helps keep things accurate. Here’s how to use it:
1. Tare the scale. Place your bucket on the scale, press ‘tare’, and any weight is zeroed out.
2. Add ingredients incrementally. Start with the heaviest component. Pour or scoop small amounts at a time, weighing as you go:
– Weigh, record, then add the next ingredient. Repeat until all components are in.
3. Cumulative weighing. Keep track of your running total. If it’s off by more than 1g, recheck your additions.
Recording Measurements and Batch Notes
Keeping records helps repeat success and troubleshoot failures. Here’s a simple log format:
– Ingredients: List them in order of addition.
– Weights: Record each ingredient’s weight to the nearest gram.
– Date, Batch size, and any notes. Jot down anything unusual or notable about that batch. Here’s an example:
– Date: 2023-01-15
– Batch Size: 1000g
– Sand (300g)
– Cement (700g)
– Notes: Mix was slightly dry, added extra water.
Step-by-Step Small-Batch Mixing Workflow
Set up a clean, labeled workspace and confirm your target batch size and ratios before you start. Have everything you need within reach and wear proper PPE for comfort and safety.
Tare the bucket, add dry ingredients in a consistent order, then hydrate slowly with water. Mix in stages: dry, then wet, then combined, checking for a uniform slurry. Finish with a quick quality check and ready the batch for storage with proper labeling.
Step-by-Step Process
This section guides you through a clear, numbered sequence of practical steps for small-batch mixing. It starts with preparation and safety checks, then moves on to the main work, and finishes with cleanup or final checks.
- Gather all materials: clean buckets, reliable scale, mixing tools, PPE, and a labeled workspace.
Ensure exact batch size and target ratios are confirmed before starting. - Tare the scale with an empty bucket. Add dry ingredients in order: adhesion aids, cement, aggregates.
Log weights for repeatability. - Add water incrementally, mixing thoroughly between additions to avoid premature lumping.
Record final water-to-powder ratio for future batches. - Mix the batch following this order: dry mix, wet mix, then combined mix.
Use specific m