
Introduction
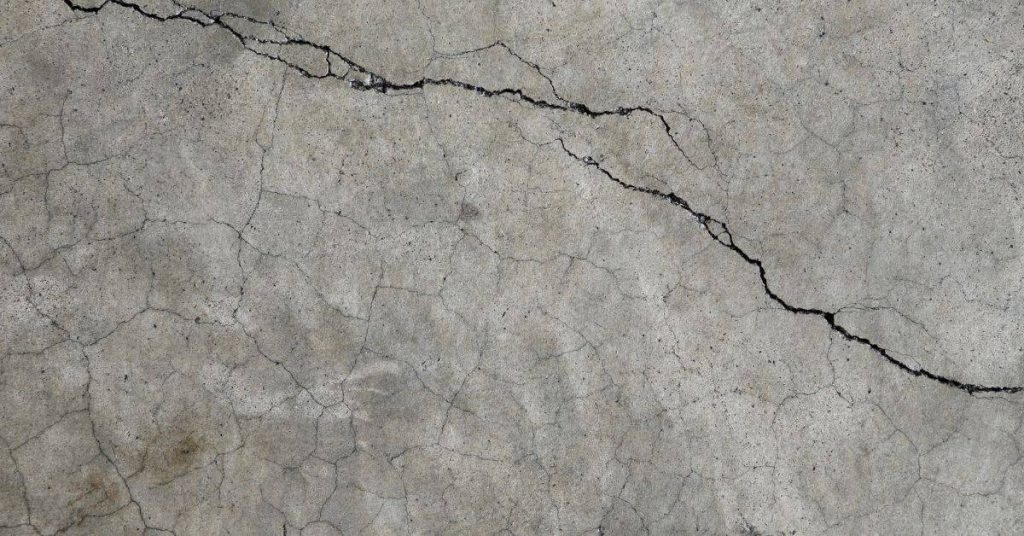
Random cracks on slabs are irregular cracks that appear across a concrete slab without a clear joint pattern.
Reading the pattern means looking at how long the crack is, where it runs, and whether it follows edges or joints. This helps you spot likely causes and what to check next when planning a fix.
Look for how the cracks form: hairline shrinkage cracks vs. larger gaps that may indicate settlement or heavy loading. Patterns over time—whether cracks stay the same, widen, or move—help you separate causes and plan fixes. To prevent future cracking, use proper control joints, ensure good curing, and verify base and drainage conditions, while checking manufacturer instructions or local guidance for best practices on joints and spacing.
Key takeaways
- Read crack patterns for timing: linear vs clustered signals shrinkage vs settlement.
- Inspect joints, edges, and compensating features to flag design or load issues.
- Document environment and moisture swings, as they drive expansion and random cracking.
- Perform simple surface checks and tap tests to spot hollow sounds.
- Prioritize repairs by root cause: poor design, poor curing, or drainage.
- Do not place heavy loads on cracked slabs until inspected.
- Proper curing, joint layout, and moisture control prevent future random cracking.
Table of Contents
- Introduction
- Key takeaways
- Why Slab Cracking Matters and When to Act
- Common Crack Types and Visual Identifiers
- How to Read Crack Patterns: Visual Checkpoints
- Material and Mix-Related Causes of Random Cracking
- Construction and Environmental Causes to Check First
- Field Diagnostics: Checklist and Simple Tests
- Case Studies: from Pattern to Root Cause
- Repair, Maintenance, and Prevention Strategies
- Conclusion
- FAQ
Why Slab Cracking Matters and When to Act
Cracks in a slab don’t just look bad; they signal how the slab will perform over time. Small, stable cracks might be cosmetic, but many patterns point to underlying movements that affect durability and safety. Water entry through cracks can lead to moisture-related problems, mold, and potential damage to finishes or installed systems. For homeowners and builders, understanding the practical consequences helps prioritize action and accountability. Immediate attention is warranted when movement is active, cracks widen suddenly, or leakage is observed, while stable, non-widening cracks with no moisture can often be monitored with a clear plan.
Different signs tell different stories. Hairline cracks in aging slabs suggest shrinkage or settlement other than active movement, while wide, vertical, or highly oblique cracks near openings may indicate more significant stress or differential settlement. Edge cracks and those following joints can reveal joint-related issues or subgrade conditions. Establishing an action ladder helps you decide what to seal, test, or escalate to a structural pro. Keep documentation handy to communicate deterioration, maintenance history, and observed changes to inspectors or contractors.
Cosmetic vs. Structural Cracks
Cracks on your slab can be surface-level (cosmetic) or signs of deeper structural problems. Here’s how to tell the difference:
Cosmetic cracks are usually thin, hairline, and don’t run deep. They’re often found near control joints – intentional gaps cut into new slabs to allow for natural shrinkage.
Structural cracks, on the other hand, are wider (usually more than 1/8 inch), irregular, or diagonal. They may run deep and could indicate serious issues like settling, shifting, or even structural failure.
If you’re unsure, err on the side of caution and consider it a structural crack until proven otherwise.
Safety and Liability Concerns
Cracks in your slab can pose safety hazards and liability issues:
Tripping hazards: Wide or uneven cracks can cause people to trip and fall. As a homeowner, you’re responsible for maintaining safe conditions on your property.
Water ingress: Cracks allow water to seep in, potentially causing mold, rot, or freeze damage (in colder climates). This could lead to costly repairs and health issues.
Contractors’ responsibilities: If you hire someone to work on your slab, they’re responsible for their own safety. However, if a crack causes an accident due to negligence in maintenance or repair, liability may fall back on you as the property owner.
When to Call a Professional
Certain signs indicate it’s time to engage an engineer or forensic concrete specialist:
Widening cracks: If cracks are getting wider over time, it could signal serious underlying issues.
Step cracks: These are diagonal cracks that form steps or stair-stepped patterns. They often indicate settlement or movement beneath the slab.
Settlement indicators: Sagging, sloping, or uneven surfaces can point to settling foundations, which require professional assessment and repair.
Don’t wait until it’s too late. If you notice any of these signs, call a pro right away.
Common Crack Types and Visual Identifiers
Slabs show distinct crack types, and recognizing them helps narrow down probable causes. Hairline shrinkage cracks are common in new concrete, while map or pattern cracks suggest movement across the slab. Settlement cracks often thread from edges toward the center, and random spider cracks can indicate stress or restrained shrinkage. Knowing these categories helps you plan appropriate evaluation steps without jumping to conclusions. Always cross-check pattern with context such as weather, loading, and joint layout.
Visual clues come next: crack width, orientation (longitudinal vs transverse), edge raggedness, and any staining or efflorescence. Do cracks align with joints or appear independent? Look for nearby damage like spalling or rebar exposure, which can shift your assessment from cosmetic to structural. A simple field checklist can help you differentiate non-structural from potential structural concerns and guide you toward the right professional or remediation approach.
Shrinkage and Plastic (Map) Cracking
These cracks show up early, like when the concrete’s still fresh. They’re random, look like a map, and can spread out from one spot.
Check base compaction. If it’s not right, these cracks will follow. Make sure your base is solid before pouring.
Plastic shrinkage happens when the surface dries too fast. It’s usually due to wind or hot weather. Keep an eye on the forecast and protect your pour if needed.
Settlement and Subgrade-Related Cracks
These cracks are caused by your concrete settling into weak or unstable soil (subgrade). They often follow the edges of slabs or show differential offsets, indicating support issues.
Check base compaction: If you’re seeing these cracks, it’s likely that the soil beneath wasn’t properly compacted before pouring. This is a common DIY mistake. You can check this by digging down to the base and checking if it’s solid or crumbles easily.
If the subgrade is weak, you might need to remove and replace it with well-compacted material. If the cracks are minor and haven’t worsened over time, they can be repaired using a concrete crack filler and proper sealing. But remember, this is just a band-aid; the underlying issue still needs addressing.
Structural or load-induced cracks
These are serious cracks that run through the full thickness of your concrete. They’re wide or single-line and suggest big problems like bending, overload, or reinforcement issues.
Check base compaction. If it’s not done right, your concrete can’t take the load and will crack. Also, look for any signs of overloading – too much weight on one spot can cause these cracks.
If you see reinforcement corrosion or rust stains, that’s a big red flag. It means your rebar is exposed to air and water, which causes it to weaken and lose its strength. You need to fix this ASAP before the whole structure collapses.
How to Read Crack Patterns: Visual Checkpoints
Reading crack patterns starts with identifying typology and shape. Random patterns often point to shrinkage or settlement, while grid-like or straight lines can indicate formwork or joint-related constraints. Stair-step patterns may reveal differential movement along a structural plane. Recognizing pattern shape helps set expectations for movement direction and potential drivers. On-site, map each crack and note how it relates to joints, rebar, and openings to build a story of what happened and why.
Another layer is measuring spacing and width. Intersections and clustered networks can differentiate shrinkage from structural concerns. Consider the on-site context: soil moisture, drainage, recent loading, or root intrusion can all influence crack development. Establish a routine for documentation with scale photos, dates, and follow-up checks to track progression or stabilization over time.
Step-by-Step Process
Use this checklist before, during, and after reading crack patterns to ensure accurate assessment and prevent costly rework.
- Preparation: Ensure the area is clean and free of debris. Remove any loose material with a wire brush or chisel.
- Safety first: Wear appropriate PPE, including safety glasses and gloves. Check for any hidden hazards like live wires or unstable structures.
- Lighting check: Ensure the area is well-lit to see cracks clearly. Use a flashlight if needed, but avoid casting shadows that can obscure details.
- Crack width measurement: Use a crack gauge or feeler gauge to measure crack widths. Check at multiple points along the crack’s length.
- Crack direction and pattern: Observe and record the direction of cracks (horizontal, vertical, diagonal) and their patterns (straight, stepped, branching).
- Crack depth assessment: Use a small pick or chisel to gently tap along the crack. Listen for changes in sound that may indicate varying depths.
- Moisture check: Look for signs of moisture around cracks, such as efflorescence (white powdery deposits) or dampness. Check local rules for moisture testing if required.
- Photographic record: Take clear, well-lit photos of cracks from different angles. Include a scale in the photo to show size relative to other objects.
Quick rule: Always recheck your measurements and observations from multiple angles and after rain or snow melt to ensure accuracy and catch any changes over time.
Pattern mapping and spacing interpretation
Use this checklist after you’ve identified cracks (as explained in the step-by-step process) to better understand their causes.
- Clustered cracks: Check if cracks are grouped together. Confirm by measuring the distance between cracks; less than 150mm apart indicates clustering.
- Random cracks: Look for cracks that seem scattered and unpatterned. Verify by drawing an imaginary grid over the area; random cracks won’t follow any lines.
- Parallel cracks: Inspect if cracks run in straight, parallel lines. Confirm by measuring their angle; within 5 degrees of each other indicates parallelism.
- Radiating cracks: Check if cracks fan out from a single point or small area. Verify by tracing the cracks back to their origin; they should converge at one spot.
- Crack width: Measure crack widths using a feeler gauge or similar tool. Narrower than 0.3mm suggests hairline cracks, while wider than 1mm indicates significant damage.
- Crack depth: If accessible, measure crack depths using a probe or similar tool. Shallow cracks (less than 25mm deep) may not require immediate repair, but deeper ones do.
- Crack age: Estimate the age of cracks by looking for signs of weathering or other aging effects. Newer cracks will appear fresher and sharper.
- Crack movement: Check if cracks are active (still moving) or dormant (stable). Gently tap the area around cracks; active ones may open slightly wider.
Quick rule: Always remember that crack patterns and spacing can change over time, so regular inspections are crucial to prevent expensive rework.
Width, length, and depth cues
Use this checklist when you’re inspecting cracks to understand their severity and likely cause. It’ll help you prioritize repairs and avoid expensive rework.
- Check crack width: Use a crack gauge or a penny (19mm) to estimate the width. If it’s wider than a coin, it’s an urgent repair.
- Measure length: Estimate the total length of the crack using a tape measure. Long cracks (>3m) often indicate structural issues.
- Check depth: Use a flathead screwdriver to gently probe the crack’s depth. If it goes deeper than 1/4″ (6mm), it might need immediate attention.
- Look for pattern changes: Cracks that change direction or width suddenly may indicate underlying structural problems.
- Check both sides: Inspect the crack on both sides of the structure. If they don’t line up, it could be a sign of settlement.
- Feel for movement: Gently push and pull on either side of the crack. Any movement indicates instability.
- Check for recurring patterns: If you see similar cracks nearby or in other parts of the structure, it could indicate a widespread issue.
- Consider age and history: Older structures may have settled over time, but new cracks in old buildings