

Introduction
Sleeve anchors are expansion fasteners used in concrete block to grip the wall, and proper edge distance and drill control help prevent cracking of the face.
When you install them, always check the product label and manufacturer instructions for edge distance guidelines and drill depth. Use a steady drill pace, keep the hole clean, and avoid forcing the anchor if the face starts to crack or spall. If you’re unsure about local rules, verify with the hardware store or building department before proceeding.
Key takeaways
- Verify block faces and edges are intact; cracked faces worsen anchor failure risk.
- Choose sleeve anchors suitable for concrete block and pressurized load paths.
- Maintain consistent edge distance and spacing to reduce face cracking during load.
- Practice drill control: keep bit perpendicular, steady feed, and avoid wobble or overdrill.
- Clean holes thoroughly; remove dust before sleeve insertion for proper grip.
- Inspect installation and stop if cracking or loose sleeves; wear eye protection.
Table of Contents
- Introduction
- Key takeaways
- Understanding Concrete Block Faces and Common Failure Modes
- Sleeve Anchor Basics and Appropriate Applications
- Edge Distance and Spacing: Principles to Avoid Cracking
- Drill Control Fundamentals to Protect Block Faces
- Hole Preparation and Cleaning for Reliable Anchor Performance
- Installation Sequence and Visual Checkpoints to Detect Distress Early
- Special Conditions: Thin Faces, Hollow Cells, and Edges
- Testing, Troubleshooting, and Repair Options
- Conclusion
- FAQ
Understanding Concrete Block Faces and Common Failure Modes
A block face comes in different textures and thicknesses. You’ll see solid runs, hollow cores, and sometimes thin skins at the surface. The way the face carries load influences how it cracks under anchor load.
Cracking can come from tensile pull, shear sliding, or breakout at the edge. Block faces fail when the embedded anchor transfers force to a small area. Expect both surface splitting and face chipping if the load path isn’t supported properly.
Block types and face variations (solid, hollow, split-faced, thin skins)
Concrete blocks come in various types. Each affects how anchors behave and their risk of cracking.
Solid blocks have no voids inside. They’re strong but heavy. Anchors here resist better.
Hollow blocks have internal cavities. Lighter, cheaper, but anchor strength’s reduced due to less material around the anchor.
Split-faced and thin-skin blocks have exposed aggregate faces. These can hide cracks until they’re big. Be extra careful here.
Typical failure patterns when anchoring near edges
Anchors near edges fail differently than those in the middle.
Edge breakout happens first. The anchor pulls out a ‘plug’ of concrete. This is due to less support at the edge.
Then, radial cracking spreads from the hole. It’s like spokes on a wheel. Cracks run perpendicular to the load direction.
Edge location, face thickness, and load direction all influence these failures. Keep edge distances high for safety.
Sleeve Anchor Basics and Appropriate Applications
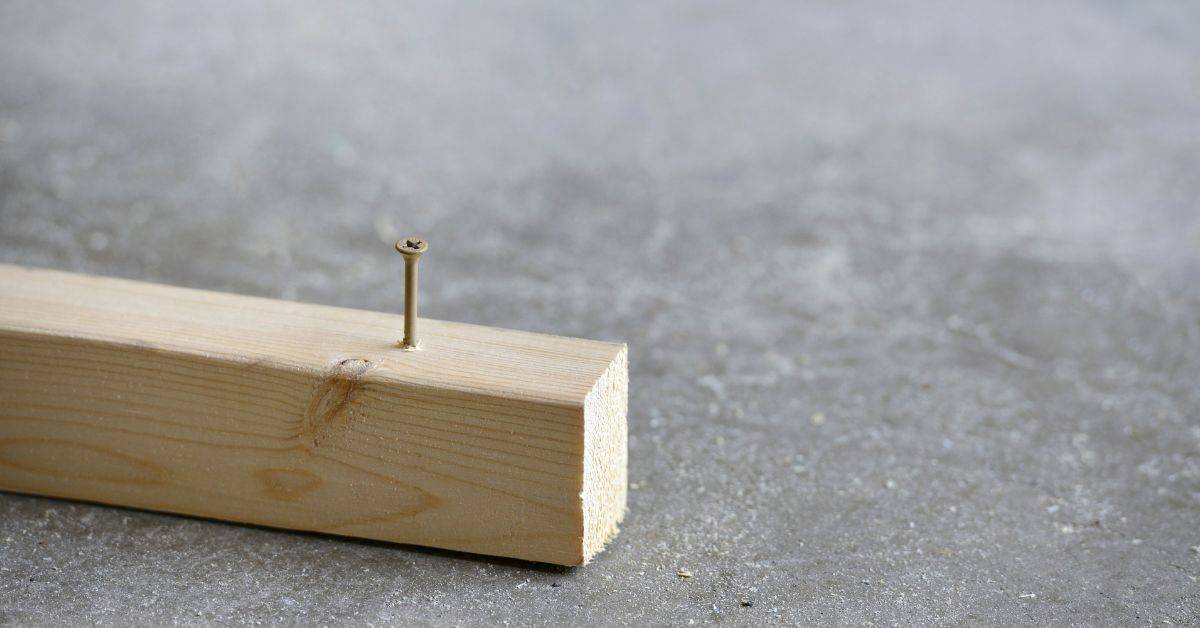
Sleeve anchors have a sleeve and a bolt that expands when tightened. In block, the expansion pressure grips the surrounding material. The assembly relies on consistent contact to stay secure.
When selecting uses, consider load direction, edge proximity, and block integrity. The anchorage mechanism interacts with the block face, so plan for protection against surface cracking. Always check the label and manufacturer instructions for suitability in concrete block.
How sleeve anchors expand and transfer load
Sleeve anchors work by expanding within a predrilled hole to grip the concrete block. Here’s how:
The anchor consists of an expansion sleeve, a bolt, and a nut. When you tighten the nut, it pulls the bolt into the sleeve, causing the sleeve to expand.
This expansion creates friction between the anchor and the concrete, transferring the load from the anchor to the substrate. The more embedment (depth) you have, the better the anchor can distribute stress across a larger area of the block face, reducing the risk of cracking.
Key point: Proper embedment and good contact with the substrate are crucial for sleeve anchors to work effectively.
When to use sleeve anchors versus alternatives
Sleeve anchors are versatile, but they’re not always the best choice. Here’s when to consider them and when to look at other options:
Use sleeve anchors: When you need a strong, reusable anchor; when you’re working with concrete block or other hollow substrates; when you want to avoid using adhesives.
Avoid sleeve anchors: When you’re anchoring near edges (see our earlier discussion on edge distance); when you need a quick, easy-to-install solution (adhesive anchors might be better); when you’re working with very thin concrete skins or other fragile substrates (through-bolts may be more suitable).
Other expansion anchors like wedge anchors and toggle bolts also have their uses. Understand your specific application before choosing an anchor type.
Edge Distance and Spacing: Principles to Avoid Cracking
Edge distance and spacing are about keeping enough material to carry load without tearing. Larger margins reduce stress concentrations at the edge of the block face. Follow the guidance from the equipment label, datasheet, or local code when sizing locations.
Design rationale ties into breakout resistance and aggregate tensile stress management. Do not rely on guesswork—verify the limits set by the product instructions and applicable standards. Plan layouts that leave solid margins around each anchor.
Determining minimum edge distance for a given anchor
The first step is checking your sleeve anchor’s datasheet. Manufacturers provide recommended edge distances based on the anchor’s size and the load it’s designed to bear.
Edge distance relates to embedment depth – how far the anchor goes into the block. It also depends on load direction. For instance, an anchor taking a pull-out force needs more edge distance than one carrying a shear load.
Always follow manufacturer guidelines. They’ve tested their anchors and know what works best. Ignoring these limits can lead to cracked faces or even anchor failure.
Spacing between anchors and group effects
Nearby anchors interact, affecting each other’s performance. This is why spacing matters. More space means less stress on the surrounding concrete.
When you place anchors close together, they share loads. This increases required edge distances to prevent cracking. It’s like having one big anchor instead of several smaller ones.
Staggering your anchors can help reduce these group effects. Instead of lining them up in a row, offset them. This spreads out the stress and reduces the risk of cracking. But remember, staggering doesn’t eliminate the need for proper spacing.
Drill Control Fundamentals to Protect Block Faces
Control the drill to minimize vibration and binding. Use steady feeds and avoid hammering past the need of the bit. Stop if you notice wandering or bit grab near the face.
Overcutting and microcracking are common signs of careless drilling. Practice proper drill alignment and pressure and verify the bit is appropriate for block material. Check the tool’s instructions and local rules for depth and technique specifics.
Bit selection and condition
Choose your drill bit wisely. Go with what the sleeve anchor manufacturer recommends for size and type.
Sharp bits make clean holes. Dull ones can cause vibration, overcutting, and microcracking. So, keep ’em sharp!
Tip: Carbide-tipped masonry bits are great for concrete blocks. They last longer and drill faster.
Drill speed, feed, and percussion use
Speed matters. Drill too fast, you’ll overheat the bit and make a mess. Too slow, and you’re asking for trouble.
Apply steady pressure while drilling. Not too hard, not too soft. You want that bit to cut smooth.
No hammering near faces! Percussion mode can crack block faces. Stick to regular rotation when close to the face.
Managing drill alignment and using stop guides
Keep that drill bit straight. Skewed holes weaken anchors and can crack faces. Use a template or guide to maintain perpendicular entry.
Depth stops are your friend. They help you drill the right depth without breaking through the face. Mark your bit with tape, or use a purpose-made stop collar.
Pro tip: For multiple holes in a line, use a simple wooden guide with spacers to keep things straight and even.
Hole Preparation and Cleaning for Reliable Anchor Performance
Prepare the hole with careful drilling, then clean out debris thoroughly. Remove dust and loose material that would isolate the anchor from the block. Dimension checks help confirm the hole matches the intended size.
Cleaning routines protect contact area and transfer load properly. Use approved cleaning methods and verify with the manufacturer’s instructions or product data sheet. Subtle gaps can lead to uneven seating and stress concentrations.
Debris removal: air, brush, and vacuum techniques
After drilling, holes need thorough cleaning to remove dust and debris. This reduces installation torque and prevents uneven anchor expansion.
Start by using compressed air to blow out loose material. Hold the nozzle close to the hole’s entrance and work in a circular motion.
Next, use a stiff-bristled brush to scrub the hole. This helps dislodge any remaining particles stuck to the sides.
Finally, vacuum the hole to remove any leftover dust. This ensures a clean surface for the anchor to grip onto.
Verifying hole diameter and depth before insertion
Before inserting anchors, ensure holes meet manufacturer tolerances. This maximizes contact and prevents installation issues.
First, use a hole gauge to check the diameter. Insert it into the hole and compare the markings with the required size.
Next, verify the depth using a depth stop or measuring tape. The anchor’s expansion should occur entirely within the block to avoid cracking faces.
Visually inspect the hole for any cracks or irregularities that could compromise anchor performance.
Installation Sequence and Visual Checkpoints to Detect Distress Early
Follow a clear step-by-step installation flow and stay organized on site. After seating, perform a tactile check for uniform contact across the sleeve. Look for uneven seating that could indicate a rare face defect.
Use visual cues and simple checks before final torque. If you suspect damage, pause and reassess with the product guidance in hand. Refer to the instructions or standards to decide if a retry is required.
Setting sequence: insertion, seating, initial torque, and final torque
Before you start torquing, follow this sequence to ensure your sleeve anchor is properly seated and won’t crack the concrete block face.
- Insert anchor: Gently push the sleeve anchor into the prepared hole until the head is flush with the surface.
- Seat anchor: Use a hammer to lightly tap the anchor head, fully seating it in the hole. Be careful not to damage the face.
- Initial torque (30-50% of final torque): Apply initial torque using a wrench or impact wrench. This helps distribute stress evenly and prevents sudden cracking.
- Check for movement: Gently pull on the anchor to ensure it’s secure. If it moves, apply more initial torque.
- Final torque (full specified torque): Apply final torque in stages, allowing the concrete to adjust and preventing sudden stress.
- Check for cracking: Inspect the face for any hairline cracks after each stage of torquing.
- Allow concrete to rest: Let the anchor sit for a few minutes between torque stages to allow the concrete to adjust.
- Recheck torque: After allowing the concrete to rest, recheck and apply final torque if necessary.
Quick rule: Staged torquing prevents sudden stress on the face, reducing the risk of cracking.
Visual signs of distress and immediate corrective actions
Regularly inspect your sleeve anchors for any signs of distress. Catching issues early prevents further damage and costly repairs.
- Hairline cracks: Look for fine, spiderweb-like cracks around the anchor. If present, stop torquing immediately to prevent further cracking.
- Powdering: Check for a white, powdery substance around the anchor. This indicates that the concrete is breaking down and needs immediate attention.
- Spalling: Inspect for small pieces of concrete flaking off around the anchor. If present, stop torquing and consider relocating or switching to a different anchor type.
- Anchor movement: Gently pull on the anchor to check for movement. Excessive movement may indicate that the anchor is not properly seated or that the concrete is weak.
- Bulging face: Look for any bulges in the concrete face around the anchor. This indicates excessive pressure and requires immediate attention.
Quick rule: If you notice any of these signs, stop work immediately to prevent further damage and reassess your installation process.
Special Conditions: Thin Faces, Hollow Cells, and Edges
Thin skins and hollow sections change how load transfers. In these areas, you may need extra backing or different anchoring strategies. Evaluate on-site geometry before committing to a layout.
Backing, inserts, or alternative anchors can help when faces are at risk. Always consider manufacturer recommendations and local guidance for difficult blocks. If unsure, choose a conservative approach and verify with the instructions.
Anchoring in hollow cells and using backing or inserts
When dealing with concrete blocks that have hollow cores, you need to be careful not to crack the thin faces. To transfer load away from these fragile areas, consider using backing plates, through-bolts, or cavity-specific inserts.
Backing Plates: These distribute the anchor’s load over a larger area on the block’s face, reducing stress concentrations that could cause cracking. Install them by drilling holes slightly smaller than the plate’s diameter, then screw or bolt them onto the block before installing your anchor.
Through-Bolts: For extra support, use through-bolts that pass through both faces of the block and are secured with nuts on the opposite side. This helps to clamp the block together and prevents it from splitting under load.
Cavity-Specific Inserts: These are designed to fit snugly inside hollow cells, providing additional support for your anchor. They’re especially useful when you need extra holding power in a lightweight or thin-faced block.
Protecting thin, split-faced, or decorative surfaces
When working with delicate or decorative concrete blocks, preserving the face’s aesthetics and integrity is crucial. Here are some non-destructive approaches to help you achieve this:
Washers/Plates: Using large washers or plates under your anchor can distribute its load more evenly across the block’s face, reducing the risk of cracking. Choose ones that match the aesthetic of your project.
Predrilling Pilot Holes: For thin-faced blocks, predrill pilot holes slightly smaller than your anchor’s diameter. This helps to relieve stress on the face and prevents it from splitting during installation.
Adhesive Anchors: If possible, use adhesive anchors instead of mechanical ones. These expand inside the hole, gripping the concrete without putting pressure on the block’s face. They’re ideal for preserving decorative surfaces or when you need to avoid damaging the block’s integrity.
Testing, Troubleshooting, and Repair Options
After installation, verify the hold with practical checks and, if available, pull tests or torque checks per instructions. Interpret signs of failure as a cue to stop and reassess. Document any unusual results for follow-up work.
When faces crack, plan repairs or reinstallation with attention to the face condition and replacement parts. Use the manufacturer data and local rules to determine the safe remedial path. If in doubt, consult the instructions and consider a different approach.
Field verification: simple pull tests and monitoring
After installing sleeve anchors, it’s crucial to verify they’re engaged properly. Here’s a simple field test:
Use a tension meter or come-along tool to apply steady force on the anchor. You should feel resistance, not movement. If it moves easily, the anchor might be loose or not engaging.
Note: This is a basic check. For critical loads, always consult an engineer for proper testing.
Repair strategies and reinstallation after cracking
If faces crack during installation, don’t panic. Here are some repair options:
Patching: Clean the area, apply a concrete patching compound, let it cure, then reinstall.
Larger Washers: Use bigger washers to distribute load over a larger area. This might help prevent further cracking.
Relocation/Reinstallation: If the crack is severe or in a critical location, relocate the anchor or reinstall using a different method (like through-bolt/epoxy).
Conclusion
You can do this safely and keep the block faces clean, strong, and looking right by sticking to edge distance, drill control, and clean hole prep so the sleeve anchors grab properly without cracking the faces.
Make your plan and execute in steady steps: check the edge distance and spacing before you drill, use the right bit and drill depth, clean every hole until you see dust-free walls, dry the hole if needed, insert the sleeve anchor firmly and torque to spec, and verify the install with a simple pull test or visual check for distress before loading the assembly. Do this in a calm sequence, and test in a small area first to confirm results before going bigger.
Common mistakes to avoid are rushing through the drill or failing to control the drill or bit, overlooking edge distance and support, and skipping hole cleaning or over-torquing the sleeve anchor. Always wear eye protection, keep the drill steady, and respect the block’s faces—if you see cracks, hollow cells, or soft spots, pause and reassess; if in doubt, back off and reassess the plan.
If the conditions are thin faces, hollow cells, or tight edges, or if you’re unsure about the load or the exact sleeve type, call a professional instead of forcing it. When you’re clear on the basics and the area checks out, you’ll finish with a fast, clean, and durable installation that will perform under load and stay looking good. Stay deliberate, stay safe, and you’ll get it done right.
FAQ
How can I pick the right drill bit and drilling technique to avoid cracking the block faces?
Use the drill size called out on the sleeve anchor package or manufacturer sheet. Drill straight and steady, and don’t push hard or twist the bit fast; let the bit do the work. Stop if you notice wobble or the bit grabs and chatters—reassess the setup before continuing.
Where should I place sleeve anchors to stay away from edges and reduce cracking risks?
Keep anchors well away from all edges and corners per the product guidance. Space them with even separation and avoid drilling too close to openings or joints. If in doubt, check the label or datasheet for minimum edge distance recommendations.
What should I do if I see small cracks or distress on the block face after drilling or during installation?
Stop and reassess before loading the anchor. Inspect the crack pattern and consider moving the anchor or using a different size/type anchor. Check manufacturer instructions and local guidelines for acceptable repair or alternative methods.
How can I verify the sleeve anchor is holding properly after installation?
Install per instructions, then apply a light load and observe for any movement or slippage. If the face or surrounding material shows movement, pull the anchor out and re-install at a safer location or with a different anchor type. When in doubt, consult the label or manufacturer guidance.