
Introduction
Anchoring into hollow vs grouted concrete block means picking fasteners and installation methods based on whether the block cavity is hollow or filled with grout.
In practice, you’ll need different anchors and installation approaches for hollow blocks versus solid, grouted blocks. Always check product labels and manufacturer instructions for proper use, load guidance, and required embedment; and follow local codes or rules when in doubt.
Key takeaways
- Hollow CMU requires different anchor types than grouted blocks for reliable pulls.
- Verify block condition and placement; mis-aligned blocks weaken pullout performance.
- Choose anchors rated for hollow CMU, review manufacturer install guidelines.
- For grouted CMU, match anchor type to load direction and embedment.
- Follow proper installation sequences; clean holes, keep dust out, avoid overdriving.
- Safety: wear eye protection, check for electrical conduits before drilling into blocks.
Table of Contents
- Introduction
- Key takeaways
- Quick Comparison: Hollow Vs Grouted Concrete Block
- How Block Anatomy and Placement Affect Anchoring
- Anchor Types That Work Best for Hollow CMU
- Anchor Types for Grouted CMU and Best Matches
- Pullout Reality: Lab Ratings Vs Field Performance
- Selection Checklist and Decision Matrix for Anchors
- Installation Best Practices, Tools, and Visual Checkpoints
- Troubleshooting Failures, Repairs, and Retrofit Options
- Conclusion
- FAQ
Quick Comparison: Hollow Vs Grouted Concrete Block
Hollow CMU has empty cores that influence how loads transfer through the block. Grouted CMU fills those cores to create a stiffer, more uniform substrate. On the job, hollow and grouted blocks behave differently when you drive anchors or bolts into them.
This section explains what to expect from each condition and how that translates to anchor choice and pullout performance. It also highlights common use cases you’ll encounter in residential projects and light commercial work. Use this as a quick reference to align expectations with the actual block you’re working with.
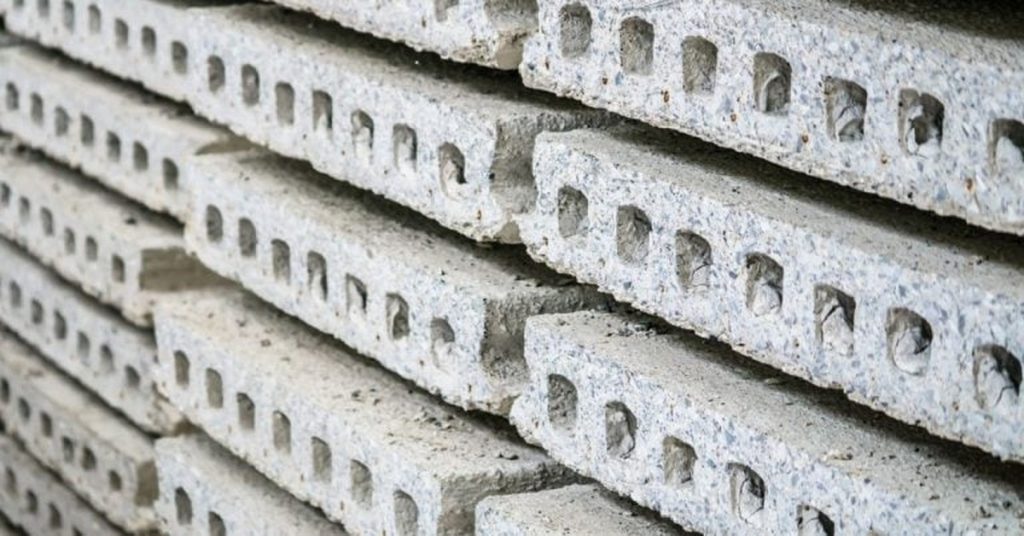
What ‘hollow’ means in practice
Hollow concrete blocks, also known as CMUs (Concrete Masonry Units), are made with empty cores. These cores run vertically through the block, reducing its weight and thermal mass.
Key points:
- Cores are typically 1-3 inches wide, with thin webs between them.
- Hollow cores reduce the bearing surface for anchors, changing how they behave under load.
- Anchor performance may vary along the block’s length due to core geometry.
What ‘grouted’ means and types of grout fills
Grouting concrete blocks fills the hollow cores with a cement-based mixture. This improves the block’s strength, stiffness, and thermal mass.
Types of grout fills:
- Full grout: Fills all cores completely, maximizing strength and stiffness.
- Partial grout: Fills some cores, providing intermediate strength and cost savings.
- Bond-beam grout: Fills only the horizontal cores at each course, creating a strong bond between courses.
Grout consolidation and rebar can further enhance anchor support and stiffness.
How Block Anatomy and Placement Affect Anchoring
Block webs, cell geometry, and mortar joints all play a role in how anchors grip. Edge distance and spacing can change how loads are distributed and when the first failure occurs. Variability in block strength from lot to lot matters for planning and safety.
Before selecting anchors, inspect the site for visible voids, mortar condition, and alignment of units. Note any inconsistent web thickness or ungrouted cells that could limit performance. This awareness helps you choose anchors that won’t overstress the block.
Void geometry, rib thickness, and anchor location
Concrete blocks have hollow cores (voids) separated by webs – the solid parts. Web size and layout dictate where you can safely place anchors.
The center of a cell is usually best for maximum pullout strength. But if that’s not possible, aim near the web. Avoid corners; they’re weakest.
Rib thickness matters too. Thicker ribs mean more material to bite into, increasing anchor hold. Check your block specs before drilling.
Grout quality, consolidation, and reinforcement
Grouted blocks are stronger than hollow ones. But grout quality makes a big difference. Well-consolidated grout packs the voids tight, boosting strength.
Check for air pockets or weak spots. Tap the block; if it sounds hollow, there might be issues. Re-grout if needed.
Rebar inside grouted cells adds serious strength. If present, use it to your advantage when placing anchors. It’s like having built-in reinforcement.
Anchor Types That Work Best for Hollow CMU
Mechanical toggles, sleeve anchors, masonry screws, and hollow-wall anchors each have strengths and limits for hollow webs. Some perform better with thin webs or in partially empty cores than others. Check installation methods and load notes from the manufacturer before committing.
Expect practical guidance on installation depth, required hole size, and load ratings to vary by product. Use those guidelines to plan for the most reliable connection in hollow CMU and to avoid overloading brittle webs. Always verify with product data sheets and supplier instructions.
Toggle and expansion anchors for voids
When it comes to anchoring into hollow concrete masonry units (CMUs), toggle and expansion anchors are top contenders. Let’s dive into how they work and when to use them.
The magic behind toggles lies in their design. They have a narrow, flat body that slips through the hole easily, then expands once inside the void. This creates a ‘T’ shape, allowing it to ‘toggle’ against the back of the block, providing excellent pullout resistance.
Toggle anchors are preferred over surface-expansion anchors in hollow cores for a few reasons:
1. They distribute stress evenly across the block’s web, reducing the risk of cracking.
2. They can be used with thin webs and small voids where other anchors might not fit or perform well.
3. They’re easy to install. Just drill a hole slightly smaller than the anchor’s body, insert it, and give the screw a few turns.
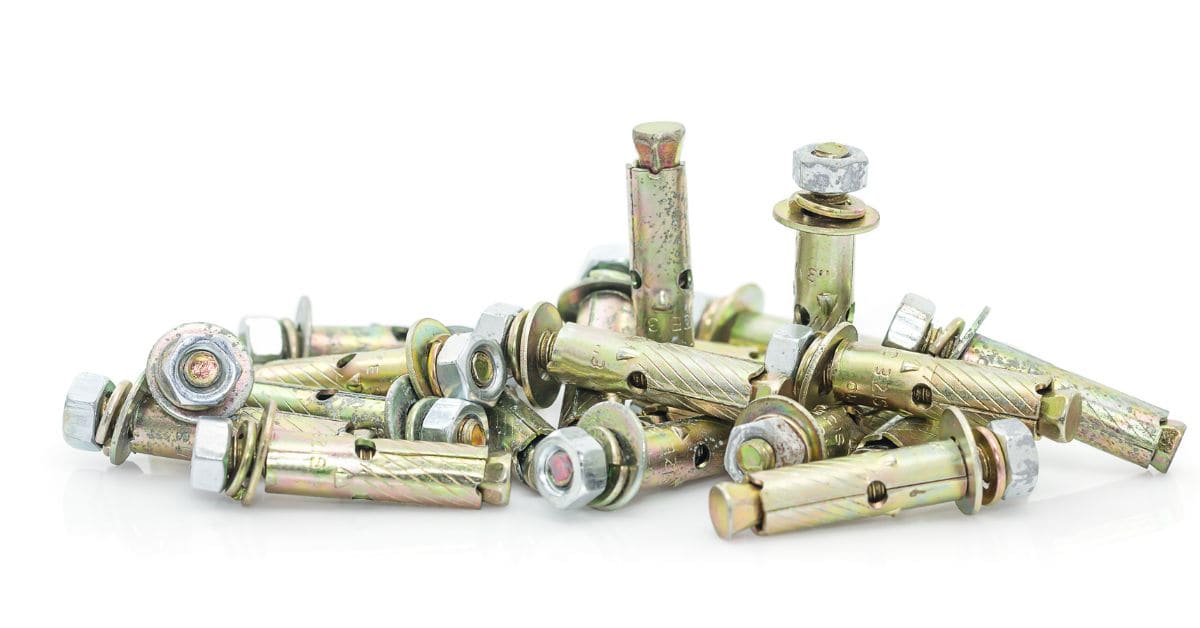
Masonry screws, sleeve anchors, and backup options
Self-tapping masonry screws and sleeve anchors are also viable options for anchoring into hollow CMUs. Here’s when to use them and what backup options you might need.
Masonry screws are great for light-duty applications where you don’t want to drill a larger hole. They cut their own thread as they’re driven in, making installation quick and easy. However, they rely on friction and the screw’s threads to stay put, so they may not perform as well under heavy loads or in thin webs.
Sleeve anchors, on the other hand, are inserted into a drilled hole and then expanded using an anchor setter tool. This creates a mechanical bond with the block, providing good pullout resistance. They’re suitable for heavier loads but require more installation steps than toggles or masonry screws.
Regardless of your chosen anchor type, you might need backup options to ensure a solid hold:
1. Backing plates: These distribute the load over a larger area, reducing stress on the block’s web.
2. Blocking or through-bolts: For heavy loads, you might need to add blocking behind the CMU or use through-bolts that extend into solid masonry or framing members.
Anchor Types for Grouted CMU and Best Matches
Chemical (adhesive) anchors, through-bolts, and certain mechanical anchors are designed to work with solid substrates and grout. They interact with grout and rebar differently than hollow-core anchors, so expectations should reflect that reality. Check cure times and grout strength with the supplier data before proceeding.
Understand how embedment in grout and clearance around rebar affect pullout and shear. Choose matches that are compatible with the grout system you have on site and that fit the load path of your project. Always confirm recommendations with the manufacturer or engineer if in doubt.
Adhesive/Chemical Anchors in Grout
Chemical anchors are a great choice for securing items to grouted CMU. They work by bonding with the grout, creating a strong, durable hold.
Proper installation is key: Drill clean holes, ensure grout is compatible with the anchor’s chemistry, and follow cure times strictly.
These anchors can handle heavy loads but need time to set properly. Don’t rush it; let them cure as directed for maximum strength.
Mechanical Anchors & Through-Bolts in Solid Fills
For high tension or dynamic loads, mechanical expansion anchors and through-bolts are your best bet. They rely on friction and bearing for their strength.
Through-bolts: Drill into rebar if possible. This provides extra support and helps distribute load evenly.
Mechanical anchors: These expand within the hole, gripping the grout tightly. Ensure the hole is clean and the anchor’s expansion fits your load needs.
Pullout Reality: Lab Ratings Vs Field Performance
Manufacturer pullout ratings are measured under controlled conditions and may not match field results. Real-world factors like block type, grout condition, edge distance, and installation quality shift those outcomes. Plan with a conservative margin to account for variations.
Use field checks to verify performance: compare observed behavior with what the label describes and adjust accordingly. When in doubt, seek a structural review to ensure your design remains within safe limits under expected loads.
Interpreting load tables and test reports
Manufacturer’s load tables and test reports are great resources, but they’re not one-size-fits-all. First, check the substrate description. If it’s different from your block type or grout fill, those pullout values might not apply.
Safety factors are built into these numbers. Don’t assume you can always use the full rated load. Apply a conservative factor of safety yourself, just to be sure.
Also, look for conditional limits. Some anchors might have restrictions on edge distance, embedment depth, or installation methods. Ignoring these could lead to lower pullout performance in real-world conditions.
When and how to do field pull tests
Field pull tests are crucial when you’ve got critical loads or unique conditions. Here’s when to consider them:
- When loads exceed manufacturer’s rated values.
- When using non-standard block types, grouts, or anchor installations.
- When previous field tests have shown lower-than-expected performance.
Here’s a basic pull-test workflow:
- Drill and install the anchor as you would in real-world conditions.
- Attach a load cell and tensionmeter to the anchor.
- Apply increasing loads until failure, recording data at each step.
Hire qualified testers or an engineer if you’re unsure about conducting tests safely and interpreting results. They can provide peace of mind and accurate data for your designs.
Selection Checklist and Decision Matrix for Anchors
Start with defined loads in tension, shear, and any combined scenarios. Next, check block condition and edge/spacing limits before picking a type. Environment and service life also steer the final choice.
Always verify critical numbers with manufacturers or engineers, and document the checks you perform on site. Use the checklist to avoid overlooking key constraints and to streamline the final decision.
Matching anchor to load type and risk tolerance
Before you pick an anchor, understand the forces at play. This checklist helps ensure your choice can handle the job safely.
- Tension loads: Check if the anchor needs to pull straight out. Most anchors work here, but some excel.
- Shear loads: Look for anchors designed to resist sideways forces. They’re a must for heavy, off-center loads.
- Combined loads: If you’ve got both tension and shear, pick an anchor that can handle the combo.
- Acceptable failure mode: Know what happens when the anchor gives out. Some let go quietly; others make a mess.
- Factor of safety: Always add a cushion to your calculations. It’s better to over-engineer than underestimate.
- Load duration: Short-term loads? Long-term? Pick an anchor that suits the timeline.
- Cyclic loading: If loads come and go, choose an anchor that can take the repeated stress.
- Dynamic loading: For sudden, heavy impacts, pick an anchor designed for shock absorption.
Quick rule: The best anchor is one that matches your load’s type, magnitude, and duration. Don’t guess; calculate.
Environmental, durability, and service-life factors
Your anchor’s got a job to do, but it also needs to last. This checklist helps you pick one that won’t let you down.
- Corrosion resistance: Check if the anchor’s material can stand up to rust. Stainless steel is usually best.
- Exterior exposure: If it’s outdoors, pick an anchor designed for sun, rain, and snow.
- Freeze-thaw cycles: In cold climates, choose an anchor that can handle the freeze-thaw dance.
- Temperature extremes: Hot or cold, some materials crack under pressure. Know your anchor’s limits.
- Moisture levels: Wet environments need anchors that won’t rot or rust away.
- UV exposure: Sunlight can degrade certain materials over time. Protect your anchor with a UV-resistant coating if needed.
- Recommended materials/coatings: Suppliers know their stuff. Ask for suggestions to extend your anchor’s life.
- Service life: How long do you need the anchor to last? Pick one designed for your timeline.
Quick rule: The right anchor is tough enough to handle its environment and smart enough to last as long as you need it to.
Installation Best Practices, Tools, and Visual Checkpoints
Follow step-by-step installation guidance for hollow and grouted CMU: select the right drill bit, clean the hole, and confirm grout presence where applicable. Use torque practices that reflect the anchor type and substrate. Wear proper PPE throughout the process.
Prepare a concise tools and materials list to avoid mid-job trips. Visual checkpoints include hole cleanliness, anchor seating, and alignment with the load path, ensuring a consistent result across openings and faces.
Drilling, hole cleaning, and verification
Before you start drilling, make sure to follow this checklist to ensure a strong anchor bond.
- Check anchor type: Refer back to the earlier section on anchor types for your specific situation.
- Select drill bit: Choose one that matches the anchor’s required hole size. Always follow the anchor manufacturer’s recommendations.
- Mark drilling spot: Clearly mark where you’ll be drilling to avoid mistakes.
- Secure block: Clamp or brace the block to prevent movement during drilling.
- Drill slowly: Use a slow, steady speed to create a clean hole. Too fast can cause cracking.
- Clean hole: Use a wire brush or compressed air to remove dust and debris from the hole.
- Check for grout: In grouted CMU, ensure there’s enough solid material around your hole. If not, consider using through-bolts.
- Verify hole size: Measure the hole to ensure it matches the anchor’s requirements.
- Inspect for obstructions: Check for any rebar or other obstacles that could interfere with installation.
Quick rule: Always follow the anchor manufacturer’s guidelines for exact hole sizes and cleaning methods.
Dealing with partial grout, obstructions, and rebar
When you encounter unexpected issues like partial grout or rebar, use these practical methods to continue your installation.
- Locate rebar: Tap the block gently with a hammer. A dull thud indicates solid material; a ringing sound suggests rebar.
- Consolidate grout: If you find partial grout, consider using adhesive anchors or consolidating the grout before installing your anchor.
- Chase drilling: For obstructions like rebar, use a chase drill bit to create a larger hole around the obstruction.
- Switch to through-bolts: If you can’t chase drill or consolidate grout, switch to through-bolts for added support.
- Check anchor type: Ensure your chosen anchor is suitable for the new conditions. You might need to switch types.
- Re-drill carefully: If you’ve chased a drill hole, re-drill carefully to avoid cracking the block.
- Inspect for damage: After dealing with obstructions or partial grout, check for any damage that could compromise your installation.
Quick rule: Always prioritize safety and structural integrity when dealing with unexpected issues in concrete blocks.
Troubleshooting Failures, Repairs, and Retrofit Options
Common failure modes include pullout, web tear, breakout, and corrosion, each with distinct diagnostic signs. Start with a careful inspection to identify the likely cause before choosing a repair path. Keep in mind some failures require a structural assessment.
Repair strategies may involve epoxy anchors, grout-in fills, blocking plates, or relocating loads. In complex cases, an engineering review helps confirm the best retrofit approach and long-term performance expectations.
Repair approaches and when to replace anchors
First, figure out why your anchor failed. Common reasons are pullout, web tear, breakout, or corrosion.
Epoxy fills: Good for small failures like pullout. Drill out old hole, clean, fill with epoxy, re-insert anchor.
Larger anchors: If failure’s due to size, upsize your anchor. But check load capacity first.
Through-bolts: For severe failures like web tear or breakout. Drill new hole, insert bolt, tighten nut. Consider engineering review for structural anchors.
Preventive maintenance and inspection intervals
Regular checks keep your anchors in tip-top shape. Here’s a quick checklist to follow.
- Document anchors: Keep records of type, size, load capacity, installation date.
- Inspect after events: Check anchors after vibration, seismic activity, or heavy use.
- Re-test critical areas: If performance is crucial, re-test anchors to ensure they’re still up to snuff.
- Check for corrosion: Rust can weaken anchors. Inspect visually and with a magnet if needed.
- Tighten loose hardware: Bolts and nuts can loosen over time. Tighten as needed.
- Look for cracks or damage: Cracks in concrete, damaged grout, or other signs of distress could affect anchors.
- Verify load capacity: Make sure your anchors are still capable of handling their intended loads.
- Inspect connections: Check where anchor meets connected item. Any movement here can cause failure.
Quick rule: Inspect annually, or after any significant event that could stress your anchors.
Conclusion
Choosing the right fastener for hollow versus grouted CMU is about safety, durability, and keeping the finish clean. Do the job with anchors that fit the block type, follow a conservative load plan, and test a small area first to avoid costly damage.
Start by confirming block type and wall condition, then select anchors that match hollow or grouted CMU, verify depth and spacing with the manufacturer guidance, measure pullout expectations against field realities, and install using the best practices and visual checkpoints you already learned. If in doubt, verify the plan with a simple end-to-end check in a low-stakes spot before scaling up.
Common mistakes to avoid include forcing anchors into blocks without proper clearance, overdriving fasteners that damage hollow cores or grout joints, and ignoring edge distances or overlap with openings. Always wear eye protection, check for hidden utilities, and test load in a controlled way before any full fixture goes in. If you hit inconsistent pullout, cracked cores, or unexpected movement, pause and reassess rather than pushing ahead.
If the project crosses into uncertain ground—large loads, unusual heights, or questionable block condition—calling a professional is wise. When you stay disciplined, you protect safety, preserve the wall, and finish with a clean, durable result you can trust. Stay deliberate, plan ahead, and you’ll get it done right.
FAQ
What signs tell me I’m anchoring into hollow CMU vs. solid or grouted blocks?
Look for visible hollow cores or empty-looking mortar lines. If you drill and only see a little dust and a short drill bite, you’re probably in hollow CMU. Always verify with the block’s manufacturer guidance for recommended fasteners on hollow versus grouted blocks.
Can I reuse old anchors if the block is hollow or partially grouted?
Don’t assume reuse is safe. Hollow blocks often need different fasteners than solid or grouted blocks. Check the fastener’s label or manufacturer instructions to confirm reuse suitability and load limits.
What’s the simplest, reliable quick-check to pick the right fastener on site?
Choose a fastener type that explicitly lists hollow CMU as compatible and verify the load rating in the installer’s instructions. If you’re unsure, pick a fastener labeled for hollow CMU and follow the installation steps on the package.
How should I handle a stubborn hole that keeps failing or spinning out?
Stop and reassess: confirm you’re in the correct block type, clean the hole, and use a corresponding anchor or a retrofit method appropriate for hollow vs. grouted blocks. If in doubt, consult the manufacturer’s instructions or local guidelines before proceeding with a retrofit.