Search Results for: polishing

Stacked gray cement bags piled outdoors

LC3 Cement Explained: Low-Carbon Concrete for Decorative Work (Pros, Cons, Pitfalls)

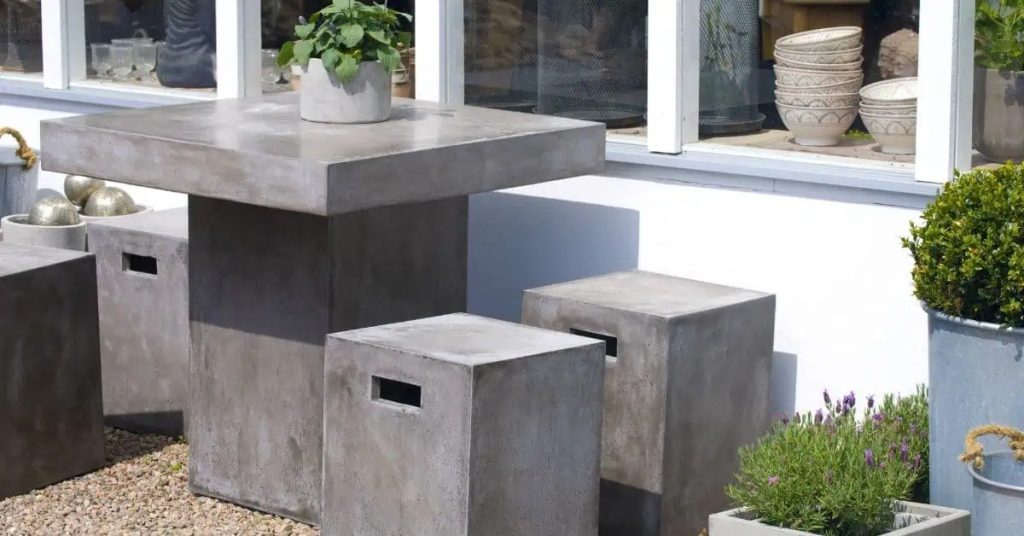
Introduction LC3 cement is a low‑carbon concrete mix that combines clinker with limestone to reduce emissions. In practice, it blends ordinary cement components with limestone to change the chemistry and clinker demand. As a DIY reader, check the bag label and local guidelines to see if LC3 fits your project. For decorative work, LC3 can […]

LC3 Cement Explained: Low-Carbon Concrete for Decorative Work (Pros, Cons, Pitfalls) Read More »

Concrete outdoor table with cube stools on gravel patio

Metakaolin for DIY Concrete Countertops: Mix Tweaks, Sealing, and Troubleshooting

Introduction Metakaolin is a pozzolanic additive that can improve the workability and durability of DIY concrete countertops. In practice, it can tighten the mix and help reduce cracking when you’re pouring custom countertops. Always follow product labels and local rules when mixing. Sealing and curing: use a proper sealer compatible with metakaolin-enhanced mixes and follow

Metakaolin for DIY Concrete Countertops: Mix Tweaks, Sealing, and Troubleshooting Read More »

Close-up of yellow earth auger drilling into soil

Rammed Earth Garden Walls: DIY Guide to Compaction, Protection, and Durability

Introduction Rammed earth garden walls are compacted earth walls built by packing soil into forms to create solid, durable features. It’s a hands-on, DIY approach that relies on correct mix, moisture, compaction, and formwork for straight walls. Check local rules and follow manufacturer instructions for materials and safety. Historically used in traditional buildings, rammed earth

Rammed Earth Garden Walls: DIY Guide to Compaction, Protection, and Durability Read More »

Concrete countertop with sink cutout and dark metal faucet

DIY Concrete Countertops with Superplasticizer: Mixing, Placement, and Finishing

Introduction DIY concrete countertops with superplasticizer are hand-poured countertop slabs that use a superplasticizer to improve flow and reduce slump. This article covers mixing, placement, and finishing in plain, hands-on terms. You’ll learn what to check on the product label, how to prep forms, and how to avoid common mistakes. Mixing, placing, and finishing require

DIY Concrete Countertops with Superplasticizer: Mixing, Placement, and Finishing Read More »

Hand applying plaster to textured wall with metal trowel

Tadelakt Soap Application: How to Maintain Water Resistance Without Streaks

Introduction Tadelakt soap application is the manual rubbing of a fatty soap into cured lime-based plaster to create and maintain a water-resistant, burnished surface. It’s a hands-on finish: you’ll work small areas, rub until the surface feels slick, and then buff to a sheen while avoiding run streaks. Check the soap product label and manufacturer

Tadelakt Soap Application: How to Maintain Water Resistance Without Streaks Read More »

Hand smoothing plaster on wall with trowel

Polished Lime Plaster in Wet Areas: What ‘Waterproof’ Really Means and Safe Details

Introduction Polished lime plaster in wet areas is not automatically waterproof; it’s a breathable finish that can resist splashes when detailed and sealed correctly. In practice that means treating the wall system—substrate, cement backer, membranes, and sealers—as a complete assembly rather than relying on the lime plaster alone. Check product labels and manufacturer instructions for

Polished Lime Plaster in Wet Areas: What ‘Waterproof’ Really Means and Safe Details Read More »

Man smoothing plaster on wall with float tool

How to Get Dead-Flat Plaster Walls: Straightedge Checks and Build-Up Strategy

Introduction Getting dead-flat plaster walls means using straightedge checks and a stepwise build-up of layers until any high or low spots are leveled out. It’s a practical process of finding the worst deviations, feathering in material, and rechecking with a straightedge until the surface reads flat to the eye and tool. Expect to use joint

How to Get Dead-Flat Plaster Walls: Straightedge Checks and Build-Up Strategy Read More »

Construction worker smoothing plaster on wall wearing blue helmet

Repairing Polished Plaster Chips: Patch Blending Without Visible ‘Halos’

Introduction Repairing polished plaster chips means filling and feathering the damaged area so the patch matches surrounding sheen and texture without a visible ring. Start by cleaning and undercutting loose edges, use compatible repair material, and build thin layers that are troweled and polished to blend into the existing finish. Check product labels and manufacturer

Repairing Polished Plaster Chips: Patch Blending Without Visible ‘Halos’ Read More »

white plaster wall with uneven textured surface

Venetian Plaster Over Existing Texture: When to Skim, When to Sand, and When to Remove

Introduction Venetian plaster over existing textured walls means deciding whether to skim, sand, or remove that texture so the final finish looks smooth and bonds properly. In plain jobsite terms: skim if the texture is shallow and solid, sand if it’s flaky or slightly high, and remove if it’s loose, highly uneven, or has adhesion

Venetian Plaster Over Existing Texture: When to Skim, When to Sand, and When to Remove Read More »