Search Results for: bucket for rolling drywall compound

Person applying plaster with trowel on drywall seams

Clay Plaster Over Drywall: Primer Selection, Screw Head Telegraphing, and Dent Resistance Upgrades

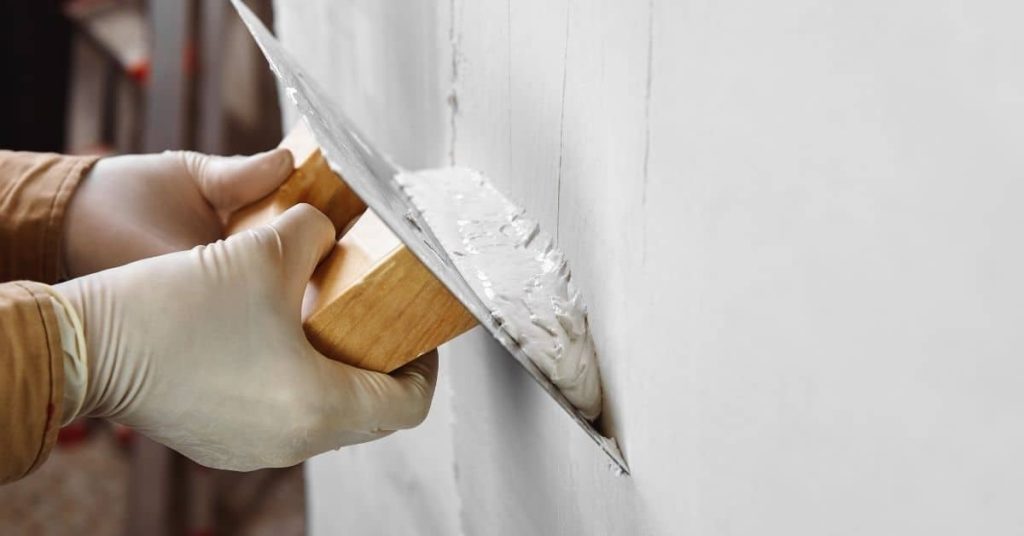
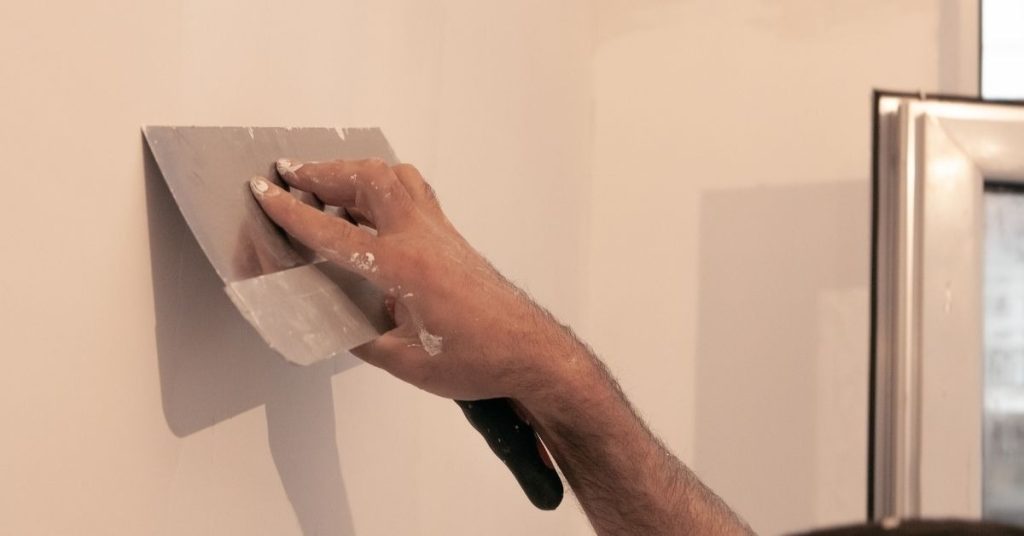
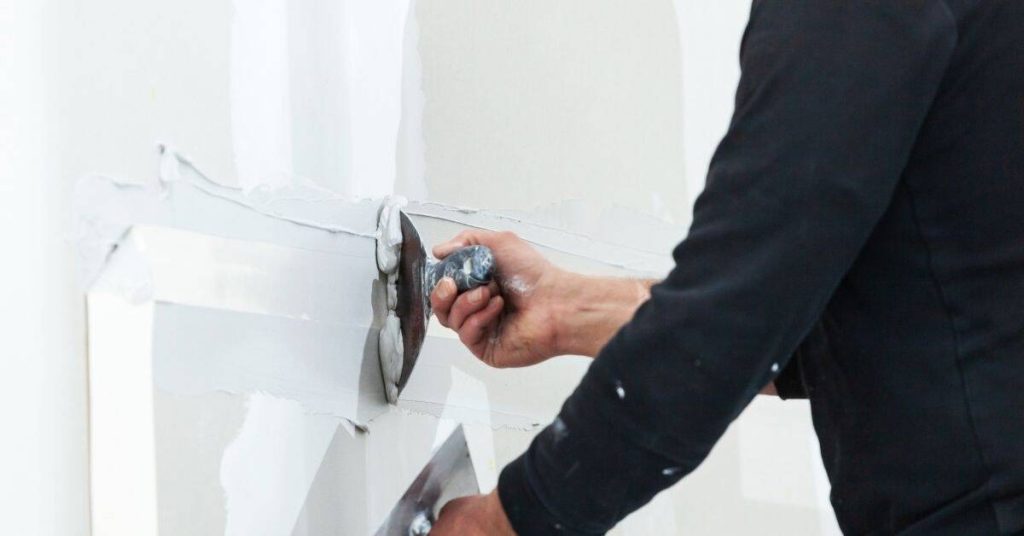
Introduction Clay plaster over drywall is a finish where a clay-based plaster is applied on standard wallboard after proper priming. Start with a compatibility-friendly primer; check the label to ensure it works with clay plasters and the drywall surface. Apply multiple thin coats, let each dry, and feather the edges for a flat, even surface. […]

Clay Plaster Over Drywall: Primer Selection, Screw Head Telegraphing, and Dent Resistance Upgrades Read More »

Worker wearing yellow helmet painting wall with roller

Painting Over Joint Compound: Priming to stop dull ‘dead spots’ on walls

Introduction Priming over joint compound means applying a primer to smooth, sealed drywall before painting to even out the surface. This helps dull spots and makes paint stick better across taped seams. Do the job with clean, dry surfaces and follow the primer label for dry times. Choose a primer designed for drywall and joint

Painting Over Joint Compound: Priming to stop dull ‘dead spots’ on walls Read More »

Gloved hands applying plaster on wall with trowel

Gypsum Over Lime Plaster: Compatibility Traps and Smart Primers

Introduction Gypsum over lime plaster is when you apply gypsum-based finish over a lime plaster substrate, which calls for checking compatibility first. Lime and gypsum cure differently, so mismatches can cause peeling or cracking, and a proper primer or bond coat helps. Plan your prep and follow manufacturer or product guidance for the exact steps.

Gypsum Over Lime Plaster: Compatibility Traps and Smart Primers Read More »

Closeup of white paint roller applying paint on wall

Feathering Plaster Repairs: Avoiding a ‘Picture Frame’ Ridge Under Paint

Introduction Feathering plaster repairs means blending new patch material into the surrounding plaster so there’s no raised ridge under paint. It’s a hands-on fix that helps avoid a visible edge where paint can lift. The goal is a smooth transition that you can sand and feather with basic tools. Start by assessing cracks and holes

Feathering Plaster Repairs: Avoiding a ‘Picture Frame’ Ridge Under Paint Read More »

Paintbrush and roller in white paint tray on brown surface

Cutting In on Textured Walls: Brush Loading and Keeping Edges Sharp Without Tape

Introduction Cutting in on textured walls without tape means achieving a clean, sharp line where the wall and adjacent surface meet by careful brush loading and technique. Start with a small amount of paint on the brush and load along the edge, then steady your hand and work in short, controlled strokes. Keep your wrist

Cutting In on Textured Walls: Brush Loading and Keeping Edges Sharp Without Tape Read More »

White decorative plaster molding on wall and ceiling corners

Repairing Plaster at Crown Molding Lines: Keeping Shadow Lines Sharp

Introduction Repairing plaster at crown molding lines means restoring damaged plaster so the shadow line stays sharp. You’ll look for cracks, chips, or loose edges where the molding meets the wall. Addressing these spots carefully keeps the line from looking soft or uneven. Start by cleaning and dampening the area, then remove loose material and

Repairing Plaster at Crown Molding Lines: Keeping Shadow Lines Sharp Read More »

fresh concrete partially poured on rough surface

Using Burlap for Wet Curing: How to Keep It Wet Without Staining the Surface

Introduction Burlap can be used to keep concrete moist during curing without staining the surface when applied correctly. This method relies on evenly saturated burlap laid over the fresh pour and kept moist. Check the burlap material and manufacturer guidance for suitability and any surface protection needs. Choose burlap that is plain and untreated, and

Using Burlap for Wet Curing: How to Keep It Wet Without Staining the Surface Read More »